How To Clean Vinyl Wrapped Cars Without Causing Damage
It’s a tough spot to be in. You’ve invested in a vinyl wrap for your car, loving that sleek new look. But now it needs a wash. You’re staring at it, maybe holding a sponge, and a little voice in your head whispers, “What if I mess this up?” You worry about damaging the wrap, causing it to peel, fade, or get unsightly marks. It’s completely understandable. A car wrap is a significant upgrade, and keeping it looking its best feels like a high-stakes game.
This guide is here to calm those nerves. We’ll walk through the best ways to clean your vinyl-wrapped car. You’ll learn what’s safe, what to avoid, and how to keep that wrap looking fresh for years.
Think of this as your friendly, step-by-step guide to a sparkling clean car wrap, without the worry.
A vinyl-wrapped car requires special care during cleaning. Gently washing with pH-neutral soap, avoiding harsh chemicals or abrasive tools, and drying thoroughly are key. Understanding specific do’s and don’ts helps maintain the wrap’s appearance and longevity.
Understanding Your Car’s Vinyl Wrap
Your car’s vinyl wrap is more than just a new coat of paint. It’s a large, flexible sheet of vinyl applied directly to your car’s body panels. This vinyl acts as a protective layer.
It shields your original paint from minor scratches, rock chips, and the sun’s UV rays. It also gives your car a totally new look, from matte finishes to vibrant colors.
But vinyl is also a bit delicate. It doesn’t have the same hardness as traditional paint. This means it can be scratched or damaged by the wrong cleaning methods.
You need to treat it with respect. Knowing how the wrap is applied and what it’s made of helps you clean it right.
The wrap adheres to the car’s surface using a strong adhesive. Sometimes, this adhesive has micro-channels. These help air escape during application.
This prevents bubbles. The vinyl itself can be made of different materials. Some are calendared vinyl, others are cast vinyl.
Cast vinyl is generally more conformable and durable. This difference matters when you’re cleaning.
My Vinyl Wrap Cleaning Journey: A Close Call
I remember the first time I had to wash my friend’s newly wrapped truck. It was a bold, metallic blue that just gleamed. He’d spent a fortune on it.
He looked at me with wide eyes. “Just be super careful, man,” he said. I nodded, feeling the pressure.
I grabbed my usual car wash kit. That’s when I saw it.
My go-to wash mitt was a bit rough. I almost used a strong degreaser I kept under the sink. A little voice in my head screamed, “STOP!” I froze.
What if those products stripped the vinyl? What if the mitt left tiny scratches? I felt a knot of panic tighten.
It was a moment of serious self-doubt. I quickly put everything down and started researching. It turned out I was about to make some big mistakes.
That day taught me a lot about treating a wrapped car with the care it truly deserves.
Vinyl Wrap Cleaning Dos and Don’ts
DO:
- Use a pH-neutral car soap.
- Wash in the shade.
- Use a soft microfiber wash mitt.
- Rinse thoroughly.
- Dry with a clean microfiber towel.
DON’T:
- Use abrasive brushes or pads.
- Use harsh chemicals like degreasers or solvents.
- Scrape off stubborn dirt.
- Wash in direct sunlight.
- Use a pressure washer too close.
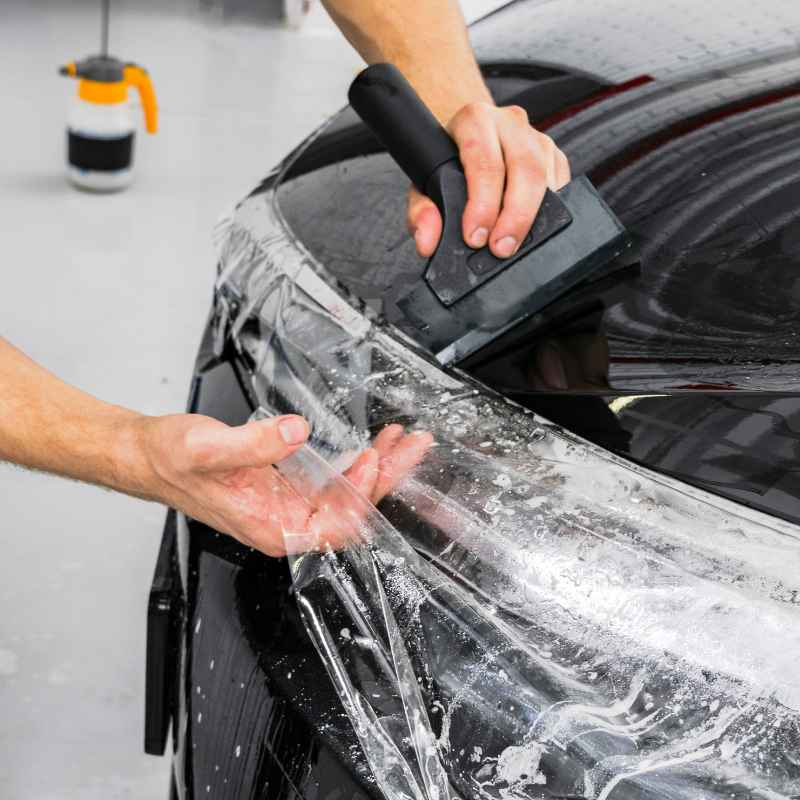
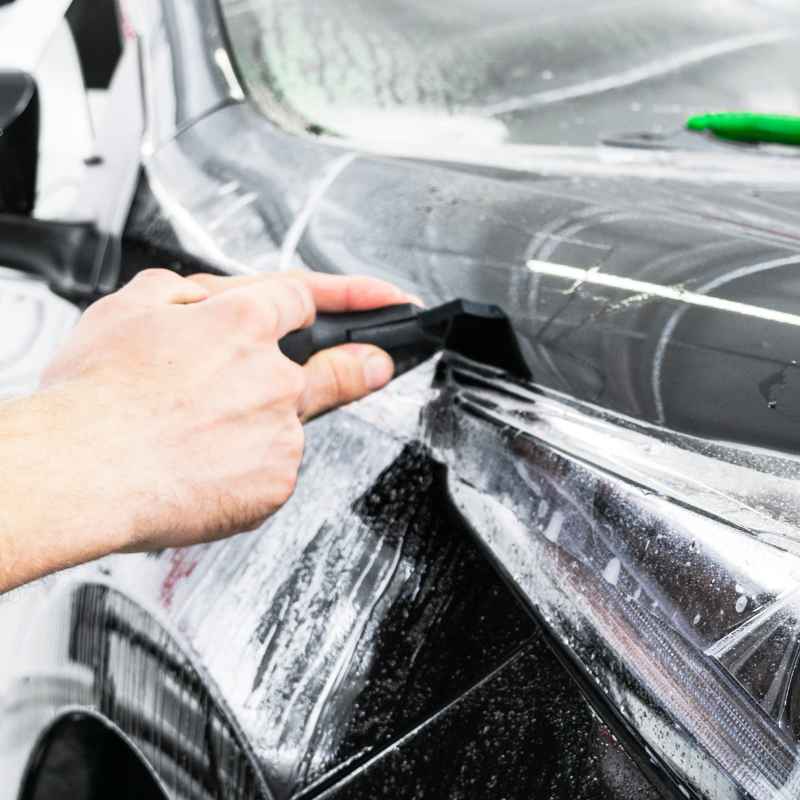
The Gentle Approach: Washing Your Vinyl Wrapped Car
Washing a vinyl-wrapped car is all about being gentle. You want to remove dirt without harming the vinyl. The best way to start is with a good rinse.
Use a hose to spray down the entire car. This removes loose dirt and debris. It stops them from being dragged around later.
Next, prepare your cleaning solution. Use a car wash soap that is specifically labeled as pH-neutral. This is important.
Harsh soaps can break down the vinyl’s adhesive or dull its finish. Mix the soap with water in a bucket. You want a good amount of suds.
These suds help lift dirt away from the surface.
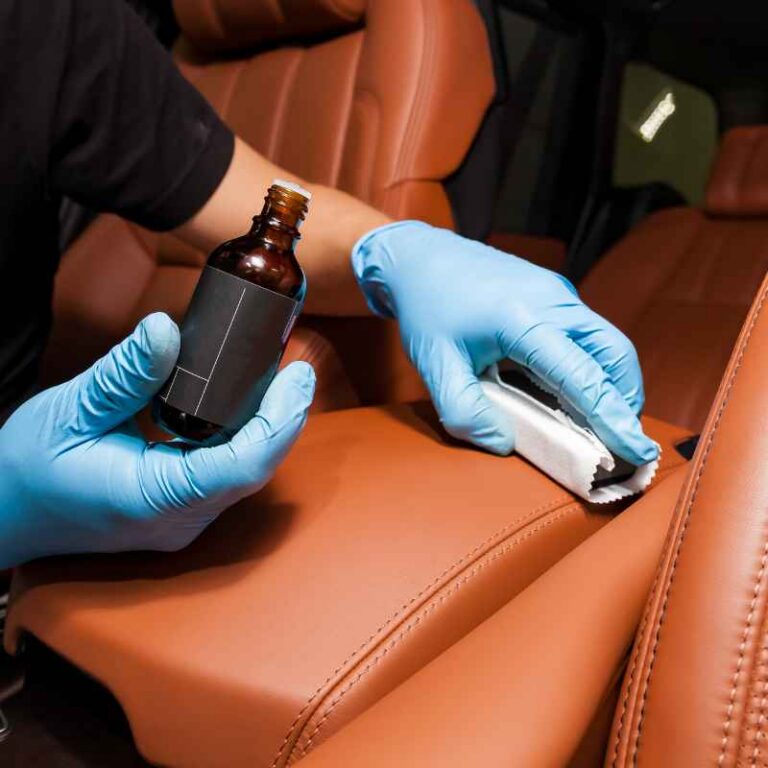
Now, grab a clean, soft wash mitt. Microfiber mitts are ideal. They are gentle and absorb a lot of water.
Start washing from the top of the car and work your way down. Wash one section at a time. This prevents the soap from drying on the vinyl.
As you wash, rinse your mitt often. This keeps you from spreading dirt back onto the car. After washing a section, rinse it immediately.
Make sure all soap is gone. Continue this process over the entire car. Don’t forget the door jams and other tight spots.
The goal here is to be thorough but not aggressive. You’re lifting the dirt, not scrubbing it off. This gentle method is crucial for preserving the look and integrity of your vinyl wrap.
Drying Your Wrapped Car: The Right Way
Drying is just as important as washing. If you let your car air dry, you’ll end up with water spots. These spots are mineral deposits left behind.
They can etch into the vinyl if left too long. So, you need to dry it properly.
The best tools for drying are high-quality microfiber drying towels. These towels are super absorbent. They are also very soft.
They won’t scratch the vinyl. You can also use a car dryer or a leaf blower. These tools blow water off the surface.
This is a touchless method and is very safe.
When using towels, don’t rub hard. Lay the towel flat on the surface. Gently pat or blot the water away.
You can also use a light drag motion. Let the towel do the work. Fold the towel as it gets wet.
This exposes a dry side. Keep using clean, dry towels until the car is completely dry.
Pay special attention to edges and crevices. Water can hide there. Make sure all moisture is removed.
This prevents water spots and keeps the wrap looking sharp. A dry car is a happy car, especially when it’s vinyl-wrapped.
Quick Drying Tips
- Use multiple clean microfiber towels.
- Gently blot or pat dry.
- Avoid air drying in the sun.
- Consider a car dryer for a touchless finish.
- Dry all seams and edges thoroughly.
Dealing with Stubborn Dirt and Grime
Sometimes, normal washing isn’t enough. You might encounter tar spots, bug splatter, or bird droppings. These can be tricky.
You need to remove them without damaging the wrap. Harsh chemicals are a big no-no here. They can eat away at the vinyl or its adhesive.
For bug splatter, act fast. Fresh bugs are easier to remove. Soak the area with a water-based bug and tar remover.
Let it sit for a minute. Then, gently wipe with a microfiber cloth. Don’t scrub.
If the bugs have been there a while, you might need to repeat this.
Tar spots are similar. Use a specialized tar remover designed for automotive use. Again, test it on an inconspicuous area first.
Apply it to a microfiber cloth, not directly to the car. Gently dab the tar. Work from the outside of the spot inward.
Rinse the area well afterward.
Bird droppings are acidic. They can etch the vinyl quickly. For fresh droppings, gently wipe them off with a damp microfiber cloth.
If they’ve hardened, soak them with water. Then, use a plastic scraper or a clay bar to lift them. Be very gentle with any scraping tool.
A clay bar can be a lifesaver for removing bonded contaminants. Use a fine-grade clay bar with plenty of clay lubricant. Glide the clay bar over the surface.
It will pick up embedded grime. This leaves the vinyl smooth. Always follow up with a rinse and dry.
Spot Cleaning Smartly
Myth: You can use any degreaser for tough spots.
Reality: Standard degreasers can be too harsh. They can damage the vinyl or adhesive. Always use products specifically made for car wraps or tested for safety.
Myth: Scrubbing harder removes stubborn dirt faster.
Reality: Aggressive scrubbing will scratch the vinyl. It can even lift edges. Gentle soaking and dabbing are safer and more effective.
What to Avoid: The Big No-Nos
This is where many people make mistakes. There are certain things you should absolutely never do when cleaning a vinyl-wrapped car. These actions can lead to costly repairs or a shortened wrap lifespan.
Harsh Chemicals: This includes strong solvents, general-purpose cleaners, degreasers not made for wraps, and even some all-purpose car soaps. These can break down the vinyl’s plasticizers, dull its finish, or weaken the adhesive. If a product’s label doesn’t mention being safe for vinyl wraps, assume it’s not.
Abrasive Tools: Forget steel wool, scouring pads, stiff brushes, or rough sponges. These will create swirl marks and deep scratches in the vinyl. Stick to soft microfiber cloths and wash mitts.
Even car brushes with synthetic bristles can be too stiff for some wraps.
Pressure Washers (Used Incorrectly): While a low-pressure rinse can be okay, high-pressure spraying directly at seams or edges can lift the vinyl. It can force water underneath, causing peeling. If you use a pressure washer, keep it at a safe distance.
Never spray directly at the edges of the wrap.
Automatic Car Washes: Many automatic car washes use stiff brushes and harsh chemicals. These are a recipe for disaster for vinyl wraps. The brushes can scratch and lift the vinyl.
The soaps can damage the finish. It’s best to avoid them entirely.
Scraping: Never use razor blades, metal scrapers, or hard plastic tools to remove anything stuck to your wrap. You will gouge the vinyl. Even a small gouge can start to peel or look bad.
Understanding these “don’ts” is just as vital as knowing the “dos.” They protect your investment.
Protecting Your Vinyl Wrap: Beyond Washing
Keeping your vinyl wrap looking great involves more than just washing. You need to protect it from the elements and daily wear and tear. This helps maintain its shine and prevent premature aging.
Parking Smart: Whenever possible, park your car in a garage or under cover. This shields the wrap from direct sunlight, rain, bird droppings, and tree sap. Sunlight is a major culprit in fading and degradation of vinyl.
If you can’t park indoors, try to find a shady spot.
Washing Frequency: Don’t let dirt and grime sit on your wrap for too long. Washing your car regularly (every 1-2 weeks, or more if it gets dirty) is key. This prevents contaminants from bonding to the vinyl.
Sealants and Waxes (Use with Caution): Some people ask about using waxes or sealants. Most vinyl manufacturers advise against traditional waxes. Waxes can contain harsh abrasives or solvents.
They can also make the vinyl harder to remove later. Instead, look for ceramic coatings or specific vinyl wrap sealants. These provide an extra layer of protection.
They can add gloss and make cleaning easier. Always follow the product instructions and test in a small area first.
Consider a Ceramic Coating: A professional ceramic coating can offer excellent protection for vinyl wraps. It creates a durable, hydrophobic layer. This repels water, dirt, and UV rays.
It also adds a deep shine. Make sure the installer knows it’s for a vinyl wrap and uses appropriate application methods.
Addressing Scratches and Damage: Small scratches can sometimes be buffed out with a dedicated vinyl polish. For deeper scratches or peeling, professional repair is usually needed. Sometimes, a small section can be replaced.
Vinyl Wrap Maintenance Schedule
Weekly:
- Quick rinse to remove dust and loose dirt.
- Address fresh bird droppings or bug splatters immediately.
Bi-Weekly/Monthly:
- Full wash using pH-neutral soap and microfiber.
- Thorough drying.
- Inspect for any damage or peeling.
Quarterly/Annually:
- Apply a vinyl-safe sealant or ceramic coating.
- Professional inspection if needed.
Real-World Scenarios and Common Issues
Living with a wrapped car means encountering different situations. Let’s look at some common issues and how to handle them in the real world.
The Road Trip Warrior: You’ve just finished a long road trip. Your car is covered in bugs, tar, and road grime. The first instinct might be to hit it hard with a powerful cleaner.
But remember the gentle approach. Soak the affected areas with water or a dedicated bug/tar remover. Let it dwell.
Gently wipe with a microfiber cloth. Patience is key here.
The Parking Lot Hazard: You returned to your car to find a suspicious smudge on the door. Maybe it’s oil, or some unknown goo. Again, avoid harsh chemicals.
Try a dedicated vinyl cleaner or even just some mild soap and water on a microfiber cloth. For tougher spots, a clay bar with lubricant can lift contaminants without scratching.
Winter Woes: In colder climates, road salt and brine are a major concern. These can be corrosive. Wash your car more frequently during winter.
Focus on rinsing away salt residue. Make sure to dry thoroughly, as ice can form and potentially damage the wrap.
Fading and Discoloration: If your wrap starts to look dull or faded, especially on areas most exposed to the sun, it might be a sign of UV damage. This can happen over time. While washing can’t fix this, using a UV-protectant sealant can slow down the process for new wraps.
For existing fading, professional restoration or a partial re-wrap might be the only options.
Edge Lifting: Sometimes, edges of the vinyl wrap can start to lift. This often happens at stress points like door handles or mirrors. It can be due to poor installation, age, or repeated pressure washing.
Small lifted edges can sometimes be carefully re-adhered with a vinyl-specific adhesive. However, if it’s significant, it might need professional attention or re-wrapping.
What This Means for You: When to Worry
Most of the time, cleaning your vinyl-wrapped car is straightforward. But it’s good to know when a problem might be more serious. Here’s what to look for.
When It’s Normal:
- A bit of dirt and dust after driving.
- Light water spots if you’ve missed a drying step.
- Minor bug splatters or tar from the road.
- Slight dullness in areas exposed to constant sun over years.
These are all common and usually fixable with proper cleaning or protection.
When to Worry:
- Deep Scratches or Gouges: If you can feel a deep groove with your fingernail, it’s likely too deep to buff out.
- Peeling Edges: If large sections of the wrap are lifting, especially around seams or curves, it’s a sign of potential failure.
- Bubbles or Wrinkles: Small, isolated bubbles might be fixable by a professional. Large or spreading bubbles mean the adhesive is failing.
- Discoloration or Fading: Significant, uneven fading or color changes that don’t come off with a wash can be permanent.
- Chemical Damage: If the vinyl looks milky, discolored, or feels sticky after using a product, you’ve likely used something too harsh.
If you notice any of the “when to worry” signs, it’s best to consult a professional vehicle wrap installer or detailer. They can assess the damage and recommend the best course of action.
Simple Checks for Your Wrap
Visual Inspection: Regularly walk around your car. Look for any signs of lifting, bubbles, or unusual marks.
Touch Test: Gently run your hand over the surface. Feel for any rough spots, scratches, or areas where the wrap feels loose.
Edge Check: Pay close attention to the edges of the wrap, especially around panels, lights, and trim. This is where lifting often starts.
Quick Tips for a Lasting Finish
Here are some simple, actionable tips to keep your vinyl wrap looking its best for as long as possible.
- Wash in the Shade: Always wash and dry your car out of direct sunlight. This prevents water from drying too quickly and causing spots, and it keeps the vinyl from getting too hot.
- Use the Two-Bucket Method: One bucket for soapy water, one for rinsing your wash mitt. This prevents dirt from the car going back into your clean soap solution.
- Rinse Thoroughly: Make sure all soap residue is completely rinsed off. Leftover soap can attract dirt or even damage the vinyl over time.
- Invest in Good Microfiber: You can’t have too many good quality microfiber towels. Use them for washing, drying, and buffing. Wash them separately from other laundry.
- Dry Immediately After Washing: Don’t let water sit on the surface. Get it dry as quickly and thoroughly as possible.
- Spot Clean Quickly: Don’t let bird droppings, bug splatters, or tree sap sit. The longer they are on the vinyl, the harder they are to remove and the more damage they can do.
- Be Mindful of Fuel Spills: If you spill fuel on your wrap, wipe it up immediately. Fuel can damage some vinyl finishes.
- Consider Professional Detailing: Once or twice a year, a professional detailer who understands vinyl wraps can give your car an excellent deep clean and apply protective treatments.
Frequently Asked Questions About Cleaning Vinyl Wrapped Cars
Can I use a regular car wash soap on my vinyl wrap?
Yes, but it must be a pH-neutral car wash soap. Avoid soaps with harsh degreasers, abrasives, or strong alkaline/acidic formulas, as these can damage the vinyl or its adhesive.
Is it okay to wax a vinyl wrapped car?
Traditional car waxes are generally not recommended for vinyl wraps. They can contain ingredients that dull the finish or make the wrap difficult to remove later. Look for specific vinyl wrap sealants or ceramic coatings that are safe for vinyl.
How often should I wash my vinyl wrapped car?
It’s best to wash your vinyl wrapped car regularly, ideally every one to two weeks, or whenever it gets noticeably dirty. Frequent washing prevents contaminants from bonding to the vinyl and causing damage.
Can I use a pressure washer on my vinyl wrapped car?
You can use a pressure washer, but with extreme caution. Keep the nozzle at a safe distance (at least 3 feet) and never spray directly at the edges or seams of the wrap, as high pressure can cause it to lift and peel.
What if I get a scratch on my vinyl wrap?
Minor surface scratches can sometimes be buffed out using a dedicated vinyl polish and a soft microfiber cloth. For deeper scratches that you can feel with your fingernail, professional repair or a partial re-wrap may be necessary.
Are automatic car washes safe for vinyl wraps?
No, automatic car washes are generally not safe for vinyl wraps. The brushes and harsh cleaning solutions used can scratch, lift, or damage the vinyl film.
What is the best way to remove tar or bugs from a vinyl wrap?
Use a specialized bug and tar remover designed for automotive use. Apply it to a microfiber cloth first, then gently dab the affected area. Let the product dwell to soften the contaminant before wiping.
Rinse the area thoroughly afterward.
Keeping Your Wrapped Car Looking Its Best
Taking care of your vinyl-wrapped car doesn’t have to be a chore. With the right knowledge and a gentle touch, you can keep it looking amazing. Remember, the key is to use the right products and techniques.
Avoid harsh chemicals and abrasive tools. Always opt for pH-neutral soaps and soft microfiber materials. Regular washing, proper drying, and smart protection will go a long way.
Enjoy that stunning look for years to come. You’ve got this!