How To Do A Proper Car Wash At Home (Full Guide)
Washing your car at home can feel like a big chore. You want it to look great. But sometimes, you end up with water spots or swirl marks.
It’s frustrating when your effort doesn’t pay off. This guide will break down the process step-by-step. We will help you get a showroom shine right in your driveway.
You’ll learn what supplies you need and the best ways to use them. Get ready to make your car gleam!
A proper car wash at home involves specific steps and the right tools. Start with a good rinse. Use a pH-neutral soap. Wash from top to bottom. Dry carefully to avoid spots. Use a two-bucket method to keep dirt away from your paint.
Understanding the Car Wash Process
Washing your car is more than just spraying it with water. It is about protecting the paint. It is also about making it look its best.
Your car’s paint job is like its skin. It faces the sun, rain, and road grime every day. A good wash removes this damaging stuff.
It helps keep the paint healthy. It also makes your car look newer for longer.
Many people think washing a car is simple. You grab some dish soap and a sponge. Then you scrub away.
But this can actually hurt your car’s paint. Dish soap can strip away protective waxes. Sponges can trap dirt.
This dirt then acts like sandpaper. It scratches the clear coat. This creates tiny lines you see in the sun.
We call these swirl marks. A proper wash prevents this. It uses gentle methods.
It uses the right tools.
The goal is to clean the car safely. You want to lift dirt away from the surface. You want to do this without adding new scratches.
Think of it like cleaning a delicate piece of furniture. You wouldn’t use rough sandpaper. You would use a soft cloth and gentle cleaner.
Your car’s paint deserves the same care.
We will cover everything from what to buy to how to do each step. You will learn about the best soaps. You will see why drying is so important.
We’ll even touch on keeping your car clean between washes. This will help your car look its best. It will also help protect your investment.
Essential Car Washing Supplies
Before you start, gather your supplies. Having everything ready makes the job easier. It also helps you do a better job.
You don’t want to stop midway to find something. This can lead to rushed mistakes.
First, you need car wash soap. Do not use dish soap. Car wash soap is pH-neutral.
This means it is gentle on your car’s wax and paint. It is designed to lift dirt. It rinses clean without leaving residue.
You can find it at auto parts stores. Or you can find it at big box stores.
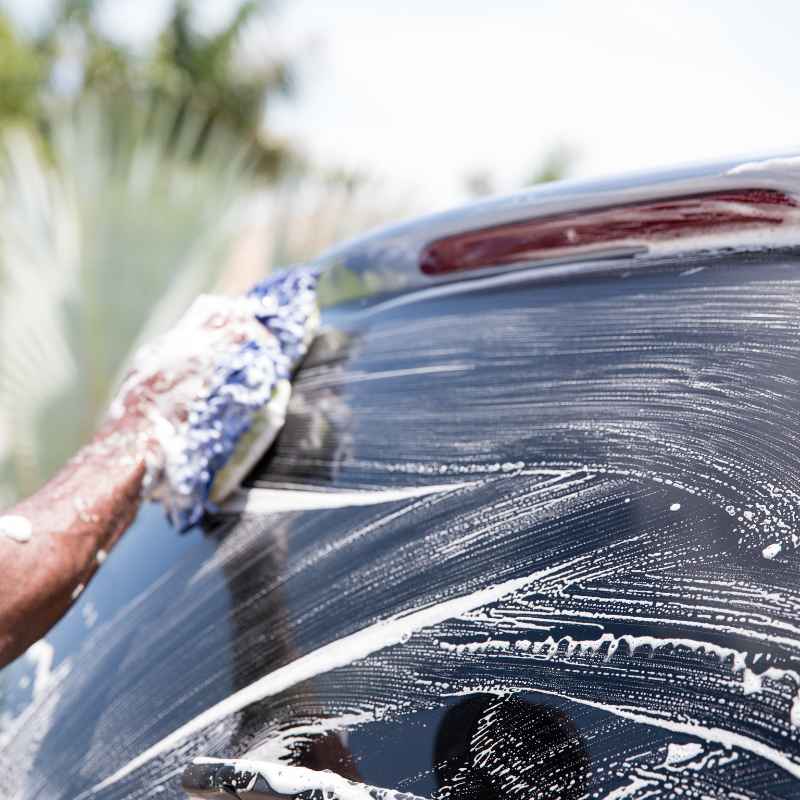
Next, you need wash mitts. A good wash mitt is made of microfiber. Microfiber is soft.
It traps dirt well. It also releases dirt easily when rinsed. Avoid using sponges.
Sponges can hold grit. They can scratch your paint. Get at least two wash mitts.
One for the upper parts of the car. One for the lower, dirtier parts.
Buckets are also very important. The best method uses two buckets. One bucket has your soapy water.
The other bucket has plain rinse water. You dip your wash mitt into the soap. Then you wash a section of the car.
After that, you rinse the dirty mitt in the plain water bucket. This removes the dirt from the mitt. Then you dip it back into the soap bucket.
This keeps your wash water clean. It stops you from putting dirt back on the car.
Drying is a big step. You need clean microfiber drying towels. These towels are super absorbent.
They are soft. They dry the car without scratching. Use multiple towels.
This way, you don’t spread water around too much.
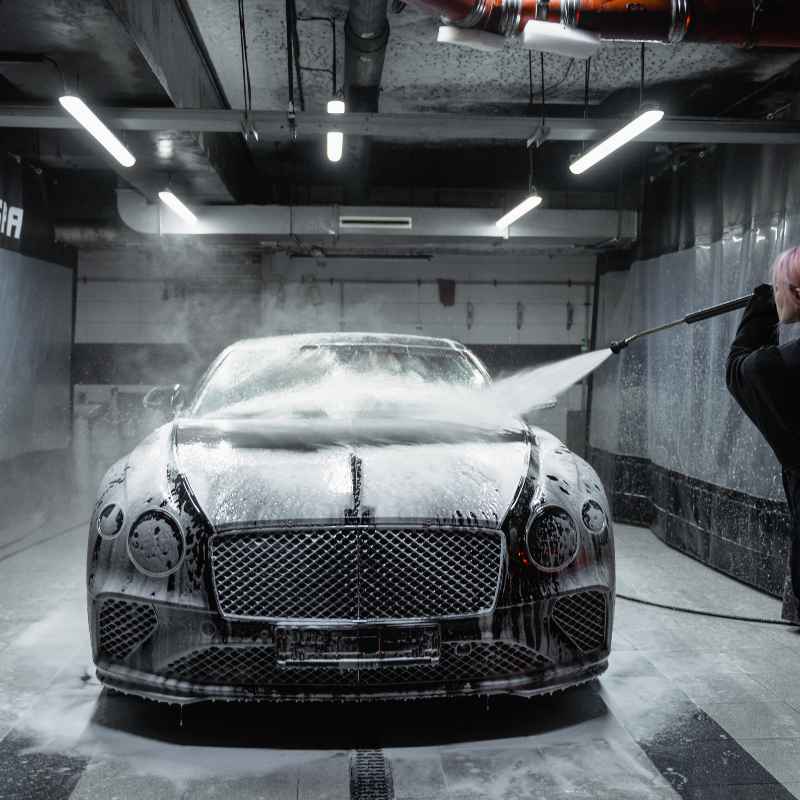
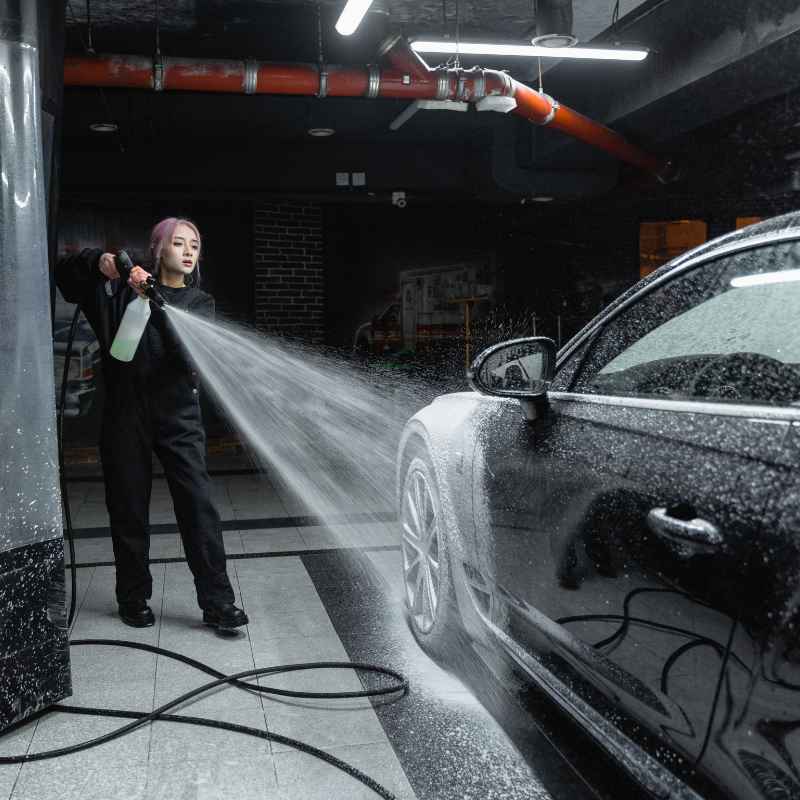
You might also need a hose. A nozzle with different spray patterns is helpful. Some people use a pressure washer.
But be careful with pressure washers. Too much pressure can damage paint. Always use a wide fan spray.
Keep it at a safe distance.
Optional but helpful items include a wheel cleaner. You also might want tire shine. A bug and tar remover is good for tough spots.
A clay bar kit can remove embedded grime. But that is for more advanced cleaning. For a basic wash, soap, mitts, buckets, and towels are key.
Your Car Wash Checklist
What You Need:
- pH-neutral car wash soap
- Two buckets (5-gallon size is good)
- Microfiber wash mitts (at least two)
- Microfiber drying towels (several)
- Hose with adjustable nozzle
- Optional: Wheel cleaner, tire shine, bug/tar remover
Why Each Item Matters:
- Car Soap: Gentle, lifts dirt safely.
- Two Buckets: Prevents scratching by separating clean and dirty water.
- Microfiber Mitts: Soft, trap dirt without scratching.
- Microfiber Towels: Absorbent, won’t scratch paint when drying.
Preparing Your Car and Workspace
Setting up is as important as the washing itself. You want to work in the right conditions. This makes the job go smoothly.
And it helps you get the best results.
First, find a good spot. The best place is in the shade. Washing your car in direct sunlight is a big mistake.
The sun heats up the car’s surface. It also dries the soap and water too fast. This causes water spots.
It can also bake soap into the paint. You will have to work much harder to remove them.
If you can’t find shade, wait for a cooler time of day. Early morning or late evening is good. If you must wash in the sun, work in small sections.
Wash one panel, rinse it, and dry it immediately. This is faster but more work.
Make sure you have enough space. You need room to walk around the car. You need space to move your buckets and supplies.
Before you touch the car with soap, give it a good rinse. Use your hose. Spray down the entire car.
This removes loose dirt and debris. This is a crucial first step. It prevents you from grinding dirt into the paint when you start washing.
Pay attention to the wheel wells and lower panels. These areas often hold a lot of grit.
Check your water supply. Ensure your hose reaches everywhere you need it to. Fill your two buckets.
One with car wash soap and water. Follow the soap’s instructions for the amount. The other bucket should be just plain water.
If you are using a pressure washer, set it up now. Make sure you have the right nozzle. And know how far away to hold it.
Most experts say to keep it at least 2-3 feet away. Use a wide spray pattern.
Double-check your supplies. Do you have enough towels? Are your mitts clean?
Is your soap ready? Being prepared avoids frustration later. It makes the whole car wash feel less like a chore.
The Two-Bucket Wash Method Explained
This is where the magic happens. The two-bucket method is the gold standard for safe washing. It is simple but incredibly effective.
It stops you from scratching your paint.
You have your two buckets ready. One is the soap bucket. The other is the rinse bucket.
Fill the rinse bucket with clean water. Add some grit guards to the bottom of both buckets if you have them. Grit guards are like grates.
They catch dirt that falls from your mitt. Dirt stays at the bottom. It won’t get back into your mitt.
Now, take your wash mitt. Dip it into the soap bucket. Get a good amount of suds.
Start washing your car. Begin at the top. Wash one section at a time.
A roof panel. A door. A fender.
Work your way down the car. The dirtiest parts are usually the lower panels. You want to save those for last.
After you wash a section, do not dip the mitt back into the soap bucket. Instead, take the dirty mitt. Dip it into the plain water bucket.
Swish it around. Rub it against the grit guard if you have one. This rinses away the dirt and grime from the mitt.
You are essentially cleaning your wash tool.
Now, your mitt is clean. You can dip it back into the soap bucket. Pick up more fresh soap.
Continue washing the next section of the car. Repeat this process: wash, rinse mitt, get soap, wash again.
This method ensures that you are always using a clean mitt. You are not transferring dirt from one part of the car to another. This is the main reason why people get swirl marks.
They use a single bucket. They keep putting the dirty mitt back into the clean soap. This contaminates the soap.
It spreads the dirt.
Wash the car from top to bottom. This way, dirty water runs down. It rinses dirt off areas you haven’t washed yet.
Wash the wheels and tires last. They are the dirtiest parts. You can even use a separate wash mitt and bucket for them.
This keeps brake dust away from your paint.
As you wash, use gentle, straight-line motions. Do not scrub hard. Let the soap and the microfiber do the work.
Rinse your mitt frequently. This is the key to preventing scratches.
Two Buckets: The Secret to Scratch-Free Washing
| Bucket 1 | Bucket 2 |
|---|---|
| Soap & Water | Plain Rinse Water |
| Dip mitt here for cleaning solution. | Dip mitt here to remove dirt. |
| Start with a clean mitt from this bucket. | Rinse mitt thoroughly before returning to soap. |
Why it Works: Keeps dirt separate. Prevents dirt from re-entering your soap water and scratching paint.
Rinsing and Drying: Crucial Steps
Once you have finished washing the entire car, it is time to rinse. This step is also very important. You want to remove all the soap.
Do this thoroughly.
Start from the top of the car. Use your hose. Rinse down the roof, then the hood, trunk, and doors.
Let the water flow down. Ensure all soap suds are gone. Pay attention to panel gaps, mirrors, and trim.
Soap can hide in these places.
A good final rinse helps with drying. Some people use a ‘sheeting’ rinse. They remove the spray nozzle.
They let water flow over the car in a wide sheet. This helps push a lot of water off the surface. It makes drying faster.
Now, for drying. This is where many people make mistakes. They use old bath towels.
Or they use chamois cloths. These can leave lint. They can also scratch the paint.
Always use clean, high-quality microfiber drying towels. These are large. They are soft.
They soak up a lot of water. They are safe for your paint.
Start drying from the top. Gently lay the towel on the surface. Pat or lightly drag the towel.
Do not scrub. Let the towel absorb the water. Lift the towel and move to the next section.
Use multiple towels if needed. If a towel becomes damp, switch to a dry one. A damp towel won’t absorb water as well.
It might also spread water around.
Get into all the nooks and crannies. Open doors. Open the trunk.
Dry the door jambs. Water can hide here. It can drip out later.
This can leave water spots on clean paint. Dry the mirrors and windows carefully.
If you notice any water spots forming, don’t panic. You can use a quick detailer spray. Spray it on the spot.
Then wipe with a clean microfiber towel. This will help lift the spot. It adds a bit of shine.
Drying is often rushed. People want to finish. But taking your time here pays off.
A perfectly dry car looks much better. It prevents those annoying water marks. It shows you paid attention to detail.
Drying Like a Pro
- Use Microfiber: Always use soft, absorbent microfiber drying towels.
- Work Top-Down: Start with the roof and work your way down.
- Gentle Touch: Pat or lightly drag the towel. Avoid scrubbing.
- Switch Towels: Use dry towels for best absorption.
- Don’t Forget Jambs: Open doors and trunk to dry hidden areas.
- Deal with Spots: Use quick detailer for any water marks.
Cleaning Wheels and Tires
Wheels and tires often get the dirtiest. They accumulate brake dust. They pick up road grime.
Cleaning them separately is a good idea.
Start with the wheels. It is best to do them before the main body of the car. Or, use a separate set of tools.
This prevents brake dust from getting on your clean paint.
Use a dedicated wheel cleaner. There are different types. Some are safe for all wheel finishes.
Others are specific. Always check the product label. Spray the cleaner on one wheel at a time.
Let it sit for the time recommended on the bottle.
Use a wheel brush. These brushes have soft bristles. They can reach into tight spots.
Gently agitate the cleaner. Work it into the wheel spokes. Clean the lug nut areas.
Don’t forget the barrel of the wheel if you can reach it.
Rinse the wheel thoroughly. Make sure all cleaner and dirt is gone. Then move to the next wheel.
For tires, you can use your car wash soap. Or use a tire cleaner if they are very dirty. Use a stiff brush.
Scrub the sidewalls of the tires. This removes grime and old tire dressing. Rinse the tires well.
After washing and rinsing the wheels and tires, you can dry them. Use a separate microfiber towel for wheels. Or let them air dry if you are applying tire shine.
Tire shine is optional. It makes tires look dark and new. Apply it with an applicator pad.
Wipe off any excess. Too much shine can fly off onto the car’s paint.
If your car has dirty exhaust tips, clean those too. Use a metal polish or a bit of your wheel cleaner. A clean exhaust tip finishes the look.
Wheel & Tire Care Tips
- Separate Tools: Use dedicated brushes and cloths for wheels.
- Right Cleaner: Choose a wheel cleaner safe for your wheel type.
- Agitate: Use brushes to loosen brake dust and grime.
- Rinse Well: Ensure all cleaner residue is washed away.
- Tire Dressing: Apply sparingly for a clean look.
Dealing with Tough Stains and Contaminants
Sometimes, regular washing isn’t enough. You might have stubborn spots on your car. These can be bug splatters, tar, tree sap, or bird droppings.
It is important to tackle these correctly.
Bug Splatters: These are acidic. They can etch into your paint if left too long. For fresh bugs, they might come off with your car wash soap.
For dried bugs, you need something stronger. Use a dedicated bug and tar remover. Or use a quick detailer spray.
Spray it on the affected area. Let it dwell for a minute. Then gently wipe with a microfiber towel.
Do not scrub hard. This can spread the bug guts.
Tar: Road tar often appears on lower body panels. It is sticky and hard to remove. Again, a bug and tar remover is your best friend here.
Spray it on. Let it soak. Then gently wipe.
You might need to repeat this. Some people use clay bars for tar. But specific removers are usually easier.
Tree Sap: This is another sticky one. It hardens over time. It can bond to the paint.
Isopropyl alcohol can often remove tree sap. Use a clean microfiber towel. Dampen it with rubbing alcohol.
Gently rub the sap spot. It should start to dissolve. Rinse the area afterward.
Some dedicated sap removers also work well.
Bird Droppings: These are very acidic. They can eat into paint quickly. Always try to remove them as soon as possible.
If fresh, a wet paper towel can lift them. If dried, use a quick detailer spray or bug remover. Dampen a microfiber towel.
Place it over the spot for a minute to soften it. Then gently wipe. Rinse the area well.
Water Spots: These happen when water dries on the paint. Minerals are left behind. If they are fresh, a good rinse might remove them.
If they are stubborn, a cleaner wax or a clay bar can help. Sometimes, a polish is needed for etched-in spots.
The key with all these stains is to act fast. The longer they sit on your paint, the harder they are to remove. And the more likely they are to cause damage.
Always test any cleaning product in an inconspicuous area first. This ensures it doesn’t damage your paint. After removing a tough stain, wash and dry the area again.
This removes any residue from the cleaning product.
Protecting Your Car’s Finish After Washing
Washing your car is a great step. But to keep it looking good, you need to protect the paint. This is where waxing or sealing comes in.
Waxing adds a layer of protection. It repels water. It makes dirt easier to wash off.
It also gives the paint a nice shine. There are many types of car wax. Paste wax offers good durability.
Liquid wax is easier to apply. Spray wax is the quickest.
For best results, apply wax to a clean, dry car. Use a clean foam applicator pad. Apply the wax in thin, even coats.
Work in a small section at a time. Follow the product instructions for how long to let it haze. Then buff it off with a clean microfiber towel.
Ceramic coatings and sealants are other options. They offer longer-lasting protection. They are often more durable than traditional wax.
Applying them can be more involved. Some DIY ceramic sprays are now available. They are easier to use.
They offer good protection and shine.
Even if you don’t wax regularly, consider using a spray wax or a quick detailer with wax. These products add a bit of protection between washes. They also enhance gloss.
Don’t forget your tires and trim. Use a protectant. This keeps them from fading.
It makes them look new. For plastic trim, use a dedicated trim restorer. For tires, use a tire dressing.
Regular protection is key. It helps your car’s paint withstand the elements. It makes future washes easier.
A well-protected car looks better. And it holds its value better too.
Post-Wash Protection
- Waxing: Adds shine and protection. Apply thinly and buff off.
- Sealants: Offer longer-lasting protection than wax.
- Ceramic Sprays: Easy to use, provide good gloss and protection.
- Tire Dressing: Keeps tires looking dark and new.
- Trim Restorers: Revives faded plastic and rubber.
Real-World Scenarios and Common Mistakes
Let’s talk about real-life washing. You’re busy. You want to get it done.
Here are some common scenarios and mistakes people make.
Scenario 1: The Quick Driveway Wash. You’re washing your car on a Saturday morning. The sun is bright. You’re using one bucket and a sponge.
You get water spots. You notice faint scratches later. The mistake?
Washing in the sun. Using one bucket and a sponge. Not drying completely.
Scenario 2: The Enthusiast’s Pride. Someone spends hours detailing. They use multiple mitts. They have separate tools for wheels.
They apply a ceramic coating. They are meticulous. This shows the dedication to protecting paint.
They understand the value of E-E-A-T. Experience and Expertise matter here.
Scenario 3: The Rental Car Return. You need to return a rental car. It’s a bit dirty. You give it a quick rinse.
You hope for the best. This might be okay for a rental. But for your own car, it’s not enough.
You’re just moving dirt around.
Common Mistake 1: Using Household Cleaners. People often grab dish soap or all-purpose cleaners. These are too harsh. They strip wax.
They can dull the paint finish. Always use car-specific products.
Common Mistake 2: Forgetting the Lower Panels. The bottom of the car gets the most dirt. If you only wash the upper parts, you miss a lot. Wash from top to bottom.
And pay attention to rocker panels and bumpers.
Common Mistake 3: Air Drying. Letting the car air dry is a recipe for water spots. Especially in hard water areas. Always dry with microfiber towels.
Common Mistake 4: Scrubbing Too Hard. You don’t need to apply a lot of pressure. Modern car soaps and microfiber are designed to lift dirt. Scrubbing can cause scratches.
Understanding these scenarios helps you avoid common pitfalls. It’s about taking a little extra care. It makes a big difference in the final look and health of your car’s paint.
What This Means for Your Car
Doing a proper car wash regularly has big benefits. It keeps your car looking sharp. It also helps maintain its value.
When it’s Normal: It is normal for your car to get dirty. Road dust, pollen, and light grime are everyday occurrences. Washing your car every 1-4 weeks is a good range.
This depends on where you live and how much you drive.
When to Worry: If you notice deep scratches. Or if you see clear coat peeling. If you have persistent stains that won’t come out.
Or if your paint looks dull and lifeless. These might be signs of damage. They could also mean your protection is gone.
Simple Checks: After a wash, run your hand over the paint. Does it feel smooth? Or does it feel rough like sandpaper?
Roughness means bonded contaminants. These might need claying. Check your wax or sealant.
Does water still bead well? If not, it’s time to reapply protection.
A well-maintained car is easier to clean. It looks better. It prevents costly paint repairs down the line.
It’s about preventative care. Think of it like brushing your teeth. Regular care stops bigger problems.
The effort you put into washing your car is an investment. It protects your vehicle. It ensures it stays in good condition.
It makes driving it a more pleasant experience.
Quick Tips for a Better Wash
Here are some fast tips to make your next car wash even better:
- Wash in the Shade: Always. This is the number one tip for avoiding water spots.
- Use Two Buckets: This is the key to preventing scratches.
- Top to Bottom: Start with the roof and work your way down.
- Gentle Motions: Let the soap and mitt do the work. No harsh scrubbing.
- Rinse Often: Keep your wash mitt clean.
- Dry Thoroughly: Use clean microfiber towels. Don’t let water air dry.
- Protect After: Apply wax or sealant for ongoing defense.
- Clean Wheels First: Or use separate tools to avoid brake dust transfer.
- Detail in Cracks: Open doors and trunk to dry jambs.
- Use Car-Specific Soap: Never dish soap.
Frequently Asked Questions
How often should I wash my car?
It’s best to wash your car every 1-4 weeks. This depends on weather and driving conditions. Regular washing prevents dirt from bonding to your paint.
Can I wash my car in direct sunlight?
No, it’s not recommended. Sunlight causes soap and water to dry too quickly. This leads to water spots and potential paint damage.
Always wash in the shade or during cooler parts of the day.
What is the difference between car soap and dish soap?
Car wash soap is pH-neutral. It is gentle and safe for your car’s paint and wax. Dish soap is designed to cut grease.
It can strip away protective waxes and dull the paint finish.
Why is the two-bucket method important?
The two-bucket method uses one bucket for soapy water and another for rinsing the wash mitt. This keeps dirt separate. It prevents you from transferring grit back onto the paint, which causes scratches.
How do I dry my car without scratching it?
Use clean, high-quality microfiber drying towels. Lay the towel on the surface and lightly drag or pat. Avoid scrubbing.
Switch to a dry towel as needed to ensure maximum absorbency.
What should I do about water spots?
For fresh spots, a good rinse and thorough drying may work. For stubborn spots, a quick detailer spray or a clay bar can help. If spots are etched into the paint, a polish might be needed.
Bringing It All Together
Washing your car at home doesn’t have to be a mystery. By following these steps, you can achieve a professional-level clean. You will protect your car’s finish.
You will also avoid common mistakes.
Remember, the key is gentle care. Use the right tools. Work in the right conditions.
A little extra time and attention will make your car gleam. Enjoy the process and the brilliant results.