How to Eliminate Wax From a Car’s Plastic Components
Getting wax on your car’s plastic can be a pain. It’s super common, especially if you’re new to waxing your car. It might seem tricky to fix, but don’t worry! We’ll explore How to Remove Wax From Plastic on a Car step by step. We’ll explore some tools and methods to return your car’s plastic to its original look. Get ready, this will be easy and fun!
Knowing What You’re Up Against
Before we explore how to fix this, let’s look at why wax gets on plastic in the first place. When you wax your car, you’re trying to protect the paint. However, wax can often end up on the plastic trim, bumpers, and other parts of the car. This happens because these parts are often near the painted areas you’re focusing on. Also, some waxes are easier to spread and can get on surfaces they shouldn’t. This is common when you’re not careful or when using the wrong type of applicator. Wax on plastic can look messy and take away from how your car looks.
The Different Types of Car Wax
There are different types of car waxes, and it’s helpful to know about them because they can affect how wax behaves on your car’s plastic. Waxes offer different levels of protection and shine. Some common types include:
-
Carnauba Wax: This wax comes from a Brazilian palm tree. It gives a great shine and is a favorite among car enthusiasts. However, it can sometimes be a bit tricky to apply without getting it on plastic parts.
This type of wax is known for its natural gloss. It’s often used because of the deep, rich shine it gives, and it’s excellent at repelling water. It can be a little harder to remove from plastic because it’s a bit thicker. Always protect your plastic parts!
-
Synthetic Wax: These waxes are made in labs using special chemicals. They last longer than natural waxes and are good at protecting against the sun and weather. They can also be a little easier to wipe off of plastic parts.
Synthetic waxes last longer than natural waxes. They give good protection against UV rays and environmental damage. Since they tend to be a bit more durable, the wax could potentially be harder to remove from plastic if it is left on for a long time.
-
Hybrid Wax: Hybrid waxes mix natural and synthetic waxes. They give you the shine of carnauba wax and the durability of synthetic wax. They may require more careful application to avoid getting on plastic.
Hybrid waxes are becoming popular because they provide both shine and durability. They are a good all-around choice. When working with hybrid waxes, it’s very important to be careful so that the wax does not come in contact with any plastics.
How Wax Sticks to Plastic
Wax sticks to plastic in a couple of ways. Plastic, unlike paint, has a different surface. It can be more porous, meaning it has tiny holes that the wax can get into. Also, some plastic parts have textures that trap wax. When you apply wax, it can seep into these areas and then be difficult to remove. This is especially true if the plastic is rough or has lots of grooves.
Consider the science behind it; waxes have oily components that like to stick to other oily or semi-oily surfaces. Paint and plastic have different chemical compositions and react differently to wax. Paint has a smoother surface, while plastic is often more porous, and the wax goes in quickly. That’s why the wax can be tougher to get out of plastic.
Preventing Wax From Getting on Plastic
The best way to deal with wax on plastic is to stop it from happening in the first place. There are a few easy things you can do to prevent wax from getting on plastic. First, always use painter’s tape to protect plastic parts before you wax. This tape is made to stick to surfaces without damaging them when you remove it. Second, apply the wax carefully. Use a clean applicator pad and try not to get any wax on the plastic. Finally, always clean up any spills or smudges immediately.
This prevention part saves a lot of time. It’s always best to prepare the car and protect plastic areas. Apply tape carefully around the plastic areas, such as bumpers, mirrors, and trim, before waxing. This stops the wax from sticking in the first place. You’ll be happy later.
Tools You Will Need to Remove Wax From Plastic
Now, let’s get into the stuff you need to remove wax from plastic. Having the right tools makes the job much easier and helps you get a better result. There are a few key things you’ll want to have on hand:
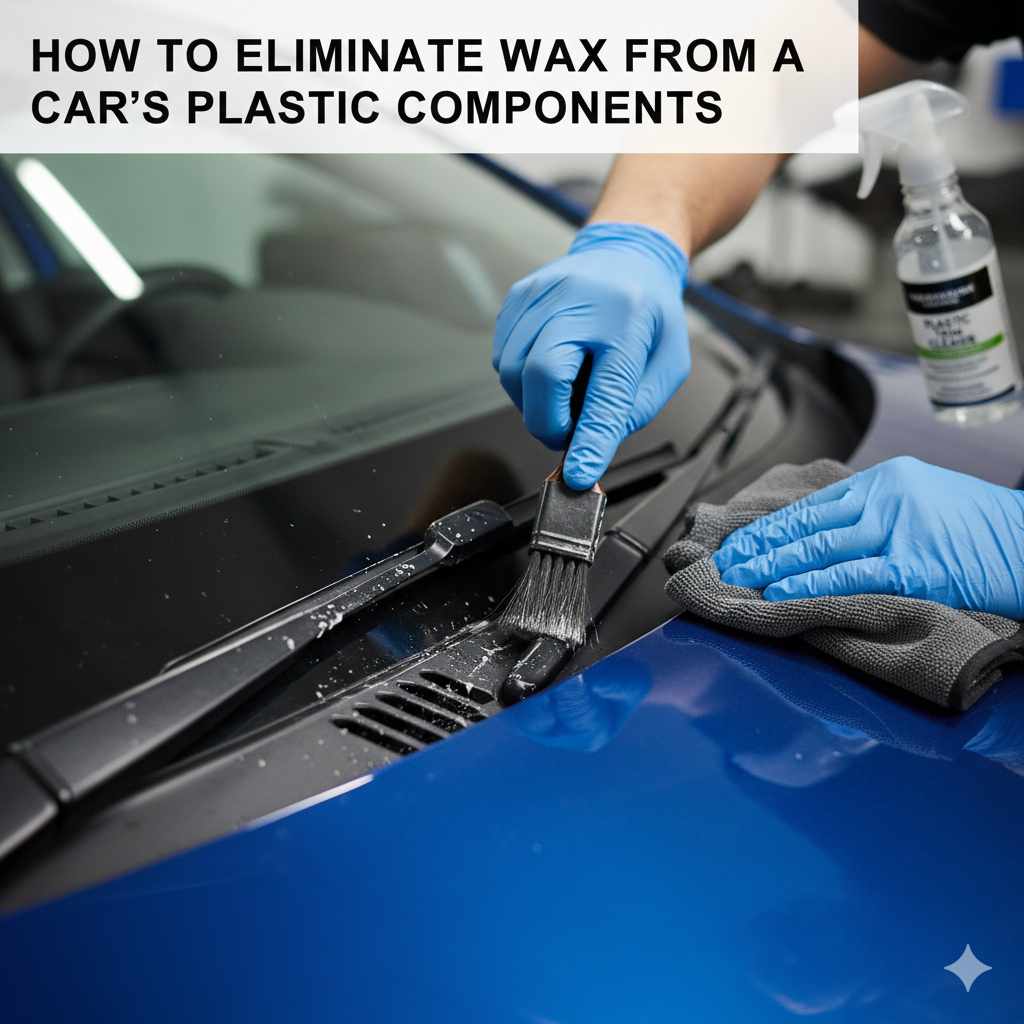
Essential Cleaning Supplies
You need some essential supplies to remove wax from your car’s plastic. This will make the work easier and safer. Here’s a list:
-
Microfiber Towels: These are super soft and won’t scratch your car. They are good for wiping away the wax and cleaning the plastic. Get several to use during the process.
Microfiber towels are soft and absorbent, which is perfect for cleaning your car. They trap dirt and wax particles without scratching the surface. It’s a must-have for safe cleaning.
-
Plastic-Safe Cleaner: You will want a cleaner that’s made for plastic. This is important because some cleaners can damage plastic. Make sure the one you choose says it’s safe for cars.
When selecting a plastic-safe cleaner, check the label. You are looking for a cleaner that’s made for cars and won’t hurt the plastic. This cleaner removes the wax without any damage to your car’s finish. You can find these at most auto supply stores.
-
Applicator Pads: Use applicator pads to put the cleaner on the plastic. Microfiber pads work great. Use new, clean pads to avoid getting any dirt on the plastic.
Applicator pads help you apply the cleaner evenly. They give you good control and make the cleaning more effective. These pads are usually soft, so they won’t scratch the plastic.
Optional Tools That Can Help
These tools can make the job even easier, but they’re not required. Having these things can make the wax removal process go faster and get even better results:
-
Detailing Brushes: These small brushes help you get into tight spots where wax can be stuck. They are great for areas like around emblems or in the small grooves.
Detailing brushes help remove wax from hard-to-reach areas. They make sure you get all the wax out and leave a clean, good-looking finish. Choose brushes with soft bristles to avoid scratching the plastic.
-
Heat Gun or Hair Dryer: Heat can soften the wax, making it easier to remove. Always use it carefully and don’t hold it in one spot for too long.
Heat can loosen the wax, making it easier to wipe away. Start with low heat settings, and test it in a small area before applying to the whole surface. This can speed up the process.
-
Wax Remover: This is a product specially designed to get rid of car wax. It usually works well and can save time.
A wax remover is specially made to cut through car wax. It’s strong enough to get rid of wax without hurting your car’s plastic. Follow the directions on the product for the best results. You will want to apply it properly.
What Not to Use
There are some things you should never use when removing wax from plastic. Some items can cause damage or make the problem worse:
-
Harsh Chemicals: Avoid using strong chemicals like bleach or ammonia. These can damage the plastic and make it look cloudy or discolored.
Always stay away from strong chemicals. These chemicals can ruin your car’s plastic, causing damage that’s hard to fix. Stick to products designed for cars.
-
Abrasive Cleaners: Things like metal polish or scouring pads will scratch the plastic. This is an important step to make sure you use safe cleaners.
Abrasive cleaners damage the surface. These cleaners scratch the plastic. When you choose your cleaner, always remember to use non-abrasive cleaners, such as plastic-safe cleaners.
-
Pressure Washers: While pressure washers are great for cleaning, they can be too intense for some plastic parts. The high pressure can damage the plastic or force wax deeper into any crevices.
Using a pressure washer can be risky. The high pressure of the water can drive the wax deeper into the plastic or even harm it. It’s usually best to avoid using a pressure washer on plastic trim.
How to Remove Wax From Plastic on a Car Step-by-Step
Now, let’s explore how to remove that wax from plastic. It’s important to do this step-by-step to get the best results. Here is a simple guide:
Prepare Your Car for Wax Removal
Before you start, you’ll need to do a few things to get your car ready. This will make the process easier, safer, and more effective. Getting things ready saves time and helps keep everything clean. Here are the steps:
-
Wash the Car: Start by washing the car thoroughly. This removes dirt and loose wax. Rinse off all of the soap and dry the car completely.
A clean car makes it easier to see the wax on the plastic. Wash away any dirt, grime, and old wax. This will give you a clean starting point.
-
Gather Your Supplies: Get all the tools and supplies you need. This helps you work more smoothly. Make sure everything is within reach.
Gathering supplies beforehand means you don’t have to stop. This will make the process faster and more enjoyable. Put all your supplies where you can easily reach them.
-
Work in a Shaded Area: Always work in a shaded area. Direct sunlight can make the products dry too fast. This can make them less effective.
Working in the shade helps protect your car. Direct sun can cause the plastic to become too hot, which can affect the cleaning process. This will also protect you from the sun’s rays.
Cleaning your car before removing wax is essential because it allows you to see the problem more clearly. Washing removes loose debris, making it simpler to identify and get rid of the wax. This step also prevents scratches, as you’re less likely to drag dirt across the plastic. Remember, start with a clean car!
Applying the Cleaner or Wax Remover
Next, you’ll apply the cleaner or wax remover. Follow the directions to do this well. Here are the steps:
-
Choose the Right Product: Select a plastic-safe cleaner or wax remover. Make sure it’s safe for your car’s plastic trim. This is important to ensure your car’s parts are not damaged during the cleaning.
Pick a product that is designed for the plastic on your car. Read the labels and make sure the cleaner is safe for plastic. You will want to test the product first, but the results will speak for themselves.
-
Apply the Product: Use an applicator pad to apply the cleaner or wax remover. Put a small amount on the pad and rub it gently on the plastic. Make sure you cover the area with wax.
This method gives you good control and helps the product spread evenly. Applying the product ensures that all wax is addressed and makes it easier to remove. Remember to apply it carefully.
-
Let It Sit (Follow Instructions): Allow the product to sit on the plastic for the time suggested on the product label. This lets it start to break down the wax. Do not let it dry on the plastic.
Following the product instructions is very important. This helps the product work the best. If you let it sit too long, it could be difficult to remove. This will have good results.
When applying the product, make sure to read all the directions carefully. It is best to test the product on a small, hidden area first to make sure it doesn’t harm the plastic. The goal is to gently remove the wax, so don’t rub too hard. When you apply it carefully, you’ll have better results.
Removing the Wax
Now, let’s get rid of the wax! This is where you remove the wax with a microfiber towel. Here’s how:
-
Wipe the Surface: Use a clean microfiber towel to wipe away the cleaner or wax remover. Use gentle pressure. Wipe in one direction to pick up the wax without spreading it.
Gently wiping the surface will remove the loosened wax. The microfiber towel will trap the wax particles, leaving a clean surface. Using a clean towel is best to avoid scratching the plastic.
-
Use Detailing Brushes (If Needed): If wax is stuck in tight spots, use a detailing brush to loosen it. Dip the brush in the cleaner, then carefully scrub the area.
Detailing brushes help get wax out of hard-to-reach areas. This will get rid of any stubborn wax, giving you a smooth finish. Be careful not to scratch the plastic with the bristles.
-
Rinse and Dry: After removing the wax, rinse the area with clean water. Then, dry it with a clean microfiber towel. This will remove any leftover cleaner.
Rinsing removes any leftover product and ensures the plastic is clean. Drying the area will prevent water spots. Then, you can see if you’ve done a good job.
During the wax removal step, keep checking your microfiber towel. You’ll see wax come off on the towel. If the towel gets too full of wax, use a fresh, clean one to prevent redepositing wax on the plastic. These methods and techniques will help you obtain a clean finish.
Removing Stubborn Wax
Sometimes, the wax can be extra hard to remove. You’ll need to use these additional steps to remove any stubborn wax.
-
Repeat as Needed: You may need to apply the cleaner or wax remover more than once. This is common if the wax is thick or old. Apply it, let it sit, then wipe it off again.
If the wax is stubborn, repeat the process. This can help break down the wax more effectively. Take your time, and don’t rush through the process. Repeating the process helps.
-
Use Heat (With Caution): For stubborn wax, you can use a heat gun or hairdryer. Hold the heat source a few inches away from the plastic. Apply the heat for a few seconds. Then, wipe away the softened wax.
Heat can help soften the wax, making it easier to remove. Never apply heat for too long, or it can damage the plastic. Always test the heat on a small area first to make sure it’s safe.
-
Try a Clay Bar (If Necessary): A clay bar can remove stubborn wax and contaminants. Use it after washing the car and before applying wax. Follow the directions on the clay bar.
A clay bar can remove anything that’s stuck on the surface. Use a clay bar if the wax is difficult to remove. This will get rid of any wax and contamination that’s still there.
Removing stubborn wax might take a little extra time and effort. Be patient and persistent. Remember, taking your time and being careful will get you the best results. Always be careful when using heat, and never hold the heat source too close to the plastic. After the wax is gone, you can apply a plastic protectant.
Advanced Techniques and Tips
Want to go beyond the basics? Explore these advanced techniques and tips to help you get professional-level results. Sometimes, you need a little more knowledge to achieve good results. Here are some options:
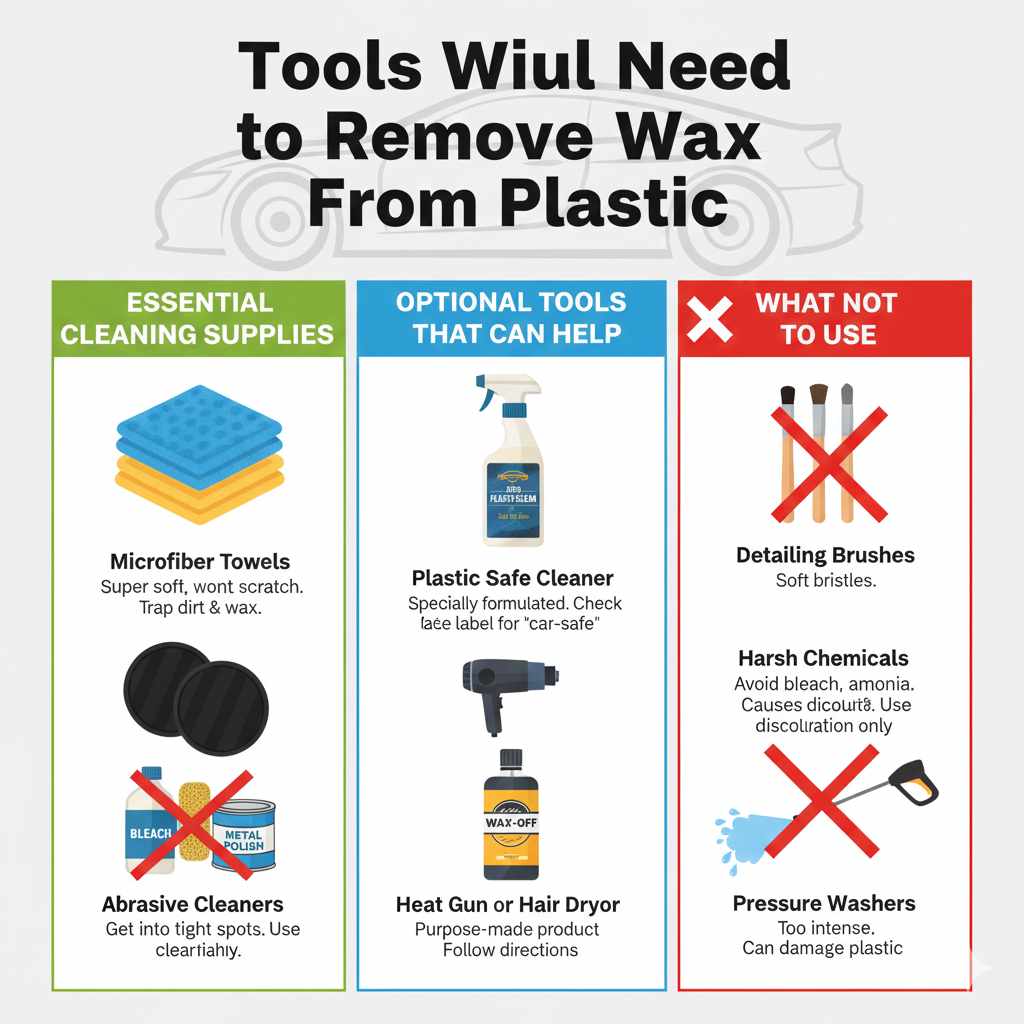
Using a Polishing Machine
A polishing machine can make removing wax from plastic easier. It can help you get a perfect finish. However, you have to do this with care. Here are some tips:
-
Choose the Right Pads: Use a soft polishing pad for plastic. This pad is less likely to scratch the plastic. Avoid using hard or abrasive pads, as they can cause damage.
Selecting the right pad is very important. Always choose a soft pad for plastic. This ensures you remove the wax safely, without any damage. This will give a good result.
-
Use a Plastic Polish: Apply a plastic polish to the pad. This helps to remove the wax. Follow the directions on the plastic polish.
A plastic polish helps remove wax and improve the appearance of the plastic. Applying it correctly ensures that you get the best results. This gives your plastic a shine.
-
Polish Carefully: Use the polishing machine on a low speed. Work in small sections, and don’t stay in one spot too long. Keep the pad moving.
Polishing machines can be powerful. Always work at a low speed to avoid damaging the plastic. Moving the pad consistently ensures even results. This gives a great look.
Polishing machines are great, but they also require practice. Start in a small, hidden area to get a feel for the machine. Using a polishing machine will give your car a better look. This tool can save time and get excellent results if you do it correctly.
Restoring Faded Plastic
If your car’s plastic is faded, you might need extra work. Wax removal is the first step. Here’s what to do next:
-
Clean the Plastic: Clean the plastic with a plastic-safe cleaner. This will remove any wax. Then, make sure the surface is prepared.
Make sure the plastic is very clean before starting the restoration process. Removing any wax is key to a good finish. Removing wax will make things look better.
-
Apply a Plastic Restorer: Plastic restorers bring back the color to faded plastic. Apply the restorer according to the directions.
Plastic restorers can help restore the original look. Apply the restorer carefully, following the instructions. You will see a big difference in the plastic’s appearance.
-
Protect the Plastic: Use a plastic protectant to keep the plastic looking good. This helps prevent fading and damage. Reapply it as needed.
Protecting the plastic is very important. This helps protect the results and maintains the look of the plastic. You can then enjoy the look for a longer time.
Faded plastic can be brought back to life, and the process takes patience. Removing wax is key, and restoration products will help you get good results. Following these steps and protecting the plastic will help the results last. Your car will look great!
Maintaining Plastic Trim
Here are some tips for keeping your plastic trim in great shape. Regular maintenance will help keep your car looking good. Here’s what to do:
-
Wash Regularly: Wash your car often. This will help remove dirt and wax. Wash your car every week.
Regular washing will help keep the plastic trim clean. Dirt and wax can damage the plastic. Washing your car regularly will help maintain your car’s look.
-
Use Plastic Protectant: Apply a plastic protectant to the trim. This protects it from the sun and weather. Reapply it often.
Protectant is a good way to defend your plastic trim. This product creates a barrier that helps protect the plastic. Using protectant is good for any plastic.
-
Avoid Harsh Chemicals: Do not use harsh chemicals when you wash your car. These chemicals can damage the plastic. Stick to car-safe cleaners.
Harsh chemicals can make your plastic look bad. Use only car-safe cleaners and products. Read the labels and use safe cleaners.
Keeping the plastic trim in good condition is important. Regular washing and the use of protectants will help you maintain your car’s look. Taking care of your car’s plastic trim will make a big difference.
| Technique | Description | Best For |
|---|---|---|
| Plastic-Safe Cleaner | A mild cleaner designed for use on plastic surfaces. | Light wax residue, regular maintenance. |
| Wax Remover | Specially formulated to dissolve car wax. | Wax buildup, more challenging cases. |
| Detailing Brush | A small brush to reach tight spots and grooves. | Areas with intricate details. |
This table summarizes different techniques for removing wax from plastic on a car. It covers essential tools and their uses. Remember to choose methods appropriate to the plastic and the severity of wax. Each technique requires patience and care for optimum results.
Here is an example of what can happen if you do not follow these steps:
- A car owner quickly waxes their vehicle without using tape to protect the plastic. During the waxing process, wax gets onto the plastic trim of the car. This results in an undesirable, streaky appearance on the car’s plastic trim.
- A DIY detailer tries to remove the wax by using abrasive chemicals and strong cleaning products. This causes the plastic trim to fade and discolor. The trim now looks worse than before.
- A detailer follows the steps properly. They wash the car, gather the correct tools, and use a plastic-safe cleaner to remove the wax. As a result, the plastic trim looks clean.
These scenarios highlight the importance of the correct approach. They also show how following the right steps and using the right products gets the best results. The results are always better when you plan ahead.
Frequently Asked Questions
Question: How often should I wax my car?
Answer: It depends on the wax, but generally, you should wax your car every 3-6 months. Always check the directions.
Question: Can I use household cleaners on my car’s plastic?
Answer: It’s best to avoid household cleaners, as they may damage the plastic. Stick to cleaners designed for cars.
Question: What if the wax is really old and hard to remove?
Answer: You might need to use a wax remover. Also, you might have to repeat the cleaning process and use a little heat.
Question: How can I prevent wax from getting on the plastic?
Answer: Always use painter’s tape to protect the plastic. Also, apply the wax carefully with a clean applicator.
Question: Is it okay to use a pressure washer on plastic trim?
Answer: Be careful with pressure washers. The strong pressure can sometimes damage the plastic or drive wax into any crevices.
Final Thoughts
So, we’ve explored the process of How to Remove Wax From Plastic on a Car. We covered everything from choosing the right tools to applying them correctly. You’ve learned about the different types of car waxes and why they can get on plastic. You now know how to get rid of the wax using simple steps like washing, using a plastic-safe cleaner, and wiping it all away. We also explored what tools you may need for this procedure.
Remember that prevention is key. Protect your plastic parts with painter’s tape when you’re waxing. If wax does get on the plastic, don’t worry. Just follow the steps we explored, and your car will look great. You can give your car a beautiful finish. You’ve got this! Start with the steps and enjoy your clean, wax-free plastic!