How to Fix a Car Tire Slow Leak Safely
Fixing a car tire slow leak yourself can save you time and money, but it’s crucial to do it correctly to ensure safety on the road. Understanding the common causes and the right methods for repair will help you address minor punctures before they become major problems. This guide will walk you through identifying a slow leak, essential tools, and step-by-step instructions to perform a temporary or even a more permanent fix.
Simply put, fixing a car tire slow leak involves identifying the puncture, preparing the area, inserting a plug or patch, and reinflating the tire. For minor leaks, a tire plug kit can be a DIY solution, but always inspect the tire afterward and consider professional repair for safety and longevity.
Key Takeaways
- Fixing a car tire slow leak can be a manageable DIY task for minor punctures.
- Essential tools include a tire plug kit, pliers, a valve stem tool, and a tire pressure gauge.
- Proper identification of the leak source is the first critical step before attempting any repair.
- A temporary plug is a common DIY fix, but a professional inspection and repair are highly recommended for safety.
- Always reinflate the tire to the manufacturer’s recommended pressure after a repair and monitor it closely.
What is a Car Tire Slow Leak?
A car tire slow leak refers to a gradual loss of air pressure from a tire that isn’t immediately obvious but can be detected over time. This type of leak is often caused by small punctures, valve stem issues, or minor damage to the tire bead. While it might not cause immediate deflation, a persistent slow leak can lead to underinflated tires, affecting handling, fuel efficiency, and potentially causing irreversible tire damage.
Recognizing the signs is key to addressing the issue before it escalates. Common indicators include needing to add air to your tires more frequently than usual, a tire that appears slightly deflated when parked for a while, or a hissing sound when the tire is close to your ear. Ignoring a slow leak is a gamble with your safety and your car’s performance.
The most common culprits are small nails, screws, or sharp debris that pierce the tire’s tread. However, leaks can also originate from the valve stem, where the rubber can degrade or the valve core might become loose. Sometimes, a poor seal between the tire and the wheel rim, known as a bead leak, can also cause gradual air loss.
Common Causes of Tire Slow Leaks
- Punctures from sharp objects: Nails, screws, glass shards, or other road debris.
- Valve stem issues: Cracks, wear, or a loose valve core.
- Rim leaks: Corrosion or damage to the wheel rim, or debris between the tire and rim.
- Tire sidewall damage: Small cuts or abrasions that compromise the rubber integrity.
- Underinflation: Prolonged underinflation can stress the tire, leading to potential leak points.
- Manufacturing defects: Though rare, a flaw in the tire itself can cause a leak.
Identifying a Slow Leak
The first step to fixing a car tire slow leak is accurately locating it. You can do this by listening for a faint hissing sound, especially near the valve stem or the tire’s surface. If the sound isn’t obvious, a spray bottle filled with soapy water is your best friend.
Spray the entire tire, from the bead to the tread, and look for bubbles forming—this indicates escaping air.
Another method involves using a tire pressure gauge to check the pressure daily or every few days. If one tire consistently loses pressure faster than the others, it’s likely the source of the leak. You can also try immersing the tire in a tub of water (if possible, by removing it from the car) and watching for bubbles.
This is the most foolproof method for pinpointing small leaks.
What You Need for a Tire Plug Repair
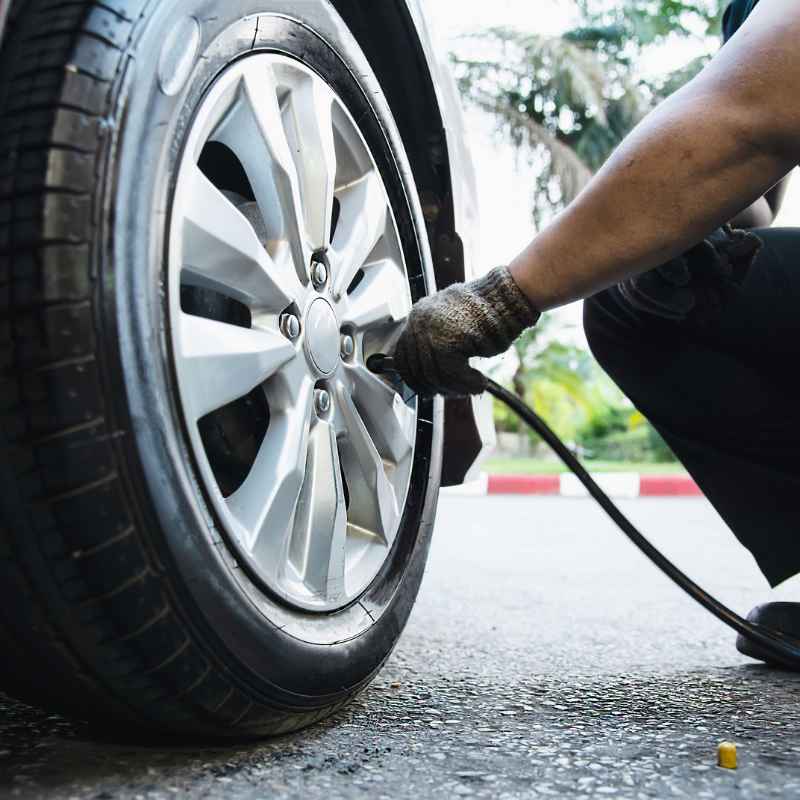
To effectively perform a DIY repair for a car tire slow leak, having the right tools is essential. A comprehensive tire plug kit is the most common and accessible solution for minor tread punctures. These kits typically include a reamer tool to clean and enlarge the puncture hole, an insertion tool for the plug material, and the plug material itself, often in the form of sticky, rubberized strings.
Beyond the plug kit, you’ll need a few other basic items to complete the job safely and effectively. A good pair of pliers is necessary to remove the offending object from the tire. A reliable tire pressure gauge is crucial for checking the pressure before and after the repair, and for ongoing monitoring.
Lastly, a portable air compressor or access to an air pump is vital for reinflating the tire.
Essential Tools Checklist
- Tire Plug Kit: Includes reamer, insertion tool, and rubber plugs.
- Pliers: For removing nails, screws, or other puncturing objects.
- Tire Pressure Gauge: To accurately measure and maintain correct tire pressure.
- Portable Air Compressor or Pump: To reinflate the tire after repair.
- Valve Stem Tool: For tightening or replacing the valve core if needed.
- Gloves: To keep your hands clean and protected.
- Safety Glasses: To protect your eyes from debris.
Optional but Recommended Items
- Tire Repair Sealant (Can): A temporary emergency fix if a plug isn’t feasible.
- Wheel Chocks: To secure the vehicle while working on a tire.
- Work Light: For better visibility, especially at night.
- Tire Mounting Lubricant: If attempting to reseat a bead.
How to Fix a Car Tire Slow Leak: Step-by-Step
Successfully fixing a car tire slow leak requires patience and attention to detail. Begin by parking your vehicle on a flat, stable surface and engaging the parking brake. If you’re unsure about the exact location of the leak, use the soapy water method described earlier to pinpoint it.
Once the leak is found, use your pliers to carefully remove the puncturing object. Be prepared for a slight rush of air; this is normal.
After removing the debris, insert the reamer tool from your tire plug kit into the puncture hole. Work it in and out several times with a twisting motion to clean and slightly enlarge the opening, ensuring the plug will seat properly. This step is crucial for a lasting repair.
Don’t overdo it, but ensure the hole is prepped for the plug.
Step 1: Locate and Remove the Puncture Source
- Park the car on a level surface and set the parking brake.
- If the leak isn’t obvious, use soapy water sprayed on the tire to find it.
- Once located, carefully remove the nail, screw, or debris with pliers. Pull straight out.
- Be ready for air to escape briefly.
Step 2: Prepare the Puncture Hole
- Take the reamer tool from your plug kit.
- Insert it into the puncture hole and work it up and down with a twisting motion.
- This cleans out debris and slightly enlarges the hole for the plug.
- Repeat this process 4-5 times to ensure a clean passage.
Step 3: Insert the Tire Plug
- Take one of the rubber plugs and thread it through the eye of the insertion tool.
- Fold the plug in half over the tool.
- Carefully push the insertion tool with the plug into the puncture hole until only about half an inch of the plug remains visible outside the tire.
- Apply firm, steady pressure.
Step 4: Remove Insertion Tool and Seal
- Slowly and carefully pull the insertion tool straight out of the tire.
- The plug should remain in the hole, sealing the puncture.
- Trim any excess plug material sticking out, leaving about a quarter inch flush with the tread.
- Apply more soapy water to the repaired area to check for any remaining leaks.
Step 5: Reinflate and Inspect
- Use your portable air compressor to reinflate the tire to the manufacturer’s recommended pressure (found on the driver’s side doorjamb sticker).
- Check the tire pressure again after a few hours and again the next day.
- If the pressure remains stable and no bubbles appear, the repair is likely successful.
| Repair Step | Key Action | Purpose |
|---|---|---|
| 1. Locate & Remove | Find leak, remove debris (nail/screw). | Identify and clear the source of air loss. |
| 2. Prepare Hole | Ream the puncture hole. | Clean and enlarge hole for proper plug seating. |
| 3. Insert Plug | Thread plug onto tool and insert into hole. | Fill the puncture to create a seal. |
| 4. Seal Check | Trim excess, re-test with soapy water. | Confirm the plug is secure and no leaks remain. |
| 5. Reinflate | Inflate tire to recommended pressure. | Ensure proper tire inflation for safe driving. |
This table summarizes the core steps for fixing a car tire slow leak using a plug kit, emphasizing the action and purpose of each stage.
What If the Leak Isn’t in the Tread?
Tire plugs are designed specifically for punctures in the tire’s tread area. If your slow leak is coming from the tire’s sidewall or shoulder, a plug repair is generally not recommended and can be unsafe. Sidewalls flex significantly during driving, and a plug in this area is prone to failure, potentially leading to a sudden blowout.
For leaks in the sidewall or shoulder, the only safe and reliable solution is professional repair or replacement. Many tire shops can perform internal patch repairs for minor sidewall damage, which involves removing the tire from the rim to apply a patch from the inside. However, significant sidewall damage often necessitates replacing the entire tire.
A loose or damaged valve stem is another common cause of slow leaks that is typically easy and inexpensive for a professional to fix.
Sidewall vs. Tread Leaks
- Tread Leaks: Small punctures from nails, screws, or debris in the main contact area of the tire. These are generally repairable with a plug or patch.
- Sidewall Leaks: Damage to the flexible, curved area of the tire between the tread and the wheel rim. These are rarely repairable and pose a significant safety risk if plugged.
- Shoulder Leaks: Leaks occurring on the edge of the tread where it curves into the sidewall. These are also considered high-risk areas and typically require professional attention or tire replacement.
Valve Stem Issues
The valve stem is a small, rubber or metal component that allows air to enter and exit the tire. Over time, the rubber can crack or become brittle, leading to leaks. The valve core, the small pin inside the stem, can also become loose or faulty.
A simple test for a valve stem leak is to apply a bit of saliva or soapy water to it; if bubbles form, the stem is likely the culprit.
Fixing a leaky valve stem usually involves a special tool to remove the valve core and replace it with a new one or to tighten a loose core. If the rubber stem itself is damaged, it will need to be replaced by a tire professional. This is a relatively quick and inexpensive repair that can prevent significant air loss.
Common Mistakes to Avoid
When trying to fix a car tire slow leak, several common pitfalls can lead to an unsuccessful repair or even create a safety hazard. One of the most frequent mistakes is not thoroughly cleaning and reaming the puncture hole. If debris is left behind, the plug won’t seat properly, leading to a leak that reappears shortly after the repair.
Another common error is using a plug that is too large or too small for the puncture. Using the wrong size can compromise the seal or damage the surrounding tire structure. Over-tightening or forcing the insertion tool can also cause damage.
Always follow the kit’s instructions and apply steady, controlled pressure. Finally, failing to check the tire pressure after the repair and monitor it regularly is a critical oversight.
Mistakes to Watch Out For
- Not cleaning the hole: Leaving debris behind prevents a good seal.
- Using the wrong size plug: Too big or too small leads to failure.
- Forcing the insertion tool: Can damage the tire or the plug.
- Not checking for leaks after repair: Air could still be escaping.
- Ignoring sidewall damage: Plugs are not for sidewalls; this is dangerous.
- Over-reliance on plugs: Plugs are often a temporary fix; professional repair is best.
- Not checking tire pressure regularly: Underinflation can cause further damage or failure.
When to Seek Professional Help
While DIY tire plug kits are convenient for minor tread punctures, there are several scenarios where seeking professional help is not just recommended, but essential. If the puncture is too large (generally over 1/4 inch in diameter), located near the tire’s shoulder or sidewall, or if there are multiple punctures close together, a plug is unlikely to be a safe or effective solution.
Additionally, if you’re unsure about the cause or location of the leak, or if the DIY repair doesn’t hold air after a day or two, it’s time to call in the experts. Tire professionals have the tools and expertise to properly inspect the tire, determine if a repair is feasible, and perform a safe internal patch-and-plug repair. In many cases, especially with significant damage, tire replacement will be the safest course of action.
Signs You Need a Professional
- Puncture is larger than 1/4 inch diameter.
- Puncture is located in the tire’s shoulder or sidewall.
- Multiple punctures in close proximity.
- Tire has sustained significant impact damage.
- DIY repair fails to hold air pressure.
- You are unsure of the leak’s cause or severity.
- The tire is old, worn, or shows signs of cracking.
| Scenario | DIY Option? | Professional Recommendation |
|---|---|---|
| Small nail puncture in tread | Yes (temporary or semi-permanent) | Recommended for permanent repair/inspection. |
| Large puncture (>1/4 inch) in tread | No | Likely requires tire replacement. |
| Any puncture in sidewall or shoulder | Absolutely Not | Requires immediate professional assessment; likely replacement. |
| Leaking valve stem | Sometimes (for core replacement) | Recommended for stem replacement or diagnosis. |
| Multiple punctures or complex damage | No | Professional inspection and likely tire replacement. |
This comparison highlights when DIY repairs for tire leaks might be appropriate versus when professional expertise is indispensable for safety.
Frequently Asked Questions
What is the average lifespan of a tire plug?
A properly installed tire plug can last for the remaining life of the tire, sometimes tens of thousands of miles. However, they are often considered a temporary or semi-permanent fix by professionals. It’s always recommended to have the tire inspected by a professional after a plug repair to ensure its long-term integrity.
Can I drive on a tire with a slow leak?
Driving on a tire with a slow leak is not recommended. Even a small loss of air pressure can affect vehicle handling, braking, and fuel efficiency. Prolonged underinflation can also damage the tire’s internal structure, making it more susceptible to blowouts.
It’s best to fix the leak or inflate the tire to the correct pressure immediately.
How often should I check my tire pressure?
You should check your tire pressure at least once a month and before any long road trips. It’s also a good practice to check them if you notice any visual changes in the tire’s inflation or if the temperature has significantly changed, as temperature fluctuations can affect pressure.
What is the difference between a plug and a patch for tires?
A plug is inserted from the outside of the tire and is a quick, temporary fix for tread punctures. A patch, often combined with a plug (a patch-plug), is applied from the inside of the tire. Internal patch-plug repairs are considered more permanent and safer by professionals because they allow for a thorough inspection of the tire’s internal structure.
How much does it cost to get a tire professionally repaired?
The cost of a professional tire repair can vary, but typically ranges from $20 to $40 for a standard internal patch-plug repair. If the damage is more severe and requires a full patch or if the tire needs to be replaced, the cost will be higher. Valve stem replacement is usually around $10 to $20.
Final Thoughts
Addressing a car tire slow leak promptly is key to ensuring your safety and maintaining your vehicle’s performance. While DIY plug kits offer a convenient solution for minor tread punctures, understanding their limitations and knowing when to seek professional help is paramount. Always prioritize safety by inspecting your tires regularly and opting for professional evaluation for any damage outside the tread area or any repair that doesn’t hold pressure.
Products related to this article
Sponsored / affiliate links. As an Amazon Associate I earn from qualifying purchases. I may earn additional commission from eligible campaigns.
 BIONIC Car Tire Inflator Portable Air Compressor with LED Road Flare, Work Light, & Window Breaker, 1500MAH Air Pump with Pressure Gauge, Emergency Lights for Vehicles, Rechargeable (120 PSI)
 ACARLUOY Car tire inflator,portable air compressor,Cordless air pump,Fit for Benz EQC 2018-2025,Tire pump for Benz EQC -12V tire inflator compressor,Compatible with compact automotive parts