How to Use a Car Tyre Repair Kit Safely & Easily
Using a car tyre repair kit can be a lifesaver when you encounter a puncture on the road, preventing you from being stranded. Understanding the process ensures you can address the issue effectively and safely, getting you back on your journey with minimal fuss. This guide will walk you through everything you need to know to confidently use your tyre repair kit.
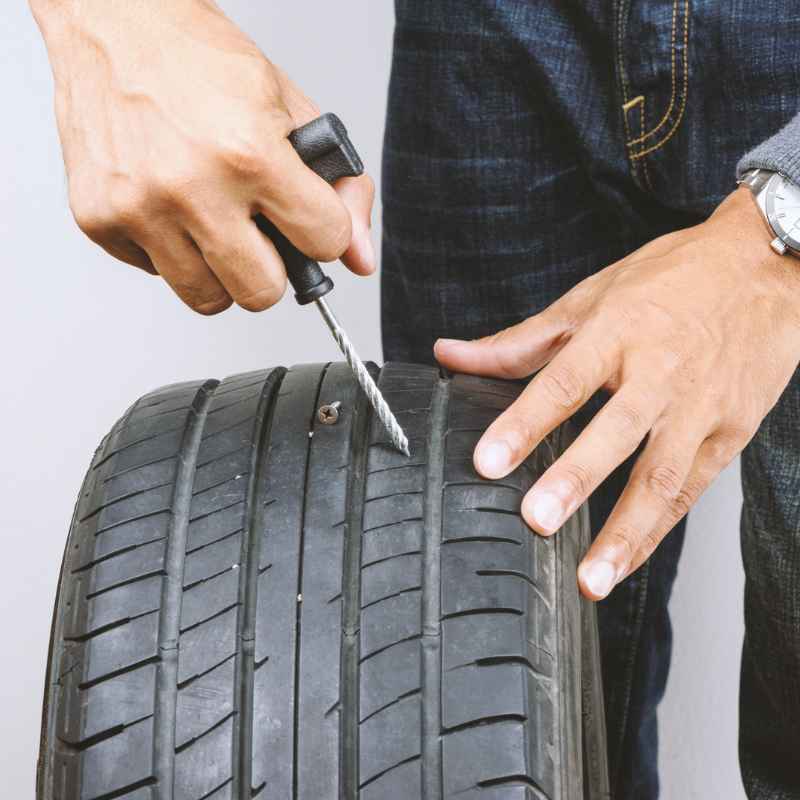
Simply put, using a car tyre repair kit involves locating the puncture, preparing the hole with an insertion tool, inserting a repair plug or sealant, and reinflating the tyre to the correct pressure. Always follow the specific instructions for your kit, and consider it a temporary fix until a professional can inspect the tyre.
Key Takeaways
- Using a car tyre repair kit is a temporary solution for punctures, not a permanent fix.
- Always wear protective gloves and eyewear when using a tyre repair kit.
- Ensure the puncture is in the tread area and not on the sidewall for a safe repair.
- Properly inflate the tyre after repair and check for leaks before driving.
- Get your repaired tyre inspected by a professional as soon as possible.
What is a Car Tyre Repair Kit?
A car tyre repair kit is a compact, portable tool designed to temporarily fix a puncture in your vehicle’s tyre. It allows drivers to mend minor damage, such as nail or screw holes, in the tyre’s tread, enabling them to drive to a service station or home. These kits are a crucial part of any emergency car kit, offering a practical solution when immediate professional help isn’t available.
There are generally two main types of car tyre repair kits: plugger kits and sealant kits. Plugger kits, often called tyre plugging kits, involve using a tool to insert a sticky, rubberised plug into the puncture. Sealant kits, on the other hand, inject a liquid sealant that hardens and seals the hole from the inside.
The effectiveness of these kits relies on the severity and location of the puncture. They are designed for small punctures in the main tread area. More significant damage, or any damage to the tyre’s sidewall or shoulder, cannot be safely repaired with these kits and will require professional attention, potentially leading to a tyre replacement.
Components of a Standard Tyre Repair Kit
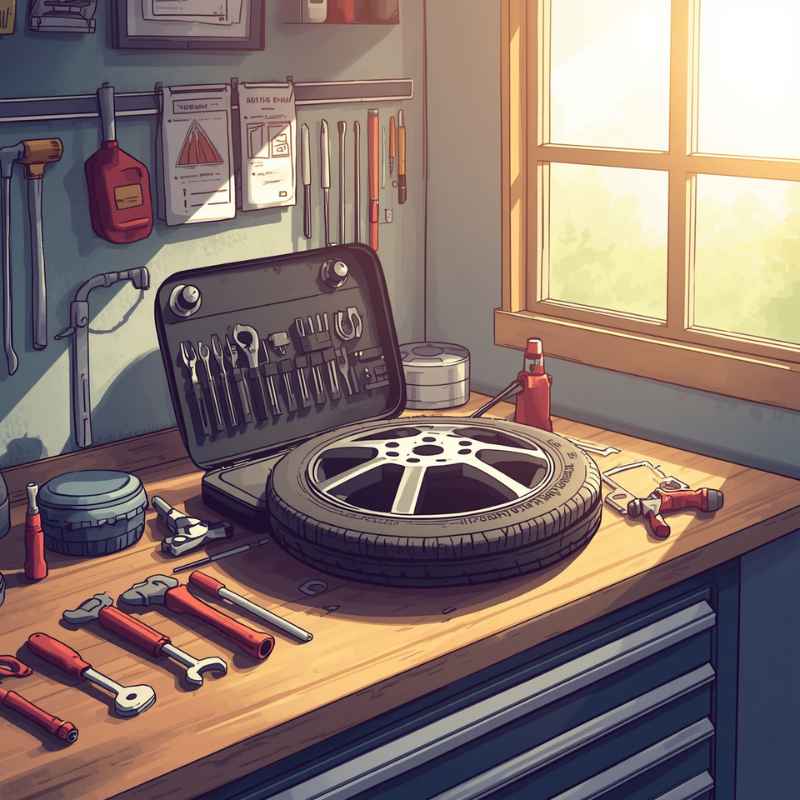
Most car tyre repair kits contain a specific set of tools and materials to help you patch a punctured tyre. Understanding what each component does is key to successfully using the kit. Familiarity with these items before an emergency arises can significantly reduce stress and time when you actually need to perform a repair.
The essential items typically found in a plugger-style kit include:
- Tyre Reamer Tool: A pointed, spiral-shaped tool used to clean out and roughen the puncture hole. This process ensures the repair plug adheres properly.
- Tyre Insertion Tool: A tool with an eyelet that you thread the repair plug through. This tool is used to force the plug into the puncture.
- Repair Plugs: These are typically long, thin strips of sticky, rubberised material. They are inserted into the tyre to seal the hole.
- Small Container of Rubber Cement/Adhesive: This is often applied to the plug before insertion to enhance sealing and adhesion.
- Utility Knife/Blade: Used to trim any excess plug material that sticks out of the tyre after insertion.
Some advanced kits might also include a small air compressor or a CO2 cartridge inflator to reinflate the tyre after the repair is complete. If your kit doesn’t include an inflator, you’ll need to have a portable air compressor or access to a petrol station air pump.
Preparing for the Tyre Repair
Before you even begin to use the tyre repair kit, several preliminary steps are crucial for safety and effectiveness. These involve assessing the situation, gathering your tools, and ensuring a safe working environment. Rushing through preparation can lead to an ineffective repair or even further damage to your tyre or yourself.
Firstly, you need to safely pull over to a level and stable surface, away from traffic. Engage your handbrake and turn on your hazard lights. If you have wheel chocks, place them around the opposite wheel to prevent the car from rolling.
Next, locate the puncture. This can sometimes be tricky, especially if the object that caused the puncture is still lodged in the tyre. If you can find it, leave the object in place for now, as it helps prevent air loss and makes locating the exact spot easier.
If you cannot find the puncture visually, you can use a spray bottle filled with soapy water. Spray it around the tyre’s surface; bubbles will form where the air is escaping.
| Safety Checklist | Action |
|---|---|
| Safe Location | Park on a level, stable surface away from traffic. |
| Handbrake | Engage the handbrake firmly. |
| Hazard Lights | Turn on hazard lights to alert other drivers. |
| Wheel Chocks | Use if available, especially on inclines. |
| Gloves and Eye Protection | Wear to protect yourself from dirt and sharp objects. |
After ensuring your safety and locating the puncture, it’s time to gather all the components of your repair kit and lay them out. Make sure you have everything you need before starting the actual repair process. Having a spare tyre nearby can also provide peace of mind, even if you plan to use the repair kit.
Step-by-Step: Using a Tyre Plugger Kit
Most common car tyre repair kits are plugger kits. These are generally straightforward to use if you follow the instructions carefully. The process involves preparing the hole, inserting the plug, and then reinflating the tyre.
Each step is critical for a successful temporary repair.
Once you’ve prepared your car and located the puncture, you need to remove the object that caused it. This is usually done with a pair of pliers or by carefully wiggling the object with the insertion tool. Be prepared for a small rush of air as the object is removed; this is normal.
Avoid removing it if you can’t get a good grip or if it’s deeply embedded, as you might enlarge the hole.
- Prepare the Hole: Take the tyre reamer tool and to. You want to make the hole slightly larger and cleaner.
- Prepare the Plug: Take one of the repair plugs and thread it through the eyelet of the insertion tool. You’ll want about half of the plug sticking out of the tool’s eyelet. If your kit includes adhesive, apply a thin layer to the plug and the area around the hole.
- Insert the Plug: Carefully and firmly push the insertion tool with the plug into the puncture hole. Drive it in until only about half an inch (or 1-2 cm) of the plug remains visible sticking out of the tyre. You might need to use significant force.
- Remove the Tool: Once the plug is fully inserted, slowly and steadily pull the insertion tool straight out. The plug should remain in the tyre. If the plug comes out with the tool, you’ll need to re-thread it and try again.
- Trim Excess Plug: Use the utility knife or blade to carefully trim off the excess plug material that is sticking out of the tyre. Cut it flush with the tyre’s surface. Be careful not to cut too deeply, as this could damage the repair.
After completing these steps, the temporary repair is in place. However, the tyre is likely deflated or underinflated. You’ll need to reinflate it to the manufacturer’s recommended pressure.
Check the tyre’s sidewall for the correct PSI (pounds per square inch) or consult your vehicle’s manual.
Using Tyre Sealant Kits
Tyre sealant kits offer an alternative method for repairing punctures, often considered simpler and quicker by some users. These kits typically contain a can of sealant and a hose or adapter to connect to the tyre’s valve stem. The sealant is pressurized and injected directly into the tyre.
The principle behind sealant kits is that the liquid sealant, often containing fibres or rubber particles, coats the inside of the tyre. When it encounters the puncture, the fibres or particles coagulate and block the hole as air escapes. The process is generally much less physically demanding than using a plugger kit.
Here’s a general outline of how to use a sealant kit:
- Locate and Assess: Similar to plugger kits, ensure you are in a safe location and identify the puncture. Sealant kits are also best for tread punctures.
- Connect the Sealant: Remove the valve cap from the tyre’s valve stem. Connect the sealant can’s hose or adapter securely to the valve stem.
- Inject the Sealant: Follow the product instructions. This usually involves pressing a trigger or valve on the sealant can to inject the entire contents into the tyre. The can is often designed to also reinflate the tyre somewhat as it injects the sealant.
- Reinflate if Necessary: If the tyre isn’t adequately inflated after the sealant is injected, use a separate portable air compressor to bring it up to the recommended pressure.
- Drive and Check: Drive your vehicle for a few miles at a moderate speed (e.g., 20-30 mph). This allows the sealant to distribute inside the tyre and seal the puncture effectively.
After driving for a short distance, pull over again and check the tyre’s pressure. You might also want to inspect the puncture area for any signs of leakage, although this can be difficult with sealant inside. It’s essential to get the tyre professionally inspected and repaired or replaced as soon as possible.
When NOT to Use a Tyre Repair Kit
While car tyre repair kits are incredibly useful, they are not a universal solution for all tyre damage. It’s critical to know when these kits should NOT be used to avoid dangerous situations or further damage. Using them in inappropriate circumstances can lead to a catastrophic tyre failure while driving.
The most important rule is to never attempt to repair a puncture on the tyre’s sidewall or shoulder. The sidewall is the flexible part of the tyre that flexes during driving. Any repair attempted here will not be structurally sound and is highly likely to fail.
The tread area, the part that contacts the road, is the only section designed for repair.
Here are the primary situations where a tyre repair kit should not be used:
- Sidewall Punctures: Any damage to the side of the tyre is a no-go.
- Shoulder Punctures: The shoulder area, where the tread meets the sidewall, is also too flexible for a plug repair.
- Large Punctures: If the hole is larger than 1/4 inch (approximately 6mm) in diameter, it’s too big for a standard repair.
- Multiple Punctures: Attempting to repair more than one puncture on the same tyre is generally not recommended by manufacturers or repair shops.
- Run-Flat Damage: If the tyre has been driven on for a significant distance while flat (run-flat), the internal structure may be compromised, even if the puncture itself looks repairable.
- Tyre Age and Condition: Older tyres with significant wear, cracks, or damage to the rubber might not be suitable for repair.
- Cut or Tear: Repairs are for punctures, not for cuts or tears in the tread.
If you encounter any of these situations, the only safe course of action is to install your spare tyre and seek professional tyre service immediately. A professional tyre shop has the expertise and equipment to determine if a tyre can be safely repaired or if it needs to be replaced.
Checking for Leaks After Repair
Once you’ve completed the repair and reinflated the tyre, the job isn’t quite finished. It’s essential to verify that the repair is holding and that there are no leaks. This step is crucial to ensure your safety and to prevent the tyre from deflating unexpectedly while you’re driving.
The most common method to check for leaks is by using soapy water. You can use a dedicated tyre leak detector spray, or simply mix dish soap with water in a spray bottle or bucket. After applying the repair and reinflating the tyre, spray or brush the soapy water generously over the repaired area and around the valve stem.
Observe the repaired area closely. If you see small bubbles forming and growing, this indicates that air is escaping from the puncture site, meaning the repair has not been successful. The bubbles will be more prominent the larger the leak is.
- Bubbles at the repair site: Indicates an unsuccessful plug or sealant job.
- Bubbles around the valve stem: Suggests a faulty valve or a loose connection.
- Sudden deflation: Obvious sign of a major leak.
- Audible hissing sound: Another clear indicator of escaping air.
If you detect any leaks, do not drive on the tyre. You will need to remove the repair attempt (if using a plugger kit) and potentially try again, or, more likely, install your spare tyre and seek professional help. If no bubbles appear, and the tyre maintains its pressure for a reasonable period (e.g., an hour or so), the repair is likely holding.
It’s also advisable to drive at a reduced speed for the first few miles after the repair. This allows the tyre to settle, and you can listen for any unusual sounds or feel for vibrations. A successful temporary repair should feel relatively normal, though a slight change in feel is possible.
Maintaining Your Repaired Tyre
A temporary tyre repair from a kit is just that – temporary. While it can get you out of a bind, it’s vital to understand that it’s not a permanent solution. The integrity of your tyre has been compromised, and continued driving on a repaired tyre carries risks.
The primary recommendation from virtually all tyre manufacturers and repair professionals is to have your tyre inspected by a qualified technician as soon as possible. They can assess the damage properly, determine if a permanent repair can be made, or if the tyre needs to be replaced. A professional repair typically involves dismounting the tyre from the wheel and applying a patch and plug from the inside.
Even if the temporary repair seems to be holding perfectly, it’s crucial not to push your luck. Here’s what you should do:
- Drive to a Tyre Shop Immediately: Aim to reach a professional tyre service centre within a day or two, or as soon as practically possible.
- Avoid High Speeds and Long Distances: Do not undertake long journeys or drive at high speeds on a repaired tyre. Keep your speed down (e.g., below 50 mph) and avoid highways if possible.
- Monitor Tyre Pressure Regularly: Continue to check the tyre pressure frequently, perhaps even more often than usual. A sudden drop is a warning sign.
- Listen for Changes: Pay attention to any new sounds or vibrations coming from the tyre.
- Consider a Replacement: If the puncture was large, on the shoulder, or if the tyre is old, it might be safer and more cost-effective to replace the tyre rather than attempting a permanent repair.
Statistics from the National Highway Traffic Safety Administration (NHTSA) indicate that tyre failures can contribute to accidents, underscoring the importance of properly maintained tyres. While a repair kit can help, it doesn’t restore the tyre to its original condition. The internal structure might be weakened, making it more susceptible to failure under stress.
Frequently Asked Questions
What is the maximum size puncture a tyre repair kit can handle?
Most standard car tyre repair kits are designed for punctures up to 1/4 inch (approximately 6mm) in diameter. Larger punctures, or any damage to the sidewall or shoulder, cannot be safely repaired with these kits.
Can I use a tyre repair kit on a tubeless tyre?
Yes, tyre repair kits are primarily designed for tubeless tyres, which are standard on most modern vehicles. The plug or sealant works by sealing the bead of the tyre against the rim.
How long does a temporary tyre repair last?
A temporary repair from a kit is not designed for long-term use. It should be considered a very short-term solution, allowing you to reach a tyre service centre for a professional inspection and repair or replacement.
Is it safe to drive on a tyre repaired with a kit?
You can drive on a tyre repaired with a kit, but only at reduced speeds and for a limited distance to get to a professional. Avoid high speeds, long distances, and rough terrain, as the repair may fail.
What’s the difference between a plug and a sealant for tyre repair?
A plug is a physical piece of rubber inserted into the puncture to seal it. Sealant is a liquid injected into the tyre that hardens to block the hole and often reinflates the tyre. Plugs are generally considered more reliable for a temporary fix, while sealants can be messier and sometimes complicate professional repairs.
Final Thoughts
Mastering how to use a car tyre repair kit provides invaluable peace of mind for any driver. Remember that these kits are designed for emergencies and temporary fixes, prioritizing your ability to reach safety. Always follow the kit’s specific instructions, never attempt repairs on the sidewall, and seek professional tyre service as soon as possible after using a repair kit.
Sponsored / affiliate links. As an Amazon Associate I earn from qualifying purchases. I may earn additional commission from eligible campaigns.
Products related to this article