How to Fix Low Refrigerant in Your Car: A Step-by-Step Guide
Hey there! If you’ve ever cranked up your car’s AC on a scorching summer day only to feel a weak puff of lukewarm air, you know the frustration of a cooling system that’s not pulling its weight. I’ve been there, sweating in my driver’s seat, wondering why my car’s air conditioning isn’t keeping up. After digging into the issue and getting my hands dirty, I learned that low refrigerant is often the culprit. Today, I’m excited to share everything I’ve discovered about how to fix low refrigerant in your car. Whether you’re a DIY enthusiast or just curious about keeping your AC ice-cold, this guide is for you. Let’s dive into the details and get your car’s cooling system back on track!
Low refrigerant in a car’s AC system can make driving uncomfortable, especially during hot weather. It’s a common issue, but the good news is that it’s fixable with the right approach. I’ll walk you through what low refrigerant means, why it happens, how to diagnose it, and how to fix it safely. By the end of this article, you’ll have a clear roadmap to restore your car’s AC to its chilly glory. Let’s get started.
What Is Refrigerant and Why Does It Matter?
Refrigerant is the lifeblood of your car’s air conditioning system. It’s a special chemical that absorbs heat from inside your car and releases it outside, leaving you with cool, refreshing air. Think of it as the magic potion that makes your AC work. Without enough refrigerant, your AC can’t cool properly, and you’re left with a car that feels more like an oven.
I remember the first time I realized my car’s AC wasn’t working right. It was a hot July afternoon, and the air coming from the vents was barely cool. After some research, I learned that low refrigerant levels are a common reason for this. Your car’s AC system is sealed, so refrigerant shouldn’t just disappear. If levels are low, it usually means there’s a leak somewhere. Fixing it involves finding the leak, repairing it, and refilling the system with the right amount of refrigerant.
Signs Your Car Has Low Refrigerant
How do you know if your car’s AC is low on refrigerant? There are a few telltale signs I’ve noticed over the years. Here’s what to look out for:
- Weak or Warm Air from Vents: If your AC is blowing air that’s not as cold as it used to be, low refrigerant is often the issue.
- Hiss or Bubble Sounds: Strange noises from the AC system can indicate refrigerant escaping through a leak.
- AC Clutch Not Engaging: When you turn on the AC, the compressor clutch should click. If it doesn’t, low refrigerant might be preventing it from working.
- Frost or Ice on AC Components: If you see frost on the AC lines under the hood, it could mean the system is struggling due to low refrigerant.
- Higher Cabin Temperatures: If your car takes forever to cool down, even with the AC on full blast, refrigerant levels could be low.
I once ignored these signs, thinking my AC just needed a quick recharge. Big mistake! Adding refrigerant without fixing the underlying issue is like putting a bandage on a broken leg. Let’s talk about how to properly diagnose the problem.
Diagnosing Low Refrigerant in Your Car
Before you start fixing anything, you need to confirm that low refrigerant is the problem. I’ve learned that jumping straight to adding refrigerant can cause more harm than good if you don’t know what’s going on. Here’s how I approach diagnosing low refrigerant:
First, I check the AC system’s performance. I turn the AC to its coldest setting and set the fan to high. If the air isn’t cold after a few minutes, I suspect low refrigerant. Next, I pop the hood and look at the AC compressor. The clutch should engage (you’ll hear a click) when the AC is on. If it’s not engaging, low refrigerant could be preventing the system from cycling properly.
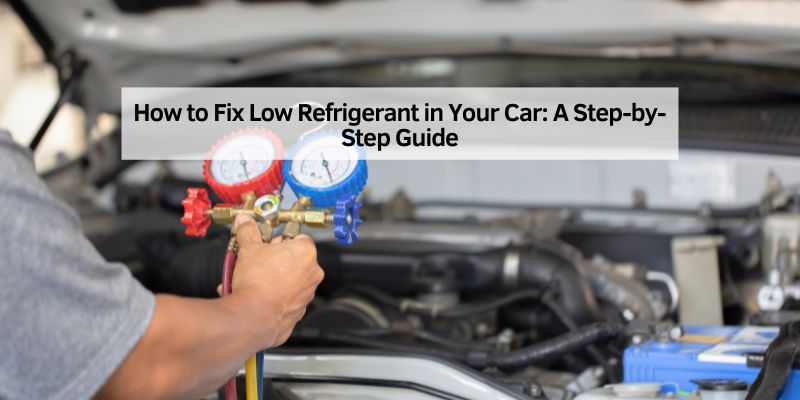
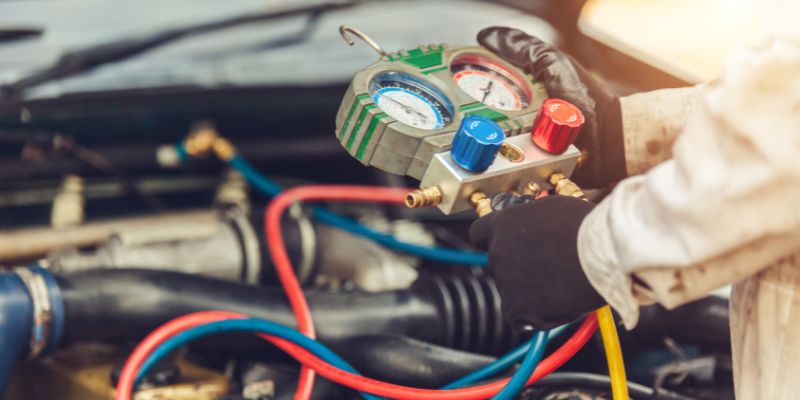
To get a clearer picture, I use a manifold gauge set to check the pressure in the AC system. This tool connects to the high- and low-pressure ports of the AC system and shows you the pressure levels. If the readings are below the manufacturer’s specifications (you can find these in your car’s manual or online), it’s a strong sign of low refrigerant.
Here’s a quick table to help you understand typical pressure readings for a car’s AC system (these vary by car model and refrigerant type, so always check your manual):
| Refrigerant Type | Low-Side Pressure (psi) | High-Side Pressure (psi) |
|---|---|---|
| R-134a (Common in older cars) | 25-35 | 150-250 |
| R-1234yf (Newer cars) | 20-30 | 130-200 |
If the pressures are low, you’ve likely got a refrigerant issue. But don’t rush to add more just yet—first, you need to find out why the refrigerant is low.
Why Does Refrigerant Get Low?
Your car’s AC system is a closed loop, meaning refrigerant shouldn’t escape under normal conditions. So, if levels are low, something’s wrong. In my experience, these are the most common reasons:
- Leaks in the System: Tiny holes or cracks in hoses, seals, or the compressor can let refrigerant escape. I once found a small leak in a hose fitting that was causing all my AC troubles.
- Worn O-Rings or Seals: The rubber seals in the AC system can degrade over time, especially in older cars, leading to slow leaks.
- Damaged Components: A faulty condenser or evaporator can develop leaks, especially after an accident or years of wear.
- Improper Maintenance: If someone overfilled or underfilled the system during a previous repair, it can cause problems down the line.
I learned the hard way that adding refrigerant without fixing the leak is a temporary fix at best. The refrigerant will just leak out again, and you’ll be back to square one. Plus, refrigerant isn’t cheap, and it’s harmful to the environment if it escapes.
Tools You’ll Need to Fix Low Refrigerant
Before you start, gather the right tools. Here’s what I keep in my garage for AC repairs:
- Manifold gauge set: To check pressure levels.
- Refrigerant (R-134a or R-1234yf): Make sure you get the right type for your car.
- AC leak detector kit: This can include UV dye and a blacklight to spot leaks.
- Vacuum pump: To remove air and moisture from the system before refilling.
- Wrenches and screwdrivers: For accessing AC components.
- Safety gear: Gloves and safety glasses to protect yourself from refrigerant.
- Refrigerant scale: To measure the exact amount of refrigerant you’re adding.
When I first tackled this, I didn’t have a vacuum pump and skipped that step. Bad idea—moisture in the system can cause corrosion and reduce AC efficiency. Trust me, invest in the right tools.
Step-by-Step Guide to Fixing Low Refrigerant
Now, let’s get to the good part: fixing the problem. I’ll break this down into clear steps based on my own experience. If you’re not comfortable working on your car, it’s okay to take it to a professional. But if you’re ready to DIY, here’s how I do it:
Step 1: Find and Fix the Leak
Start by locating the leak. I use a UV leak detection kit, which involves adding a small amount of UV dye to the AC system and running it for a bit. Then, I use a blacklight to check for glowing spots under the hood or around AC components. Common leak points include hose connections, the compressor, and the condenser.
Once you find the leak, repair it. For small leaks in hoses or fittings, replacing an O-ring or tightening a connection might do the trick. For bigger issues, like a damaged condenser, you may need to replace the component. I once had to swap out a leaky hose, and it was a game-changer for my AC.
Step 2: Evacuate the System
After fixing the leak, you need to remove any remaining refrigerant, air, and moisture from the system. I connect a vacuum pump to the AC system’s service ports and run it for about 30 minutes. This creates a vacuum, pulling out contaminants that could harm the system. Check your manifold gauges to ensure the system holds the vacuum—if it doesn’t, there’s still a leak.
Step 3: Add Refrigerant
Now it’s time to add refrigerant. Check your car’s manual to find out how much refrigerant your system needs (usually measured in ounces or pounds). I use a refrigerant scale to measure the exact amount. Connect the refrigerant can to the low-pressure port (never the high-pressure port!) and slowly add the refrigerant while the AC is running. Keep an eye on the manifold gauges to ensure pressures stay within the recommended range.
Step 4: Test the System
Once you’ve added the right amount of refrigerant, test the AC. I run the system for 10-15 minutes, checking the air temperature from the vents. It should be nice and cold—around 40-50°F is ideal. I also double-check the pressures with the manifold gauges to make sure everything’s stable.
Step 5: Monitor for Future Issues
After fixing the system, keep an eye on it. I check my AC every few weeks to make sure it’s still cooling properly. If the air starts getting warm again, there might be another leak to address.
Safety Tips for Working with Refrigerant
Working with refrigerant can be tricky, and I’ve learned to prioritize safety. Here are some tips to keep in mind:
- Wear Protective Gear: Refrigerant can cause frostbite if it touches your skin, and it’s harmful if inhaled. I always wear gloves and safety glasses.
- Work in a Well-Ventilated Area: Avoid breathing in refrigerant fumes.
- Don’t Overfill the System: Too much refrigerant can damage the compressor. Stick to the manufacturer’s specifications.
- Dispose of Refrigerant Properly: If you recover old refrigerant, take it to a certified recycling center. Don’t release it into the air—it’s bad for the environment.
When to Call a Professional
I love tackling car repairs myself, but sometimes it’s best to call in the pros. If you can’t find the leak, don’t have the right tools, or aren’t confident in your skills, take your car to a certified mechanic. AC systems are complex, and mistakes can be costly. Plus, professionals have access to advanced diagnostic tools and can handle refrigerant safely.
Preventing Low Refrigerant in the Future
Once your AC is back in action, you’ll want to keep it that way. Here’s what I do to prevent low refrigerant issues:
- Regular AC Maintenance: I run my AC year-round, even in winter, to keep the system lubricated and prevent seals from drying out.
- Check for Leaks Early: If you notice any signs of low refrigerant, address them quickly to avoid bigger problems.
- Keep Components Clean: Dirt and debris can damage the condenser, so I make sure it’s clean and free of obstructions.
- Schedule Professional Inspections: Every couple of years, I have a mechanic check my AC system to catch issues before they escalate.
Conclusion
Fixing low refrigerant in your car’s AC system might seem daunting, but with the right tools and a bit of patience, it’s a problem you can tackle. I’ve been through this process a few times, and each time I learn something new about keeping my car’s AC in top shape. From diagnosing the issue to finding leaks and refilling the system, every step brings you closer to a cool, comfortable ride. There’s nothing like the feeling of blasting cold air on a hot day, knowing you fixed it yourself!
If you’re not ready to dive into a DIY repair, don’t worry—a good mechanic can handle it for you. Either way, understanding how your AC system works and what causes low refrigerant empowers you to make smart decisions about your car. So, next time your AC starts acting up, you’ll know exactly what to do. Stay cool out there, and happy driving!
Frequently Asked Questions
Why Is My Car’s AC Blowing Warm Air?
If your AC is blowing warm air, low refrigerant is a likely cause. It could be due to a leak in the system, which prevents the AC from cooling effectively. Check for signs like hissing noises or frost on AC components, and consider using a manifold gauge set to confirm low pressure.
Can I Add Refrigerant to My Car Without Fixing the Leak?
You can, but it’s not a good idea. Adding refrigerant without fixing the leak is a temporary fix, and the refrigerant will eventually leak out again. It’s better to find and repair the leak first to save money and protect the environment.
How Do I Know What Type of Refrigerant My Car Uses?
Check your car’s manual or look for a sticker under the hood that lists the refrigerant type (usually R-134a or R-1234yf). Newer cars (post-2017) often use R-1234yf, while older models use R-134a. Using the wrong type can damage your system.
Is It Safe to Work on My Car’s AC System Myself?
It can be safe if you follow proper precautions, like wearing gloves and safety glasses, working in a ventilated area, and using the right tools. However, if you’re unsure or don’t have the equipment, it’s best to leave it to a professional.
How Often Should I Check My Car’s AC System?
I recommend checking your AC every 6-12 months, especially before summer. Run it regularly to keep the system lubricated, and watch for signs of trouble like weak airflow or strange noises. A professional inspection every couple of years can also catch issues early.