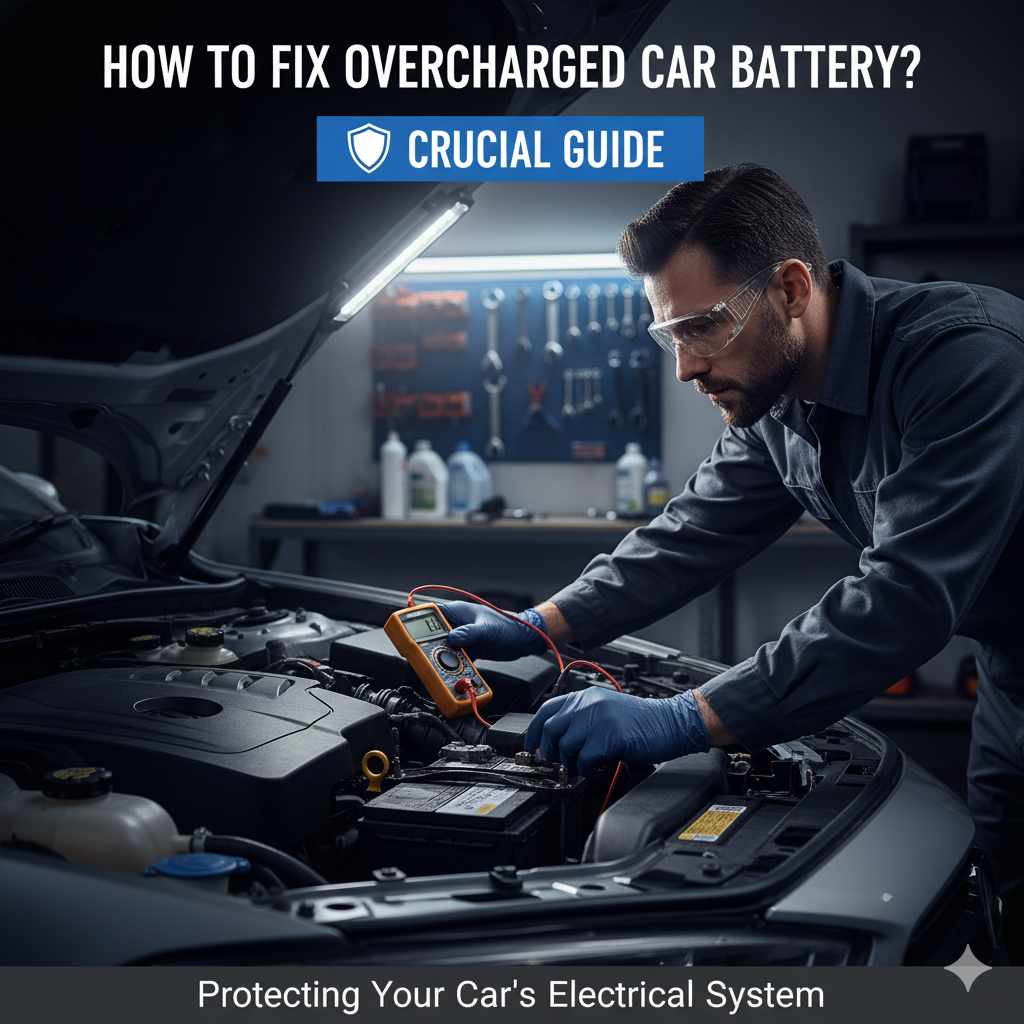
How to Fix Overcharged Car Battery: Crucial Guide
An overcharged car battery is often caused by a faulty voltage regulator or alternator. The fix usually involves diagnosing the charging system and replacing the faulty component. This guide provides simple steps to identify the problem and solutions to get your car running smoothly again.
Hey there, fellow drivers! Md Meraj here, ready to help you tackle one of those head-scratching car issues: an overcharged car battery. It’s a common problem that can leave you wondering what’s going on under the hood. If your battery is bubbling, smells like rotten eggs, or your car’s electronics are acting strangely, you might be dealing with an overcharge. Don’t worry! This guide will break down exactly what’s happening and give you clear, easy steps to fix it. We’ll explore the causes, how to identify the signs, and the solutions to get your car battery back to its best, all without needing to be a master mechanic. Let’s dive in!
Understanding the Overcharged Car Battery
A car battery is like the heart of your vehicle’s electrical system. It stores power to start your engine and runs essential components like lights, radio, and the car’s computer. The alternator is the component that keeps the battery charged while the engine is running. It’s a delicate balance. When this system works perfectly, your battery stays at just the right charge level. However, sometimes this balance gets thrown off, leading to an overcharged battery. This isn’t just a minor inconvenience; it can actually cause significant damage to your battery and other electrical parts. Let’s explore why this happens.
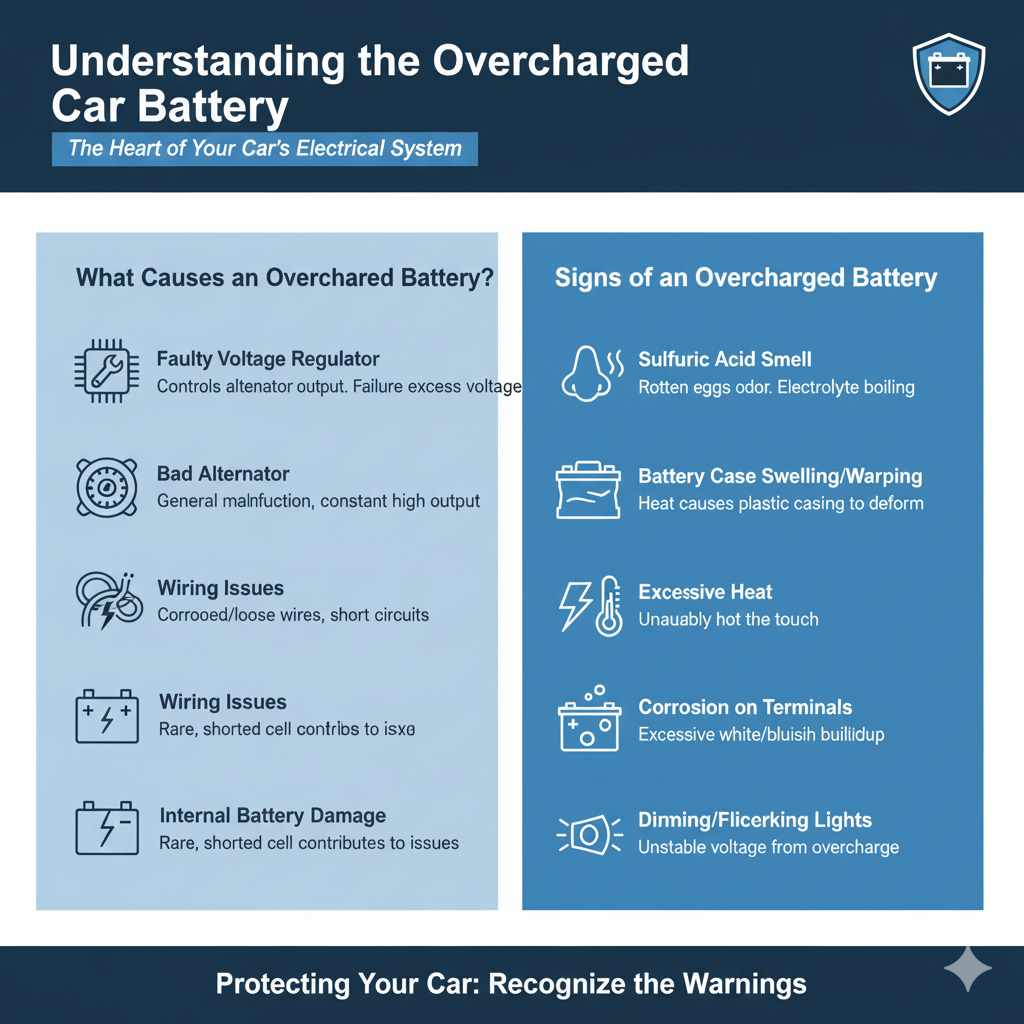
What Causes an Overcharged Car Battery?
The primary reason a car battery gets overcharged is a malfunction in the vehicle’s charging system. Here’s a breakdown of the most common culprits:
- Faulty Voltage Regulator: This is the most frequent cause. The voltage regulator’s job is to control the amount of electricity your alternator produces, ensuring it stays within a safe range for the battery. If it fails, it might allow too much voltage to pass through, effectively “cooking” your battery. Many modern cars have the voltage regulator built into the alternator, so a faulty regulator often means replacing the whole alternator.
- Bad Alternator: While the voltage regulator is often the specific part that fails, a generally failing alternator can also lead to overcharging. If the alternator is producing a constant, uncontrolled high output, the battery receives too much power.
- Wiring Issues: Sometimes, corroded, loose, or damaged wires connecting the alternator, voltage regulator, and battery can create resistance or short circuits. This can confuse the system and lead to incorrect voltage readings, potentially causing overcharging.
- Internal Battery Damage (Less Common): In rare cases, damage within the battery itself, like a shorted cell, might contribute to charging system issues, though this is less often the primary cause of overcharging.
Signs of an Overcharged Battery
Recognizing the symptoms is the first step to fixing the problem. Here are key indicators that your car battery might be overcharged:
- Sulfuric Acid Smell: This is a strong, unmistakable odor like rotten eggs. It’s a sign that the electrolyte inside the battery is boiling and releasing hydrogen gas. This is a serious warning sign.
- Battery Case Swelling or Warping: When a battery is overcharged, the internal heat can cause the plastic casing to swell, bulge, or even crack. This is a visual cue that something is wrong.
- Excessive Heat: The battery might feel unusually hot to the touch. While batteries naturally generate some heat during charging, excessive heat indicates a problem.
- Bubbling or Gassing: If you can safely look at the battery (with proper ventilation and safety gear), you might see visible bubbling within the battery cells. This is the electrolyte boiling.
- Corrosion on Battery Terminals: While some corrosion is normal over time, excessive white or bluish powdery buildup on the battery terminals can be exacerbated by the overcharging process.
- Dimming or Flickering Lights: Ironically, an overcharged battery can sometimes lead to unstable voltage. This can cause your headlights or dashboard lights to flicker or appear dim, even though the system is producing too much power.
- Battery Warning Light: Your car’s dashboard might display a battery warning light. While this light generally indicates a charging issue, it could be overcharging or undercharging.
Crucial Steps to Fix an Overcharged Car Battery
Alright, let’s get down to fixing this! Remember, safety first. Batteries contain corrosive acid and can release explosive gases. Always wear safety glasses and gloves, and work in a well-ventilated area.
Step 1: Safety First and Initial Inspection
Before you touch anything, take a moment to ensure safety:
- Park your car safely: In a well-lit, well-ventilated area, away from sparks or open flames.
- Turn off the engine: Make sure the car is completely off and the keys are out of the ignition.
- Wear safety gear: Put on safety glasses and sturdy gloves.
- Visually inspect: Look for any obvious damage to the battery case (swelling, cracks) or excessive corrosion on the terminals. If the case is significantly damaged, it’s best to stop and seek professional help, as the battery might be at risk of leaking.
Step 2: Test Battery Voltage
This is where you can get a clearer picture of what’s happening. You’ll need a multimeter to measure the voltage. If you don’t have one, they are relatively inexpensive and a great tool for any DIYer. You can find reliable multimeters from brands like Klein Tools or Fluke.
Here’s how to do it:
- Set your multimeter: Set it to measure DC voltage (VDC) in a range above 20V.
- Locate battery terminals: Identify the positive (+) and negative (-) terminals on your battery. They are usually marked.
- Measure resting voltage: With the engine off, touch the red probe of the multimeter to the positive terminal and the black probe to the negative terminal. A fully charged battery at rest should typically read between 12.4 to 12.7 volts. If it’s higher, it could indicate a recent overcharge or a battery holding too much charge.
- Measure charging voltage (engine running): Start your car’s engine. Carefully touch the red probe to the positive terminal and the black probe to the negative terminal again. With the engine running, the voltage should climb to between 13.5 and 14.7 volts. If it’s consistently higher than 15 volts, especially as the battery gets closer to full charge, this is a strong sign of overcharging and a faulty voltage regulator or alternator.
You can find a helpful guide on using a multimeter from sources like the U.S. Army’s technical publications, which often provide practical, detailed instructions.
Step 3: Check the Alternator and Voltage Regulator
As we discussed, the alternator and its integrated voltage regulator are the most likely culprits. Testing them often requires specialized tools or knowledge, but here’s a simplified approach:
- Alternator Output Test: While the multimeter test in Step 2 is a strong indicator, a more definitive test involves loading the electrical system. With the engine running and the multimeter connected as described in Step 2 (showing charging voltage), turn on higher electrical loads like headlights, the fan on high, and the rear defroster. The voltage should remain stable within the 13.5-14.7V range. If the voltage drops significantly or spikes erratically, it points to an alternator or regulator issue.
- Visual Inspection of Alternator: Sometimes, you can spot obvious damage on the alternator itself, like frayed wires or a damaged casing. However, internal components are not visible externally.
Important Note: Many modern vehicles have the voltage regulator as a component inside the alternator. This means if the voltage regulator is faulty, you’ll typically need to replace the entire alternator assembly. This can be a more involved repair.
Step 4: Address the Cause
Based on your findings, here are the common solutions:
Option A: Replace the Alternator/Voltage Regulator
If your voltage tests consistently show overcharging (above 15V when the engine is running), the most common and effective solution is to replace the alternator. This unit houses the voltage regulator in most cars today.
- Difficulty: Moderate to Hard. This can be a complex job depending on your car model. Many alternators are located at the front of the engine and can be accessed by removing accessory belts.
- Tools Needed: Socket set, wrench set, serpentine belt tool (sometimes), pry bar, possibly a torque wrench.
-
Procedure Summary:
- Disconnect battery: Always disconnect the negative battery terminal first.
- Locate the alternator: Find its position in the engine bay.
- Remove drive belt: Loosen the belt tensioner and remove the serpentine belt.
- Disconnect electrical connectors: Unplug the wires and power cable from the alternator.
- Unbolt the alternator: Remove the bolts that hold the alternator in place.
- Remove the old alternator: Carefully maneuver it out of its mounting.
- Install the new alternator: Position the new unit, secure it with bolts, reconnect electrical connectors, and reinstall the drive belt, ensuring proper tension.
- Reconnect battery: Reconnect the negative battery terminal.
- Test: Start the car and re-test charging voltage with the multimeter.
- External Resource: For detailed instructions specific to your car’s make and model, I recommend consulting resources like AutoZone’s Service Guides or YouTube channels dedicated to your vehicle, which often have step-by-step videos.
Option B: Repair Wiring Issues
If you’ve identified loose connectors, corroded terminals, or damaged wires in the charging system circuit, these need to be fixed.
- Difficulty: Easy to Moderate.
-
Repair Steps:
- Inspect all connections: Check wires leading to the alternator, voltage regulator (if separate), and battery.
- Clean terminals: Use a wire brush and terminal cleaner to remove corrosion from battery posts and cable clamps.
- Tighten loose connections: Ensure all connectors are snug and secure.
- Repair/Replace damaged wires: If wires are frayed or broken, they may need to be spliced and reconnected properly using appropriate connectors and heat shrink tubing, or the entire harness section might need replacement.
- Test: After making repairs, re-test voltage as described in Step 2.
Step 5: Assess Battery Health
Even after fixing the charging system, the overcharging may have damaged your battery. Batteries that have been consistently overcharged can have their lifespan significantly reduced.
- Capacity Test: A professional mechanic can perform a load test on your battery. This test simulates starting the engine and checks if the battery can deliver sufficient amperage. This is the most accurate way to tell if the battery is still good.
- Visual Checks: If the battery case swelled or cracked, it needs to be replaced immediately.
- Performance: If your car starts sluggishly after the repairs, or if it struggles to start in cold weather, the battery might be compromised.
When to Replace the Battery: If your battery shows signs of physical damage (swelling, cracks) or fails a load test, it’s time for a new one. Continuing to use a damaged battery can be dangerous.
Preventing Future Overcharging
Once you’ve fixed the immediate problem, you’ll want to avoid another overcharging situation. Here’s how:
- Regular Maintenance: Have your car’s charging system checked as part of your routine maintenance schedule. Mechanics can easily test the alternator and battery health.
- Monitor Battery Condition: Keep an eye on your battery’s terminals for corrosion and clean them as needed. Look for any physical signs of damage.
- Address Warning Signs Promptly: Don’t ignore strange smells, unusual sounds, or dashboard warning lights. Getting them checked early can prevent more extensive damage.
- Use Quality Replacement Parts: When replacing components like the alternator, opt for reputable brands (e.g., Bosch, Denso, AC Delco).
Understanding Charging System Components
To better understand how to fix an overcharged battery, it helps to know the key parts involved in your car’s charging system. Here’s a quick look:
| Component | Function | Why it Matters for Overcharging |
|---|---|---|
| Alternator | Generates electrical power when the engine is running; converts mechanical energy into electrical energy. | If it fails internally, it can produce uncontrolled voltage. |
| Voltage Regulator | Controls the output voltage of the alternator to prevent overcharging or undercharging the battery. Crucial for maintaining a stable electrical supply. | A faulty regulator is the most common cause of overcharging. |
| Battery | Stores electrical energy to start the engine and power accessories when the engine is off. Also acts as a voltage stabilizer. | Can be damaged by overcharging, leading to reduced lifespan or failure. |
| Drive Belt (Serpentine Belt) | Powers the alternator (and other accessories like power steering pump, A/C compressor) by transferring rotational energy from the engine’s crankshaft. | A loose or worn belt can cause undercharging, but a properly functioning belt is essential for the alternator to operate correctly. |
| Wiring and Connectors | Transmit electrical power and signals between components. | Corrosion, looseness, or damage can disrupt voltage regulation and cause charging system faults. |
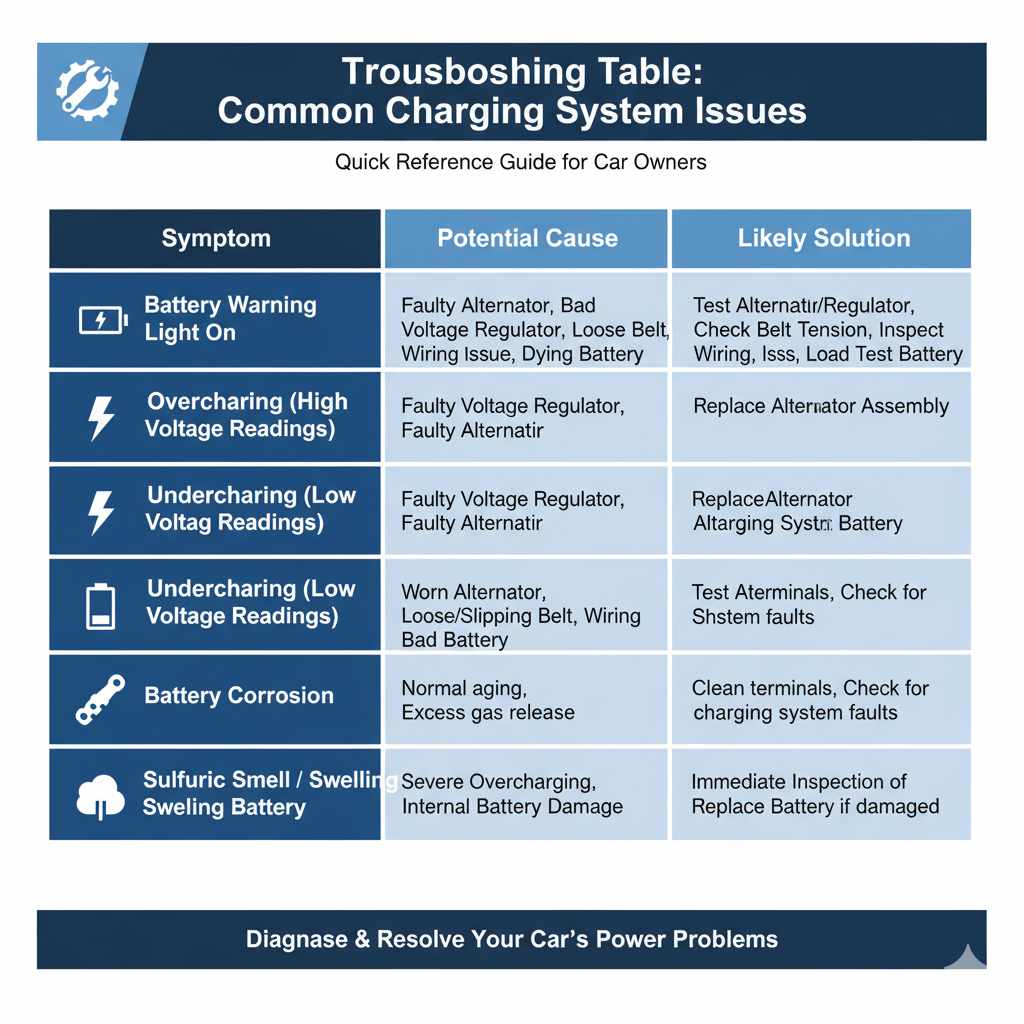
Troubleshooting Table: Common Charging System Issues
Here’s a quick reference to help diagnose charging system problems:
| Symptom | Potential Cause | Likely Solution |
|---|---|---|
| Battery Warning Light On | Faulty Alternator, Bad Voltage Regulator, Loose Belt, Wiring Issue, Dying Battery | Test Alternator/Regulator, Check Belt Tension, Inspect Wiring, Load Test Battery |
| Overcharging (High Voltage Readings) | Faulty Voltage Regulator (often part of alternator), Faulty Alternator | Replace Alternator Assembly |
| Undercharging (Low Voltage Readings) | Worn Alternator, Loose/Slipping Belt, Wiring Issue, Bad Battery | Test Alternator, Check Belt Tension, Inspect Wiring, Load Test Battery |
| Battery Corrosion | Normal aging, Excess gas release (from overcharging/undercharging) | Clean terminals, Check for charging system faults |
| Sulfuric Smell / Swelling Battery | Severe Overcharging, Internal Battery Damage | Immediate Inspection of Charging System, Replace Battery if damaged |
Frequently Asked Questions (FAQ)
Q1: Can an overcharged battery be fixed without replacing parts?
A: Sometimes, if the overcharging is due to simple wiring issues (loose connections, corrosion), cleaning and tightening those connections might resolve the problem. However, if the voltage regulator or alternator itself has failed, those components will typically need replacement.
Q2: How do I know if my battery is damaged from overcharging?
A: Signs of damage include a swollen or cracked battery case, a foul sulfuric smell, and the battery failing a professional load test. Even if the charging system is fixed, a damaged battery likely needs replacement for safety and reliability.
Q3: Is it safe to drive with an overcharged battery?
A: It’s not recommended. An overcharged battery can overheat, potentially damage other electrical components in your car, and in extreme cases, it can even swell to the point of rupturing. It’s best to get it diagnosed and fixed as soon as possible.
Q4: What is the normal charging voltage for a car battery?
A: With the engine running, the charging voltage should typically be between 13.5 and 14.7 volts. If it consistently reads above 15 volts, it’s likely overcharging.