How to Power a Car Stereo at Home: Bench PSU & ATX Setup Guide
A car stereo runs on 12V DC, not the 120V AC from a wall outlet, so connecting one at home requires a power supply that converts and regulates that voltage — a dedicated 12V bench supply or a modified ATX computer power supply, never a direct outlet connection. Skip that conversion step and you risk frying the head unit or starting an electrical fire. This guide covers wiring the power supply, connecting speakers, and fixing the most common no-power and no-sound problems.
Insert your Affiliate Disclosure reusable block here.
Quick Answer
To connect a car stereo at home, you need a 12V DC power supply — either a dedicated bench power supply (5–30 amps) or a modified ATX computer power supply — never a direct wall outlet. Wire the red and yellow power wires to the supply’s positive terminal, the black wire to negative, then connect speakers by matching impedance (4 or 8 ohms).
Why Connect a Car Stereo at Home?
I remember the first time I thought about using my old car stereo at home. I had upgraded my car’s audio system and didn’t want to toss out the perfectly good head unit sitting in my garage. Car stereos are built to deliver powerful sound in a compact package, making them a great choice for a home setup if you’re on a budget or love DIY projects. They’re durable, versatile, and often come with features like Bluetooth, USB ports, and AUX inputs — perfect for a home audio system.
Using a car stereo at home can also be a fun way to repurpose equipment, reduce waste, and create a unique setup that sparks conversations. Plus, if you’re like me and love tinkering with electronics, this project is incredibly satisfying. But before we get to the how-to, let’s talk about what you’ll need to make this work.
What You’ll Need to Get Started
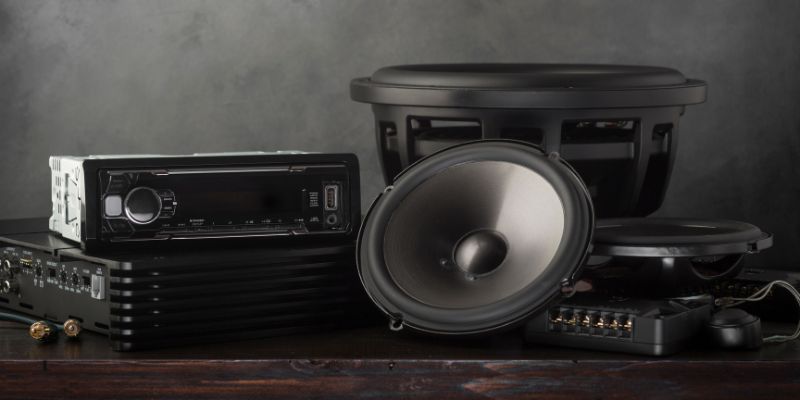
Before I connected my first car stereo at home, I spent some time gathering the right tools and components. Trust me, having everything ready makes the process so much smoother. Here’s a quick rundown of what you’ll need:
| Item | Purpose |
|---|---|
| Car stereo (head unit) | The main device you’re connecting. Make sure it’s in working condition. |
| Power supply (12V) | Converts household AC power to the DC power your car stereo needs. |
| Speakers | To output sound. Check the stereo’s wattage to match with compatible speakers. |
| Speaker wire | Connects the stereo to the speakers. |
| Wiring harness | Simplifies connecting the stereo’s wires to power and speakers. |
| Antenna (optional) | For FM/AM radio functionality. |
| Tools (screwdriver, wire cutters, strippers) | For cutting, stripping, and securing wires. |
| Electrical tape or connectors | To secure wire connections safely. |
| Multimeter (optional) | To test voltage and ensure proper connections. |
I found that a 12V power supply with at least 5–10 amps works well for a basic head unit with no external amplifier. You can grab one from an electronics store or repurpose an old computer power supply if you’re feeling adventurous (more on exactly how to do that below). For speakers, I’ve used both car speakers and home bookshelf speakers — both work great as long as the impedance (ohms) matches the stereo’s requirements.
Best Bench Power Supply Pick
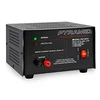
Universal Compact Bench Power Supply — 12 Amp Linear Regulated
Converts household AC to a regulated 13.8V DC output built specifically for car audio, CB radio, and ham radio gear — no wiring modifications needed like an ATX PSU requires.
- Best for: anyone running a head unit daily, not just testing it once
- Why we picked it: screw-type terminals, built-in short-circuit protection, and enough amperage (12A continuous / 14A surge) for a head unit plus modest speakers
- Main drawback: costs more than a free repurposed computer PSU
Compare more home car-stereo setup essentials
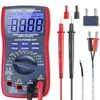 Option 1 AstroAI Digital Multimeter (True RMS)
|
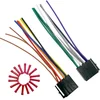 Option 2 Universal ISO Car Radio Wiring Harness
|
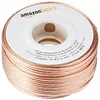 Option 3 Amazon Basics 16-Gauge Speaker Wire
|
As an Amazon Associate we earn from qualifying purchases.
Understanding Car Stereo Power Requirements
One thing that tripped me up the first time was figuring out the power situation. Car stereos run on 12V DC power, while your home outlets provide 120V AC (in the USA). This means you need a power supply to convert that AC to DC. When I set up my first system, I used a basic 12V power adapter I had lying around, but I quickly learned it didn’t provide enough current. The stereo would power on but cut out when I cranked the volume.
“When I set up my first system, I used a basic 12V power adapter I had lying around, but I quickly learned it didn’t provide enough current. The stereo would power on but cut out when I cranked the volume.”
Here’s the deal: car stereos need a steady 12V supply with enough amperage to handle the load, especially if you’re pushing multiple speakers or running the volume high. A basic head unit with two or four small speakers is usually fine on 5–10 amps. Add a second-hand amplifier or a subwoofer into the mix, though, and that draw can climb toward 20–30 amps at peak volume — undersize the supply and the stereo will reset or cut out exactly like mine did.
📊 A properly rated 12V bench power supply actually outputs a regulated 13.8V DC — matching a running car alternator’s charging voltage, not just a resting battery’s 12V — with built-in short-circuit and overload protection. Source: Manufacturer product specifications, Universal Compact Bench Power Supply (12A), 2026.
Numerically, most car stereos have three main power wires:
- Red wire: Constant 12V power (always on).
- Yellow wire: Switched 12V power (turns on with the ignition).
- Black wire: Ground.
You’ll need to connect the red and yellow wires to the positive terminal of your power supply and the black wire to the negative terminal. I’ll explain how to do this safely in the next section.
Can You Use an Old Computer (ATX) Power Supply Instead?
Yes — an ATX power supply pulled from an old desktop PC is the most common budget option, because it’s already built to output high-amperage 12V DC. Standard ATX supplies use color-coded wires: yellow carries +12V, red carries +5V, orange carries +3.3V, and black is common ground. For a car stereo, you only need the yellow and black wires — ignore the red and orange rails entirely.
There’s one critical modification an ATX supply needs that a dedicated bench supply doesn’t: without a motherboard attached, it won’t turn on by itself. Bridge the green wire (labeled PS_ON) to any black ground wire — a paperclip or a short jumper wire works — and the supply will power on automatically the moment it’s plugged in.
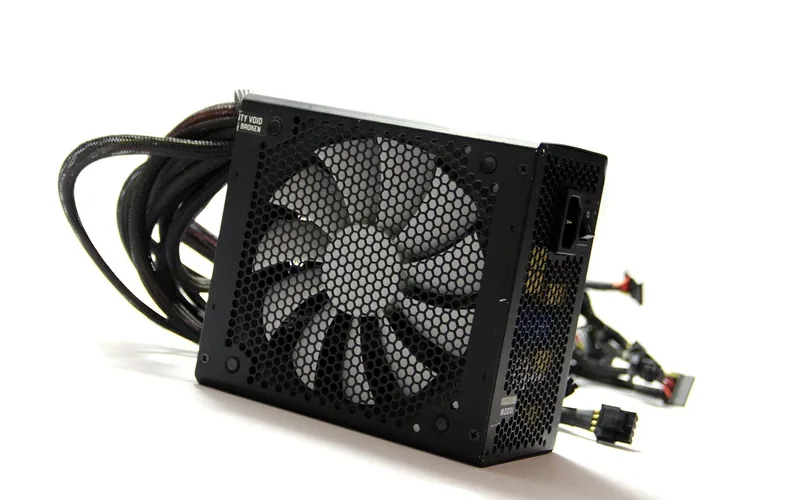
The trade-off: ATX 12V rails aren’t voltage-regulated for automotive electronics the same way a purpose-built bench supply is, and most ATX units lack the reverse-polarity protection a dedicated car-audio power supply includes. That makes an ATX PSU a solid choice for a one-time test or a low-stakes setup, but a dedicated bench supply is the more reliable choice for a system you plan to run every day.
| Power Source | Typical Amperage | Cost | Best For |
|---|---|---|---|
| Modified ATX PC power supply | 15–30A (varies by model) | Free (repurposed) | Budget builds, basic head units, one-time testing |
| Dedicated 12V bench power supply | 5–30A (rated and regulated) | $30–$90 | A daily-use setup with a stable 13.8V output |
| Car battery + trickle charger | 40–100A+ | $50–$150 | Running an amplifier or subwoofer at full volume |
| Direct wall outlet (120V AC) | N/A | N/A | Never — will destroy the stereo or start a fire |
Step-by-Step Guide to Connecting Your Car Stereo
Alright, let’s get to the fun part — actually setting this thing up! I’ve done this a few times, and while it might seem intimidating, it’s pretty straightforward if you follow these steps. Here’s how I connected my car stereo at home:
Step 1: Prepare Your Workspace
Find a clean, well-lit area to work. I like to set up on a sturdy table with all my tools and components laid out. Make sure your power supply is unplugged while you’re wiring things up to avoid any shocks or damage.
Step 2: Identify the Stereo’s Wiring
Most car stereos come with a wiring harness — a bundle of colored wires that connect to power, speakers, and other functions. If your stereo doesn’t have one, check the manual or look up the model online to find a wiring diagram, or see our full car stereo wiring guide for a color-by-color breakdown. I once spent an hour puzzling over a harness until I realized the colors followed a standard pattern (more on that later).
Step 3: Connect the Power Supply
Here’s where you bring your stereo to life. Connect the red (constant power) and yellow (switched power) wires to the positive terminal of your 12V power supply. The black wire goes to the negative terminal. I use wire connectors or electrical tape to secure these connections. Double-check everything before plugging in the power supply — trust me, I learned the hard way after frying a fuse once!
Step 4: Hook Up the Speakers
Car stereos usually have four speaker outputs: front left, front right, rear left, and rear right. Each output has a positive and negative wire (e.g., green for left rear positive, green/black for left rear negative). Match these to your speakers’ terminals. I’ve found that 4-ohm or 8-ohm speakers work best, as most car stereos are designed for these. If you’re using home speakers, check their impedance to avoid overloading the stereo.
Step 5: Connect an Antenna (Optional)
If you want to use the radio function, plug in an FM/AM antenna to the stereo’s antenna port. I used a cheap dipole antenna, and it worked fine for picking up local stations. You might need an adapter if the antenna connector doesn’t match.
Step 6: Test the System
Plug in the power supply and turn on the stereo. If it doesn’t power up, check your connections with a multimeter. I had a moment of panic the first time my stereo didn’t turn on, only to realize I’d swapped the red and yellow wires. Once it’s on, test the speakers with a song you love — I always go for something with heavy bass to feel the vibe.
Step 7: Fine-Tune and Secure
Adjust the stereo’s settings (bass, treble, balance) to suit your room. Secure all wires with tape or zip ties to keep things tidy. I like to mount the stereo on a small shelf or in a custom enclosure for a polished look.
Safety Tips to Keep in Mind
Safety is a big deal when working with electronics. I’ve had a few close calls, so here are some tips to keep you safe:
- Unplug the power supply while wiring to avoid shocks or short circuits.
- Double-check wire connections to prevent damage to the stereo or speakers.
- Use proper connectors like crimp terminals or wire nuts for secure connections.
- Keep wires organized to avoid confusion or accidental shorts.
- Check the power supply’s amperage to ensure it can handle the stereo’s load.
I once had a spark fly when I accidentally crossed a positive and negative wire — scary, but a good reminder to stay cautious!
Choosing the Right Speakers
Picking speakers can make or break your setup. I’ve tried both car speakers and home audio speakers, and both can work if you match the impedance and power handling. Car speakers are rugged and compact, perfect for a garage or workshop setup. Home speakers, like bookshelf or floor-standing models, give a fuller sound but need more space.
Check your stereo’s manual for its RMS power output (usually 10–50 watts per channel) and choose speakers that can handle that range. I used a pair of old 4-ohm car speakers for my first setup, and they sounded surprisingly good in my living room.
Adding Modern Features
One of the coolest things about modern car stereos is their features. Many have Bluetooth, USB, or AUX inputs, so you can stream music from your phone or plug in a device. I love connecting my phone via Bluetooth to play my Spotify playlists — it feels like having a high-end home audio system for a fraction of the cost. If your stereo has a USB port, you can also plug in a flash drive with your favorite tracks. Just make sure the stereo’s firmware is updated for the best compatibility.
If your project is specifically about running a standalone amplifier or subwoofer off house power rather than a full head unit, the wiring is a bit different (you’ll also need a turn-on/REM wire and an audio source) — see our dedicated guide on connecting a car amp to a wall plug at home for that setup.
Troubleshooting Common Issues
Not everything goes smoothly the first time. Here are some issues I ran into and how I fixed them:
- Stereo won’t turn on: Check the power supply connections. Ensure the red and yellow wires are both connected to the positive terminal.
- No sound from speakers: Verify speaker wire connections and ensure the speakers’ impedance matches the stereo’s output.
- Sound cuts out at high volume: Your power supply might not have enough amperage. Try one with at least 10 amps.
- Radio doesn’t work: Make sure the antenna is connected properly and that you’re in an area with good reception.
I once spent an hour troubleshooting only to realize I hadn’t turned on the power supply — oops! A multimeter is your best friend for diagnosing these issues.
Customizing Your Setup
Once your stereo is up and running, you can get creative. I built a wooden enclosure for my stereo to make it look sleek in my living room. You can also add an amplifier if you want more power or connect a subwoofer for that extra bass kick. I added a small subwoofer to my setup, and it made movie nights feel like a theater experience. If you’re tech-savvy, you can even integrate a smart home system to control the stereo with voice commands.
Cost Breakdown and Budget Tips
Here’s a rough idea of what this project might cost, based on my experience:
| Component | Estimated Cost |
|---|---|
| Car stereo (used) | $20–$100 |
| 12V power supply (bench) — or a free repurposed ATX PSU | $15–$50 (or $0) |
| Speakers (used or new) | $20–$100 |
| Wiring harness | $5–$20 |
| Antenna (optional) | $5–$15 |
| Tools and connectors | $10–$30 |
| Total | $60–$315 |
To save money, I scoured thrift stores and online marketplaces for used stereos and speakers. You can often find great deals on older models that still sound fantastic.
Why This Project Is Worth It
After setting up my car stereo at home, I was blown away by the sound quality for such a low cost. It’s a unique way to repurpose old equipment, and it’s a conversation starter when friends come over. Plus, it’s a great way to learn about electronics and audio systems. I’ve used my setup for everything from casual music listening to hosting small parties, and it’s never let me down.
Conclusion
Connecting a car stereo at home is a rewarding project that combines creativity, technical skills, and a love for great sound. I had so much fun figuring out the wiring, picking the perfect speakers, and tweaking the settings to get the best audio for my space. Whether you’re a car audio enthusiast or just looking for a budget-friendly home audio solution, this setup delivers. The process taught me a lot about electronics, and the result is a system that rivals pricier home setups. So grab that old car stereo, gather your tools, and start building — you’ll be amazed at what you can create. Let me know how your project goes, and happy listening!
Frequently Asked Questions
Can I use any car stereo for a home setup?
Yes, most car stereos can be used at home as long as you have a 12V power supply and compatible speakers. Check the stereo’s manual for power and impedance requirements to ensure everything matches.
Do I need a special power supply?
You need a 12V DC power supply with enough amperage (at least 5–10 amps) to handle the stereo’s power needs. A dedicated bench power supply or a modified ATX computer power supply can both work.
Can I really use an old computer power supply instead of a dedicated bench supply?
Yes. Bridge the green PS_ON wire to any black ground wire so the ATX supply turns on without a motherboard, then use the yellow wire for +12V and any black wire for ground. It works well for testing or a low-stakes setup, but it isn’t voltage-regulated or reverse-polarity protected the way a dedicated bench supply is, so it’s a better fit for occasional use than a daily setup.
Can I use home speakers with a car stereo?
Absolutely! Just make sure the speakers’ impedance (usually 4 or 8 ohms) matches the stereo’s output. Check the wattage ratings to avoid overpowering the speakers.
Why does my stereo keep shutting off?
This usually happens if the power supply doesn’t provide enough current. Try a power supply with higher amperage (10 amps or more) to handle the load, especially at higher volumes.
Can I add a subwoofer to my setup?
Yes, you can connect a subwoofer if your stereo has a subwoofer output or if you use an external amplifier. Make sure the subwoofer’s power and impedance ratings are compatible.
How do I make the setup look neat?
Use zip ties or electrical tape to organize wires, and consider building or buying an enclosure to house the stereo. I made a simple wooden box, and it looks great in my living room.
Products related to this article
Sponsored / affiliate links. As an Amazon Associate I earn from qualifying purchases. I may earn additional commission from eligible campaigns.