How to Fix Spider Cracks in Car Paint Explained Simply
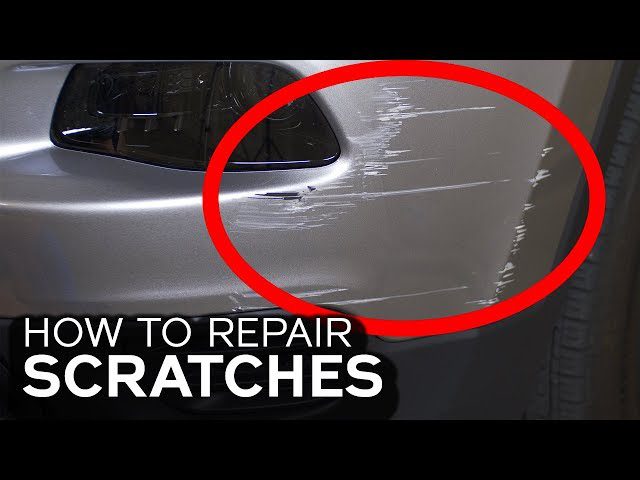
If you’re seeing those tiny cracks, often looking like spiderwebs, on your car’s paint, you’re not alone. Figuring out How to Fix Spider Cracks in Car Paint can seem tricky at first, especially if you’re new to car care. It’s a common problem that many car owners face. But don’t worry, the process isn’t as hard as it looks. This guide will make it easy, breaking down the steps so you can get your car’s paint looking great again. Let’s start and learn how to fix this issue.
What Causes Spider Cracks in Your Car’s Paint?
Before you learn How to Fix Spider Cracks in Car Paint, it’s helpful to know what causes them. Spider cracks, also known as craze cracking, happen when the clear coat or paint layers on your car’s exterior become damaged. These cracks look like a web of fine lines. They’re usually found on areas that get a lot of sun, heat, or movement, like the hood, roof, and bumpers. These cracks can be annoying because they ruin the shine of your car. The cause of these cracks varies. Knowing the main causes helps in both preventing and repairing these cracks effectively. This knowledge lets you maintain your car’s paint for a longer duration.
Environmental Issues Leading to Paint Damage
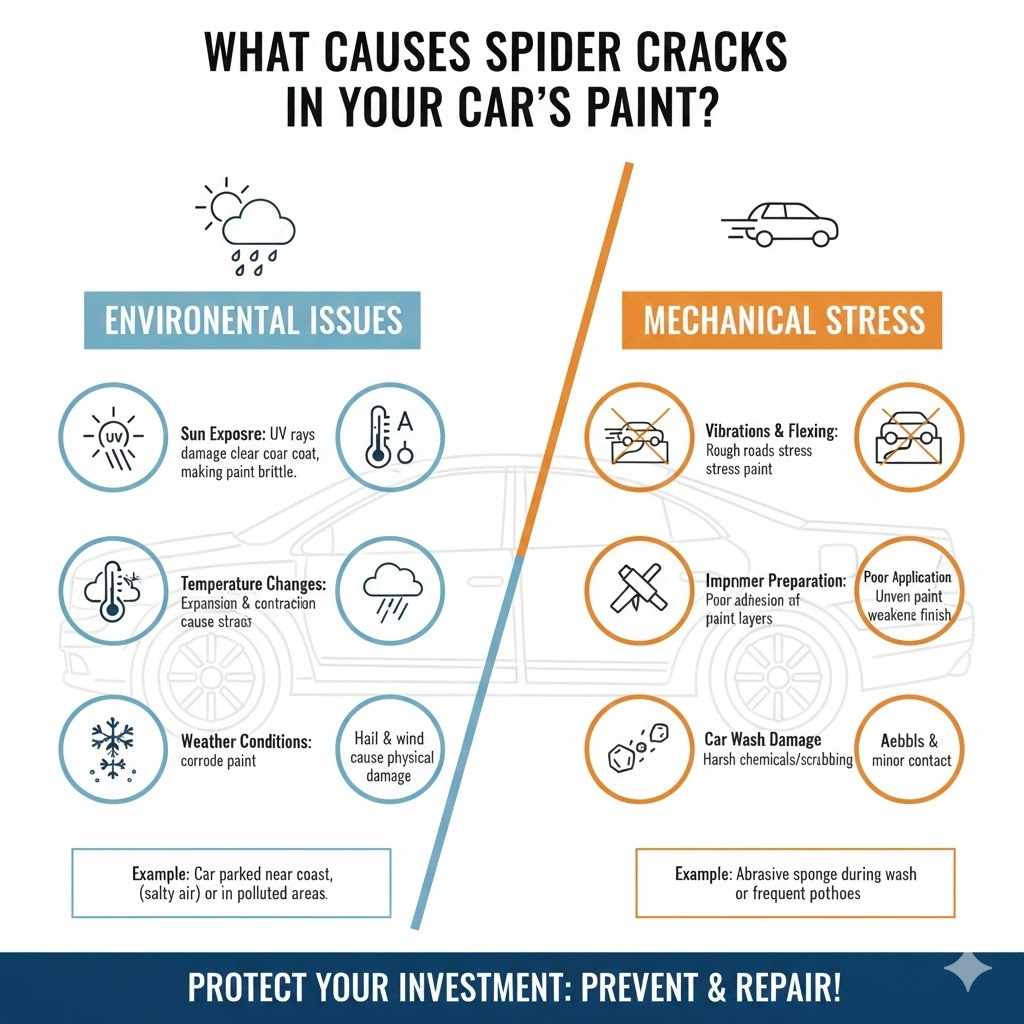
Your car is exposed to many environmental factors every day. These factors play a large role in the development of spider cracks. Extreme temperatures, exposure to ultraviolet (UV) light, and constant fluctuations in weather conditions all contribute to the breakdown of paint. The sun’s UV rays, for example, are a primary cause, weakening the paint molecules over time. Also, rapid temperature changes can cause the paint to expand and contract. This can lead to cracks. For example, if your car’s parked outside in the sun often, the paint may dry out. This makes it more prone to cracking. Environmental issues impact paint on all vehicles.
- Sun Exposure: Direct sunlight’s UV rays break down the clear coat. It also damages the paint, making it brittle and more likely to crack.
- Temperature Changes: Extreme heat and cold cause the paint to expand and contract. This puts stress on the paint layers, potentially leading to cracks.
- Pollution: Acid rain, industrial fallout, and other pollutants corrode the paint. This weakens the clear coat and underlying paint layers.
- Weather Conditions: Hail or strong winds can cause physical damage, leading to cracks. Also, harsh conditions accelerate paint deterioration.
- Salt Exposure: Road salt in winter can damage your paint.
A good example of environmental damage is a car parked near the coast. The salty air causes the paint to erode. This makes it more susceptible to cracking. Another example is a car that spends time in areas with high pollution levels. These pollutants eat away at the paint, leading to spider cracks. Protect your car using the right materials and keeping your vehicle clean.
Mechanical Stress and Paint Problems
Sometimes, the damage isn’t from the environment, but from how the car moves or is used. Mechanical stress from things like road vibrations, bumps, and even how you wash your car can all cause damage. Also, the factory process plays a role in how well the paint adheres. If the car isn’t prepared correctly, the layers won’t stick well. This will lead to cracks. Understanding these mechanical stresses can help you be better at protecting your car’s paint and preventing future problems. A careful approach ensures your car stays looking great.
- Vibrations and Flexing: Driving on rough roads or the natural flexing of the car’s body can cause stress. The stress leads to cracks in the paint over time.
- Improper Preparation: If the car wasn’t prepped the right way during painting, the paint might not stick well. This can lead to cracking.
- Poor Application of Paint: Mistakes during painting, like uneven layers, can weaken the finish. This will cause spider cracks.
- Car Wash Damage: Using harsh chemicals or scrubbing too hard can damage the paint. This will make it more prone to cracks.
- Accidental Impacts: Minor incidents like pebbles or contact with objects can cause chips. This leads to cracks eventually.
Consider a scenario where a car is washed using an abrasive sponge. The sponge scratches the clear coat and starts the cracking process. In another instance, if a car is driven on roads full of potholes frequently, the paint might show spider cracks early. Keeping these issues in mind helps you maintain your car’s paint over time.
Step-by-Step Guide to Fix Spider Cracks in Car Paint
Now that you know what causes spider cracks, let’s explore How to Fix Spider Cracks in Car Paint. Fixing these cracks takes time and some special tools, but you can get amazing results. This process requires a few stages: cleaning, sanding, filling, painting, and polishing. Each step is important for fixing the cracks and making your car’s paint look perfect. With the right method and some patience, you can bring your car’s paint back to its original beauty. Let’s get started on the process.
Gathering Your Materials
Before you start, you’ll need a range of supplies to do the job right. Having everything ready saves time and makes the process smooth. Get high-quality products. They’ll last longer and give you better results. Remember, the quality of your supplies directly impacts the finish of the paint. Taking time to select the right items ensures a better end result. Make sure everything you need is available before you start.
- Cleaning Supplies: Car soap, clean microfiber cloths, and a grease and wax remover. These items help clean the surface before you start.
- Sanding Materials: Sandpaper with several grit grades. Start with coarser grits for removing the damage and finish with finer ones for smoothness.
- Filler: Automotive body filler. Use this to fill in cracks and level the surface. You’ll also need a hardener.
- Painting Supplies: Primer, base coat paint that matches your car’s color, and clear coat. Choose high-quality paints for a better finish.
- Tools: Sanding block, putty knife, masking tape, and a spray gun or aerosol cans. These tools make the application process easier.
- Protective Gear: Safety glasses, a respirator mask, and gloves to protect you while working.
- Polishing Compounds: A cutting compound, polishing compound, and a finishing compound, plus microfiber cloths.
For example, you’ll need to choose the right grit of sandpaper based on the severity of the cracks. A coarser grit will work better for deep cracks. You’ll also need to consider your paint type when picking out supplies. Different paint types require specific products to achieve the best result. Using the right materials is necessary for the process. This will provide a long-lasting, attractive finish.
Preparation and Cleaning of the Car’s Surface
Proper surface preparation is one of the most important parts of repairing spider cracks. This stage involves carefully cleaning and preparing the area. This involves removing any old wax or contaminants. A clean surface is essential for the primer and paint to stick properly. A clean surface creates a great foundation for the next steps. This ensures a durable, professional finish. Good preparation is critical for success.
- Washing the Area: Use car soap and water to wash the area around the cracks. Remove dirt, dust, and other debris that could interfere with the repair. Rinse thoroughly.
- Grease and Wax Removal: Use a wax and grease remover to get rid of any wax or other coatings on the area. This ensures the primer adheres properly.
- Masking: Use masking tape and paper to protect areas that you don’t want to paint. This will help you keep the paint within the cracked area only.
- Inspection: Examine the area closely to see how big and deep the cracks are. Note any other damage that might be there. This step helps you plan for the steps.
- Sanding Assessment: Determine the type of sandpaper and sanding technique. Choose the right sandpaper grade based on the depth of the cracks.
Imagine a scenario where someone skips the grease removal step. The primer might not stick to the surface. This leads to the paint peeling off soon after application. Another example involves using low-quality masking tape. It doesn’t stick well. The paint might go beyond the area. Preparing the surface properly will make sure that the paint sticks.
Sanding and Filling the Cracks
Once the surface is cleaned, you’re ready to start fixing the cracks. This step involves sanding down the damaged paint. Then you fill in the cracks to make the surface even. This stage takes patience. Each step must be done carefully to make sure the repair looks perfect. This creates a good surface for painting. Thorough sanding and filling are very important for a high-quality outcome.
- Sanding Down the Cracks: Begin with coarser sandpaper. Then slowly sand down the area around the cracks to remove damaged paint. Try to even out the surface.
- Applying Body Filler: Mix the body filler with the hardener. Apply the filler to the sanded area. Use a putty knife to fill in the cracks.
- Leveling the Filler: Once the filler has dried, sand it down. Make sure it’s even with the rest of the surface. A sanding block can help.
- Second Inspection: Check for any imperfections or low spots. If you see any, you may need to apply a second coat of filler.
- Fine Sanding: Use finer sandpaper to smooth out the filled area. This step prepares the surface for primer and paint.
Consider a situation where someone fills the cracks too thickly. They will have more sanding work later. In another example, an individual might skip leveling the filler. The surface will be uneven. This will show through the new paint. Therefore, sanding and filling must be done precisely.
Painting and Clear Coating
After you’ve prepped the surface by sanding and filling, it’s time to paint. This is where you bring the color back to your car and protect the repair. This step requires precision and attention to detail. This also involves layering the paint to create a uniform finish. Correct painting and clear coating will make the repair last longer. It also protects your car’s paint from the elements. This guarantees a smooth, uniform, and factory-like look.
- Applying Primer: Apply a thin, even coat of primer to the filled and sanded area. Let it dry according to the instructions on the can.
- Base Coat Application: Apply several thin coats of your car’s base coat color. Let each coat dry before applying the next. This prevents runs and drips.
- Clear Coat Application: Once the base coat is dry, apply several coats of clear coat. The clear coat protects the base coat from UV rays and other elements.
- Drying Time: Allow the paint to fully dry and cure. This may take a few days, depending on the paint and weather conditions. Avoid touching the paint during this time.
- Inspection: Look over the painted area for any flaws. If needed, you can gently wet-sand any imperfections once the clear coat is fully cured.
Imagine a scenario where someone applies the base coat too heavily. It might lead to drips or an uneven finish. Also, if the clear coat is applied too soon, it could trap solvents. It creates bubbles in the paint. Getting the painting process correct is necessary. This will ensure your repair is both durable and looks great.
Polishing and Finishing Touches
The final step is to polish the newly painted area to match the original paint. This step removes imperfections. Polishing brings out the shine. It blends the repair seamlessly with the rest of your car. Proper polishing also helps to protect the paint. A well-polished finish provides a smooth, beautiful, and lasting appearance. This will make your car look its best.
- Wet Sanding (Optional): If there are any minor imperfections, gently wet-sand the clear coat with very fine-grit sandpaper. This will make the surface smooth.
- Cutting Compound Application: Use a cutting compound with a polishing machine or by hand. This will remove any sanding marks and light scratches.
- Polishing Compound Application: Apply a polishing compound to refine the finish. This will improve the gloss and remove any swirl marks.
- Finishing Compound Application: Use a finishing compound to give your car a smooth, high-gloss shine. This seals the surface for protection.
- Waxing: Apply a coat of car wax to protect the paint. Wax adds a layer of protection and boosts the shine.
For example, if the cutting compound is skipped, some scratches might remain. These would affect the overall finish. Also, if you skip waxing, the paint could be more vulnerable to UV damage. Taking these steps is essential for a professional and durable outcome.
Preventive Measures: Keeping Spider Cracks Away
The best way to deal with spider cracks is to stop them from happening. This means taking care of your car’s paint. This involves good habits and using the right products. Regular maintenance and protection help extend the life of your car’s paint. These measures will keep your car looking great for longer. It’s much easier to prevent damage than to repair it. These steps are a good idea for any car owner.
- Regular Washing and Waxing: Wash your car frequently to remove dirt and grime. Apply wax regularly to protect the paint. Wax helps to guard against UV rays.
- Parking in Shade: Park your car in a garage or under shade to reduce UV exposure. Sunlight is a major cause of paint deterioration and spider cracks.
- Using Quality Products: Use car wash soap, waxes, and other products designed for cars. This helps protect the paint. Avoid harsh chemicals that can damage the clear coat.
- Avoiding Abrasive Materials: Don’t use abrasive sponges or scrub pads. These can scratch the paint. Always use a soft microfiber cloth.
- Immediate Repairs: Fix any chips or scratches right away. Ignoring small issues lets them become bigger problems. This can lead to spider cracks.
Imagine a situation where a car is washed every week and waxed twice a year. Its paint stays protected. It is less prone to spider cracks. In contrast, if a car is often left in direct sunlight and never waxed, it is more likely to show signs of damage. Taking these preventive steps makes a big difference.
Advanced Techniques and Professional Help
While the steps described above work for many situations, some repairs might require more expertise. For complex cases, consider getting help from a professional. They have the tools, skills, and experience to fix serious paint damage. Understanding when to seek professional help and knowing about advanced techniques ensures the best results. Professional assistance will bring your car’s paint back to perfect condition.
When to Seek Professional Help
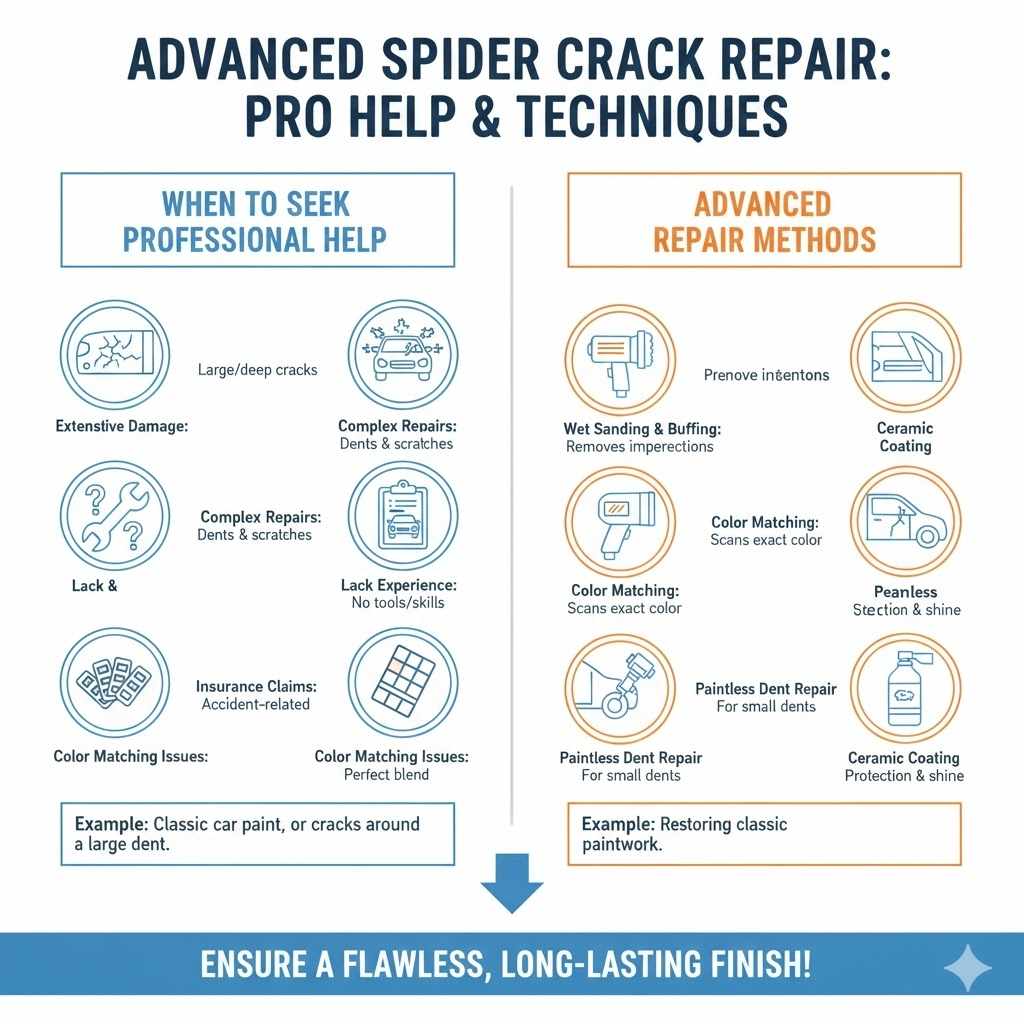
Knowing when to call in a professional is key. For smaller issues, you might fix the cracks yourself. But if the damage is extensive or you’re not confident, seek expert help. Professionals can offer specialized services. This will give you the best outcome. They know the special tools and techniques needed for good results.
- Extensive Damage: If the spider cracks cover a large area. If they go deep, it’s best to call a pro. They can handle the bigger repairs.
- Complex Repairs: If there’s multiple damage, like deep scratches or dents, get help from a professional.
- Lack of Experience: If you’re not comfortable with the repair process. If you don’t have the tools, a professional can help.
- Insurance Claims: If the damage is caused by an accident. Then, a professional can work with your insurance.
- Color Matching Issues: Getting the perfect color match can be hard. Professionals have the tools and expertise to make the color match perfectly.
For example, if you have a classic car with a rare paint color, a professional will make sure the color is matched perfectly. In another case, if the cracks are around a large dent, a professional body shop will provide help to resolve the issues. Using professional services guarantees the best results. It ensures a high-quality, long-lasting finish.
Advanced Repair Methods
Professionals use special methods and tools that aren’t for everyday car owners. These techniques give perfect results, especially for complicated repairs. These methods require specialized knowledge. This helps ensure that the paint looks great. Advanced methods make sure that the car’s paintwork will last longer.
- Wet Sanding and Buffing: Professionals use advanced sanding and buffing machines. They remove imperfections and create a perfect finish.
- Color Matching: Professionals use special tools to scan and match the exact paint color. This is necessary for a perfect blend.
- Panel Replacement: In severe cases, replacing a damaged panel is the best option. Professionals can do this properly, ensuring a seamless fit.
- Paintless Dent Repair: This method removes dents without affecting the paint. It’s helpful if the cracks are around a small dent.
- Ceramic Coating: A professional can apply a ceramic coating to protect the paint after repairs. This coating adds extra protection and shine.
Imagine a scenario where a car has a lot of spider cracks on the hood. A professional might use a combination of sanding, filling, and then a ceramic coating to fully protect the paint. In another example, a professional might replace a panel instead of repairing extensive damage. This ensures the best result. Using these advanced methods will deliver the best outcomes.
Frequently Asked Questions
Question: How can I tell if my car has spider cracks?
Answer: Spider cracks look like a web of tiny cracks on your car’s paint. They’re usually most visible when the light hits the surface at an angle. Inspect your car in different lighting conditions to spot them easily.
Question: What’s the best way to prevent spider cracks?
Answer: Prevent them by regularly washing and waxing your car, parking it in the shade, and using high-quality car care products. Protect your car from environmental factors and potential damage.
Question: Can I fix spider cracks myself, or do I need a professional?
Answer: You can fix minor spider cracks yourself using the steps in this guide. But if the damage is widespread or you aren’t comfortable, it’s best to seek help from a professional.
Question: What materials do I need to fix spider cracks?
Answer: You’ll need cleaning supplies, sandpaper, automotive filler, primer, base coat paint, clear coat, polishing compounds, and protective gear. Choose quality products for better results.
Question: How long does it take to fix spider cracks?
Answer: The time it takes varies depending on the severity of the cracks and your experience. It can take a few days to a week, accounting for preparation, painting, and drying times.
Final Thoughts
Learning How to Fix Spider Cracks in Car Paint can seem complex at first, but with the right information and steps, you can fix your car’s paint and make it look great again. From understanding the reasons behind the cracks to gathering the right supplies and following the steps, you now have the knowledge to get the job done. Remember that patience is important. Each step plays a critical role in the final result. Consider the importance of good preparation and using quality products. Keeping your car clean, protected, and well-maintained is a key aspect of preventing these cracks. This guide provides you with the skills to address these problems. So, get ready to apply what you’ve learned. You’ll make your car look its best! With these techniques, you’ll be able to fix spider cracks and maintain your car’s value.