How To Glue Car Ceiling Material Back Without A Mess
Fixing a sagging car headliner can be done with the right glue and a careful approach. This guide helps you understand the materials, the best adhesives, and a step-by-step process to reattach your car’s ceiling fabric neatly. Get ready for a clean, professional-looking repair.
Understanding Your Car’s Headliner
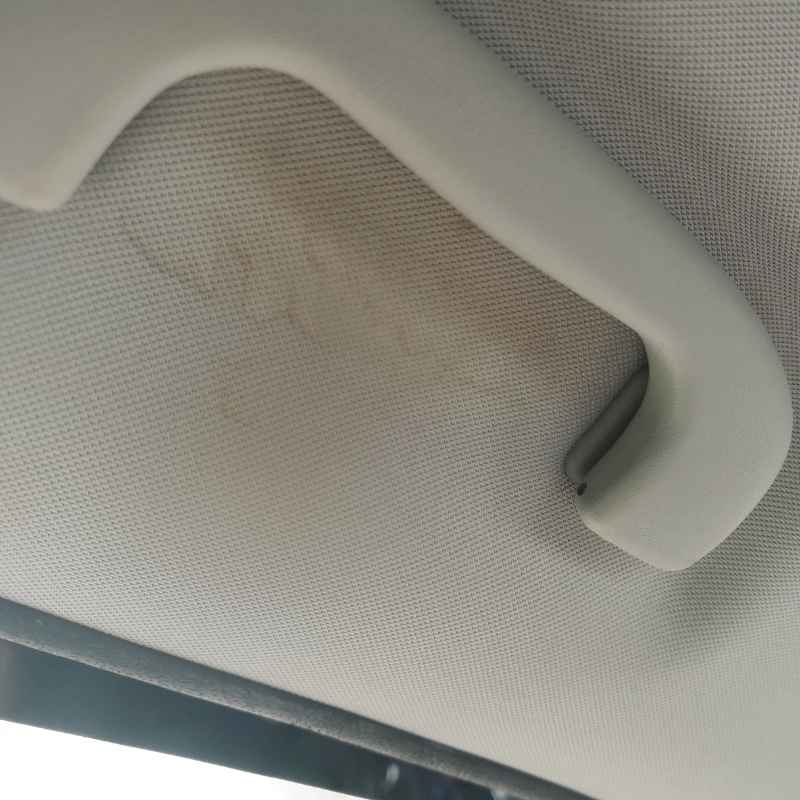
A car’s headliner is more than just fabric. It’s usually a multi-layer system. Most often, it starts with a fabric or vinyl surface.
This fabric is bonded to a thin foam layer. This foam layer then sticks to a rigid backing board. This board is often made of thin fiberboard or a type of plastic.
The whole thing is then fitted snugly into the roof cavity of your car. It helps with sound dampening and insulation too. It gives the inside of your car a finished look.
Over time, the glue that holds these layers together breaks down. Heat from the sun is a big culprit. It bakes the inside of your car for years.
The glue gets brittle and loses its grip. Moisture can also play a role. Old age and constant vibration from driving can also weaken the bond.
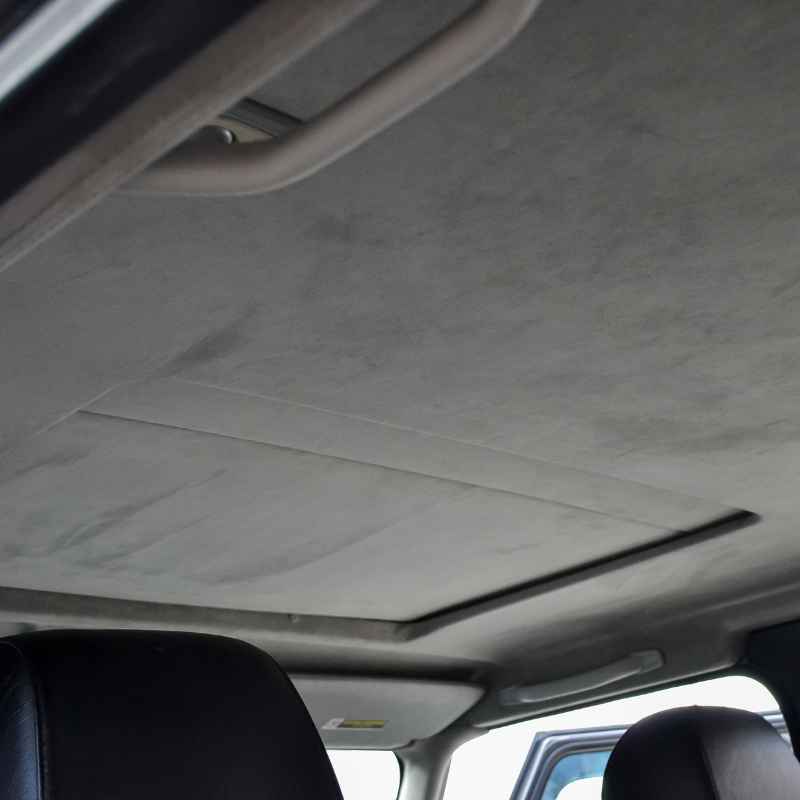
When this happens, the fabric layer starts to separate from the backing board. This makes it sag. It looks like it’s falling down.
Knowing what your headliner is made of helps you choose the right glue. Some glues work better on fabric. Others are best for foam or plastic.
You want a glue that bonds these materials well. It also needs to withstand the heat inside your car. A glue that melts or becomes sticky in the sun won’t last.
We need a strong, flexible bond.
Personal Experience: The Droopy Dachshund Dilemma
I remember it clearly. It was a hot July afternoon. I had just picked up my dog, Buster, from the groomer.
Buster is a dachshund, and he’s quite long. As he hopped into the back seat, his tail gave a big wag. It caught the edge of the headliner.
Suddenly, a whole section of the fabric peeled away. It hung down right over the back window. I felt a wave of panic.
Buster just looked at me, tail still wagging, totally oblivious.
My first thought was, “Oh no, this is going to be an expensive fix.” I imagined the dealership charging a fortune. Then, I thought about trying to glue it myself. But the idea of making a sticky mess everywhere scared me.
I pictured glue squeezing out. I saw fabric ruined. I pictured my car interior looking worse than before.
It was a frustrating feeling. I knew I needed to fix it, but I wasn’t sure how to do it without making a bigger mess.
Quick Scan: Headliner Fix Essentials
What you need:
- Fabric or upholstery cleaner
- Masking tape or painter’s tape
- A good quality spray adhesive (suitable for fabric and foam)
- A clean cloth or sponge
- A putty knife or a thin piece of plastic
- Gloves (optional, but recommended)
Choosing the Right Adhesive: What Works Best?
This is the most critical step. Picking the wrong glue can lead to more problems. You don’t want something that will stain the fabric.
You also don’t want it to become brittle. The best glues for car headliners are often spray adhesives. They offer a wide, even coverage.
This is important for fabric. These sprays are designed for automotive interiors. They can handle temperature changes.
They remain flexible even when hot.
Look for adhesives specifically labeled for “automotive upholstery” or “fabric headliners.” Brands like 3M Super 77 or 3M Hi-Strength 90 are popular choices. These are strong. They create a lasting bond.
They are also designed to dry clear. This means no ugly glue marks. Some people try craft glues or super glue.
These are generally not recommended. Craft glues might not be strong enough. They could also leave shiny spots.
Super glue is too rigid. It can make the fabric crack or tear.
When you buy a spray adhesive, read the instructions carefully. Some require you to spray both surfaces. Others need a “tack time” before pressing.
This means letting the glue sit for a few minutes to become sticky. Always test the spray on an inconspicuous area first. This is usually underneath the edge of the headliner.
Or on a scrap piece of similar fabric. This checks for color fastness and any adverse reactions.
Contrast Matrix: Glue Myths vs. Reality
| Myth | Reality |
|---|---|
| Any strong glue will work. | No, automotive-specific glues are needed. They handle heat and flexibility. |
| A little glue is fine. | No, even coverage is key for a lasting bond and neat finish. |
| Super glue is the strongest. | Super glue is too brittle for headliners and can crack the material. |
The Preparation Process: Getting Ready to Glue
Before you even think about spraying glue, you must prepare. This step is vital for a clean result. First, clean the affected area.
Use a mild fabric or upholstery cleaner. Gently wipe away any dust or grime. Let it dry completely.
Any dirt trapped under the glue will make the repair look bumpy. It can also weaken the bond.
Next, you need to protect the surrounding areas. This is where masking tape or painter’s tape comes in. Carefully tape off the edges of the headliner.
Also, tape any plastic trim pieces nearby. This prevents overspray from the adhesive. It also keeps glue from getting on surfaces you don’t want it on.
Take your time with this. Neat taping leads to a neat finish.
If a large section of the headliner has detached, you might need to support it. You can use small pieces of cardboard or plastic. Slide these gently between the fabric and the backing board.
This helps hold the fabric in place. It stops it from drooping further while you work. It gives you a flatter surface to work with.
Step-by-Step Guide to Gluing Your Headliner
Now for the actual gluing. This needs a steady hand and a bit of patience. Work in a well-ventilated area.
Open your car doors and windows. The fumes from spray adhesives can be strong. Wear gloves if you have them.
This keeps your hands clean.
Start with the part that has come loose. If it’s just a small sag, you might be able to peel it back carefully. Aim to peel it back enough to spray glue onto the backing board.
For larger areas, you might need to gently pull the fabric away from the board. Use your fingers or a putty knife. Be gentle.
You don’t want to tear the fabric or the foam layer.
Hold the spray can about 6 to 8 inches away from the surface. Spray a thin, even coat. If the instructions say to spray both the fabric and the backing board, do that.
Aim for complete coverage. Don’t soak it. You want a light mist.
If you apply too much, the glue will soak through the fabric. It might also drip.
Allow the adhesive to become tacky. This is called “flash-off time.” It usually takes 1 to 5 minutes. Check the glue can for specific times.
Once it’s tacky, carefully press the fabric back onto the backing board. Start from one edge and work your way across. Use your hand or a clean cloth to smooth it down.
Apply firm, even pressure.
Pay close attention to the edges. Make sure they are fully adhered. Use your putty knife or plastic tool to gently press the edges down.
This ensures a strong seal. If you notice any wrinkles, try to smooth them out as you press. It’s easier to fix them now than later.
Repeat this process for any other loose sections. Work in small areas. This way, the glue doesn’t dry out before you can press the fabric back on.
Don’t rush. The key is patience and precision. Once you’re done, let the glue cure fully.
This usually takes at least 24 hours. Avoid touching the headliner during this time.
Observational Flow: The Gluing Process
1. Prepare the Area: Clean fabric. Apply tape around edges.
2. Peel Back Fabric: Gently separate loose headliner from backing.
3. Apply Adhesive: Spray a thin, even coat onto the backing board (and fabric if instructed).
4. Allow Tack Time: Let the glue become sticky (check product instructions).
5. Press and Smooth: Carefully reattach fabric, pressing from edge to edge.
6. Smooth Edges: Use a tool to press down edges for a secure bond.
7. Cure: Let the glue dry completely for 24 hours.
Dealing with Stubborn Wrinkles and Drips
Sometimes, despite your best efforts, wrinkles might appear. Or, you might see a small drip of glue. Don’t panic.
There are ways to deal with these. If you spot a wrinkle right after pressing, you can gently lift the fabric again. Try to smooth it out before the glue sets too hard.
A soft cloth or a foam roller can help.
If the wrinkle is more stubborn, you might have to live with it. Or, if it’s a big wrinkle, you may need to try redoing that small section. Make sure to remove all the old glue residue before reapplying.
This is why working in small, manageable sections is so important.
For glue drips, act fast. If the glue is still wet, you can carefully wipe it away with a clean, damp cloth. Be very gentle.
You don’t want to spread the glue around. If the glue has started to dry, it becomes trickier. You can try to carefully scrape it off with a plastic scraper.
For small, dried drips on the fabric itself, sometimes a bit of rubbing alcohol on a cotton swab can help. Test this in a hidden spot first.
Stacked Micro-Sections: Post-Gluing Checks
Check for Gaps: Ensure all edges are firmly attached. Press down any loose spots.
Inspect for Drips: Look for any visible glue that squeezed out. Clean while wet.
Smooth Surfaces: Gently run your hand over the glued area to ensure it’s flat.
Air Out Car: Keep doors and windows open as much as possible during curing time.
Real-World Context: Why Does This Happen So Often?
You’re not alone. Headliner sag is incredibly common in cars. Think about the conditions inside a car.
It gets very hot in the summer. Temperatures can soar well over 100 degrees Fahrenheit. In the winter, it gets very cold.
These extreme temperature swings put a lot of stress on the adhesives. The materials expand and contract. This weakens the bond over time.
Then there’s the simple fact that cars are used every day. There’s vibration from the road. People lean on the headliner.
Stuff gets tossed around in the car. Sunlight itself can degrade the foam and the glue over the years. The average age of cars on the road is increasing.
This means more older vehicles with headliners that have seen better days.
The design of the headliner also plays a role. It’s often just glued to a thin board. There aren’t many anchor points.
This means the entire weight of the fabric and foam relies on that adhesive layer. Once that glue starts to fail, there’s nothing else holding it up.
What This Means for You: When to Worry
Most of the time, a sagging headliner is just an aesthetic issue. It looks bad, but it’s not dangerous. However, there are a few things to keep in mind.
If the headliner is sagging very badly, it could potentially obstruct your view. This is a safety concern, especially if it hangs down over the windshield or side windows.
In some cases, the backing board itself might be damaged. This can happen if there was a major water leak. If you suspect water damage, you need to address that first.
Water can also cause mold or mildew to grow. If the fabric feels damp or smells musty, that’s a sign of a bigger problem than just old glue.
If you have a sunroof, check the seals around it. A leaky sunroof is a common cause of headliner water damage. For most sagging issues, though, it’s just the glue giving up.
It’s a fixable problem. You can often do it yourself and save money.
Quick Fixes & Tips for a Neater Repair
Here are some extra tips to help you get the neatest possible result. Think of these as extra helpers for your headliner repair.
- Work in Sections: Don’t try to glue the entire headliner at once. Break it down into smaller, manageable areas. This gives you better control.
- Use Enough Tape: Don’t skimp on the masking tape. It’s your best friend for preventing overspray. Make sure the edges are sealed well.
- Ventilation is Key: Always work with doors and windows open. Those spray adhesives have strong fumes. It’s better for your health and helps the glue cure properly.
- Gentle Pressure: When pressing the fabric back on, be firm but gentle. You want to ensure good contact without stretching or distorting the fabric.
- Read the Can: Seriously, read the instructions on the spray adhesive. Each product is a little different. Knowing the exact tack time and application method is crucial.
- Consider a Headliner Kit: Some auto parts stores sell specific headliner repair kits. These often come with the right type of glue and sometimes even a small applicator.
- Patience is a Virtue: Rushing this job will lead to mistakes. Take your time. The better you do the prep and the application, the better the final result will look.
Card Grid: Things to Remember
Ventilation
Open doors and windows.
Taping
Protect surrounding areas well.
Spraying
Thin, even coats are best.
Pressure
Apply firm, smooth pressure.
Drying
Allow 24 hours for full cure.
Frequent Questions About Headliner Repair
Can I use a hot glue gun to fix my headliner?
A hot glue gun is generally not recommended for car headliners. The glue can become gooey and melt in hot temperatures. It’s also often too stiff once dry, which can lead to cracking or stiffness in the fabric.
Specialized spray adhesives designed for automotive interiors are a much better choice.
Will spray adhesive damage my car’s paint?
If you tape off the area properly, the spray adhesive should not damage your car’s paint. However, overspray can stick to paint. If you get any overspray on the paint, clean it off as soon as possible with a mild car soap or an automotive cleaner.
Avoid letting it sit for too long.
How much fabric glue do I need for a sagging headliner?
For a typical sagging headliner repair, one can of automotive spray adhesive is usually enough. It’s better to have a little extra than to run out. Make sure it’s a generously sized can, usually around 10-16 ounces.
My headliner has stains. Can I clean them before gluing?
Yes, you should clean any stains before gluing. Use a cleaner specifically made for car upholstery. Gently blot the stain.
Do not scrub too hard, as this can damage the fabric. Let the area dry completely before applying any adhesive. Some stains might be permanent, but cleaning helps ensure a better bond.
What if the foam layer is also falling apart?
If the foam layer is deteriorating, it can make the repair more challenging. You might need to use a reinforcing adhesive or even consider replacing the entire headliner board. However, for most common sagging, the foam is usually intact, just separated from the backing.
How long does a glued headliner usually last?
When done correctly with the right adhesive and proper preparation, a glued headliner can last for many years. It should hold up as long as the original glue did, if not longer. Consistent extreme heat or moisture can still shorten its lifespan over time, but it’s a durable fix.
Conclusion
Seeing your car’s headliner droop can be frustrating. But with the right approach, you can fix it cleanly. Understanding the materials and using the correct spray adhesive is key.
Taking your time with preparation and application leads to a professional-looking repair. You’ve got this!