How To Replace A Car Aerial Yourself (Step-By-Step Guide)
Replacing a car aerial yourself is a manageable DIY task that can restore your radio’s signal. This guide provides simple, step-by-step instructions suitable for most vehicles, helping you avoid costly repair shop visits and enjoy clear radio reception again.
Understanding Your Car Aerial
Your car aerial, or antenna, is what picks up radio signals. Think of it like an ear for your car’s radio system. It catches the invisible waves that radio stations send out.
Without a good aerial, these waves can’t reach your radio receiver properly. This often leads to fuzzy sound or silence.
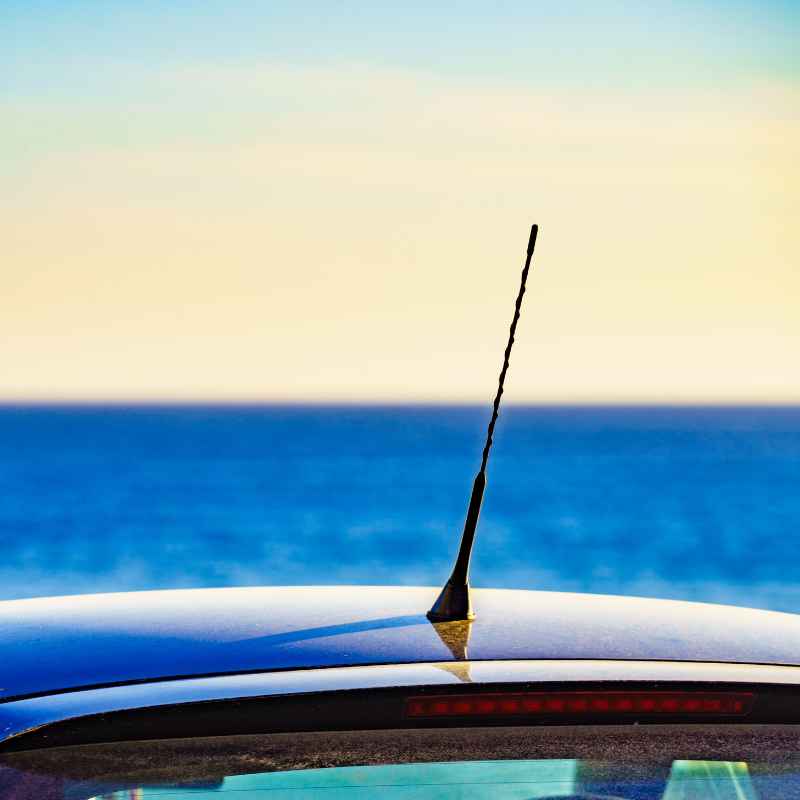
There are a few main types of car aerials. Some are just simple metal rods sticking out of your car. You see these a lot on older cars.
Others are built right into the car’s body or windows. These are called shark fin antennas or window antennas. They look sleeker and are more common on newer models.
The job of any aerial is to convert radio waves into electrical signals. These signals then travel to your car’s radio. The radio tunes into these signals to play music or talk.
If the aerial is damaged, bent, or corroded, it can’t do this job well. That’s when you start to lose reception.
Sometimes, the issue isn’t the aerial itself but the cable connecting it to the radio. Or, it could be the base where the aerial screws in. These parts can also get worn out.
Understanding these parts helps you figure out what might be wrong.
Most of the time, when your radio starts acting up, it’s the aerial that’s the culprit. It’s exposed to the elements all the time. Rain, sun, dirt, and even small bumps can cause damage.
So, it’s a common part to need replacement.
Why Your Car Aerial Might Need Replacing
Several things can cause your car aerial to stop working. The most obvious is physical damage. If you’ve scraped your car against something, the aerial might be bent or broken off.
Even a small crack can let water in, causing corrosion.
Corrosion is a big enemy of car electronics. The metal parts of the aerial and its base can rust over time. This rust creates a barrier.
It stops the electrical signals from flowing freely. You might see this as a greenish or black crust around the aerial base.
Loose connections are another common issue. The aerial screws into a base. This base is connected to a cable.
If this connection becomes loose, it won’t transmit signals well. Vibration from driving can cause these parts to loosen up.
Sometimes, the internal wiring can get damaged. This might happen if the aerial is old or if there was an electrical fault. Age takes its toll on all car parts.
The materials can degrade over years of use and exposure.
Water damage is also a big concern. If the seal around the aerial base fails, water can seep in. This water can then get into the wiring.
It can cause corrosion or even short circuits. This is why checking the seal is important.
Finally, sometimes the aerial just stops working for no clear reason. This can happen if there’s an internal fault within the aerial itself. It’s less common, but it does occur.
When you notice a significant drop in radio quality, it’s time to investigate.
Tools and Materials You’ll Need
Getting ready for this DIY job is important. Having the right tools makes everything much smoother. You won’t have to stop midway to go find something you forgot.
Most of these items are pretty standard for anyone who does a little car work.
First, you’ll likely need a new car aerial. Make sure you get one that fits your specific car model. You can usually find this information in your car’s manual or by looking up your car online.
Sometimes, you can buy just the aerial mast, and sometimes you need the whole base unit.
You’ll need a basic set of screwdrivers. A Phillips head screwdriver is usually essential. You might also need a flathead screwdriver.
Sometimes, special tools called trim removal tools are helpful. These are plastic and won’t scratch your car’s interior panels.
A socket wrench set or adjustable wrench can be useful. These might be needed to loosen a stubborn nut holding the aerial base in place. Make sure you have a few different sizes available.
You might need pliers. Needle-nose pliers are great for grabbing small nuts or disconnected wires. A wire stripper could be helpful if you need to reconnect any wires, though this is less common.
Don’t forget cleaning supplies. You’ll want some rags or paper towels. A cleaner like rubbing alcohol can help clean the area where the aerial sits.
This ensures a good seal for the new aerial.
Consider having some dielectric grease on hand. This is a special lubricant that protects electrical connections from moisture and corrosion. It’s a good idea to apply it to the new aerial’s connection points.
Finally, a small flashlight or headlamp will be very useful. Many of these tasks involve working in dark spots, like under the dashboard or inside door panels. Good lighting makes it easier to see what you’re doing.
Personal Experience: The Day My Radio Went Silent
I remember it clearly. It was a Tuesday morning. I was driving to a client meeting, and my favorite podcast was on.
Suddenly, it all cut out. Just static. I fiddled with the dial, trying to find another station.
Nothing. Just a sea of noise. Panic started to bubble up.
I’m someone who relies on my radio for news and entertainment on my commute. A silent radio felt really isolating.
I pulled over a few minutes later. I popped the hood, thinking maybe something obvious had come loose. No luck.
Then I looked at the aerial on the roof. It was tilted at a weird angle. I must have scraped it in the parking garage last week.
I tried to straighten it, but it felt brittle. I knew then and there that this was going to be a DIY job. I didn’t want to spend a fortune at the dealership just for a radio antenna.
The thought of driving around with a broken aerial was just too much. That day, my mission was clear: get my radio back.
Step-by-Step Guide: Replacing Your Car Aerial
Let’s get started with the actual replacement. We’ll break it down into simple steps. This process might vary slightly based on your car.
But the general idea stays the same.
Step 1: Locate Your Aerial and Assess the Situation
First, find your car’s aerial. As we talked about, it could be on the roof, the trunk, or even the windshield. Look closely at it.
Is it bent? Is it broken off? Is the base damaged?
This visual check helps you understand what you’re dealing with.
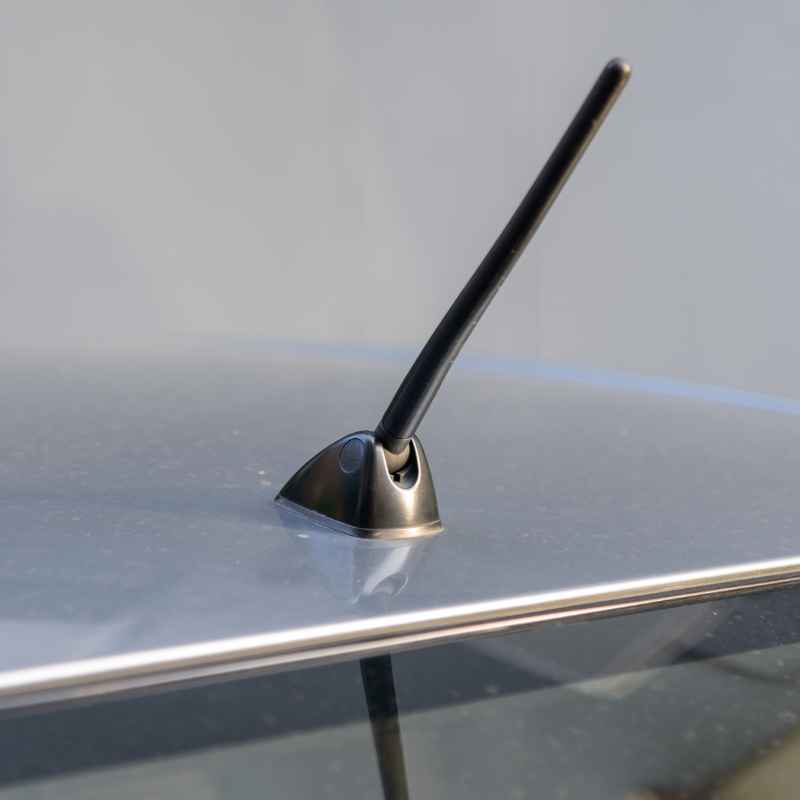
If it’s a simple mast that screws off, you might be in luck. This is often the easiest fix. If the whole base unit needs replacing, it will take a bit more work.
This usually involves getting into the car’s interior.
Step 2: Remove the Old Aerial
If you have a screw-off mast, try unscrewing it by hand. Turn it counter-clockwise. If it’s stuck, you might need a pair of pliers.
Wrap a cloth around the base of the aerial mast to avoid scratching it. Then, gently try to turn it.
If the aerial is part of a larger base unit, this step is trickier. You’ll likely need to access the inside of your car. This might mean removing trim panels around the aerial base.
Often, you’ll need to pull down the headliner or remove interior panels in the trunk or tailgate.
Look for screws or clips holding the trim in place. Use your trim removal tools or a flathead screwdriver to gently pry them loose. Be patient.
Forcing these panels can break them. Once the panels are off, you should see the nuts or bolts holding the aerial base to the car body.
Use your wrench or socket set to loosen and remove these nuts or bolts. As you loosen the final one, hold the aerial base from the outside. You don’t want it to fall inside the car.
Once free, pull the old aerial and its wiring through the opening.
Aerial Base Removal Tips
- Patience is Key: Car interiors can be tricky. Take your time.
- Gentle Pressure: Use plastic tools for trim to avoid damage.
- Document Everything: Take photos as you remove parts. This helps with reassembly.
- Inspect Wiring: Check the wiring harness for any signs of damage.
Step 3: Clean the Mounting Area
Before putting on the new aerial, clean the area where the old one sat. There might be old gunk, dirt, or sealant residue. Use a clean rag and some rubbing alcohol.
This will give you a clean surface.
A clean surface is important for a good seal. This prevents water from getting into your car. A good seal ensures the new aerial stays put and works as it should.
Step 4: Install the New Aerial
If you have a new aerial base, thread its cable through the hole from the outside. Position the new base on the car body. Make sure it sits flat and snug.
From the inside, re-attach the nuts or bolts that hold the aerial base in place. Tighten them securely, but don’t overtighten. You don’t want to crack the base or damage the car body.
If you’re just replacing a mast, screw the new mast into the base. Turn it clockwise until it’s snug. Again, don’t force it.
If your new aerial came with a new gasket or seal, make sure it’s properly in place. This is crucial for keeping water out. Some aerials have a rubber gasket that sits between the base and the car body.
Sealant and Gaskets
Why they matter: A good seal prevents water leaks. Water can cause rust and electrical problems inside your car.
Check your kit: Most new aerials come with a new rubber gasket or seal. Always use it.
Clean contact points: Make sure both the car body and the gasket are clean for the best seal.
Step 5: Connect the Wiring
Your new aerial should have a connector that plugs into your car’s radio system. This is usually a standard coaxial connector. Find the corresponding connector in your car.
It might be tucked away near the radio or under the dashboard.
Push the connector firmly onto the radio’s antenna input. You should feel it click into place. If you had to disconnect any other wires, reconnect them now.
Refer to any photos you took earlier.
If you are replacing just the mast and not the base, the connection is usually already made inside the base. So, this step might be simpler.
Step 6: Reassemble Interior Panels
Now it’s time to put everything back together. Start by reattaching any trim panels you removed. Make sure they snap or clip back into place securely.
Replace any screws or fasteners you took out.
If you lowered your headliner, carefully lift it back up and secure it. Double-check that all panels are flush and look like they did before you started. This is where your photos will be very helpful.
Take your time with this step. A neat reassembly makes the job look professional. It also ensures everything is secure and won’t rattle while you’re driving.
Reassembly Checklist
- Replace all trim panels.
- Secure all screws and clips.
- Ensure panels fit snugly.
- Check for rattles after reassembly.
Step 7: Test Your Radio
This is the exciting part! Start your car. Turn on the radio.
Tune into your favorite stations. Do they sound clear? Is the static gone?
If the reception is good, congratulations! You’ve successfully replaced your car aerial. If you still have problems, don’t worry.
It might be a different issue, or maybe a connection isn’t quite right.
If you’re still experiencing poor reception, double-check all connections. Make sure the aerial base is tightened properly. Sometimes, the cable itself might be damaged.
In rare cases, the issue could be with the radio itself.
Real-World Context: Aerials in Different Cars
The way you replace an aerial can change a lot depending on your car. For example, on a small sedan, the aerial might be a simple mast on the roof or the rear fender. This often means you only need to unscrew the mast and screw in a new one.
The base might be accessible from the trunk or a small panel.
On a larger SUV or minivan, the aerial might be integrated into the windshield. These are called embedded antennas. Replacing these is much more complex.
It often involves removing the entire windshield. This is usually a job best left to professionals.
Trucks sometimes have aerials mounted on the side mirrors or the dashboard. These can be easier to access. You might just need to pop off a small cover to get to the connection and mounting screws.
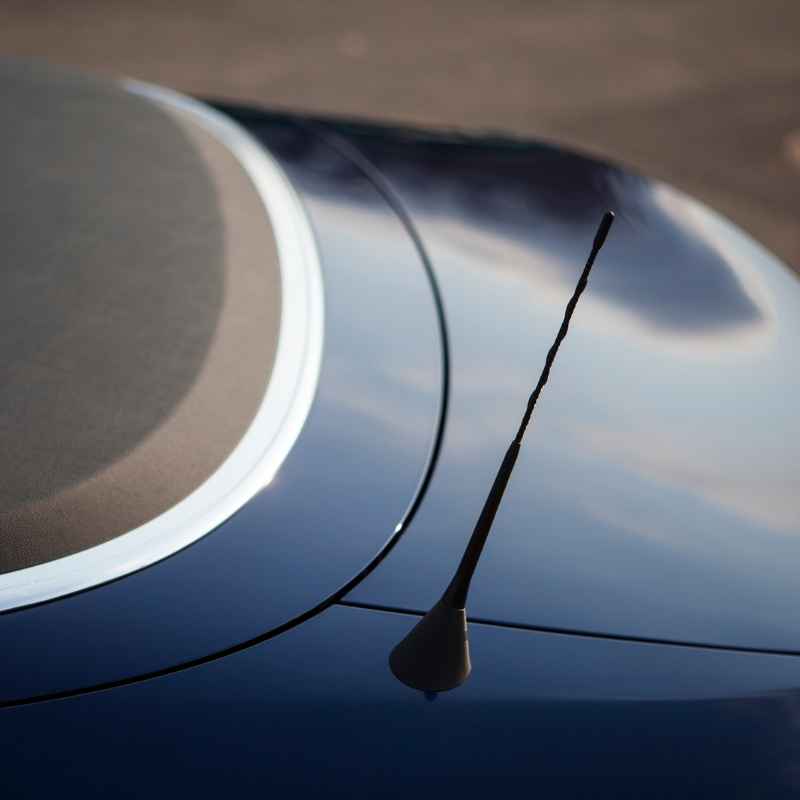
Shark fin antennas, common on many modern cars, are often a single unit. The base contains the antenna element. Removing these usually involves accessing the roof lining from the inside.
You’ll typically find a few nuts holding the base to the roof. The connection to the radio is usually a coaxial cable.
Consider older cars. Many have robust metal masts that can withstand a lot. Newer cars often use more delicate, integrated antennas.
The materials and design have changed over time to improve aerodynamics and aesthetics.
Aerial Types and Their Installation
Mast Antenna: Simplest. Usually screws directly into the base. Minimal tools needed.
Base-Mounted Antenna: Mast screws into a base unit. Base is bolted to the car body. May require interior panel removal.
Shark Fin Antenna: Integrated unit. Base is bolted from inside. Often requires headliner access.
Window Antenna: Thin strips on the glass. Complex to replace, often professional work.
What This Means For You: When to Worry
Most of the time, a faulty aerial is a straightforward fix. But there are times when you should be cautious or seek professional help. If your aerial is completely snapped off and left a jagged hole, water could be getting into your car.
If you notice any signs of rust or corrosion around the aerial base, address it promptly. Rust can spread and damage the car body. It can also create poor electrical connections.
When you remove the old aerial, check the surrounding paint. If the paint is chipped or damaged, it will need repair to prevent rust. You might want to touch up the paint after installing the new aerial.
If after replacing the aerial, your radio reception is still poor, it could indicate a more serious issue. This might be with the antenna cable running to the radio or the radio unit itself. It’s also possible the new aerial is faulty, though this is rare.
If your car has an antenna built into the windshield or bodywork, and it’s damaged, it’s often best to consult a professional. These are usually specialized parts that require specific installation techniques.
Don’t ignore a broken aerial. While it might seem like a minor inconvenience, poor reception can be distracting. Plus, water ingress can lead to bigger, more expensive problems down the line.
Quick Fixes and Tips
Here are some quick tips to make the process easier and ensure a good result:
- Buy the Right Part: Always confirm your car’s make, model, and year when ordering a new aerial.
- Watch a Video: Search YouTube for a video of someone replacing the aerial on your specific car model. Seeing it done can be very helpful.
- Protect Your Car’s Interior: Lay down a towel or drop cloth inside your car to protect the seats and carpet from tools or debris.
- Keep Track of Hardware: Use small containers or a magnetic tray to keep screws and nuts organized.
- Dielectric Grease: Apply a thin layer of dielectric grease to the electrical connection. This prevents corrosion and ensures good contact.
- Test Thoroughly: After installation, scan through all your usual radio stations. Check AM and FM bands.
DIY Aerial Replacement Dos and Don’ts
DO: Get the correct part for your car.
DON’T: Force parts that don’t seem to fit.
DO: Clean the mounting area thoroughly.
DON’T: Overtighten nuts or screws.
DO: Test your radio after installation.
DON’T: Ignore signs of water damage or rust.
Frequent Questions About Car Aerial Replacement
How much does it cost to replace a car aerial?
If you do it yourself, the cost is mainly for the new aerial part, which can range from $20 to $100, depending on the type. If you take it to a mechanic, expect to pay anywhere from $100 to $300 or more, due to labor costs.
Can I drive with a broken car aerial?
Yes, you can still drive your car. However, your radio reception will likely be poor or nonexistent. Also, a broken aerial might leave an opening that can let water into your car, causing rust or electrical issues.
What if my car has a hidden antenna?
Many modern cars have antennas built into the body, windows (embedded antennas), or the rearview mirror. If these are damaged, replacing them often requires specialized tools and knowledge. It’s usually best to consult a professional for these types of antennas.
How do I know if it’s the aerial or the radio causing the problem?
If you have replaced the aerial and are still experiencing poor reception, the problem might be the antenna cable or the radio itself. Check that the cable is securely connected to the back of the radio. If reception is bad on all stations and types of radio (AM/FM), the radio might be faulty.
Do I need to disconnect the battery before replacing the aerial?
It’s not strictly necessary for most aerial
My aerial mast just spins, but won’t come off. What should I do?
This usually means the base it screws into is damaged or stripped. You will likely need to remove the entire base unit. This involves accessing the underside of the aerial from inside your car.
You may need to remove interior trim panels to get to the mounting nuts.
Conclusion
Replacing your car aerial yourself is a rewarding DIY project. It can save you money and restore your radio’s sound. By following these steps and using the right tools, you can get your radio working like new again.
Enjoy your clear music and podcasts!