How to Install a Car Bike Rack: Roof, Trunk & Hitch Guide
Installing a car bike rack takes 10 to 30 minutes, depending on the type. Trunk-mounted racks strap on with no tools in about 10 minutes. Hitch-mounted racks slide into a receiver and lock in place in 5 minutes. Roof-mounted racks take the longest, usually 20 to 30 minutes, because you have to mount towers to your roof rails or crossbars first.
Which type you need depends on your car and your bike, not just your budget. A car with no roof rails and no hitch can still carry a bike with a trunk-mounted rack. A car with a factory hitch receiver can usually run a heavier-duty hitch rack. This guide walks through all three installation types step by step, plus the tools you need and how to check your work before you drive off.
Choosing the Right Type of Bike Rack
NO HITCH OR ROOF RAILS NEEDED
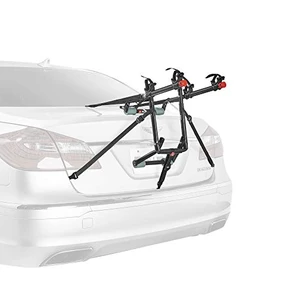 |
Allen Sports Deluxe 2-Bike Trunk Mount Rack – $58.00 If your car has no roof rails and no hitch receiver, this is the rack type this guide’s trunk-mount install steps below cover — it straps onto the trunk lid in minutes with no drilling or tools.
|
There are three main types of car bike racks, and each mounts differently:
| Rack Type | Mounts To | Typical Capacity | Best For |
|---|---|---|---|
| Trunk-mounted | Trunk lid or rear hatch, via straps and hooks | 1–3 bikes | Cars with no hitch or roof rails; lowest cost |
| Hitch-mounted | A 1.25-inch or 2-inch trailer hitch receiver | 1–5 bikes | Trucks and SUVs with a factory or aftermarket hitch; easiest bike loading |
| Roof-mounted | Roof rails or crossbars | 1–4 bikes | Vehicles with roof rails already installed; keeps the trunk and rear view clear |
Before you buy, check your car’s owner’s manual for its hitch, roof rail, or trunk-mount compatibility, and confirm the rack’s weight limit covers your bike (e-bikes are often 15 to 20 lbs heavier than standard bikes and can exceed a lighter rack’s rated capacity).
Tools You Will Need
Most trunk- and hitch-mounted racks install without any tools at all — you just tighten straps and pins by hand. Roof racks and some trunk racks with bolt-on feet may need a few basics:
- Adjustable wrench or socket set — for tightening roof rack clamp bolts
- Phillips or flathead screwdriver — some rack feet use set screws instead of clamps
- Tape measure — to center the rack and check even spacing on both sides
- Rubber or foam protective pads — placed between the rack and your car’s paint on trunk-mount installs
- Locking cable or integrated rack lock — to secure the bike itself, separate from the rack’s own hitch or clamp lock
How to Install a Trunk-Mounted Bike Rack
Trunk-mounted racks are the most universal option because they do not require a hitch or roof rails — almost any car with a trunk or rear hatch can use one.
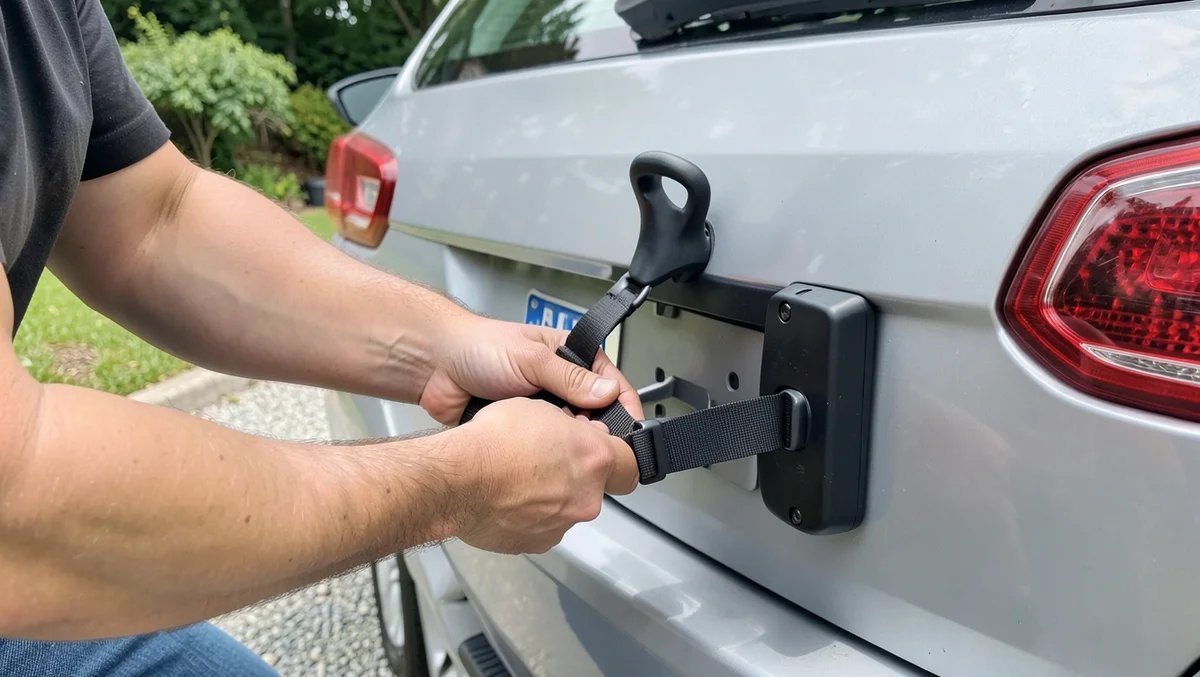
- Clean the trunk lid or hatch. Wipe down the mounting surface with a soft cloth and mild soap. Dirt trapped under the rack’s feet can scratch paint, and a wet surface makes straps slip once you tighten them.
- Position the rack on the trunk. Center it over the trunk lid, resting the arms on the manufacturer-recommended contact points (check the included fit diagram — these vary by rack).
- Hook the upper straps to the trunk edge. Most racks have 2 to 4 straps that hook over the top edge of the trunk or hatch. Pull each one snug, but don’t fully tighten yet.
- Hook the lower and side straps to the bumper or lower body panel. These stabilize the rack against side-to-side and front-to-back sway.
- Tighten all straps evenly. Alternate between straps rather than fully tightening one before moving to the next, so the rack settles evenly instead of pulling to one side.
- Confirm lights and the license plate are unobstructed. The rack’s frame — not just the bikes you’ll load later — should not cover brake lights, turn signals, or the plate. Reposition if it does.
Once the empty rack is secure, load your bike and recheck strap tension — a bike’s weight can pull straps that felt tight when the rack was empty.
How to Install a Hitch-Mounted Bike Rack
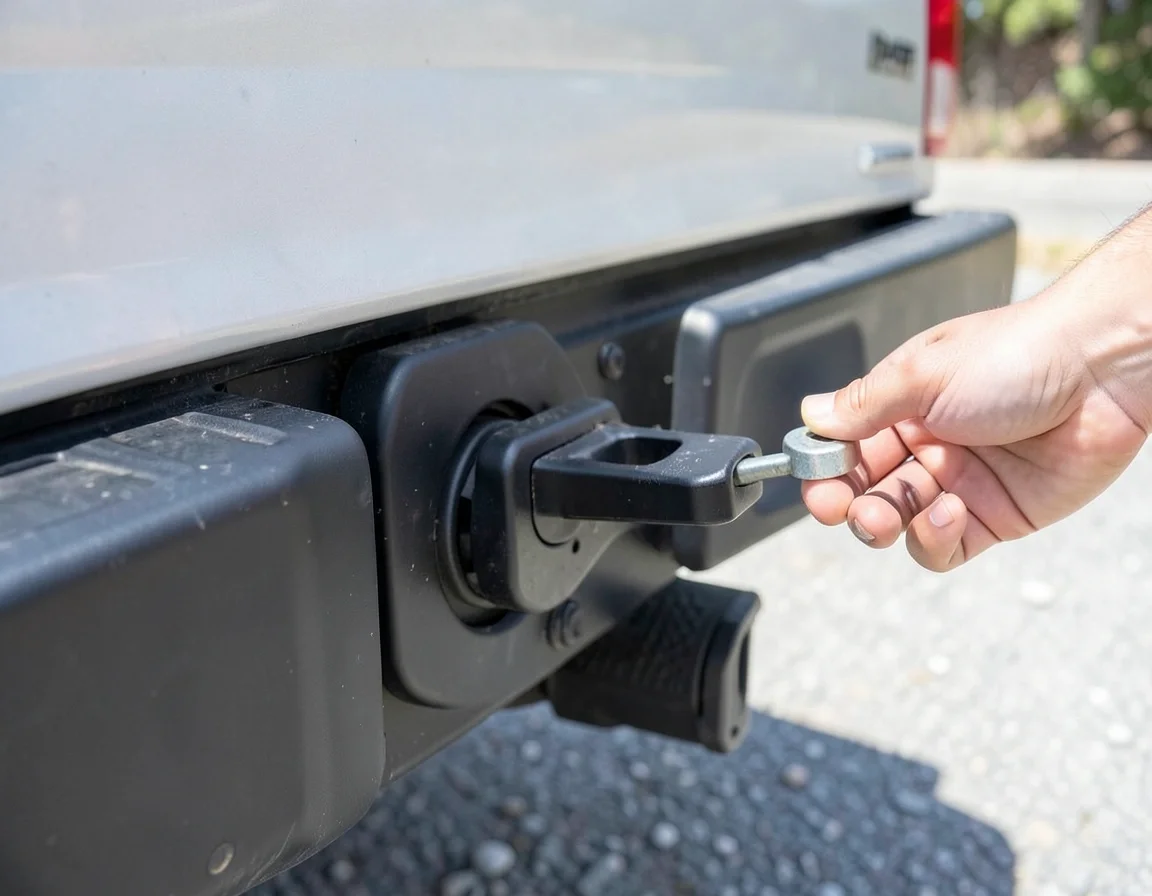
Hitch racks slide into your vehicle’s trailer hitch receiver, the square opening under the rear bumper. Before buying one, confirm your receiver’s size — hitch receivers come in standardized classes, and a rack sized for one won’t fit another without an adapter.
| Hitch Class | Receiver Opening | Common On |
|---|---|---|
| Class I – II | 1.25 inch | Sedans, coupes, small crossovers |
| Class III – V | 2 inch | Midsize and full-size SUVs, trucks; required for heavier platform racks carrying 3+ bikes or e-bikes |
- Align the rack’s shank with the hitch receiver opening. Line it up level with the ground, not tilted.
- Slide the shank fully into the receiver until the mounting holes line up.
- Insert the hitch pin (or the rack’s integrated locking pin) through the aligned holes. Push it in until it seats fully — you should not be able to see a gap between the rack and the receiver.
- Secure the pin with its clip, cotter pin, or built-in lock, depending on your rack’s hardware. This is what keeps the rack from bouncing loose over bumps.
- Tighten any anti-wobble bolt. Most hitch racks include a bolt that presses against the inside of the receiver to eliminate side-to-side play — snug it down until the rack doesn’t shift when you push on it.
- Engage the rack’s lock, if it has one, to deter theft of the rack itself, separate from any lock securing your bikes.
How to Install a Roof-Mounted Bike Rack
Roof racks need existing roof rails or crossbars to clamp onto — they are not a standalone mount for a bare roof. If your car doesn’t have factory rails, you’ll need a separate crossbar system first.
- Position the rack’s base on the crossbar or rail, centered and aligned so the mounting clamps sit parallel to the bar.
- Open the clamp jaws and set them around the crossbar at the manufacturer’s recommended spacing — use a tape measure to make sure both towers (if installing a 2-point rack) sit the same distance from the car’s centerline.
- Tighten the clamp bolts or lever by hand first, then finish with a wrench if the rack has hex-head bolts, alternating sides so the base doesn’t shift while tightening.
- Check that the rack sits flush and doesn’t rock when you press down on either end. If it rocks, loosen, reposition, and retighten.
- Mount your bike and engage the wheel or frame clamp according to the rack’s design (fork-mount, wheel-clamp, or hanging styles all differ here).
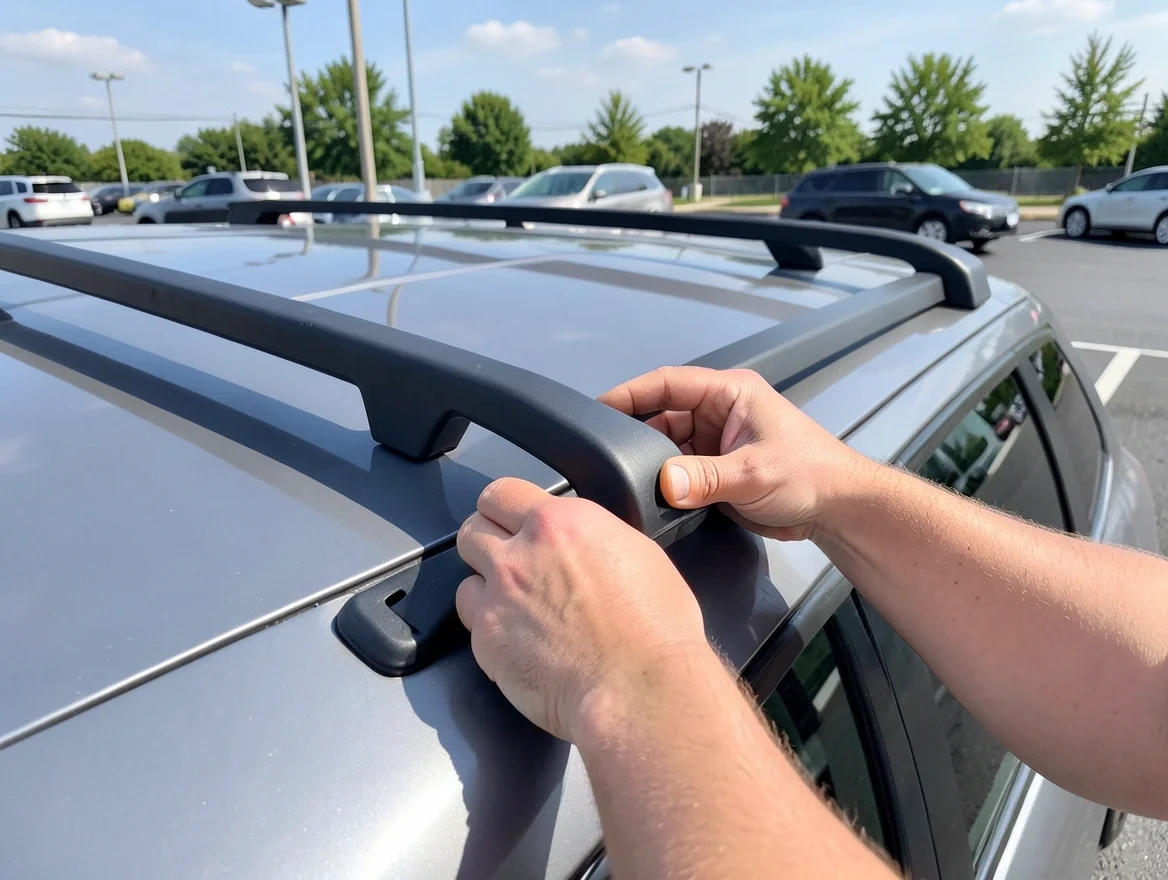
If your vehicle came with factory crossbars but no dedicated bike-carrying accessory yet, our roof-mounted bike rack picks compare a couple of budget-friendly options that clamp onto standard rail systems.
How to Test Your Installation Before Driving
Don’t skip this step for any rack type — a rack that felt tight during installation can still be improperly seated.
- Shake test. Grip the rack (with a bike loaded, if possible) and push firmly in every direction — up, down, side to side, front to back. It should not shift, rock, or slide.
- Recheck every strap, bolt, and pin after the shake test. A rack that passed the shake test but has a slightly loose strap can still work its way looser over miles of road vibration.
- Confirm visibility. Walk behind the vehicle and check that brake lights, turn signals, and the license plate are all fully visible — not just clear of the rack frame, but also clear of the bike(s) once loaded.
- Drive a short test loop. Go around the block at low speed before heading onto a highway, then pull over and recheck tightness once more.
- Recheck again after 10–15 minutes of highway driving on longer trips. Straps and clamps can settle and loosen slightly once everything has vibrated into place.
Common Mistakes to Avoid
- Buying a rack before checking receiver size or roof rail type. A 2-inch hitch rack won’t fit a 1.25-inch receiver without an adapter, and clamp-style roof racks don’t fit every rail cross-section.
- Skipping the anti-wobble bolt on a hitch rack. This is the single most common cause of a hitch rack that rattles or bangs over bumps — it’s a quick fix that’s easy to forget.
- Overloading past the rated capacity. Adding a heavier e-bike to a rack rated for standard bikes stresses the frame and straps beyond their design limit.
- Not checking for plate and light coverage. Many states require the rear license plate to stay visible; a rack or loaded bike blocking it can result in a citation in some jurisdictions, on top of being a visibility hazard to drivers behind you.
- Forgetting to recheck tightness on a long trip. Straps and clamps can loosen gradually with road vibration — a rack that was solid at the start of a 5-hour drive isn’t guaranteed to still be solid at the end.
Maintaining Your Bike Rack After Installation
A properly installed rack still needs periodic upkeep to stay safe over months of use.
Regular Inspections
Check for loose screws, bolts, or clamp bolts every few uses, and tighten anything that’s worked loose. Look over straps and cables for fraying or cracking, and inspect metal parts for rust, especially on trunk racks exposed to road salt and moisture. Replace any worn strap or cracked plastic clamp before your next trip rather than after it fails.
Cleaning and Storage
Rinse the rack with water and mild soap after use, especially after driving in rain, snow, or on salted roads. Dry it fully before storing to prevent rust on metal hardware. Store it in a dry garage or shed when not in use, and cover it with a cloth or tarp if it has to stay outside — UV exposure breaks down rubber straps and plastic clamps faster than most owners expect.
Frequently Asked Questions
How Do You Attach a Bike Rack to Your Car?
Choose a rack compatible with your car (trunk-mount, hitch-mount, or roof-mount), then secure it using the manufacturer’s straps, hitch pin, or clamps. Tighten everything evenly, confirm the rack doesn’t block lights or the license plate, and shake-test it before loading a bike.
Are Bike Racks Easy to Install?
Yes, most are. Trunk and hitch racks typically install with no tools in 5 to 10 minutes. Roof racks take longer, usually 20 to 30 minutes, since you’re clamping a mount onto existing roof rails or crossbars. Always follow the specific instructions included with your rack, since hardware varies by brand.
How Do You Put a Bike Rack on a Car Without a Hitch?
Use a trunk-mounted rack. These attach with straps that hook over the trunk lid or rear hatch and lower body panel — no hitch receiver or roof rails required. They work on most sedans, hatchbacks, and minivans, though you should confirm fit against the rack’s published vehicle list first.
What Kind of Hitch Do I Need to Install a Bike Rack?
You need a trailer hitch receiver, most commonly a 1.25-inch (Class I–II) or 2-inch (Class III–V) opening. Smaller cars typically have 1.25-inch receivers, while larger SUVs and trucks usually have 2-inch receivers. Check your rack’s listed receiver size against your vehicle’s hitch before buying.
How Much Weight Can a Hitch-Mounted Bike Rack Hold?
It depends on the rack and receiver class. Lighter 1.25-inch-receiver racks often support 2 bikes at around 35 lbs each, while 2-inch-receiver platform racks can support 4 or more bikes and up to around 60 lbs per bike, which matters if you’re carrying a heavier e-bike. Always check the rack’s specific rated capacity rather than assuming based on receiver size alone.
Can I Install a Bike Rack Without Roof Rails or Crossbars?
Not a roof-mounted one — roof racks clamp onto existing rails or crossbars and won’t attach to a bare roof. If your car doesn’t have either, choose a trunk-mounted or hitch-mounted rack instead, or install an aftermarket crossbar system first if you specifically want to carry bikes on the roof.
The Bottom Line
Installing a car bike rack is straightforward once you know which type fits your vehicle. Trunk racks need no hitch or rails and go on in minutes. Hitch racks need a compatible receiver but load the fastest. Roof racks need existing rails or crossbars but keep your rear view and trunk clear. Whichever you choose, tighten everything evenly, shake-test it before loading a bike, and recheck it partway through longer trips.
Looking for a specific rack recommendation? See our picks for best bike racks for SUVs or bicycle racks for cars if you haven’t bought one yet.
Products related to this article
Sponsored / affiliate links. As an Amazon Associate I earn from qualifying purchases. I may earn additional commission from eligible campaigns.