How to Install a Car Stereo: Cost, Tools & Wiring Guide
A DIY car stereo install runs about $30-$50 in tools versus $50-$150 for a professional shop. The whole job takes 1-3 hours: disconnect the battery, pull the old unit, match the wiring harness colors, ground the new stereo properly, test it before final mounting, then reattach the dash trim.
Below is the full process, including two steps most guides skip entirely: letting the airbag and infotainment electronics discharge before you start, and giving each accessory its own ground wire so you do not end up with an engine-noise whine through the speakers.
Why Upgrade Your Car Stereo?
BEST FOR REMOVING DASH TRIM WITHOUT SCRATCHES
 |
GOOACC 5 PCS Nylon Trim Removal Tool Kit – $7.65 Pries dash panels and door trim off cleanly around the stereo opening without cracking clips or scratching plastic.
|
A factory head unit is usually the cheapest part a manufacturer can get away with installing, which is why the sound is often tinny, the buttons feel sluggish, and there is no easy way to stream music from a phone. Swapping in an aftermarket stereo adds Bluetooth calling and audio, a USB port for charging and music, and in many cases Apple CarPlay or Android Auto. It also tends to improve resale value, since a modern head unit is one of the first things a used-car buyer checks.
Doing the install yourself is where the real savings show up. A shop typically charges $50-$150 in labor on top of the stereo itself, while the tools and wiring parts for a DIY job usually add up to $30-$50 total, most of which you only buy once.
Choosing the Right Car Stereo
Before you buy, confirm five things so the unit you order actually fits and works with your car:
- Compatibility: Check your car’s make, model, and year against the stereo’s fitment list. Most cars take either a single-DIN slot (about 2 inches tall) or a double-DIN slot (about 4 inches tall). A fit-guide tool from a retailer like Crutchfield will confirm which one your dash has and whether you need a specific wiring harness.
- Features: Decide what you actually want: Bluetooth calling and audio, a USB port, AUX input, or full smartphone integration. Touchscreen units with CarPlay or Android Auto cost more but remove most of the wiring guesswork for phone audio.
- Power Output: Compare RMS wattage, not the inflated “peak power” number printed on the box. 15-20 watts RMS per channel is enough for clear sound at normal volume with factory speakers.
- Budget: Aftermarket stereos run from about $50 for a basic Bluetooth deck to $500+ for a large touchscreen unit with navigation. A solid mid-range model with Bluetooth and a clear display usually lands around $100-$180.
- Brand: Established car-audio brands such as Pioneer, Kenwood, JVC, and Alpine back their units with real warranty support, which matters more than it sounds like once you are three screws into a dashboard.
Measure your dash opening before ordering, and check whether your car needs a dash kit (a trim adapter so the new stereo fills the factory opening) or a wiring harness adapter (so you can plug in without cutting factory wires).
Tools and Materials You’ll Need
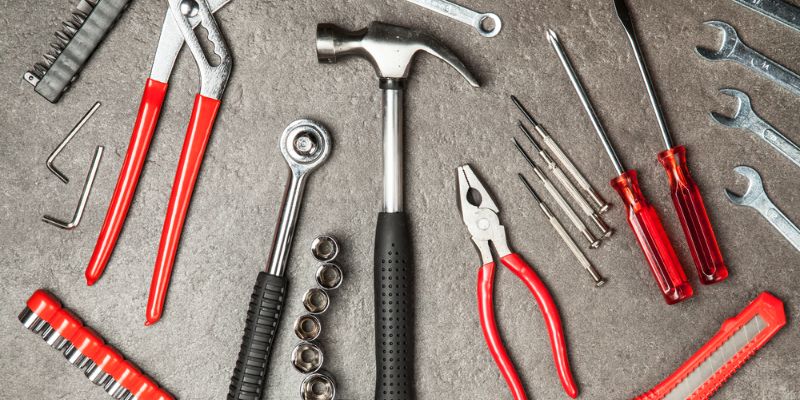
Gather everything before you start pulling panels off the dashboard:
- Screwdrivers (Phillips and flathead): for removing panels and mounting screws.
- Socket wrench set: some cars bolt the stereo cage in instead of using screws.
- Plastic trim removal tools: for prying off dash panels and door trim without cracking the clips or scratching the plastic.
- Wire cutters and strippers: for trimming and prepping wire ends.
- Crimp tool and butt connectors: to make secure, insulated wire splices.
- Electrical tape or heat-shrink tubing: for insulating any exposed connections.
- Wiring harness adapter: matches your car’s factory wiring plug to the new stereo’s wire leads.
- Dash kit: fills the gap if the new stereo’s size doesn’t match your car’s factory opening.
- Antenna adapter: needed if your car’s antenna plug doesn’t match the new stereo’s antenna input.
- Torx or Allen keys: some dash panels and stereo cages use these instead of Phillips screws.
Most of this list costs under $30 total at a hardware store. The wiring harness and dash kit are usually car-specific, so order those matched to your exact make, model, and year, often alongside the stereo itself.
Preparing for the Installation
A few minutes of prep prevents most of the problems that turn a one-hour install into an all-afternoon one:
- Park Safely: Park on a flat surface, set the parking brake, and work somewhere with good lighting, such as a garage or driveway in daylight.
- Disconnect the Battery: Loosen and remove the negative (black) terminal first, and tuck the cable away from the post so it can’t swing back and touch metal while you work. This prevents shorts and shocks while you’re handling bare wires.
- Read the Manual: Skim the new stereo’s wiring diagram before you touch anything so you know which wire does what before it matters.
- Gather Parts: Lay out every tool, the stereo, the wiring harness, and the dash kit before you start, so you’re not making a mid-install parts-store run.
- Check Fitment: Test-fit the dash kit and stereo against the dash opening before you disconnect anything, to confirm they actually match before you commit.
Wait a Few Minutes After Disconnecting the Battery
This is the step most car-stereo tutorials skip. Modern cars store residual charge in capacitors that power the airbag control module and the infotainment/dashboard electronics, and that charge doesn’t disappear the instant you pull the battery cable. Give it roughly 10 minutes after disconnecting the negative terminal before you start unplugging anything else. Working too fast here is a common reason installers accidentally trigger an SRS (airbag) warning light or damage a sensitive module, both of which can turn a simple stereo swap into an expensive dealer visit.
Removing the Old Stereo
With the battery disconnected and the wait time observed, the old unit usually comes out in four steps:
- Remove Dash Panels: Use a plastic trim tool (not a metal screwdriver, which can crack plastic or scratch the finish) to pry the trim around the stereo loose. Go slowly and work around the panel evenly, since factory clips release with a light pop, not a hard snap.
- Unscrew the Stereo: Most factory units are held in by screws or small bolts around the cage. Keep every screw in a labeled cup or bag; you’ll likely reuse several of them.
- Pull Out the Stereo: Slide the unit out slowly and check behind it for wires before pulling it fully free, since the harness and antenna cable are still attached.
- Disconnect Wires: Unplug the factory wiring harness and antenna cable from the back of the old stereo. Labeling connectors with a strip of tape as you go makes reassembly far less confusing.
If your car has a factory amplifier, premium sound system, or steering-wheel audio controls, you’ll likely need a dedicated adapter (a “steering wheel control interface” or amp-integration harness) to keep those features working with the new stereo.
Wiring the New Stereo
Wiring intimidates most first-time installers, but a vehicle-specific harness adapter turns it into color matching rather than guesswork:
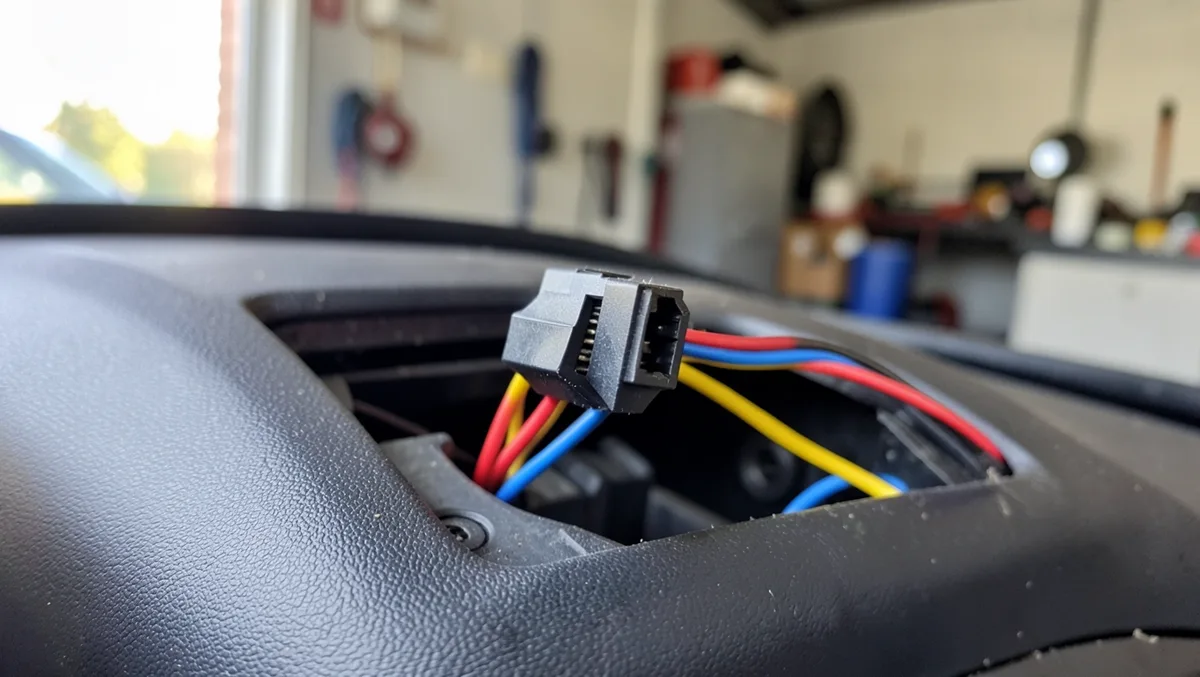
- Use a Wiring Harness Adapter: This plugs into your car’s factory harness on one end and the new stereo’s wire leads on the other, so nothing gets cut. Order one matched to your exact make and model.
- Match Wire Colors: Standard aftermarket wiring uses yellow for constant 12V power (stays hot with the key off, feeds the stereo’s memory/clock), red for switched or accessory power (only hot with the key on), black for ground, blue for the power antenna or amp turn-on lead, and orange for dash illumination. The harness adapter’s included diagram will confirm the exact colors for your car, since a few manufacturers swap red and yellow.
- Crimp Connections: Twist matching wires together, crimp with butt connectors, and cover each joint with electrical tape or heat-shrink tubing. A loose or exposed splice is the single most common cause of static, intermittent power, or a stereo that resets itself.
- Connect the Antenna: Plug the antenna cable into the new stereo’s antenna input, using an antenna adapter if the connector shapes don’t match.
- Double-Check Before Powering Up: Tug gently on each connection to confirm nothing is loose before you test the system. A loose wire at this stage causes static, no sound, or the stereo losing its clock settings every time the car is turned off.
If your car has a complex factory sound system with a built-in amplifier or digital signal processor, the wiring gets significantly more involved, and that’s a reasonable point to hand the job to a professional installer instead.
Avoid Ground Loop Noise: One Ground Per Device
If you’re also wiring in an amplifier, backup camera, or dash cam at the same time, resist the urge to run all of them off one shared ground point. Chaining multiple accessories to a single ground wire is a common cause of “ground loop” noise, a whining or humming sound through the speakers that changes pitch with engine RPM. Instead, run each device its own dedicated ground wire to bare, sanded metal on the chassis, ideally within about 18 inches of the device itself. It costs a few extra inches of wire and prevents a noise problem that’s genuinely annoying to chase down after everything is already buttoned up.
Installing the New Stereo
With the wiring tested and confirmed, mounting the new unit is the last mechanical step:
- Attach the Dash Kit: If the stereo’s size doesn’t match the factory opening, snap the dash kit onto the stereo first so the combined unit fills the slot correctly.
- Plug in Wires: Connect the wiring harness and antenna cable to the back of the stereo, pushing each connector in firmly until it seats.
- Slide in the Stereo: Guide the unit into the dashboard opening. If it doesn’t slide in smoothly, stop and check for a pinched wire or an obstruction rather than forcing it.
- Secure the Stereo: Use the original mounting screws or the ones included with the new stereo. Tighten screws gradually and in a diagonal pattern, similar to torquing a wheel, so the faceplate seats evenly instead of warping to one side.
- Reattach Panels: Snap the dash trim back into place, pressing evenly along the edges to avoid breaking clips.
Reconnect the negative battery terminal, then start the car to confirm the stereo powers on before you consider the job finished.
Testing and Troubleshooting
Test everything before you call the install done:
- Power: If the stereo won’t turn on, check the battery connection first, then the red switched-power wire and the fuse in the harness.
- Sound: No sound from one or more speakers usually traces back to a loose crimp on that speaker’s wire pair; recheck each splice.
- Features: Pair a phone over Bluetooth, test the USB port, tune the radio, and check steering-wheel controls if you installed an adapter for them.
- Fitment: Make sure the stereo sits flush and doesn’t wobble; a loose mounting screw is the usual culprit.
If something’s off, recheck connections before assuming a part is defective. Most post-install issues trace back to one loose crimp or an unplugged connector rather than a bad stereo.
Car Stereo Installation: Step-by-Step Summary Table
Use this as a quick-reference checklist while you work:
| Step | What to Do | Tip |
|---|---|---|
| Choose Stereo | Pick one that fits your dash slot and needs | Use an online fit guide; compare RMS wattage, not peak |
| Gather Tools | Get screwdrivers, trim tools, crimp tool, harness, dash kit | Buy the wiring harness and dash kit matched to your exact car |
| Disconnect Battery | Remove the negative terminal, then wait about 10 minutes | Prevents shocks, shorts, and airbag-module warning lights |
| Remove Old Stereo | Unscrew, unplug the harness and antenna | Label wires with tape; go slow to avoid cracking clips |
| Wire New Stereo | Match harness wire colors, crimp, ground separately | One ground wire per device prevents engine-noise whine |
| Install Stereo | Slide in, secure with screws, reattach panels | Test fitment first; tighten screws diagonally, not overtight |
| Test System | Check power, sound, Bluetooth, and any control adapters | Recheck loose crimps before assuming a part is bad |
Common Mistakes to Avoid
- Skipping the Battery Disconnect: Always disconnect the negative terminal first, and give it a few minutes before touching other wiring.
- Wrong Wiring Harness: A generic, non-vehicle-specific harness often has mismatched pinouts. Buy one built for your exact make, model, and year.
- Forcing the Stereo: If it doesn’t slide in smoothly, stop. Forcing it risks cracking the dash panel or pinching a wire behind the unit.
- Not Testing Before Reassembly: Power everything on and test all features before snapping the dash trim back on, so you don’t have to reopen it.
- Buying the Cheapest Stereo: Bargain-bin units are the most common source of early failures and no real warranty support. Spend a bit more for a known brand.
Enhancing Your Audio System
Once the head unit is in and working, a few add-ons take the sound further:
- Speakers: Factory speakers are usually the weakest link in a car audio system. Swapping in a matched set of aftermarket component or coaxial speakers, typically $80-$150 per pair, is one of the biggest audible upgrades you can make.
- Subwoofer: A compact powered subwoofer adds real low-end bass that factory speakers can’t reproduce. See our guide on wiring a subwoofer for the amp and power-wire steps.
- Amplifier: An external amp drives speakers or a subwoofer with more clean power than the stereo’s built-in amp can supply, useful for larger systems or louder listening without distortion. Our guide on wiring car audio the right way covers proper power and ground wire sizing.
- Sound Deadening: Foam or butyl mats applied under door panels and in the trunk reduce road noise and rattling, which makes the whole system sound noticeably clearer.
Maintaining Your New Stereo
- Clean the Screen: Wipe touchscreen units with a microfiber cloth; a proper screen cleaner handles fingerprints and smudges without scratching the coating.
- Check Connections: Give the wiring a quick tug-test every few months. A connection that was fine at install can work loose from vibration over time.
- Update Firmware: Many stereos support USB firmware updates that improve Bluetooth stability or add features; check the manufacturer’s site periodically.
- Avoid Extreme Heat: Parking in direct sun for long periods can shorten a touchscreen’s lifespan and cause temporary display lag. Shade or a windshield sunshade helps.
When to Call a Professional
DIY installs work well for most factory setups, but a car with a complex integrated audio system, such as one with a factory amplifier, digital sound processor, or built-in navigation tied into the dash, is a reasonable case for a professional installer. Expect to pay roughly $50-$150 in labor for that kind of job. If you’re a beginner working through this for the first time, our companion walkthrough, How to Install a Car Stereo: Easy Guide for Beginners, breaks the same process down at a slower, more beginner-focused pace.
Conclusion
Installing a car stereo comes down to five things done in order: disconnect the battery and let it discharge, remove the old unit carefully, match the wiring harness colors, ground each device separately, and test everything before you reassemble the dash. Skip any one of those and you end up chasing static, a whining noise, or a stereo that won’t power on after the trim is already back together.
Frequently Asked Questions
Do I need to be an expert to install a car stereo?
No. Basic hand tools and patience are enough for most standard installs. Cars with a factory-integrated amp, navigation, or premium sound system are the exception, and those are worth handing to a professional.
How long does it take to install a car stereo?
Plan on 1-3 hours for a standard single- or double-DIN install, including the wait time after disconnecting the battery. Repeat installs, or cars with a simple factory harness, usually go faster.
Can I install a stereo without a wiring harness adapter?
It’s possible by splicing directly into the factory wiring, but it’s riskier and harder to undo cleanly later. A vehicle-specific harness adapter makes the connection plug-and-play and keeps your factory wiring intact if you ever sell the car.
Will installing a new stereo void my car’s warranty?
Generally no, as long as the install doesn’t damage other systems. Under the Magnuson-Moss Warranty Act, a manufacturer can’t void your whole warranty just because you added an aftermarket stereo; they can only deny coverage for damage the aftermarket part actually caused.
What if my new stereo doesn’t fit my car’s dashboard?
Use a dash kit, a trim adapter sized to your factory opening, so a single- or double-DIN stereo fills the slot cleanly instead of leaving a visible gap.
Can I keep my steering wheel audio controls with a new stereo?
Yes, with a steering-wheel control interface adapter, typically $20-$40, that translates your factory button signals into a format the new stereo understands.
Why does my new stereo make a whining noise that changes with engine speed?
That’s a ground loop, usually caused by two or more accessories sharing one ground point. Run each device, the stereo, any amp, and any camera, its own dedicated ground wire to bare metal, and the noise typically disappears.
Products related to this article
Sponsored / affiliate links. As an Amazon Associate I earn from qualifying purchases. I may earn additional commission from eligible campaigns.