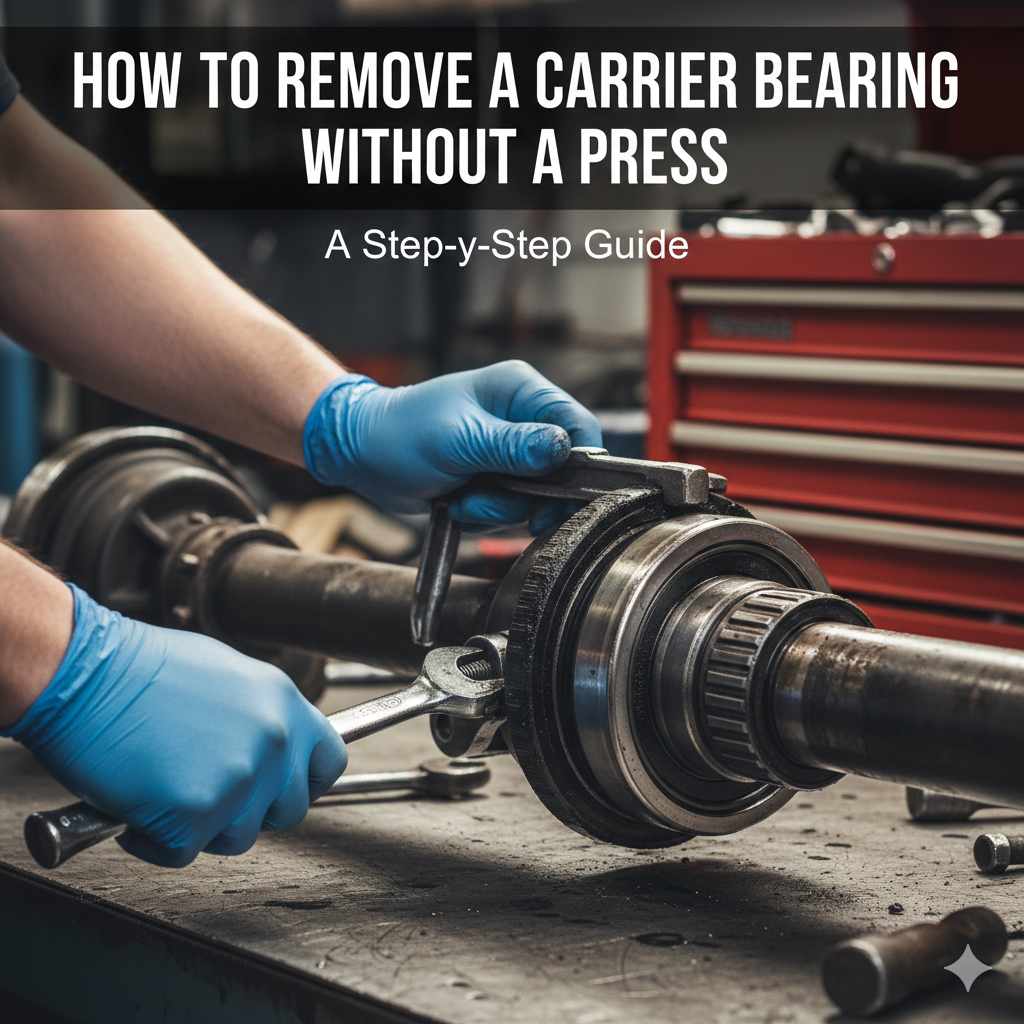
How to Remove a Carrier Bearing Without a Press
So, you’re trying to figure out How to Remove a Carrier Bearing Without a Press? It’s a common challenge for folks who are just starting to tinker with cars. The idea of using a press sounds scary, and it can be. Don’t worry, though. This guide makes the process super easy. We’ll explore simple steps that you can follow, and soon you’ll be removing carrier bearings like a pro. Let’s get started!
Tools You’ll Need
Before we explore the process of carrier bearing removal, getting your tools ready is key. Having everything prepared beforehand makes the job a lot smoother and keeps you from having to stop in the middle to find something. It also helps prevent damage to your car parts. We’ll keep the list simple. You probably have some of these already. A well-stocked toolbox makes any repair task easier.
You’ll need a few common tools and some less common ones to get the job done right. This list will prepare you to face the task ahead. Using the right tools also increases your safety and protects your vehicle’s components. Remember, safety comes first. Always wear safety glasses and gloves when working on your car.
Essential Items to Collect
Gathering the right equipment is important for a successful repair. These are the basic items you will need: a good set of sockets and wrenches, a sturdy hammer, and some penetrating oil. These tools allow you to disassemble the necessary components safely. You’ll also need some specific tools that are usually needed for this type of repair.
Socket Set and Wrenches: You’ll need a complete socket set, including both metric and standard sizes. Wrenches of different sizes are also helpful, especially for bolts in tight spots.
Make sure your sockets and wrenches are of good quality. Cheap tools can break easily, causing frustration and possibly injury.
Hammer: A ball-peen hammer is ideal. The hammer will be used for tapping and persuading the bearing.
A rubber mallet is a good alternative because it reduces the chance of damaging parts.
Penetrating Oil: This is a must-have for loosening rusted bolts and seized components.
Penetrating oil soaks into the rust and makes it easier to remove bolts. Using penetrating oil can make your life a lot easier.
Bearing Separator: This will help remove the bearing.
A bearing separator is an important tool for this job. It separates the bearing from its housing, making removal easier.
Pry Bar: A pry bar helps in prying out stubborn components or in positioning parts during reassembly.
The pry bar gives you leverage when you need it.
Heat Source (optional): A propane torch or heat gun can be very useful for expanding the housing, making bearing removal easier.
Use a heat source with caution and only if you have experience. Don’t overheat the housing.
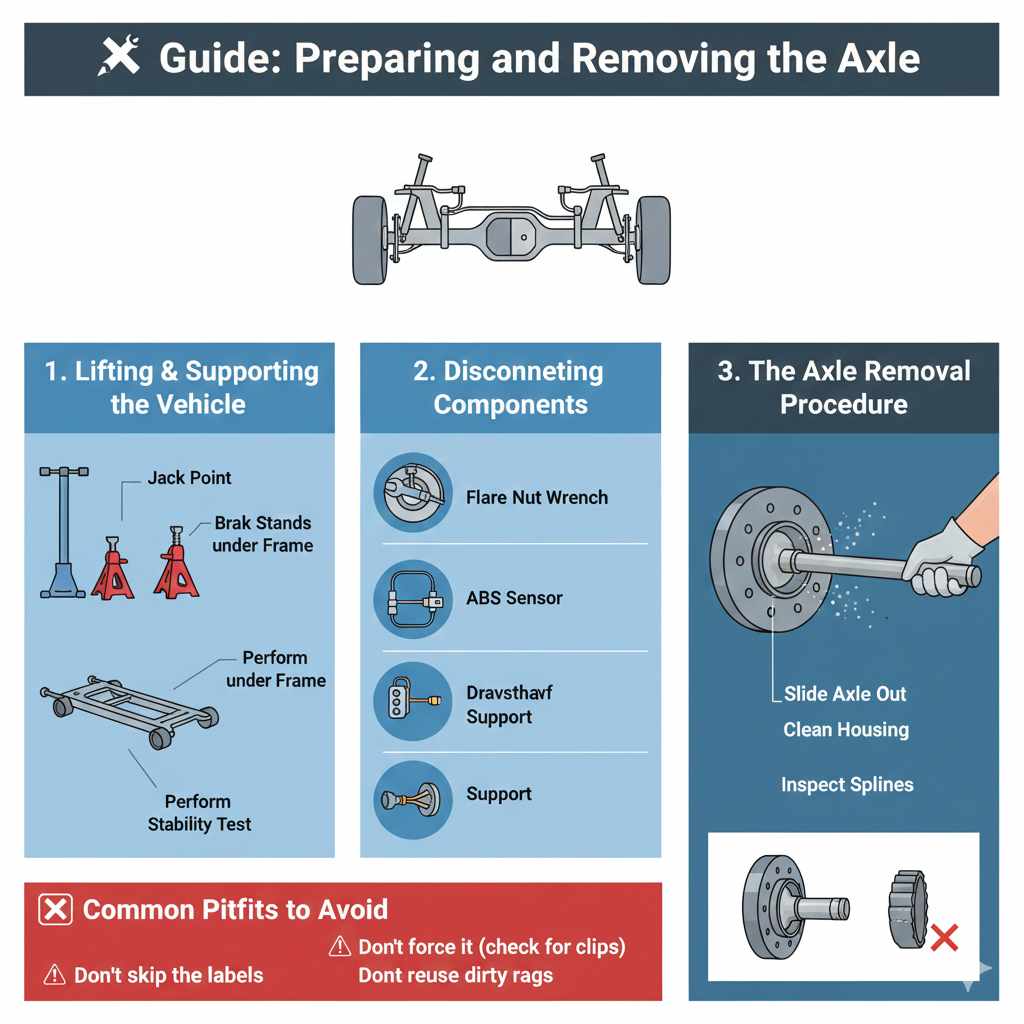
Taking Apart the Axle
The first step involves getting the axle ready for the carrier bearing removal. This includes safely lifting and supporting your vehicle. Make sure you disconnect any connected parts. Then, you can carefully remove the axle from the vehicle. This step is about gaining access to the carrier bearing. It’s also important for safety. Make sure the vehicle is secure and cannot move. Then, proceed with disconnecting parts.
The axle is a critical part of your car’s drivetrain. Removing it requires patience and a good workspace. Proper preparation and organization are essential. Work in a clean and well-lit area. This is also key for a smooth process.
Lifting and Supporting the Vehicle
Safety is the most important thing. You must always lift and support the vehicle safely. Use jack stands to secure the vehicle. Never work under a car supported only by a jack. This is incredibly dangerous.
Positioning the Jack: Place your jack on the appropriate jacking points of your vehicle.
Consult your vehicle’s owner’s manual for the exact locations.
Lifting the Vehicle: Slowly lift the vehicle until the tire is off the ground.
Go high enough so you have room to work.
Securing with Jack Stands: Place jack stands under the frame of your vehicle.
Ensure the jack stands are on a stable surface.
Lowering the Vehicle: Slowly lower the vehicle onto the jack stands.
Make sure it’s securely positioned on the stands.
Checking Stability: Give the vehicle a gentle shake to make sure it’s secure.
This ensures the vehicle won’t move while you’re working.
Disconnecting Components
Once the vehicle is safely supported, begin disconnecting the necessary parts. This includes disconnecting brake lines, ABS sensors, and other components. Proper disconnection ensures you don’t damage anything when you remove the axle. Label all disconnected components. This will help you during reassembly.
Brake Lines: Carefully disconnect the brake lines from the axle. Use a flare nut wrench to avoid damaging the lines.
Brake fluid is corrosive. Avoid spilling it on your car or yourself. Cap the lines to prevent leaks.
ABS Sensors: Unplug the ABS sensor connectors.
ABS sensors are often located near the axle.
Driveshaft (if applicable): If your vehicle has a driveshaft, unbolt it from the axle.
Make sure the driveshaft is supported so it doesn’t fall.
Axle Nuts/Bolts: Loosen and remove the axle nuts or bolts.
Use the correct size socket or wrench.
Other Connectors/Clamps: Detach any other connectors or clamps that may be attached to the axle.
Make a note of where these connectors go.
Axle Removal Procedure
After you have safely lifted the vehicle and disconnected the necessary components, it’s time to take out the axle. This part of the process is straightforward but must be done with care. Ensure all connections are disconnected. Then you can remove the axle. This step is about getting the axle out so you can work on removing the bearing.
Sliding the Axle Out: Carefully slide the axle out from the vehicle.
You may need to gently tap with a hammer if the axle is stuck.
Clean the Area: Clean the area around where the axle was to provide a clean work environment.
Clean the area to prevent dirt from entering. Protect the car components.
Inspection: Inspect the axle for any damage. Check for wear or damage.
Check the splines and the general condition.
Storing the Axle: Safely store the axle away from the work area.
Avoid damaging the axle while working on the carrier bearing.
Removing the Carrier Bearing
Now that you have the axle out, you can get the carrier bearing out. This requires some careful techniques to avoid damage. A bearing separator is your friend here. It makes the job easier and helps you avoid using a press. Always be patient and take your time. This ensures you don’t harm any of your car’s parts. Having the right tools and a methodical approach will help you.
Carrier bearings can be stubborn. Using the right methods and tools will make the removal much easier. With some persistence, and the right approach, you can successfully remove the carrier bearing. This step is key for replacing it. If you need to replace your bearing, this is the process to use.
Using a Bearing Separator
A bearing separator is designed to make removing bearings a lot easier. It allows you to apply force evenly around the bearing. Proper use of this tool will minimize the risk of damage. Always choose the correct size for your bearing. The right size will ensure the separator fits properly. Make sure to use it correctly to remove the bearing without damage.
Position the Separator: Position the bearing separator behind the carrier bearing.
Ensure it sits properly and is secure.
Tightening the Separator: Tighten the separator evenly to grip the bearing.
Do this gradually to avoid damage to the axle.
Applying Pressure: Use a wrench or impact wrench to apply pressure to the separator.
Do this slowly and evenly.
Removing the Bearing: Once enough pressure is applied, the bearing will start to move.
Continue until the bearing comes off.
Alternative Removal: You may use a slide hammer with the bearing separator. This tool can apply controlled force and make removal easier.
A slide hammer will help to apply more force if the bearing is stubborn.
Using Heat (Carefully)
Applying heat can help expand the housing, making it easier to remove the carrier bearing. But you have to be careful. Excess heat can damage the metal or the bearing. It’s essential to use a heat gun or propane torch with care. Make sure the heat is applied evenly. This way, the expansion is controlled. This method may not always be necessary, but it helps when the bearing is stuck.
Safety First: Wear protective gear and work in a well-ventilated area.
Wear eye protection to avoid injury.
Applying Heat: Use a heat gun or torch to heat the housing around the bearing.
Apply heat evenly, avoiding direct heat on the bearing itself.
Monitoring Temperature: Don’t overheat the housing.
High temperatures can damage the metal.
Trying Removal: After heating the housing, try removing the bearing with a bearing separator.
The heat should help expand the housing slightly.
Letting it Cool: Allow the component to cool before handling.
Avoid contact with hot surfaces.
Hammer and Punch Method
If you don’t have a bearing separator, you can try this method. It is more labor-intensive and has a higher risk of damage. This method uses a hammer and punch to carefully drive the bearing out. Use it only when you have no other options. You must be careful to avoid damage to your axle or bearing housing. This method calls for precision and patience. Make sure you take it slow and steady.
Finding a Suitable Punch: Choose a punch that fits the inner race of the bearing.
The punch should contact the inner race.
Positioning the Punch: Place the punch at an angle, hitting the edge of the inner race.
This is key to driving the bearing out.
Tapping with a Hammer: Gently tap the punch with a hammer.
Gradually increase the force.
Working Around: Rotate the axle. Hit the edge of the race from multiple directions.
This helps to remove the bearing evenly.
Checking Progress: Check how the bearing is moving.
Avoid getting the bearing stuck during removal.
Installing the New Bearing
With the old bearing out, you can get ready to put in the new one. The new bearing should be handled with care. The process requires cleanliness and a careful approach to ensure a perfect fit. Proper installation will help the bearing last a long time. It also keeps your car running smoothly.
The installation needs precision. You want to make sure the bearing is seated correctly. This can be done without a press using simple tools and techniques. Remember, take your time, and make sure everything is aligned properly. This will keep your car working correctly.
Cleaning the Housing
Before you install the new bearing, you need to clean the housing. This removes any dirt or debris that may interfere with installation. A clean housing is essential for good bearing performance. Cleaning helps guarantee that the new bearing seats correctly. It also ensures the housing is free from contaminants.
Wiping: Clean the housing with a clean cloth.
Use a clean cloth.
Inspection: Inspect the housing for any burrs or damage.
Any damage can affect the bearing.
Using a Brush: Use a wire brush to remove any rust or debris.
A wire brush can help get rid of stubborn deposits.
Solvents: Use a solvent to remove any grease or oil.
Make sure the solvent is compatible with the metal.
Drying: Ensure the housing is completely dry before proceeding.
Moisture can cause issues with the new bearing.
Using a Bearing Driver
A bearing driver is designed to make installing a new bearing much easier. This tool applies force evenly across the bearing. The correct driver size is important. Using the wrong size can damage the bearing. The driver ensures the bearing is pressed in evenly. This will help it sit properly in the housing.
Choosing the Correct Driver: Select a bearing driver that matches the size of the bearing.
The driver should contact the outer race.
Positioning the Bearing: Place the new bearing in the housing.
Ensure it is aligned properly.
Using the Driver: Use the bearing driver to tap the bearing into the housing.
The driver will transmit force evenly.
Working Around: Tap the bearing evenly, working around the edge.
This helps to ensure it enters squarely.
Checking the Fit: Regularly check the bearing is seating correctly.
Once it is flush, installation is complete.
Hammer and Punch for Installation
You can use a hammer and punch to install the bearing. This method can work when a bearing driver isn’t available. It can also be very helpful when you don’t have the space. Make sure you use the right punch size. You must carefully tap the bearing. This helps to prevent damage to the new bearing. Patience and precision are key.
Selecting a Punch: Find a punch that matches the outer race.
The punch should make contact with the outer race.
Positioning the Bearing: Place the new bearing carefully.
Ensure the bearing is aligned properly.
Using the Punch: Place the punch on the bearing’s outer race.
Tap the punch to drive the bearing in.
Working Around: Tap the bearing evenly.
Go around in a circle to keep it straight.
Checking Progress: Check that the bearing is entering the housing.
Once it is flush, the installation is complete.
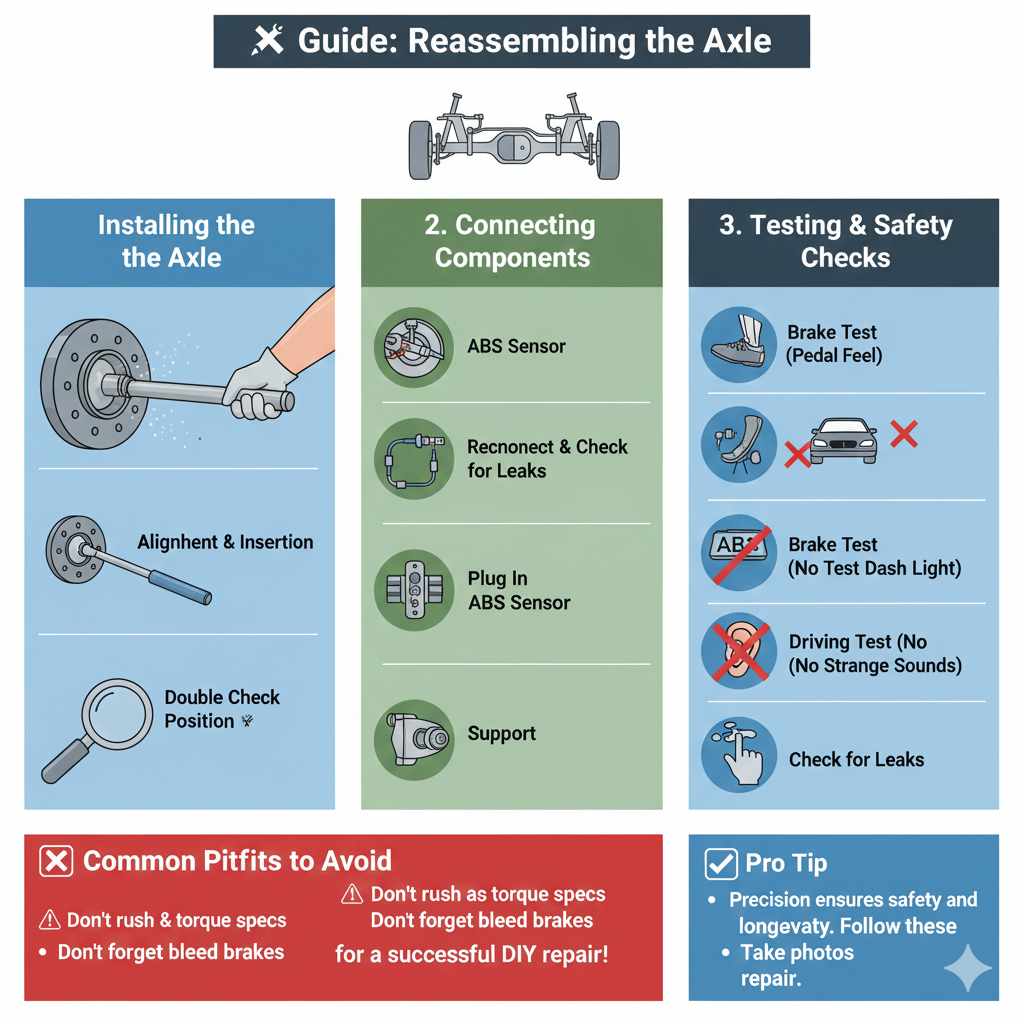
Reassembling the Axle
Once the new carrier bearing is in, you have to put the axle back together. This involves reassembling all the parts you took apart. Remember, it is important to pay close attention to detail. This also requires care and precision. Proper reassembly ensures your car runs smoothly and safely. Take your time to make sure everything fits and works correctly. This is just as important as the removal.
Putting everything back together can be easier if you take notes and pictures. Having all the components in order also matters. Make sure to double-check everything as you work. This is important to ensure your car is working properly. The steps are simple if you take the time to get them right.
Installing the Axle
Putting the axle back in requires the same care and attention you used to take it out. Double-check all connections. This makes sure everything is aligned. Make sure the axle goes in smoothly. This prevents any damage to the components. Following this careful process will guarantee a proper fit.
Alignment: Carefully align the axle with the hub.
This ensures it slides back smoothly.
Inserting the Axle: Slide the axle back into the housing.
Make sure it goes in straight.
Securing the Axle: Reinstall the axle nuts or bolts.
Use the correct torque specifications.
Tightening: Tighten the bolts according to the manufacturer’s specifications.
Use the correct torque wrench.
Double Checking: Check that the axle is correctly positioned.
The axle should fit securely.
Connecting the Components
Connecting the various components is essential for putting the axle back together. This process includes connecting brake lines, ABS sensors, and the driveshaft. Each connection is important. It ensures that all parts work together as intended. Double-check each connection to ensure it is secure. This will ensure your vehicle runs without issues.
Reconnecting Brake Lines: Reconnect the brake lines.
Make sure there are no leaks.
Reconnecting ABS Sensors: Plug in the ABS sensor connectors.
This ensures the ABS system functions correctly.
Reconnecting the Driveshaft (if applicable): Reconnect the driveshaft.
Tighten the bolts to the correct torque.
Checking: Check that all connections are secure.
Double-check everything.
Final Touches: Reinstall any clamps or clips.
Make sure everything is as it should be.
Testing and Safety Checks
Before you get back on the road, testing and safety checks are essential. This is your chance to confirm that everything is working properly. Testing helps to discover any issues before you start driving. Safety checks help you prevent accidents. Make sure everything is operating correctly and safely. Take the time to conduct these checks. Then you will know that the job is done right.
Brake Test: Test the brakes.
Check the pedal feel for any issues.
ABS Test: Test the ABS system.
Make sure the ABS light is not on.
Driving Test: Take the vehicle for a short test drive.
Listen for any strange sounds.
Checking for Leaks: Check for any leaks.
Look for leaks in the brake lines.
Final Inspection: Perform a final inspection of all work done.
This will help prevent any potential problems.
A recent study found that nearly 10% of vehicle breakdowns are due to axle or wheel-bearing issues. The number of people attempting DIY car repairs has increased by 15% in the last few years.
Frequently Asked Questions
Question: Can I really remove a carrier bearing without a press?
Answer: Yes, you absolutely can! This guide provides several methods, including using a bearing separator, heat (with caution), and the hammer and punch method, all of which avoid the need for a press.
Question: What’s the most common mistake people make during carrier bearing removal?
Answer: A frequent mistake is using the wrong tools or applying excessive force, leading to damage to the axle or bearing housing. Always use the right tools for the job.
Question: How do I know if my carrier bearing is bad?
Answer: Signs of a bad carrier bearing include unusual noises like humming or grinding, excessive vibration, and sometimes, a clunking sound when you change speed or direction. It’s important to inspect your vehicle regularly.
Question: What kind of grease should I use for installing a new carrier bearing?
Answer: Use a high-quality, high-temperature grease designed for automotive bearings. This grease should be applied lightly to the bearing’s outer race and the housing. This keeps it running smoothly.
Question: How do I prevent rust and make carrier bearing removal easier next time?
Answer: To prevent rust, apply anti-seize compound to the axle and other components during reassembly. For easier removal next time, consider using penetrating oil regularly on bolts and components that are prone to rust.
Final Thoughts
You have made it through the steps, and now you know how to remove a carrier bearing without a press. The process can seem tricky at first, but with the right tools, some patience, and the techniques we covered, you can totally do this! Remember, having the right tools makes everything easier. Taking it slow, being careful, and understanding each step are key. You’ve explored how to get your vehicle ready, take apart the axle, and remove and install the carrier bearing. Then you reassembled everything, performed final checks, and tested the system. Now you can get your car running smoothly. So, get out there and start working, and you’ll find that removing a carrier bearing is a task you can successfully complete. Keep going, and you’ll become more confident!