How to Remove Sprinkler Water Spots from Your Car
Hey there! If you’ve ever parked your car near a sprinkler, you know the frustration of finding those pesky water spots all over your shiny paint. They’re not just annoying—they can make your car look dull and neglected. I’ve dealt with this issue myself, and after trying countless methods, I’ve learned what really works. In this article, I’m sharing everything I’ve discovered about how to remove sprinkler water spots from your car. Whether you’re a car enthusiast or just someone who wants their ride to sparkle, I’ve got you covered with practical, easy-to-follow steps. Let’s dive in and get your car looking pristine again!
Understanding Sprinkler Water Spots
Sprinkler water spots are those stubborn, cloudy marks left on your car’s surface after water from a sprinkler dries. The culprit? Minerals like calcium and magnesium in the water. When the water evaporates, these minerals stick to your car’s paint, glass, or chrome, leaving behind white or chalky spots. I first noticed them on my car after parking near my neighbor’s lawn sprinkler. At first, I thought a quick rinse would do the trick, but those spots laughed at my garden hose.
These spots aren’t just a cosmetic issue. If left untreated, they can etch into your car’s clear coat, causing permanent damage. The longer they sit, the harder they are to remove. That’s why I learned to tackle them as soon as I spot them. Knowing what you’re dealing with is half the battle, so let’s talk about why these spots form and how to prevent them from becoming a bigger problem.
Why Sprinkler Water Spots Are Tricky
You might wonder why sprinkler water spots are tougher than regular watermarks. It’s all about the water’s mineral content. Sprinkler systems often use hard water, which is loaded with minerals. When that water dries on your car, it leaves behind tiny mineral deposits that bond to the surface. Unlike rainwater, which might just leave a light film, sprinkler water can be relentless.
I learned this the hard way when I ignored the spots on my car for a week. The sun baked them into the paint, and what started as a quick fix turned into a weekend project. The type of surface matters too—glass, paint, and chrome all react differently to these spots. Glass is more forgiving, but paint and chrome can suffer if you don’t act fast. Let’s break down the tools and supplies you’ll need to tackle this issue.
Tools and Supplies You’ll Need
Before you start scrubbing, gather the right tools. Trust me, having everything ready makes the process so much smoother. Here’s what I keep in my garage for dealing with water spots:
| Item | Purpose |
|---|---|
| Microfiber cloths | Soft, non-abrasive cloths for wiping without scratching your car’s surface. |
| White vinegar | Breaks down mineral deposits effectively and is safe for most car surfaces. |
| Car wash soap | Cleans the car and prepares the surface for spot removal. |
| Spray bottle | For applying vinegar or water evenly. |
| Bucket | For mixing soap and water during washing. |
| Clay bar | Removes bonded contaminants that vinegar alone can’t handle. |
| Polishing compound | For stubborn spots that have etched into the paint. |
| Wax or sealant | Protects your car after cleaning to prevent future spots. |
| Hose or pressure washer | For rinsing the car thoroughly. |
| Glass cleaner | Specifically for tackling water spots on windows. |
I always keep these items handy because you never know when a sprinkler will sneak up on your car. Most of these are affordable and easy to find at auto stores or online. Now, let’s get to the step-by-step process of removing those spots.
Step-by-Step Guide to Removing Sprinkler Water Spots
I’ve tried a bunch of methods, and this process is the one that works best for me. It’s simple, effective, and won’t harm your car if done carefully. Follow these steps, and your car will be spot-free in no time.
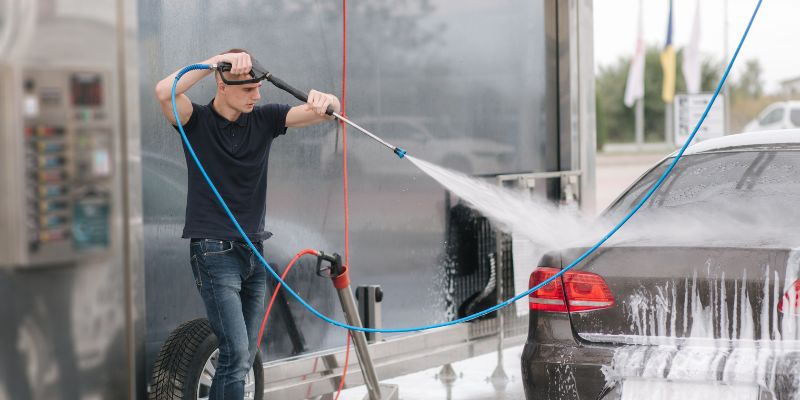
Step 1: Rinse the Car Thoroughly
Start by giving your car a good rinse. I use a hose with a spray nozzle to blast away loose dirt and debris. This step is crucial because you don’t want to rub dirt into the paint while cleaning the spots. If you have a pressure washer, even better—just keep it on a low setting to avoid damaging the paint. Make sure to rinse the entire car, focusing on areas with visible water spots.
Step 2: Wash with Car Soap
Next, wash your car with a quality car wash soap. I mix the soap in a bucket with water and use a microfiber mitt to clean the surface. This removes any remaining dirt and loosens the water spots a bit. Pay extra attention to the spotted areas, but don’t scrub too hard yet. Rinse thoroughly and dry with a microfiber towel to prevent new water spots from forming.
Step 3: Use White Vinegar for Mild Spots
White vinegar is my go-to for most sprinkler water spots. It’s cheap, safe, and works like magic on mineral deposits. I pour some vinegar into a spray bottle and mist it over the affected areas. Let it sit for about 5-10 minutes to break down the minerals. Then, wipe gently with a microfiber cloth. For glass surfaces, this usually does the trick right away. On paint, you might need to repeat this step a couple of times.
Step 4: Try a Clay Bar for Stubborn Spots
If vinegar doesn’t fully remove the spots, a clay bar is your next best friend. I was skeptical at first, but after using one, I’m hooked. Spray a lubricant (like a quick detailer or soapy water) on the area, then gently rub the clay bar over the spots. It picks up bonded contaminants that vinegar can’t touch. Be patient and work in small sections. You’ll feel the surface getting smoother as the spots disappear.
Step 5: Polish for Etched Spots
Sometimes, water spots etch into the paint, leaving faint marks. I had this happen on my car’s hood after a particularly hot week. A mild polishing compound can help. Apply a small amount to a microfiber applicator pad and work it into the affected area in circular motions. Don’t overdo it—too much polishing can wear down your clear coat. Wipe off the residue and check your progress. This step usually restores the shine.
Step 6: Wax or Seal Your Car
After removing the spots, protect your car with a layer of wax or sealant. I learned this step after noticing new spots forming too quickly. Wax creates a barrier that makes it harder for minerals to stick. Apply it with a foam applicator pad, let it haze, and buff it off with a clean microfiber cloth. Your car will not only look great but also stay protected longer.
Tackling Water Spots on Different Surfaces
Not all car surfaces are the same, and I’ve found that each requires a slightly different approach. Here’s how I handle water spots on various parts of my car.
Paint
Car paint is the trickiest because it’s prone to etching. I always start with vinegar and move to a clay bar if needed. For older spots, polishing is a must. Be gentle to avoid damaging the clear coat. I once over-polished a spot and ended up with a dull patch—lesson learned!
Glass
Glass is more forgiving. Vinegar usually removes spots easily, followed by a good glass cleaner for a streak-free finish. I use a dedicated glass microfiber cloth to avoid lint. If the spots are stubborn, a little elbow grease with the clay bar works wonders.
Chrome
Chrome surfaces, like trim or wheels, can show water spots prominently. Vinegar works well here too, but I avoid abrasive tools like clay bars on chrome to prevent scratches. After cleaning, I apply a chrome polish to restore the shine.
Preventing Sprinkler Water Spots
Prevention is easier than removal, trust me. After dealing with water spots multiple times, I made some changes to keep them at bay. Here are my top tips:
- Park Strategically: I now avoid parking near sprinklers, especially during watering hours. If you can’t avoid it, try to move your car before the water dries.
- Use a Car Cover: A breathable car cover is a lifesaver if you park in a sprinkler-heavy area. I got one for my car, and it’s saved me so much hassle.
- Regular Waxing: Waxing every few months creates a protective layer. I noticed fewer spots sticking to my car after I started waxing regularly.
- Rinse Immediately: If your car gets hit by a sprinkler, rinse it off as soon as possible. The sooner you act, the less likely the spots will set.
- Install a Water Softener: If you have sprinklers at home, consider a water softener for your irrigation system. It reduces mineral content, which means fewer spots.
Common Mistakes to Avoid
I’ve made plenty of mistakes while trying to remove water spots, so let me save you some trouble. Don’t use abrasive sponges or household cleaners—they can scratch your paint or strip wax. Avoid letting vinegar sit too long on chrome; it can dull the finish. And never skip drying your car after rinsing—new water spots can form if you let it air dry. Lastly, don’t ignore the spots, thinking they’ll go away on their own. They won’t, and they’ll only get worse.
When to Call a Professional
Most water spots can be handled at home, but sometimes, you need a pro. If the spots have deeply etched into the paint or if you’re not confident using a clay bar or polisher, take your car to a detailer. I had to do this once when spots on my car’s roof wouldn’t budge. A professional detailer used a machine polisher and had it looking brand new. It cost me about $100, but it was worth it for the peace of mind.
Conclusion
Dealing with sprinkler water spots on your car can feel like a chore, but with the right tools and techniques, it’s totally manageable. I’ve gone from dreading those chalky marks to confidently tackling them in an afternoon. By rinsing, washing, using vinegar, clay bars, and polishing when needed, you can restore your car’s shine and keep it protected. Plus, a little prevention goes a long way—park smart, wax regularly, and rinse quickly to avoid future headaches. Your car deserves to look its best, and with these steps, you’ll have it sparkling in no time. Happy cleaning!
Frequently Asked Questions
Can I Use Household Vinegar to Remove Water Spots?
Yes, household white vinegar works great. I use it all the time. Just spray it on, let it sit for a few minutes, and wipe it off with a microfiber cloth. It’s safe for paint and glass but don’t let it sit too long on chrome.
How Often Should I Wax My Car to Prevent Water Spots?
I wax my car every three to four months. It creates a protective layer that makes water spots less likely to stick. If you live in a hard-water area, consider waxing more often.
Will Water Spots Damage My Car Permanently?
If you act quickly, most water spots won’t cause permanent damage. But if they sit for too long, especially in the sun, they can etch into the paint. I learned this the hard way—don’t ignore them!
Can I Use a Clay Bar on Glass?
Absolutely! I’ve used a clay bar on my car’s windows when vinegar wasn’t enough. Just use plenty of lubricant to avoid scratches, and it’ll leave the glass smooth and spot-free.
Is It Safe to Use a Pressure Washer on My Car?
Yes, but use a low-pressure setting. I made the mistake of using high pressure once and ended up with paint chips. Stick to a gentle spray to rinse off dirt without harming the finish.