How to Repair a Cloth Car Seat Tear: 3 Methods That Actually Work
Small tears under an inch repair well with fabric glue and a patch; larger or seam tears need stitching; and a no-sew liquid repair kit works for both if you want a nearly invisible fix.
Using the wrong method — or regular household glue instead of flexible fabric adhesive — is why so many DIY repairs crack or re-tear within months. This guide covers all three methods, the tools each one actually needs, and when a $100-$300 professional repair is the better call.
Quick Answer
For tears under an inch, glue a matching fabric patch underneath and let it cure 24 hours. For larger or seam tears, stitch with heavy-duty upholstery thread and a curved needle. For a nearly invisible fix on either size, use a color-matched liquid fabric repair kit instead of visible patching. Always use flexible fabric glue, never household glue.
Understanding the Damage
Before you grab your tools, take a close look at the tear. Is it a small nick, a clean cut, or a jagged rip? I remember when my dog scratched my car seat, leaving a messy tear about two inches long. The type of damage matters because it decides the repair method. Small tears (less than an inch) are easier to fix with simple patching, while larger or frayed tears might need stitching or a combination of techniques. Check if the tear is on a seam or in the middle of the fabric. Seams are trickier since they’re under tension, but I’ll cover how to handle those too.
Also, look at the fabric type. Most cloth car seats are made of polyester, nylon, or a blend. Knowing this helps you pick the right materials, like matching thread or patches. If the tear exposes the foam underneath, you’ll need extra steps to ensure a smooth repair — see our broader car seat repair guide if the damage also involves the foam padding or recline mechanism, not just the fabric. Don’t rush this part—understanding the damage saves you from making it worse.
Gathering the Right Tools and Materials
I learned the hard way that having the right tools makes all the difference. The first time I tried fixing a tear, I used a random needle and thread from my mom’s sewing kit, and let’s just say it didn’t end well. Here’s what you’ll need for a proper repair:
| Item | Purpose |
|---|---|
| Upholstery needle | Strong enough to pierce thick car seat fabric without breaking. |
| Heavy-duty upholstery thread | Matches your seat color and is durable for long-lasting repairs. |
| Fabric patch | Matches your car’s fabric for patching larger tears. |
| Scissors | For cutting thread, patches, or loose fibers cleanly. |
| Fabric glue | Secures patches or reinforces stitches for a seamless look. |
| Seam ripper | Helps undo stitches if the tear is near a seam. |
| Tweezers | For pulling loose threads or positioning small patches. |
| Rubbing alcohol and cloth | Cleans the area to ensure glue or patches stick properly. |
| Small foam piece | Fills gaps if the tear exposes the foam underneath. |
You can find these at auto parts stores, craft shops, or online. I got a great upholstery repair kit on Amazon for about $20, and it had everything I needed. Make sure the thread and patch match your seat’s color and texture as closely as possible. If you’re unsure, take a photo of the seat and compare it in-store.
Best No-Sew Repair Kit Pick
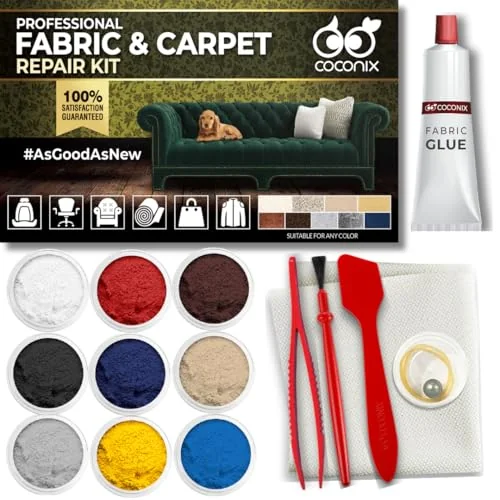
COCONIX Fabric & Carpet Repair Kit
The exact style of kit behind the no-sew liquid repair method covered above — color-customizable to match most cloth seat shades.
- Best for: a nearly invisible repair without stitching or a visible patch
- Why we picked it: it’s the same liquid-repair category this guide’s Method 3 walks through
- Main drawback: color-matching takes a bit of practice on the first attempt
Compare more car seat repair options
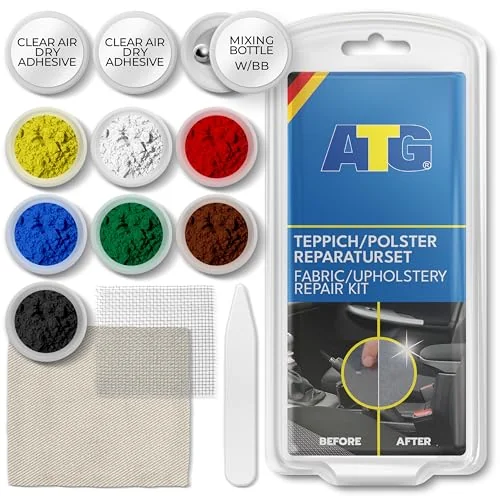 Option 1 ATG Upholstery Repair Kit
|
 Option 2 Scotchgard Fabric Protector
|
 Option 3 Budget Fabric Protector Spray
|
As an Amazon Associate we earn from qualifying purchases.
Preparing the Area for Repair
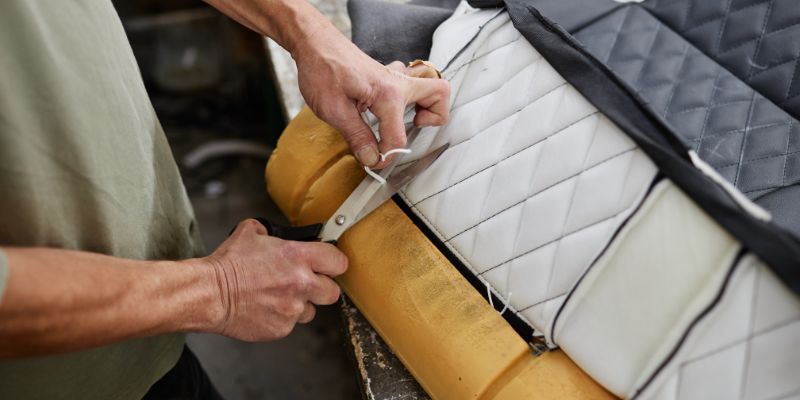
Before you start fixing the tear, you need to prep the area. I made the mistake of skipping this once, and the glue didn’t stick because of dirt on the seat. First, vacuum the seat to remove dust, crumbs, or pet hair. Then, use rubbing alcohol on a clean cloth to wipe the area around the tear. This removes oils and grime, helping the glue or patches adhere better. Let it dry completely—damp fabric can mess up your repair.
If there are loose threads or frayed edges, trim them carefully with scissors. Be gentle so you don’t make the tear bigger. If the foam underneath is exposed or damaged, cut a small piece of foam to fit the gap. I used a bit of craft foam from a hobby store, and it worked like a charm. Push the foam into the tear to create a smooth surface before patching or stitching.
Repairing Small Tears with Glue and Patching
For small tears (less than an inch), a fabric patch and glue can work wonders. I had a tiny rip from a keychain that I fixed this way, and you can barely tell it was there. Here’s how to do it:
- Cut a patch: Find a piece of fabric that matches your seat. If you can’t find an exact match, check under the seat or inside the car for a hidden piece of the same material. Cut the patch slightly larger than the tear—about a quarter-inch bigger on all sides.
- Apply fabric glue: Use a small brush or toothpick to spread a thin layer of fabric glue on the underside of the patch. Don’t overdo it; too much glue can seep through and look messy.
- Place the patch: Use tweezers to carefully position the patch over the tear. If the tear is deep, tuck the patch slightly under the edges of the fabric for a cleaner look. Press down firmly and smooth out any wrinkles.
- Let it dry: Hold the patch in place for a minute, then let it dry for at least 24 hours. I put a heavy book on top to keep pressure on it overnight.
This method is quick and works great for minor damage. If the tear is in a high-traffic area, like where you sit, reinforce it with a few stitches after the glue dries.
Stitching Larger or Seam Tears
For bigger tears or those along a seam, stitching is your best bet. I had a tear along the seam of my driver’s seat that was about three inches long, and stitching saved it. It takes patience, but it’s worth it. Here’s how I did it:
- Choose the right stitch: A curved upholstery needle and heavy-duty thread are perfect for car seats. I used a whip stitch for a clean, tight hold, but a running stitch works for simpler repairs.
- Start from the back: If possible, access the underside of the seat fabric by removing the seat cover (check your car’s manual for how to do this safely). Starting from the back hides the knot and makes the repair look neater.
- Stitch carefully: Push the needle through both sides of the tear, pulling the thread tight but not so tight it puckers the fabric. Space your stitches about an eighth of an inch apart for strength. If the tear is on a seam, follow the original stitch line as closely as possible.
- Knot and secure: Once you’ve closed the tear, tie a small knot on the underside and trim excess thread. For extra durability, I dabbed a bit of fabric glue along the stitches.
If the tear is too big to close with stitches alone, combine this with a patch. Sew the patch in place first, then stitch the tear closed over it. It’s a bit more work, but it holds up better.
Method 3: No-Sew Liquid Fabric Repair Kits
A third option skips both visible stitching and a separate patch: color-matched liquid fabric repair kits (Coconix and similar brands) blend fabric adhesive into a nearly invisible fix. This method works on both small tears and larger holes and is worth considering if you want a factory-look repair rather than a patch you can see.
- Slide backing fabric under the tear: Cut a piece of backing fabric with rounded edges slightly larger than the hole, then use the kit’s spatula to slide it beneath the torn area.
- Apply the liquid fabric adhesive: Spread the color-matched adhesive over the tear, slightly larger than the hole itself, so it bonds to the backing fabric underneath.
- Add a texture/grain pattern if included: Some kits include a grain sheet to press into the wet adhesive, mimicking your seat’s original fabric texture.
- Heat-set with an iron: Use a cloth barrier and a warm iron (per the kit’s instructions) to cure the adhesive so it bonds permanently and blends with the surrounding fabric.
Unlike a fabric patch, there’s no visible seam or overlap — the repair reads as part of the original upholstery once it’s cured.
Reinforcing the Repair for Longevity
After fixing the tear, you want it to last. I learned this when my first repair started fraying after a few months. To make your repair durable:
- Reinforce with glue: Apply a thin layer of fabric glue along the edges of the patch or stitches. This prevents fraying and keeps everything in place.
- Use a fabric protector: Spray a fabric protector (like Scotchgard) over the repaired area to guard against stains and wear. I did this, and it kept my seat looking fresh.
- Avoid stress on the repair: If the tear is in a high-use area, try not to put too much pressure on it. For example, don’t slide across the seat when getting in or out.
If the tear is in a spot that gets a lot of wear, consider a professional repair or a seat cover to protect it long-term.
When to Call a Professional
Sometimes, a tear is too big or complex for a DIY fix. I tried fixing a huge rip in my back seat once, but it was near a seam and kept splitting. That’s when I knew I needed help. If the tear is longer than six inches, involves multiple seams, or the fabric is heavily worn, a professional upholsterer is your best option. They have industrial machines and expertise to make the repair seamless. Check local auto shops or upholstery specialists for quotes.
📊 Professional cloth car seat repair typically costs $100-$300 in the US, depending on tear size and location — Source: local auto upholstery shop quotes (industry-standard range, no single linkable national source available for this labor cost).
“I tried fixing a huge rip in my back seat myself, but it was right next to a seam and kept splitting open again no matter how I stitched it — that’s when I gave up and took it to a professional.”
Preventing Future Tears
Once you’ve fixed the tear, you’ll want to keep your seats in good shape. I started being more careful after my repairs, and it’s made a big difference. Here are some tips:
- Cover sharp objects: Keep keys, tools, or anything sharp in a pocket or bag to avoid accidental tears.
- Use seat covers: I got some affordable seat covers for my car, and they’ve saved my seats from further damage.
- Clean regularly: Vacuum and clean your seats monthly to prevent dirt from weakening the fabric — see our cloth car seat cleaning guide for the right products to use.
- Pet precautions: If you have pets, use a pet seat cover or blanket to protect the upholstery.
Cloth seats face other kinds of damage too — if you’re dealing with a scorch mark rather than a tear, our guide on fixing a cigarette burn in a car seat covers that repair specifically.
Conclusion
Fixing a cloth car seat tear doesn’t have to be a headache. With the right tools, a bit of patience, and the steps I’ve shared, you can make your car’s interior look great again. I’ve been through this process a few times, and each repair taught me something new. Whether you’re patching a small rip or stitching a larger tear, take your time and follow the process. You’ll save money and feel proud every time you sit in your car. Got more questions? Check out the FAQs below, and let’s keep those seats looking sharp!
Frequently Asked Questions
Can I repair a cloth car seat tear without sewing?
Yes, you can! For small tears, a fabric patch and fabric glue work well. Clean the area, apply the patch with glue, and let it dry for 24 hours. It’s simple and effective for minor damage.
How do I find a fabric patch that matches my car seat?
Look under your seat or in hidden areas of your car for a matching piece of fabric. If that’s not an option, visit an auto parts store or online retailer for upholstery fabric that closely matches your seat’s color and texture.
How long does a cloth car seat repair last?
A good repair can last years if done right. Use heavy-duty thread, reinforce with fabric glue, and apply a fabric protector to make it durable. Avoid putting stress on the repaired area to extend its life.
Can I use regular glue for car seat repairs?
No, regular glue won’t hold up. Use fabric glue or upholstery adhesive designed for car seats. These are flexible and strong enough to handle the wear and tear of daily use.
Should I replace the seat instead of repairing it?
For small to medium tears, repairing is cheaper and works well. If the tear is very large, involves multiple seams, or the fabric is worn out, replacing the seat or getting professional help might be better. Compare costs to decide.
Products related to this article
Sponsored / affiliate links. As an Amazon Associate I earn from qualifying purchases. I may earn additional commission from eligible campaigns.