How to Clean Car Seats with Little Green: A Step-by-Step Guide to a Spotless Interior
Hey there! If you’re like me, your car is more than just a way to get from point A to point B—it’s a second home. Whether it’s crumbs from your kid’s snacks, a coffee spill from a hectic morning, or muddy paw prints from your furry co-pilot, car seats take a beating. I’ve been there, staring at a stain and wondering how to make my car look fresh again without spending a fortune at the detail shop. That’s where the Bissell Little Green machine comes in—a game-changer for cleaning car seats. In this article, I’m sharing everything I’ve learned from my own experience using the Little Green to tackle messes. I’ll walk you through each step, share tips I’ve picked up, and make sure your car seats look as good as new. Let’s dive in!
Why the Bissell Little Green Is Perfect for Car Seats
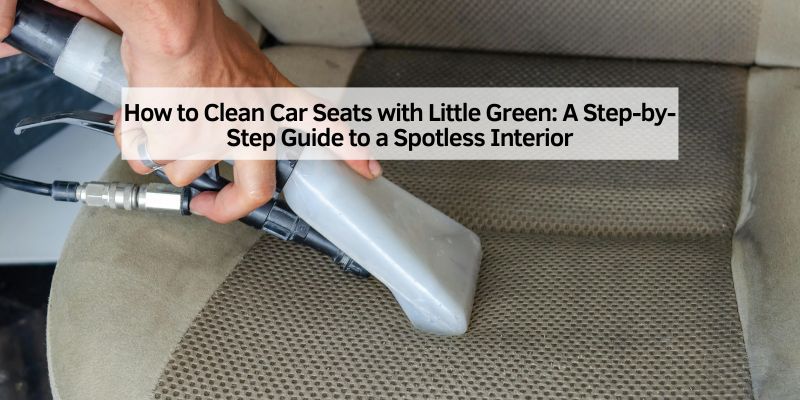
I remember the first time I used the Bissell Little Green. I was skeptical—could a compact machine really handle the chaos of my car’s interior? Spoiler alert: it did. The Little Green is a portable upholstery and carpet cleaner designed for small, tough jobs. It’s lightweight, easy to use, and powerful enough to suck out dirt and stains from fabric car seats. Its hose attachment and small brush make it ideal for getting into the nooks and crannies of your car’s upholstery. Plus, it’s affordable and doesn’t require a professional to operate. Whether you’re dealing with cloth seats or need to spot-clean a child’s car seat, this machine is a lifesaver. It sprays a cleaning solution, agitates the stain, and vacuums up the dirty water, leaving your seats clean and fresh.
What I love most is how versatile it is. It’s not just for cars—you can use it on furniture, rugs, or even pet beds. But for car seats, it’s a dream. It tackles everything from juice spills to pet hair without soaking the fabric, which means no moldy smells later. If you’ve got kids or pets, or just love your morning coffee a little too much, the Little Green is about to become your best friend.
What You’ll Need Before You Start
Before we get to the fun part—cleaning—let’s talk about what you need. I learned the hard way that preparation is key. The first time I tried cleaning my car seats, I didn’t have everything ready, and I was running back and forth to the house. Save yourself the hassle and gather these supplies:
| Item | Purpose |
|---|---|
| Bissell Little Green Machine | Sprays, scrubs, and extracts dirt and stains |
| Bissell Cleaning Solution | Formulated for the Little Green; breaks down stains |
| Microfiber Cloths | For wiping down surfaces and absorbing excess water |
| Soft-Bristle Brush | For gentle scrubbing on stubborn stains |
| Vacuum with Crevice Tool | To remove loose dirt and debris before cleaning |
| Bucket of Warm Water | For rinsing brushes or wiping down surfaces |
| Disposable Gloves (Optional) | To keep your hands clean, especially for gross messes |
| Fan or Towels | To speed up drying or absorb moisture |
You’ll also want a well-ventilated area, like an open garage or driveway, to work in. Trust me, the smell of cleaning solution can be strong, and good airflow helps the seats dry faster. I also recommend checking your car seat manual if you’re cleaning a child’s car seat—some have specific cleaning instructions to avoid damaging safety features.
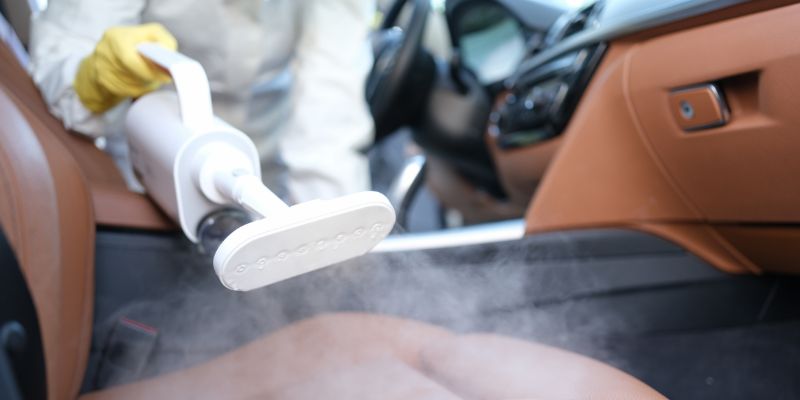
Step-by-Step Guide to Cleaning Car Seats with the Little Green
Now, let’s get to the good stuff—how to actually clean your car seats. I’ve broken this down into steps based on what’s worked for me. Follow these, and you’ll have spotless seats in no time.
Step 1: Prepare Your Car and Seats
Before you even touch the Little Green, you need to prep your car. I made the mistake once of skipping this step, and I ended up pushing crumbs deeper into the fabric. Start by removing any loose items from your car—think toys, wrappers, or that random sock your kid left behind. Then, grab your vacuum with a crevice tool and go to town. Vacuum every inch of the seats, focusing on seams and crevices where dirt loves to hide. If you’re cleaning a child’s car seat, take it out of the car for better access. This step is crucial because it removes surface debris, so the Little Green can focus on the deep stains.
Next, check for any removable seat covers or padding. Some car seats, especially child seats, have machine-washable covers. If yours does, remove them and follow the manufacturer’s washing instructions. For fixed upholstery, you’re ready to move on.
Step 2: Spot-Test the Cleaning Solution
I can’t stress this enough: always spot-test. The first time I used the Little Green, I was so excited that I sprayed the solution everywhere, only to realize later I should’ve checked first. Pick a hidden spot, like under the seat or behind the headrest, and apply a small amount of the Bissell cleaning solution. Wait a minute, then wipe it with a microfiber cloth. If there’s no discoloration or damage, you’re good to go. This step saves you from accidentally ruining your upholstery—especially if your car has delicate or light-colored fabric.
Step 3: Fill and Set Up the Little Green
Setting up the Little Green is super easy, but it’s worth doing right. Fill the clean water tank with warm water (not boiling—too hot can damage the machine) and add the recommended amount of Bissell cleaning solution. The machine usually comes with a measuring cap to make this foolproof. Secure the tank, plug in the machine, and attach the hose with the cleaning tool. I like the small brush attachment for car seats because it’s perfect for tight spaces. Turn on the machine and test the spray on a cloth to make sure it’s working properly. You’re now ready to tackle those stains!
Step 4: Apply the Cleaning Solution
Work on one seat at a time to keep things manageable. Lightly spray the cleaning solution onto the seat, holding the tool a few inches away. You want the fabric to be damp, not soaked. I learned this the hard way when I oversaturated a seat and had to wait forever for it to dry. Focus on stained areas first, but don’t be afraid to spray the entire seat for an even clean. Let the solution sit for about a minute to loosen the dirt. This dwell time is key—it gives the cleaner a chance to break down stubborn stains like grease or juice.
Step 5: Scrub Gently
Here’s where the Little Green shines. Use the brush attachment to gently scrub the seat in circular motions. The machine sprays and scrubs at the same time, which makes it feel like you’re a pro detailer. For tough stains, like that time my kid spilled yogurt, I use a soft-bristle brush to agitate the area before using the machine’s brush. Be gentle—scrubbing too hard can damage the fabric or push dirt deeper. Work in small sections, and don’t let the solution dry on the seat. If you’re cleaning a child’s car seat, avoid scrubbing the harness straps too aggressively, as it can weaken them.
Step 6: Extract the Dirty Water
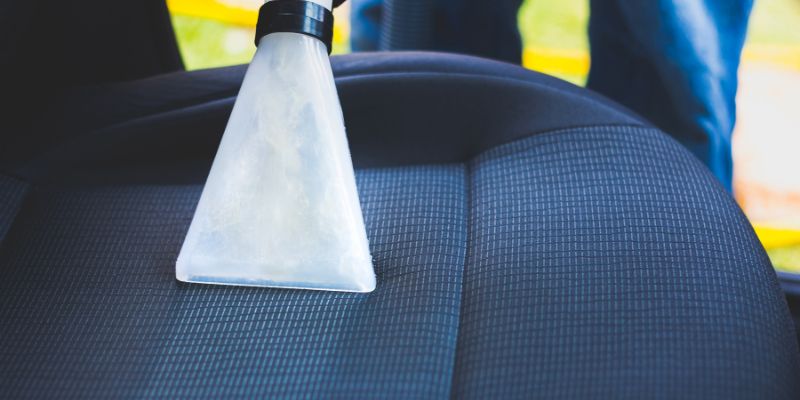
This is my favorite part—watching the Little Green suck up all the grime. After scrubbing, press the tool firmly against the seat and pull the trigger to vacuum up the dirty water. Move slowly to ensure you’re extracting as much liquid as possible. You’ll be amazed at how dirty the water in the collection tank looks! I once cleaned a seat that looked “okay” but ended up with a tank full of brown water. Go over each section a few times, especially on stubborn stains. If the seat still looks dirty, repeat the spray-and-scrub process.
Step 7: Rinse and Dry
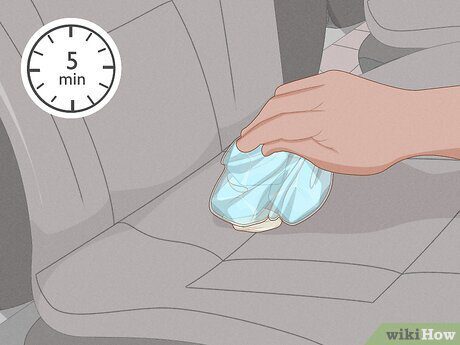
To avoid any cleaner residue, rinse the seat by wiping it with a damp microfiber cloth dipped in clean water. This step is especially important for child car seats, as residue can irritate sensitive skin. After rinsing, blot the seat with dry microfiber cloths to absorb excess moisture. Let the seats air dry completely before using the car—usually 2-3 hours, depending on the weather. I like to park my car in a sunny spot with the windows down to speed things up. If you’re in a hurry, a fan can help, but don’t sit on the seats until they’re dry to avoid mold or mildew.
Step 8: Add a Protective Layer
Once your seats are clean and dry, consider applying a fabric protector like Scotchgard Auto Fabric & Carpet Water Shield. This creates a barrier against future spills and stains, making your next cleaning session easier. I started doing this after a particularly bad coffee spill, and it’s saved me so much hassle. Spray lightly, let it dry, and you’re good to go. For child car seats, check the manufacturer’s guidelines before applying any protector, as some may affect safety features.
Tips for Tackling Specific Stains
Not all stains are created equal, and I’ve dealt with my fair share of weird ones. Here’s how to handle common culprits using the Little Green:
- Food and Drink Stains: For coffee, juice, or ketchup, act fast. Spray the Little Green solution, let it sit for a minute, and scrub gently. Repeat if needed. For sticky messes like candy, use a soft-bristle brush first to loosen the residue.
- Pet Hair and Odors: Vacuum thoroughly first, then use the Little Green with a pet-specific Bissell formula. It’s great for neutralizing odors. Follow up with a sprinkle of baking soda, let it sit for 15 minutes, and vacuum again.
- Grease or Oil: These are tricky, but the Little Green can handle them. Apply the solution generously, scrub with a soft brush, and extract multiple times. Blot with a microfiber cloth to absorb any remaining oil.
- Vomit or Diaper Blowouts: Gross, I know, but I’ve been there. Remove as much solid mess as possible with gloves, then use the Little Green with a gentle detergent. Rinse thoroughly to avoid lingering smells.
For really stubborn stains, I sometimes pretreat with a mix of vinegar and water (1:4 ratio) before using the Little Green. Just be sure to spot-test, as vinegar can be harsh on some fabrics.
Maintaining Your Car Seats After Cleaning
Cleaning is only half the battle—keeping your seats clean is the real challenge. I’ve learned a few tricks to make my car seats stay fresh longer:
- Use Seat Covers: Invest in washable seat covers, especially if you have kids or pets. They’re a lifesaver for protecting your upholstery.
- Vacuum Regularly: A quick vacuum every week prevents dirt from building up. I keep a handheld vacuum in my trunk for this.
- Ban Messy Foods: I know it’s tough, but try to limit eating in the car. My kids now have a “no chips” rule after one too many crumb disasters.
- Wipe Spills Immediately: Keep a pack of wet wipes in your car for quick cleanups. The sooner you tackle a spill, the less likely it is to stain.
Why I Love the Little Green for Car Seat Cleaning
After trying countless cleaning methods—vinegar sprays, baking soda pastes, you name it—the Little Green is my go-to. It’s not just about the results (though those are amazing). It’s about how easy it makes the process. I don’t need to be a detailing expert to get professional-level results. The machine is intuitive, and the satisfaction of seeing that dirty water get sucked up is unmatched. Plus, it’s saved me hundreds of dollars compared to professional detailing. Whether you’re a busy parent, a pet owner, or just someone who wants a clean car, the Little Green is worth every penny.
Conclusion
Cleaning car seats doesn’t have to be a chore, and with the Bissell Little Green, it’s almost fun. I’ve gone from dreading the sight of a new stain to feeling confident I can handle anything my kids or pets throw at me. By following the steps I’ve shared—prepping, spot-testing, cleaning, and protecting—you’ll have car seats that look and smell like they just rolled off the lot. The Little Green isn’t just a tool; it’s a ticket to a cleaner, fresher car interior without breaking the bank. So grab your machine, roll up your sleeves, and give your car seats the love they deserve. You’ll be amazed at the difference it makes, and your passengers will thank you for it. Happy cleaning!
Frequently Asked Questions
Can I use the Bissell Little Green on leather car seats?
You can, but you need to be careful. Leather requires special care, so use a leather-safe Bissell solution and avoid over-wetting. Spot-test first, and follow up with a leather conditioner to keep the seats supple. I’ve used it on my leather seats with great results, but I always go slow and use a microfiber cloth.
How often should I clean my car seats with the Little Green?
It depends on how messy your car gets. I clean mine every 3-6 months for a deep clean, but I spot-clean stains as soon as they happen. If you have kids or pets, you might need to clean more often—maybe every couple of months.
Can I use other cleaning solutions in the Little Green?
Stick to Bissell’s cleaning solutions for the best results and to avoid damaging the machine. I’ve tried homemade solutions like vinegar and water, but they can clog the machine or leave residue. Bissell formulas are designed to work with the Little Green’s system.
How long does it take for car seats to dry after using the Little Green?
It usually takes 2-3 hours for seats to dry completely, but it depends on the weather and ventilation. I speed things up by parking in the sun with windows down or using a fan. Don’t sit on the seats until they’re fully dry to avoid mold.
Is the Little Green safe for child car seats?
Yes, but always check the car seat manual first. Some manufacturers have specific cleaning rules to maintain safety features. Use a gentle Bissell formula, avoid harsh chemicals, and don’t oversaturate the straps or buckles. I always rinse thoroughly to avoid any residue that could irritate my kid’s skin.
Products related to this article
Sponsored / affiliate links. As an Amazon Associate I earn from qualifying purchases. I may earn additional commission from eligible campaigns.