How to Replace a Car Lighter Socket: A Step-by-Step Guide
Hey there! If you’re reading this, chances are your car’s lighter socket isn’t working, and you’re wondering how to fix it yourself. I’ve been there, fumbling with a dead socket that wouldn’t charge my phone or power my GPS. It’s frustrating, right? But don’t worry—I’ve tackled this job a few times, and I’m here to walk you through it like we’re working on your car together.
Replacing a car lighter socket isn’t as hard as it sounds, and with a little patience, you can save some serious cash by doing it yourself. In this guide, I’ll break down every step, share some tips from my own experience, and make sure you feel confident enough to get that socket working again. Let’s dive in!
Understanding the Car Lighter Socket
First, let’s talk about what a car lighter socket is. You might know it as the cigarette lighter, but these days, it’s mostly used for charging devices or powering accessories like dash cams. It’s a small, cylindrical port in your car, usually near the dashboard or center console, that delivers 12-volt power from your car’s battery.
When the socket stops working, it could be due to a blown fuse, loose wiring, or a damaged socket itself. I remember the first time I tried to plug in my phone charger and got nothing—no light, no charge, just silence. That’s when I knew I had to figure out what was going on. Before you start replacing the socket, it’s worth understanding its role and why it might have failed. This will help you avoid future issues and make the replacement process smoother.
Tools and Materials You’ll Need
Before we get our hands dirty, let’s gather everything you need. I learned the hard way that having the right tools makes all the difference. Once, I tried to skip a step and ended up stuck halfway through because I didn’t have a multimeter to test the socket. Here’s what you’ll need:
| Item | Purpose |
|---|---|
| Screwdriver set | To remove panels or screws holding the socket or dashboard in place. |
| Multimeter | To test the socket and wiring for power issues. |
| Replacement lighter socket | Make sure it matches your car’s make and model. |
| Wire cutters/strippers | For trimming or preparing wires if needed. |
| Electrical tape | To insulate any exposed wires. |
| Socket wrench (optional) | For stubborn bolts or nuts in some vehicles. |
| Fuse puller or pliers | To check or replace the fuse. |
| Safety gloves | To protect your hands while working with electrical components. |
You can find most of these at an auto parts store or online. I got my replacement socket from a local shop for about $15, but prices vary depending on your car. Double-check your car’s manual to ensure you’re getting the right socket—it’s a small detail that can save you a headache later.
Safety First: Preparing to Work on Your Car
I can’t stress this enough: safety comes first. Working on your car’s electrical system isn’t super dangerous, but you don’t want to take risks. The first thing I do is disconnect the car’s battery. This cuts power to the socket and prevents any shocks or short circuits. Trust me, I once skipped this step and got a tiny zap—not fun.
To disconnect the battery, pop the hood and find the negative terminal (it’s usually marked with a “-” sign). Use a wrench to loosen the clamp and pull the cable off. Set it aside so it doesn’t accidentally touch the terminal. Also, make sure your car is parked on a flat surface, and keep your workspace clear. I like to lay out all my tools on a towel so I can grab them easily. Oh, and wear those safety gloves—they’re a lifesaver if you’re dealing with sharp edges under the dashboard.
Step 1: Diagnosing the Problem
Before you replace the socket, let’s make sure it’s the problem. I’ve seen people swap out perfectly good sockets only to realize it was a blown fuse all along. Start by checking the fuse box. Your car’s manual will tell you where it is—usually under the dashboard or in the engine compartment.
Find the fuse for the lighter socket (it might be labeled “CIG” or “ACC”). Use a fuse puller or pliers to gently remove it. Hold it up to the light—if the metal strip inside is unbroken, it’s probably fine. If it’s broken or blackened, replace it with a new fuse of the same amperage. I keep a pack of assorted fuses in my toolbox because they’re cheap and handy.
If the fuse is good, grab your multimeter to test the socket. Set it to DC voltage (around 20V), and touch the probes to the socket’s center pin (positive) and the metal sidewall (ground). You should see around 12 volts if the car’s ignition is on. No voltage? The issue might be in the wiring, but let’s assume the socket itself is faulty for now. This step saved me from replacing a socket once when I realized the problem was just a loose wire.
Step 2: Accessing the Lighter Socket
Now comes the tricky part—getting to the socket. In most cars, the lighter socket is tucked behind a panel or the center console. My old sedan had it right in the dashboard, which made it a bit of a puzzle to access. Start by removing any trim or panels covering the socket. You might need a screwdriver to pop off plastic clips or remove screws.
Be gentle with those clips—they can break easily, and replacements aren’t always cheap. I usually keep a small container nearby to hold screws and clips so they don’t roll away. If your socket is in the center console, you might need to remove the entire console or just a small cover. Check your car’s manual for specifics, as every model is a little different. For example, my friend’s truck had a socket buried under layers of plastic, and we had to watch a YouTube video to figure out the exact steps.
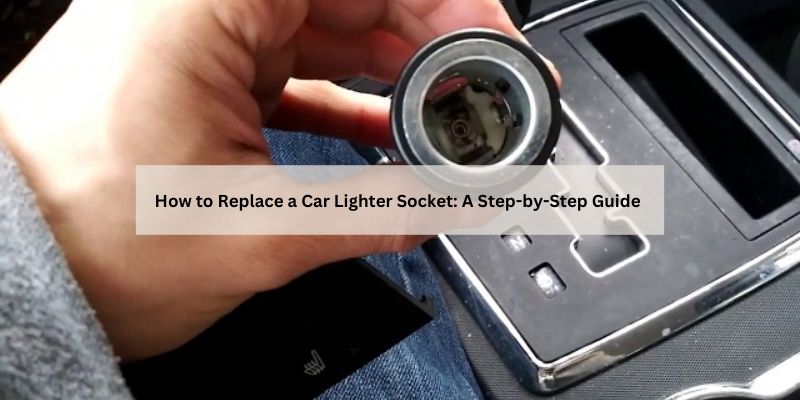
Step 3: Removing the Old Socket
Once you’ve got access, it’s time to take out the old socket. Most sockets are held in place by a retaining nut or clip. In my experience, the nut is usually on the back of the socket, so you’ll need to reach behind the panel. Use a socket wrench or pliers to loosen it. If it’s stuck, a little WD-40 can help, but don’t overdo it—electrical components don’t like getting wet.
After loosening the nut, pull the socket out gently. You’ll see a couple of wires connected to it—usually a positive and a ground. Note which wire goes where (I take a quick photo with my phone to avoid mix-ups). Disconnect the wires by gently pulling on the connectors, not the wires themselves. If they’re stuck, wiggle them carefully or use a small screwdriver to pry them loose. My first time doing this, I yanked too hard and damaged a connector, so take it slow.
Step 4: Installing the New Socket
With the old socket out, it’s time to put in the new one. Start by connecting the wires to the new socket. Match the positive and ground wires to their correct terminals—your photo or notes from earlier will help here. Most sockets have a clip or spade connector that snaps into place. Make sure they’re secure; a loose connection can cause the socket to fail again.
Next, slide the new socket into the mounting hole. Secure it with the retaining nut or clip, but don’t overtighten—you don’t want to crack the plastic or strip the threads. I made that mistake once and had to buy another socket. Once it’s snug, give the wires a gentle tug to ensure they’re firmly attached.
Step 5: Testing the New Socket
Before you put everything back together, let’s test the socket. Reconnect the car’s battery by attaching the negative cable. Turn on the ignition and plug something into the socket, like a phone charger or a 12-volt tester. If it works, you’re golden! If not, double-check your connections and test the socket with your multimeter again. I had a moment of panic once when the socket didn’t work, only to realize I’d forgotten to tighten a wire.
Step 6: Reassembling Everything
If the socket is working, it’s time to put your car back together. Reattach any panels, consoles, or trim you removed. Make sure all screws and clips are secure, but don’t force anything—plastic parts can be finicky. I like to give everything a quick wipe-down to remove fingerprints or dust before I call it done. Step back and admire your work; it feels good to fix something yourself, doesn’t it?

Troubleshooting Common Issues
Sometimes, things don’t go as planned. If your new socket isn’t working, here are a few things to check:
- Loose connections: Double-check that all wires are securely attached.
- Wrong socket: Make sure the replacement matches your car’s specs.
- Blown fuse: Installing a new socket can sometimes blow a fuse if there’s a short. Check the fuse again.
- Wiring issues: If the socket still doesn’t work, the problem might be deeper in the wiring harness. At this point, you might need a professional to take a look.
I had a stubborn socket that wouldn’t work even after replacement. Turned out, a wire had frayed inside the harness. A quick patch with electrical tape and a new connector fixed it, but it took some detective work.
Maintaining Your Car Lighter Socket
To keep your new socket working for years, a little maintenance goes a long way. Avoid overloading it with high-power devices—some accessories draw more current than the socket can handle. I learned this when I tried to run a mini fridge off my socket, and it blew the fuse in minutes. Also, keep the socket clean. Dust and debris can build up inside, causing poor connections. A quick blast of compressed air every few months does the trick.
Why Doing It Yourself Is Worth It
Replacing a car lighter socket yourself isn’t just about saving money (though I saved about $100 compared to a shop’s quote). It’s also about the satisfaction of fixing something with your own hands. Plus, you’ll learn a bit more about your car, which makes future repairs less intimidating. I felt like a pro the first time I got my socket working again, and I’m sure you will too.
Conclusion
There you go—you’ve just learned how to replace a car lighter socket from start to finish! I hope this guide made the process feel doable and maybe even a little fun. From diagnosing the issue to installing the new socket, you’re now equipped to tackle this repair like a seasoned DIYer. It’s a small job, but it can make a big difference when you’re back on the road with a working socket for your charger or accessories. So, grab those tools, take your time, and enjoy the feeling of fixing your car yourself. Got any questions? Check out the FAQs below, or drop a comment on the blog—I’d love to hear how it went!
FAQs
What if my car lighter socket still doesn’t work after replacing it?
If the new socket doesn’t work, check the fuse first—it might have blown during installation. Then, verify all wire connections are secure. If you’re still having issues, use a multimeter to test for power at the socket. If there’s no power, the problem might be in the wiring harness, and you may need a mechanic’s help.
Can I use any lighter socket as a replacement?
No, you need a socket that matches your car’s make, model, and year. Check your car’s manual or consult an auto parts store to get the right one. Using the wrong socket can cause fitment issues or electrical problems.
How long does it take to replace a car lighter socket?
For most cars, it takes about 30 minutes to an hour, depending on how easy it is to access the socket. If it’s your first time, it might take a bit longer—mine took about 45 minutes the first go-around.
Is it safe to replace the socket without disconnecting the battery?
It’s not recommended. Disconnecting the battery prevents shocks or short circuits. I skipped this once and got a small shock, so don’t take the risk.
Can a bad lighter socket drain my car’s battery?
A faulty socket usually won’t drain the battery unless there’s a short circuit. If you suspect a drain, check for loose or exposed wires and fix them immediately to avoid bigger issues.