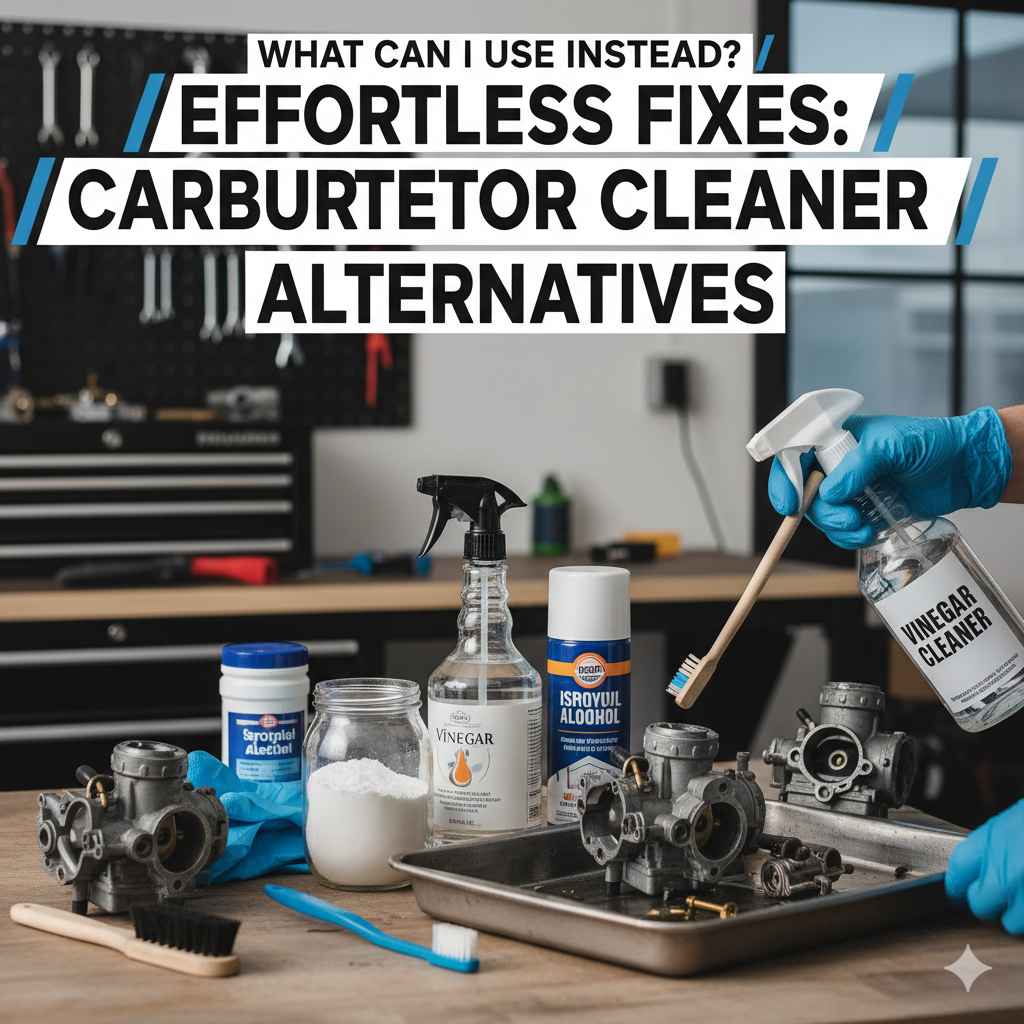
What Can I Use Instead Of Carburetor Cleaner: Effortless Fixes
If you can’t find dedicated carburetor cleaner, you can often use alternatives like throttle body cleaner, brake cleaner, or even concentrated isopropyl alcohol for initial cleaning. Always prioritize safety and test in an inconspicuous area for compatibility.
Hey there, car enthusiast! Ever find yourself staring at a carburetor, knowing it needs a good clean, but the specialized cleaner has vanished from your go-to toolbox? It’s a frustrating moment, but don’t worry, you’re not alone. Many of us have been there, needing to tackle a sluggish engine or a fuel delivery issue, only to hit a snag with a missing tool. The good news is, there are practical, readily available options that can often do the job just as well. This guide will walk you through simple, effective fixes using items you might already have or can easily pick up. We’ll explore what works, how to use it safely, and when a dedicated cleaner is still the best bet. Let’s get your engine purring again without the fuss!
Understanding Carburetor Issues and Cleaner
Carburetors are fascinating devices. They mix air and fuel to keep your engine running smoothly. Over time, deposits like gum, varnish, and carbon can build up inside these intricate passages. This gunk can clog tiny jets and passages, leading to all sorts of problems: rough idling, stalling, poor acceleration, and even increased fuel consumption. Carburetor cleaner is specifically formulated to dissolve these stubborn deposits without damaging the sensitive materials within the carburetor, like rubber seals and specific metal alloys.
When you can’t get your hands on specialized carburetor cleaner, it’s natural to wonder about substitutes. The goal is to find a solvent that can break down fuel residues and other contaminants effectively while being safe for carburetor components. We need something that can penetrate, dissolve, and flush away the grime without causing more harm than good. Let’s look at some common household and automotive products that might fit the bill.
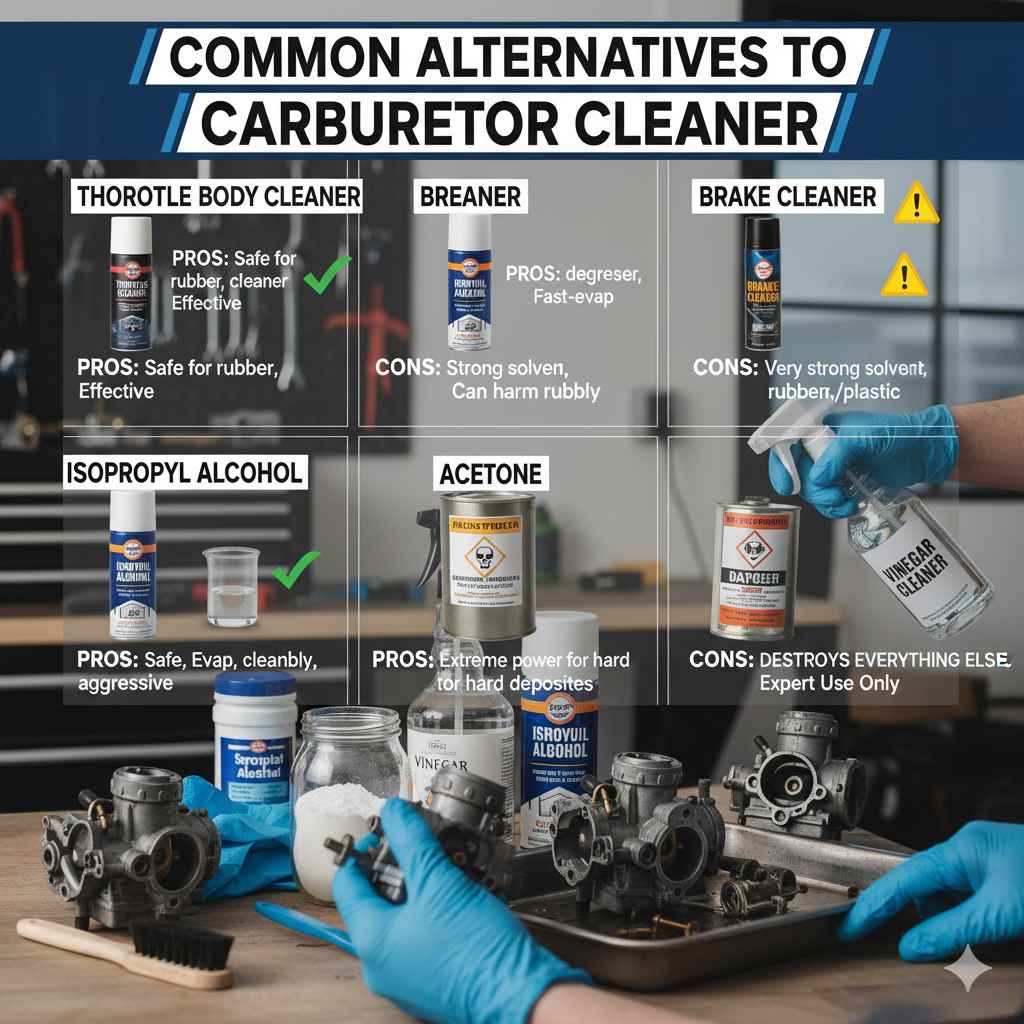
Common Alternatives to Carburetor Cleaner
When you’re in a pinch, several readily available automotive cleaning products can serve as temporary or even long-term solutions for cleaning your carburetor. It’s important to understand what each alternative does and its potential limitations.
1. Throttle Body Cleaner
This is often the closest and most effective alternative. Throttle body cleaner is designed to remove carbon deposits and gunk from the throttle body, which contains similar materials and is exposed to similar contaminants as a carburetor. It’s formulated to be safe for the various metal and rubber components found in the intake system, making it a very suitable substitute.
Why it works: It’s a powerful solvent that effectively breaks down carbon, varnish, and fuel deposits. It’s generally safe for rubber and O-rings, which are also found in carburetors. You can find detailed information on the safe use of throttle body cleaners on automotive resource sites like AutoZone’s DIY guides.
How to use: Spray directly onto the parts you wish to clean, letting it soak for a few minutes to loosen grime. You can then use a brush or rag to scrub away loosened deposits. Rinse with more cleaner or compressed air if possible.
2. Brake Cleaner
Brake cleaner is a common go-to for many DIY mechanics needing a strong degreaser. It’s excellent at removing oil, grease, and surprisingly, many fuel-related residues. Many formulations are fast-evaporating, which is a plus for drying components. However, it’s crucial to check the label. Some aggressive formulations can damage rubber or plastic parts over prolonged exposure.
Why it works: It’s a potent solvent designed to remove brake dust (which is oily and metallic) and is very effective at dissolving varnish and gum. Its fast-evaporating nature means less residual solvent left behind.
How to use: Apply generously to carburetor parts. Allow it to sit for a short period (a few minutes) to break down deposits. You may need to scrub stubborn areas with a non-metallic brush. Ensure thorough drying afterward, especially before reassembly. Always use in a well-ventilated area, as brake cleaner fumes can be potent.
3. Carburetor and Choke Cleaner (Aerosol)
While we are looking for alternatives, it’s worth noting that if you can find a can labeled “Carburetor and Choke Cleaner,” it’s usually a safe bet. Often, these products are slightly less aggressive than pure carburetor cleaners, making them suitable for use on chokes and external parts where sensitive rubber might be present. However, if it specifically states it’s safe for internal carburetor components, it’s a solid option.
Why it works: Formulated to tackle gum and varnish specific to fuel systems. Often contains ingredients that help dissolve these stubborn residues effectively.
How to use: Follow the instructions on the can. Typically involves spraying into the carburetor throat, jets, and passages. Allow time for the solvent to work, then use compressed air to blow out loosened debris.
4. Isopropyl Alcohol (90% or higher concentration)
Higher concentrations of isopropyl alcohol (rubbing alcohol), particularly 90% or 99%, can act as a solvent for some fuel residues and varnish. It’s relatively safe for most common carburetor materials and evaporates cleanly. It might not be as aggressive as specialized cleaners for heavily caked-on deposits, but it’s excellent for lighter cleaning and maintenance.
Why it works: Alcohol is a polar solvent capable of dissolving certain types of organic compounds, including some fuel residues. It evaporates without leaving significant residue.
How to use: You can soak smaller parts in isopropyl alcohol or use a spray bottle to apply it to larger components. Brushing or wiping can help remove loosened grime. Ensure all components are thoroughly dry before reassembly, as water in the air intake can cause engine trouble. For a deeper dive into using alcohol effectively, resources on chemistry and solvency, like those found on university pages, can offer insights into its properties.
5. Acetone
Acetone is a powerful solvent known for its ability to dissolve many plastics, resins, and coatings. This makes it effective at breaking down stubborn varnish and gum. However, its aggressive nature means it can also damage certain rubber seals, O-rings, and plastic components common in carburetors. Use with extreme caution and only on metal parts where there’s no risk of contact with rubber or plastic.
Why it works: A very strong solvent that rapidly breaks down many organic compounds, including dried fuel residues and varnishes.
How to use: Apply sparingly and for short durations. It’s best used for soaking metal parts that have been removed from the carburetor. Thoroughly rinse with water or another solvent and ensure complete drying before reassembly. Always wear protective gloves and ensure excellent ventilation. Given its potency, consulting material compatibility guides on chemical supplier websites can be wise. For instance, sites like ChemSpider can provide detailed properties, but always cross-reference with actual material resistance charts for automotive parts.
6. M.E.K. (Methyl Ethyl Ketone)
Similar to acetone, M.E.K. is a very strong solvent. It’s highly effective at dissolving heavy carbon deposits, varnish, and fuel residues. However, like acetone, it is aggressive and can damage rubber, certain plastics, and some painted surfaces. It should be used with extreme caution and ideally only on bare metal components that have been completely disassembled.
Why it works: One of the most potent common solvents, excellent for dissolving hardened residues and varnishes.
How to use: Primarily for soaking thoroughly disassembled metal parts. Use sparingly and for very short contact times. Ensure parts are rinsed thoroughly and completely dried. Strict adherence to safety precautions (gloves, ventilation, eye protection) is mandatory. It’s crucial to check material safety data sheets (MSDS) for M.E.K. to understand its hazards and proper handling procedures.
When Are Alternatives NOT Recommended?
While the alternatives listed above can be effective in a pinch, there are situations where using them might be risky or less effective than a dedicated carburetor cleaner. Understanding these limitations is crucial for preventing damage or further problems.
- Heavily Varnished Carburetors: If your carburetor has been sitting for a very long time or has significant, hardened varnish buildup, milder alternatives might struggle to break it down completely. A dedicated cleaner is often formulated with specific detergents and solvents to tackle these tough jobs.
- Complex or Sensitive Carburetors: Modern carburetors, especially those with intricate designs or specialized coatings, can be sensitive to harsh solvents. If you’re unsure about the materials in your carburetor, sticking with a product specifically designed for it minimizes risk.
- Risk of Material Damage: As mentioned, acetone, M.E.K., and some aggressive brake cleaners can degrade rubber, plastic, and certain paints. If your carburetor has many rubber seals, diaphragms, or plastic components that cannot be easily removed, a gentler or dedicated cleaner is a safer bet.
- When You Have Plently of Time: If you’re not in an emergency and have the time to source proper carburetor cleaner, it’s generally the most reliable and safest option. The cost saved by using an alternative might be lost if you need to replace damaged parts later.
Safety First: Essential Precautions
Working with solvents, even common ones, requires care. Your safety and the integrity of your vehicle depend on it. Always remember these vital safety tips:
- Ventilation is Key: Work in a well-lit, well-ventilated area, preferably outdoors or in a garage with open doors. Fumes from these cleaners can be harmful and cause dizziness or headaches.
- Protective Gear: Always wear safety glasses to protect your eyes from splashes. Nitrile gloves are recommended to protect your skin from prolonged exposure to solvents.
- No Open Flames: Many of these solvents are highly flammable. Never smoke or work near open flames, sparks, or extremely hot surfaces.
- Read the Labels: Even for common products, read the manufacturer’s instructions and warnings. Pay close attention to compatibility and safe handling guidelines.
- Test First: If you’re unsure about how a particular cleaner will affect a material, test it on an inconspicuous area or a spare part if possible.
- Proper Disposal: Dispose of used rags and solvents responsibly according to local regulations. Never pour them down drains or into the environment.
Step-by-Step: Using Alternatives to Clean Your Carburetor
Assuming you’ve chosen an appropriate alternative (like throttle body cleaner or high-concentration isopropyl alcohol) and are prioritizing safety, here’s a general guide. This process assumes you have a basic understanding of how to access your carburetor. If not, consult your vehicle’s service manual or look for specific guides for your car make and model.
Tools You’ll Likely Need:
Besides your chosen cleaning agent, you might need:
- Screwdrivers (Phillips and flathead)
- Socket set or wrenches
- Pliers
- Old rags or shop towels
- Parts cleaning brush (non-metallic is best)
- Compressed air (canned air or an air compressor)
- New gasket or seal for the carburetor base (highly recommended)
- Safety glasses and gloves
The Cleaning Process:
- Preparation and Safety: Ensure your engine is cool. Disconnect the battery to prevent accidental starting. Lay down rags to catch any spills.
- Access the Carburetor: This usually involves removing the air cleaner assembly and disconnecting fuel lines, vacuum hoses, and throttle/choke linkages. Take pictures as you go to help with reassembly!
- Remove the Carburetor (Recommended for thorough cleaning): For the best results, it’s often easiest to remove the entire carburetor. This allows you to disassemble it further if needed and clean all passages thoroughly. Loosen and remove the mounting bolts securing it to the intake manifold.
- Disassemble (Carefully): If you’ve removed the carburetor, you can carefully disassemble its main components, such as the float bowl and top cover. Be mindful of small springs, jets, and screws. Keep everything organized!
-
Apply Your Chosen Cleaner:
- Throttle Body Cleaner/Brake Cleaner: Spray generously onto the internal passages, jets, throttle plate, and any other dirty metal surfaces. Let it sit for 5-10 minutes to soften the deposits.
- Isopropyl Alcohol: Spray liberally or soak smaller parts. It might require more scrubbing or a second application for tougher gunk.
- Scrub and Wipe: Use your non-metallic brush to agitate softened deposits. Wipe down surfaces with clean rags until they are free of grime. Pay special attention to the throttle bore and jet passages.
- Clear Passages with Air: This is crucial! Use compressed air to blow out all the cleaner and loosened debris from every passage, jet, and orifice. Ensure they are completely clear and dry. Any remaining solvent or debris can cause problems.
- Reassemble: Carefully put the carburetor back together, ensuring all jets, screws, and components are in their correct places. Use a new gasket at the base where the carburetor meets the intake manifold to prevent vacuum leaks.
- Reinstall and Connect: Mount the carburetor back onto the engine. Reconnect all fuel lines, vacuum hoses, and linkages. Reinstall the air cleaner assembly.
- Reconnect Battery and Test: Reconnect the battery. Start the engine. It might run a little rough initially as residual cleaner burns off. Check for any vacuum leaks (hissing sounds) and adjust the idle speed if necessary, following your vehicle’s manual.
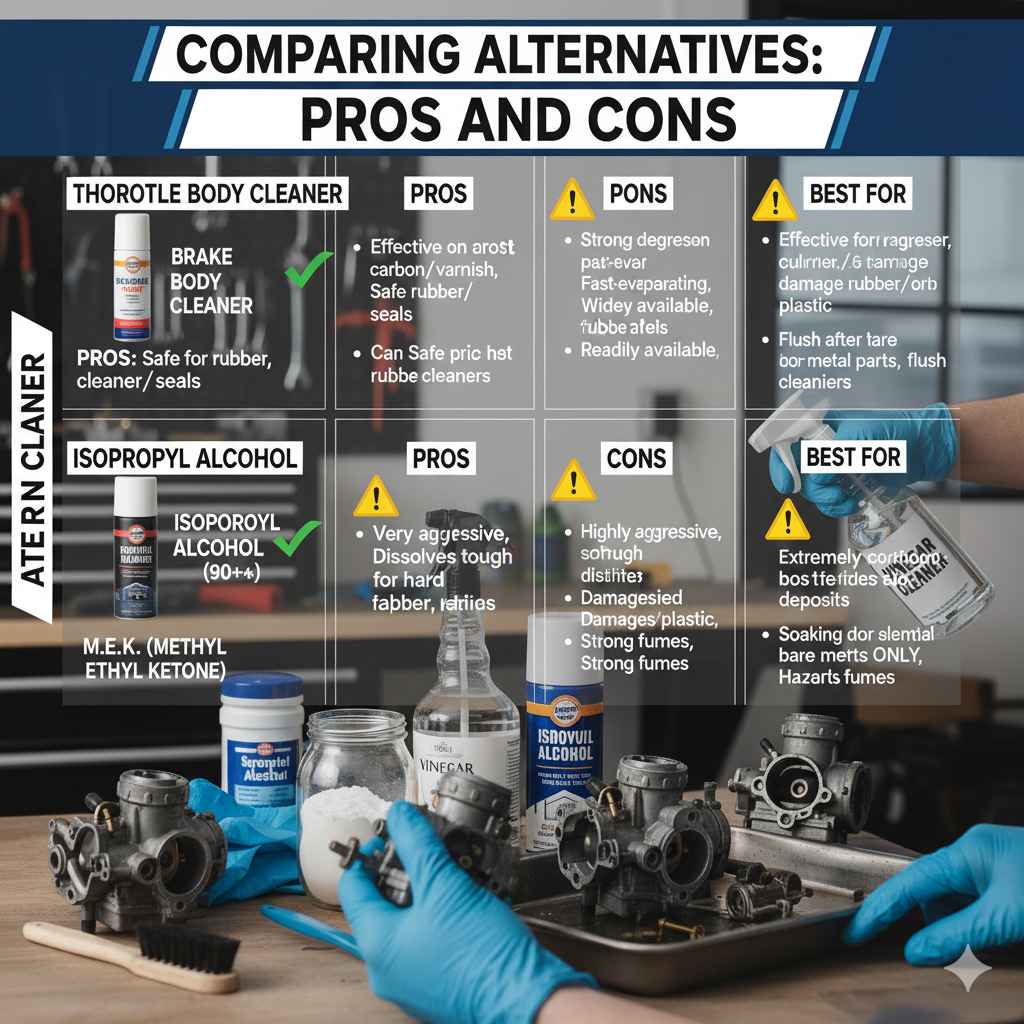
Comparing Alternatives: Pros and Cons
To help you decide which alternative might be best for your situation, here’s a quick comparison:
| Alternative Cleaner | Pros | Cons | Best For |
|---|---|---|---|
| Throttle Body Cleaner | Effective on carbon/varnish, generally safe for rubber/seals. | Can be pricier than basic cleaners. | Most carburetor components, general cleaning. |
| Brake Cleaner | Strong degreaser, fast-evaporating, widely available. | Some formulations can damage rubber/plastic with prolonged exposure. | Metal parts, initial degreasing. Use caution around sensitive parts. |
| Isopropyl Alcohol (90%+) | Safe for most materials, evaporates cleanly, readily available. | Less aggressive on tough grime, may require multiple applications. | Light cleaning, maintenance, as a flush after using other cleaners. |
| Acetone | Very strong solvent, dissolves tough varnish. | Highly aggressive, damages rubber/plastic/paint. Strong fumes. | Soaking bare metal parts ONLY. Requires extreme caution. |
| M.E.K. | Extremely powerful for hardened deposits. | Very aggressive, damages most non-metal materials. Hazardous fumes. | Heavy-duty cleaning of bare metal parts. Requires expert handling. |
When to Just Buy Carburetor Cleaner
While alternatives are useful, dedicated carburetor cleaner is engineered for a reason. It’s formulated to be highly effective against the specific types of deposits found in fuel systems (varnish, gum, carbon) and is designed to be safe for the wide array of materials found in a carburetor. Carburetor cleaners often contain rust inhibitors and other additives that offer added protection.
If your carburetor issues are severe, if you’re dealing with a particularly old or delicate system, or if you simply want the peace of mind that you’re using the best possible product, investing in a can of proper carburetor cleaner is often the wisest choice. You can find these at most auto parts stores. For more information on selecting the right automotive chemicals, resources like the Environmental Protection Agency (EPA) offer guidance on chemical safety and regulations, which indirectly informs product choices for consumers.
Frequently Asked Questions (FAQ)
Q1: Can I use starting fluid to clean my carburetor?
A1: While starting fluid is a powerful solvent and can evaporate quickly, it’s generally not recommended for cleaning carburetor internals. It’s highly flammable and designed for ignition, not for dissolving gum and varnish. Its aggressive nature could potentially damage seals or coatings, and it leaves no protective residue.