How to Install Shocks on a Car (No Spring Compressor Needed)
Installing shocks on a car is a straightforward bolt-on job — unlike struts, standard shock absorbers carry no spring load, so no spring compressor is required unless yours are coilover shocks. Skip the torque wrench step, though, and worn or loose shocks can add up to 7.6 meters to your stopping distance. This guide covers the full 9-step process, the priming trick that extends shock life, real torque spec ranges, and exactly when you do need a spring compressor.
What Are Shocks and Why Do They Matter?
Shocks, or shock absorbers, are parts of your car’s suspension that keep your ride smooth and safe. They soak up bumps from the road, keeping your tires glued to the ground. Without good shocks, your car might bounce like a pogo stick, making it hard to steer or brake. I learned this the hard way when my old truck felt like a rollercoaster on a gravel road! Replacing worn shocks improves handling, safety, and comfort, especially on long drives.
Tools and Materials You’ll Need
Before you start, gather your tools and parts. You don’t need a fancy garage—just some basics. Here’s what I use:
- New Shocks: Pick shocks that match your car’s make and model. Check your manual or ask at an auto parts store. I got mine from a trusted site like RockAuto for quality and price.
- Jack and Jack Stands: These lift your car safely. Never work under a car held only by a jack!
- Wrenches and Sockets: A set of metric or standard sizes, depending on your car.
- Pliers: For removing clips or stubborn bits.
- Penetrating Oil: Great for loosening rusty bolts.
- Torque Wrench: To tighten bolts to the right specs.
- Gloves and Safety Glasses: Keep your hands clean and eyes safe.
Table 1: Tool Comparison for Shock Installation
| Tool | Purpose | Budget Option | Pro Option |
|---|---|---|---|
| Jack | Lifts car safely | $30 floor jack | $100 hydraulic jack |
| Socket Wrench Set | Removes bolts | $20 basic set | $50 ratchet set |
| Torque Wrench | Tightens bolts correctly | $25 manual | $80 digital |
Best Torque Wrench Pick
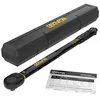
LEXIVON 1/2-Inch Drive Click Torque Wrench 10-150 Ft-Lb
A 10-150 ft-lb click-style torque wrench covers most shock mounting bolts on cars, trucks, and SUVs, so you tighten to spec instead of guessing.
- Best for: tightening shock mounting bolts to the exact spec in your service manual
- Why we picked it: click-stop feedback stops you from over-tightening and crushing rubber bushings
- Main drawback: tops out at 150 ft-lb, too low for some heavy-duty truck lower mounts
Compare more shock installation tools
 Option 1 WINMAX 50pc Shock Absorber Strut Nut Socket Set
|
 Option 2 Hantec 3-Ton Jack Stands, Pair, Double Safety Locking
|
 Option 3 Free All Rust Eater Deep Penetrating Oil, 11oz Aerosol
|
As an Amazon Associate we earn from qualifying purchases.
Do You Need a Spring Compressor to Install Shocks?
No — not for a standard shock absorber. Shocks carry no static weight from the car; a separate coil or leaf spring supports the vehicle, so the shock itself is never under tension when you unbolt it. That’s why the tool list above is just wrenches, a jack, and a torque wrench, with nothing that compresses a spring.
The one exception is a coilover shock — a design where the coil spring wraps directly around the shock body, common on some rear setups and most aftermarket adjustable dampers. If that’s what you’re working with, you’re compressing a loaded spring, and the danger is identical to a strut job.
“The spring stores tremendous energy when compressed under vehicle weight — simply unbolting a strut without properly compressing the spring can cause violent spring release that results in serious injury or death.”
— Bilstein Technical Academy
If your car uses struts instead of separate shocks, don’t follow this guide — struts integrate the coil spring around the strut body, and reusing the factory spring requires a proper hand-operated spring compressor plus the patience to inspect it for wear before every use. See our full how to install struts on a car guide for that process, including the spring compressor steps this shocks-only job skips entirely.
📊 Worn shocks can extend a vehicle’s stopping distance by up to 7.6 meters on a dry road — roughly one car length longer than a car with good shocks — because a bouncing tire has zero grip for a fraction of a second. Source: Monroe Shocks & Struts, Stop Sooner safety testing
Step-by-Step Guide to Installing Shocks
Here’s how to install shocks on most cars or trucks. Follow these steps, and it’s a piece of cake!
- Park and Prep: Park on a flat surface, set the parking brake, and turn off the engine. Block the wheels with bricks or chocks to keep the car steady.
- Lift the Car: Use a jack to lift one corner of the car. Check your manual for safe jacking points. Secure it with jack stands.
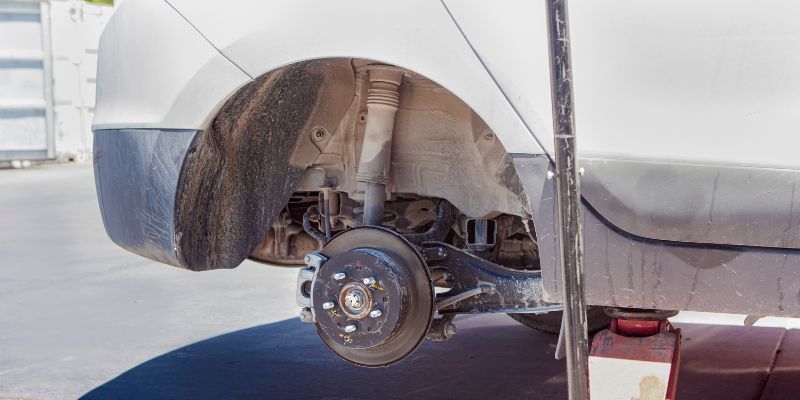
- Remove the Wheel: Take off the lug nuts and pull the wheel to expose the shock absorber and both its upper and lower mounting points.
- Find the Shocks: Shocks are usually near the wheels, connecting the suspension to the frame. My Chevy’s front shocks were tucked behind the tires—sneaky!
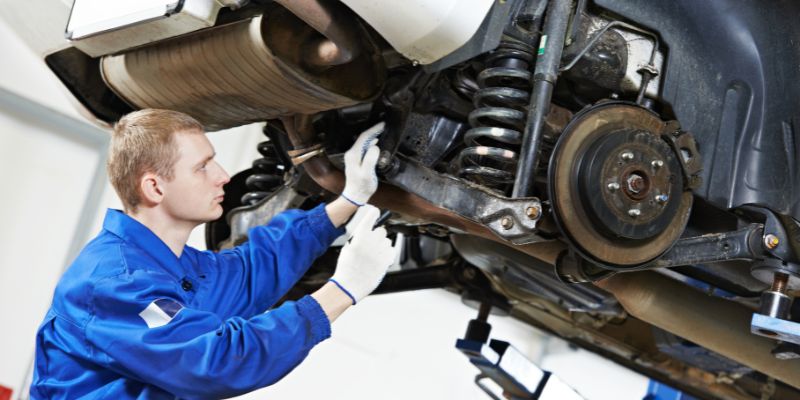
- Remove Old Shocks: Use a socket wrench to loosen the bolts holding the shocks. If they’re rusty, spray penetrating oil and wait 10 minutes. Remove clips with pliers.
- Prime the New Shock: Hold the new shock upright, top side up, and manually pump the shaft in and out 3 to 5 times before it goes on the car. This works trapped air out of the hydraulic fluid and shortens the break-in period.
- Install New Shocks: Line up the new shock and hand-tighten the lower bolt first, then compress the shock enough to work it into the top mount. Reattach any clips or brackets, then finger-tighten the top bolts before final torque.
- Torque and Lower the Car: Tighten every bolt with a torque wrench to the manufacturer’s spec (see the torque table below), reinstall the wheel, then carefully lower the car. Repeat all steps for each corner.
- Test Drive: Before you drive, push down on each corner and let go — it should rebound once and settle, not keep bouncing. Then take a short drive to check for weird noises or handling issues. My first test drive felt like gliding on butter!
Shock Bolt Torque Specs: What to Expect
Shock mounting bolts don’t share one universal number — the spec depends on the bolt size and where it sits on your specific vehicle. These general ranges give you a ballpark before you open your service manual:
| Mount Location | Typical Torque Range | Note |
|---|---|---|
| Upper mount (top nut) | 15–40 ft-lb | Usually a smaller nut — overtightening crushes the rubber bushing |
| Lower mount, car/sedan | 40–60 ft-lb | Standard range for most passenger cars |
| Lower mount, truck/SUV | 50–70 ft-lb | Heavier-duty bolts on trucks and larger SUVs |
| Any bolt, any vehicle | Check your service manual | The only number that’s actually correct for your exact car |
These figures are general ranges gathered from common factory service data across several makes — they are not a substitute for the torque spec listed in your own vehicle’s service manual. Using a torque wrench instead of an impact gun or “tight by feel” is what keeps you inside that range instead of stripping threads.
Benefits and Drawbacks of DIY Shock Installation
Installing shocks yourself saves money—shops can charge $100-$200 per pair! It’s also satisfying to fix your own car. On the downside, it takes time (about 1-2 hours per shock), and rusty bolts can be a pain. If you’re not confident, a mechanic is a safer bet. I once spent an hour wrestling a stuck bolt before calling a pro—lesson learned!
Table 2: DIY vs. Professional Shock Installation
| Option | Cost | Time | Skill Level |
|---|---|---|---|
| DIY | $50-$150 (parts) | 2-4 hours | Beginner-Intermediate |
| Professional | $200-$400 | 1-2 hours | None needed |
My Top Tips for a Smooth Installation
From my garage mishaps, here are some tips to make your shock installation easier:
- Check Compatibility: Double-check that your shocks match your car. I once ordered the wrong set and had to wait a week for the right ones!
- Work in Pairs: Replace shocks in pairs (both fronts or both rears) for balanced handling.
- Stay Safe: Always use jack stands. I had a close call when a jack slipped—scary stuff!
- Clean as You Go: Wipe down bolts and parts to avoid dirt gumming up your work.
Common Mistakes to Avoid
Don’t make these rookie errors I did early on:
- Skipping the Manual: Always check your car’s manual for torque specs and jacking points.
- Over-Tightening Bolts: Use a torque wrench to avoid stripping threads.
- Ignoring Rust: Spray penetrating oil early to save time on stuck bolts.
Choosing the Right Shocks
Not all shocks are the same. For daily drivers, go for standard shocks like Monroe’s OE replacements. If you’re off-roading, try heavy-duty ones like Bilstein. I picked Monroe shocks for my truck because they’re affordable and reliable, per advice from Monroe’s site. Ask yourself: Do you want a smooth commute or a rugged ride? Your driving style matters.
Table 3: Shock Types for Different Drivers
| Shock Type | Best For | Price Range | Example Brand |
|---|---|---|---|
| Standard | Daily driving | $30-$60 | Monroe |
| Heavy-Duty | Off-roading, towing | $50-$100 | Bilstein |
| Performance | Sporty driving | $80-$150 | KYB |
Safety First: Protecting Yourself and Your Car
Working under a car can be risky, so take these precautions:
- Use Jack Stands: Never crawl under a car supported only by a jack.
- Wear Gloves: Keep your hands clean and safe from sharp edges.
- Double-Check Bolts: Loose bolts can cause shocks to fail, so tighten them right.
- Skip This Job If You Have Coilovers: If your shocks are coilovers or your car actually has struts, don’t wing it without a spring compressor — a loaded spring released suddenly can cause serious injury.
Cost-Saving Ideas
Save some cash with these tricks:
- Shop Online: Sites like RockAuto or AutoZone often have better prices than local stores.
- Buy in Pairs: Some retailers offer discounts for buying two shocks at once.
- Reuse Clips: If old clips aren’t damaged, keep them to avoid buying new ones.
Conclusion
Installing shocks on your car is a doable weekend project that saves you $100 to $200 over a shop visit and takes most beginners about 2 to 4 hours. With the right tools, a torque wrench you actually use, and this 9-step process, you’ll have a smoother, safer ride without ever needing a spring compressor — unless you’re running coilovers, in which case treat it like a strut job.
Frequently Asked Questions
How Do I Know If My Shocks Need Replacing?
Look for bouncing after bumps, nose-diving when braking, or uneven tire wear. If your car feels unstable, it’s time for new shocks.
Do I Need a Spring Compressor to Install Shocks?
No, not for standard shock absorbers — they carry no static weight from the car, so a socket set and torque wrench are enough. The exception is coilover shocks, where the spring wraps around the shock body; those carry the same crush-injury risk as struts and require a spring compressor.
Can I Install Shocks Without a Torque Wrench?
You can, but it’s risky. A torque wrench ensures bolts are tight enough without damage. Borrow one if you don’t own it.
How Long Does It Take to Install Shocks?
For beginners, expect 1-2 hours per shock. With practice, it’s faster—my last set took 3 hours total.
Are Shocks and Struts the Same Thing?
No, shocks absorb bumps, while struts also support the car’s weight. Check your manual to know what your car has.
Can I Drive With Bad Shocks?
It’s not safe. Bad shocks make steering and braking harder, especially on rough roads. Replace them ASAP.
What’s the Best Shock Brand for Beginners?
Monroe and KYB are great for beginners—affordable and easy to find. Check reviews on sites like RockAuto.
Do I Need to Align My Wheels After Installing Shocks?
Usually not, but if you notice uneven tire wear or pulling, get an alignment. It’s a cheap safety check.
Products related to this article
Sponsored / affiliate links. As an Amazon Associate I earn from qualifying purchases. I may earn additional commission from eligible campaigns.