
When to Adjust Car Seat Straps: A Complete Timing Guide
Adjust car seat straps every time your child’s outerwear changes, whenever the harness slots no longer line up with their shoulders, and — the one most parents skip — with a quick pinch test before every single ride.
This matters more than it sounds. In federal observational surveys, NHTSA found that close to half of all child car seats in use were misused in ways likely to reduce crash protection, and loose harness straps are one of the most common errors safety technicians see at car seat check events. A seat that was installed perfectly on day one can become unsafe weeks later just because your child grew, the season changed, or the straps got twisted during the last wash.
This guide covers every real trigger for adjusting the straps, the exact slot rule for rear-facing versus forward-facing seats (most parents get this backwards), how to run the pinch test correctly, and how often to do a full check even if nothing seems to have changed.
The 4 Times You Actually Need to Adjust the Straps
Most parents only think to adjust the harness when the car seat is brand new or when a growth spurt is obvious. In practice, four separate triggers matter, and three of them have nothing to do with your child getting taller.
1. Every Time Your Child’s Outerwear Changes
A puffy winter coat can add over an inch of loft between your child’s body and the harness. Straps that pass the pinch test over a t-shirt will be dangerously loose over a coat, because in a crash the coat compresses instantly and the child can slip partway or fully out of a harness that looked snug at pickup. Car seat technicians recommend buckling your child in wearing only thin layers, then adding a blanket or coat backwards over the buckled harness for warmth instead of loosening the straps to fit bulky outerwear. Any time you swap a thin shirt for a jacket, or a jacket for a snowsuit, re-run the pinch test — don’t assume last week’s setting still holds.
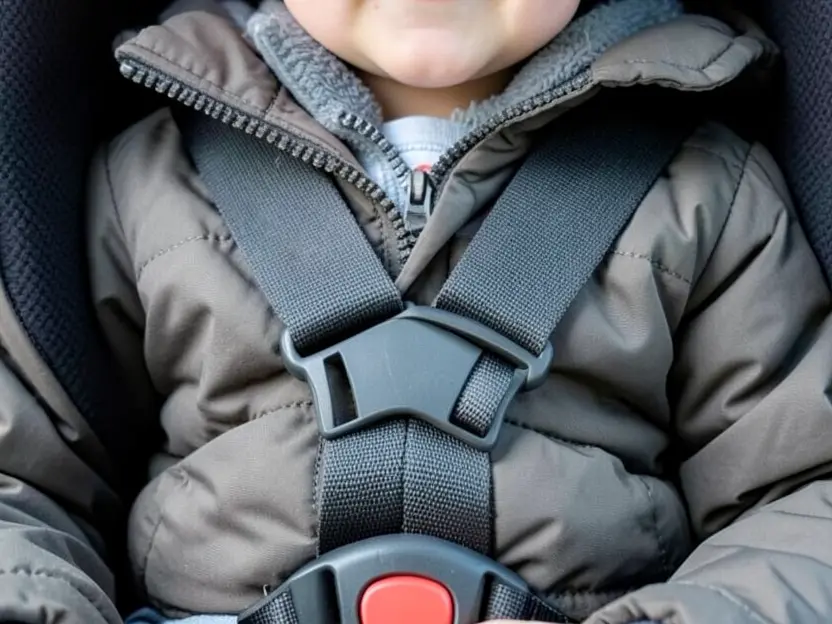
2. When Their Shoulders Cross the Slot Line
Every convertible and infant seat has a specific rule for where the shoulder straps should sit relative to your child’s shoulders, and that rule flips depending on which way the seat is installed (the full rule is in the next section). Check this monthly for a fast-growing infant and every few months for an older toddler — kids rarely announce a growth spurt, but the strap slots will tell you plainly if you look.
3. After You Remove the Cover to Wash It
Removing the seat cover almost always means threading the harness straps back through the fabric and the shell. It is very easy to accidentally leave a strap twisted or to rethread it into the wrong slot. Before the next ride, buckle the harness with nothing in the seat and check that both straps lie completely flat with no twists, and that they’re still coming through the correct slot pair.
4. Before Every Single Ride
This is the step almost everyone skips once the seat feels “set.” A 10-second pinch test before every trip catches slack that builds up from a squirming child, a strap that loosened itself slightly, or a rushed buckle-in. It costs almost nothing and it’s the single change that would fix the most common harness error technicians report.
NO-RETHREAD HARNESS PICK
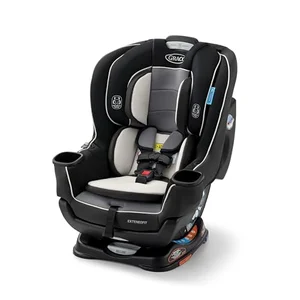 |
Graco Extend2Fit Convertible Car Seat – $191.99 If you’re tired of rethreading straps through the shell every time your child grows, this seat uses a no-rethread harness — you adjust the height with one lever instead of pulling the straps apart, exactly the “no-rethread” style covered in the slot section below.
|
Rear-Facing vs. Forward-Facing: The Slot Rule Most Parents Get Backwards
This is the part most guides get wrong or leave out entirely, and it’s the opposite rule depending on which way the seat faces. Getting it backwards doesn’t just look odd — it changes how crash forces move through your child’s body.
| Seat Orientation | Correct Shoulder Strap Slot | Why |
|---|---|---|
| Rear-facing | At or below your child’s shoulders | Keeps the harness from lifting the child’s body up and out of the seat shell during a frontal crash |
| Forward-facing | At or above your child’s shoulders | Helps limit how far forward the head and torso can travel, matching the seat’s forward-facing tether design |
If you’ve just moved your child from rear-facing to forward-facing, don’t forget the harness slot needs to change too — it’s a completely separate step from flipping the seat itself, and it’s easy to forget in the moment.
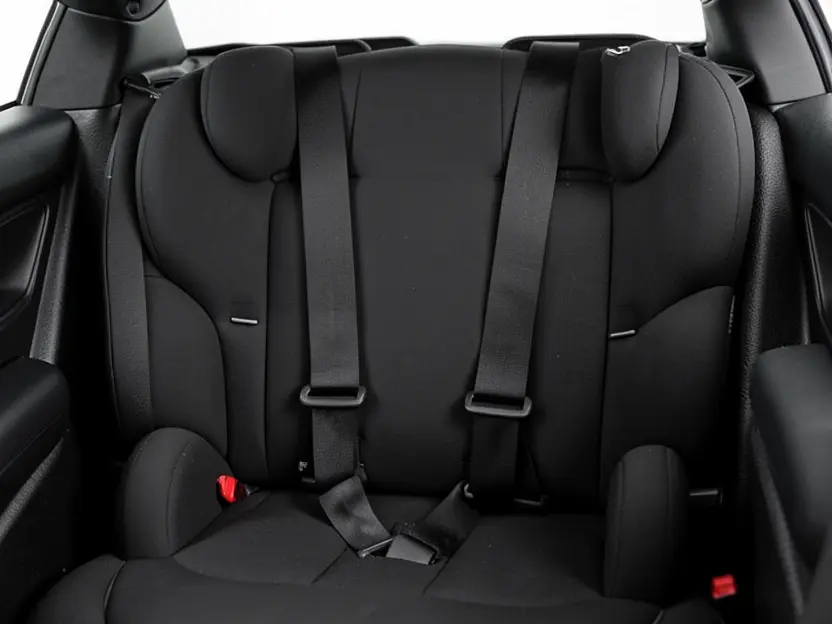
Some newer convertible seats use a “no-rethread” harness, where you move a single lever or dial to raise the shoulder height instead of pulling the straps out of the shell and rethreading them into a different slot pair. Older seats and many budget models still use the traditional rethread design shown below, where multiple slot pairs are visible in the seat back and you manually move the straps between them.
How to Do the Pinch Test and Chest Clip Check
This takes under a minute once you’ve done it a few times, and it’s the single most reliable at-home check for harness fit.
- Buckle your child in as you normally would, with only thin, close-fitting layers on (add a coat or blanket over the top afterward if it’s cold).
- Tighten the harness by pulling the adjuster strap until you feel real resistance — the straps should sit flat against your child’s chest and hips.
- Pinch the strap at the shoulder between your thumb and forefinger, lengthwise, and try to fold it. If you can pinch any extra material, tighten further and test again.
- Check the chest clip: it should sit level with your child’s armpits, centered on the breastbone — not on the stomach, and not up near the neck.
- Run a finger along both straps from the shoulder to the buckle to confirm neither one is twisted. Twisted webbing concentrates crash force on a smaller area of the strap instead of spreading it out.
If the chest clip is riding low on the stomach, the harness is too loose overall — a properly tightened harness naturally pulls the clip up toward the correct armpit-level position. Repositioning the clip alone without also tightening the straps doesn’t fix the underlying problem.
Common Strap Mistakes That Undo the Safety Benefit
A handful of small mistakes account for most of the harness misuse safety technicians find at inspection events, and none of them require a defective seat — just an overlooked step.
- Straps left loose “for comfort.” A harness that feels comfortable to an adult’s touch is almost always too loose for crash protection — the pinch test, not how it feels, is the standard.
- Twisted webbing. A twist as small as a quarter-turn concentrates force on a narrow band of strap instead of the full width, reducing how well it distributes crash energy.
- Chest clip too low. A low clip lets the shoulder straps ride out toward the arms, raising the risk your child could partially slip out in a crash.
- Wrong slot for the seat’s orientation. Using the rear-facing rule (at or below shoulders) after switching to forward-facing, or vice versa, is one of the most common installation-day errors.
- Bulky clothing under the harness. As covered above, coats and snowsuits compress in a crash, turning a seemingly snug harness into a genuinely loose one.
- Skipping the check after a wash. Rethreading the harness after washing the cover is exactly when twisted straps and wrong-slot mistakes tend to happen.
How Often to Do a Full Strap Check
Beyond the before-every-ride pinch test, build a rhythm for the deeper checks so nothing slips through unnoticed.
| Check | How Often | What to Look For |
|---|---|---|
| Pinch test | Every ride | No slack you can pinch at the shoulder |
| Chest clip position | Every ride | Level with armpits, centered on the chest |
| Shoulder slot height | Monthly for infants, every 2–3 months for toddlers | Straps at or below shoulders (rear-facing) or at or above shoulders (forward-facing) |
| Twist and wear check | Monthly, and always after washing the cover | Flat webbing, no fraying, buckles click and release cleanly |
| Full seat re-fit | After any seat swap between vehicles, or a growth spurt | Recheck installation angle, harness slot, and recline in the new vehicle |
When to Replace the Straps Instead of Just Adjusting Them
Adjustment only helps if the webbing itself is still in good condition. Frayed edges, visible thinning, a buckle that doesn’t click firmly, or straps that were in the car during any crash — even a minor one — mean it’s time to contact the manufacturer about replacement harness parts rather than continue adjusting worn webbing. Most manufacturers sell harness replacement kits directly, and using anything other than the manufacturer’s own replacement parts can void the seat’s crash certification. If you’re not sure whether your specific seat’s straps are still within spec, your car seat’s own expiration date is a good place to start, since aging webbing loses strength even without visible damage.
For a deeper look at what “snug” actually means once the straps are adjusted, our guide on how car seat straps should fit walks through the pinch test and chest clip position in more detail. And if your seat is specifically a Graco model, our Graco-specific strap adjustment guide covers the exact lever and rethread points for that brand’s seats.
Frequently Asked Questions
How Often Should I Adjust My Child’s Car Seat Straps?
Run the pinch test before every ride, and do a full slot-height and twist check monthly for infants or every 2 to 3 months for toddlers. Adjust immediately any time clothing changes, the cover has been washed and reinstalled, or the seat has moved to a different vehicle.
Should the Shoulder Straps Be Above or Below the Shoulders?
It depends on the seat’s orientation. For rear-facing seats, the straps should come through the slot at or below your child’s shoulders. For forward-facing seats, they should be at or above the shoulders. This is one of the most commonly reversed rules in car seat use.
Where Should the Chest Clip Sit?
The chest clip should sit level with your child’s armpits and centered on the breastbone. If it’s resting on the stomach, the harness itself is too loose; if it’s up near the neck, it’s positioned too high and could cause injury in a crash.
What Is the Pinch Test?
The pinch test is the standard way to check harness tightness: after tightening the straps, try to pinch the webbing at the shoulder between two fingers. If you can pinch any extra material, the harness is too loose and needs to be tightened further before the vehicle moves.
Do I Need to Adjust the Straps for a Winter Coat?
Yes. A thick coat compresses in a crash, so a harness that fits snugly over a coat will be dangerously loose once that coat flattens. Buckle your child in wearing thin layers and add a coat or blanket backwards over the harness for warmth instead of loosening the straps to fit outerwear.
How Do I Know If My Car Seat Straps Are Too Worn to Adjust?
Frayed edges, visible thinning of the webbing, a buckle that doesn’t click firmly, or any strap that was in the car during a crash are all signs to stop adjusting and contact the manufacturer for a replacement harness kit instead. Adjustment can’t restore webbing that has lost its strength.
Conclusion
The straps that were perfect on installation day won’t necessarily stay perfect — growth, seasons, washing, and simple wear all change the fit. Make the pinch test a habit before every ride, remember that rear-facing and forward-facing seats use opposite slot rules, and do a fuller check monthly so a loose harness never rides along unnoticed.
When the straps themselves show wear rather than just needing a tighter pull, stop adjusting and replace them through the manufacturer instead. A few seconds of checking is a small price for the protection a properly adjusted harness is actually designed to give.
Products related to this article
Sponsored / affiliate links. As an Amazon Associate I earn from qualifying purchases. I may earn additional commission from eligible campaigns.
 PartsTo Adjustable Kids Travel Car Seat Headrest Pillow with Lean Support Cushion Sleeping Travel Neck Safeguard Cushion Suitable for Kids Children Teenagers and Adults
 FLORICH Leather Seat Cover, Car Seat Covers Front Set, Waterproof Car Seat Protectors, Front Seat Covers 2 Pack, Breathable Automotive Seat Covers Protector Fit for Most Cars Trucks SUV