Why Hyundai Tail Lights Stay On When Car Is Off? Find Solutions
It can be super frustrating when your car’s lights won’t turn off, especially when the issue is the Hyundai Tail Lights Stay On When Car Is Off: Causes are unknown! For new drivers, figuring out why this happens can feel like solving a puzzle. Don’t worry, though; it’s often something simple. This post breaks down the common reasons and gives you a step-by-step way to troubleshoot the problem. We’ll explore the main culprits and how to fix them quickly, so you can get back on the road safely. Let’s get started!
Possible Issues with Hyundai Tail Lights
If your Hyundai’s tail lights stay on, it’s usually due to a malfunction in the electrical system. This could be anything from a faulty switch to a wiring problem. The good news is that these issues are usually easy to spot and fix. By exploring the different components involved, you can pinpoint the source of the problem and get your car back to normal quickly. It’s often a process of elimination, looking at each possible cause until you find the solution.
Faulty Light Switch
The light switch, often located on the steering column or dashboard, is a common culprit. If the switch is stuck or malfunctioning, it might not fully turn off the lights. This can happen due to wear and tear, or because of a manufacturing defect. The switch sends signals to the tail lights, telling them when to turn on and off. When it fails, the lights may remain lit, even when the car is off. A simple test is to gently wiggle or try turning the switch repeatedly to see if the lights turn off.
- Test the switch: Try wiggling the light switch to see if it affects the tail lights. Sometimes, a loose connection or internal fault can be resolved by manipulating the switch.
- Inspect for damage: Check for any physical damage to the light switch. Look for cracks, melted plastic, or any signs of wear and tear.
- Check the connection: Make sure the electrical connector is firmly attached to the light switch. A loose connection can cause intermittent problems.
- Test with a multimeter: If you have a multimeter, you can test the switch for continuity. This helps determine if the switch is functioning correctly.
- Consider replacement: If the switch is faulty, the best solution is usually to replace it. A new switch ensures the lights function as intended.
Problems with the Brake Light Switch
The brake light switch plays a critical role in the operation of your tail lights. This switch is located near the brake pedal. When you press the brake, the switch activates the brake lights. If this switch malfunctions, it may send a constant signal, keeping the tail lights illuminated. This can be caused by the switch getting stuck, having internal damage, or being out of alignment. Regularly checking and adjusting this switch is crucial to prevent this problem.
- Inspect the switch: Look for any physical damage, such as cracks or broken wires, on the brake light switch.
- Check the alignment: Make sure the switch is properly aligned with the brake pedal. Misalignment can cause the switch to activate even when the pedal isn’t pressed.
- Test the switch: You can often test the switch by pressing the brake pedal and listening for a clicking sound from the switch. If no click, it might be faulty.
- Use a multimeter: A multimeter can be used to test the switch for continuity. This helps confirm whether the switch is opening and closing the circuit correctly.
- Replace as needed: If the switch is damaged or not working properly, replace it. It’s a simple fix that prevents your tail lights from staying on.
Wiring Issues: Shorts and Corrosion
Wiring problems, like shorts or corrosion, can cause the tail lights to stay on. Shorts happen when wires that shouldn’t touch make contact, sending electricity where it’s not supposed to go. Corrosion, caused by moisture and time, can create poor connections. These issues can disrupt the electrical flow and cause the tail lights to remain illuminated. Regular inspections and immediate repairs are key to solving wiring problems and ensuring safety. Professional help is advised if you are not comfortable working with electrical components.
- Inspect the wiring: Carefully examine the wiring that connects to the tail lights. Look for any exposed wires, damaged insulation, or signs of wear and tear.
- Check for shorts: Check for any instances where wires may be touching or making contact with metal parts of the vehicle. This can cause a short circuit.
- Look for corrosion: Examine the wiring connectors and terminals for any signs of corrosion, such as rust or greenish buildup.
- Test for continuity: Use a multimeter to test the continuity of the wires. This will help determine if the wires are properly carrying electricity.
- Professional help: If you are not experienced with electrical repairs, it’s best to have a professional inspect and repair the wiring.

Pinpointing the Reason for Tail Lights Staying On
Finding the exact reason for your tail lights staying on involves a systematic approach. You can start with basic checks and move on to more detailed inspections. It’s often a process of elimination, where you assess each possible cause until the problem is identified. This method helps you to resolve the problem efficiently and ensures that all areas are carefully considered. Remember to work in a safe area and consult with a professional if you’re not confident in your abilities.
Check Fuses and Relays
Fuses and relays are essential parts of your car’s electrical system, designed to protect circuits from damage. A blown fuse can interrupt the power supply, while a faulty relay can cause components to malfunction. Checking these parts is a good starting point. Find the fuse box, usually in the car’s interior or under the hood. Locate the fuse for the tail lights and visually inspect it for a broken filament. Also, examine the relay that controls the lights, as it may be stuck in the “on” position. These parts are easy to replace.
- Locate the fuse box: Find the fuse box in your Hyundai. It is usually found in the engine bay or inside the car, often near the dashboard or under the steering wheel.
- Identify the tail light fuse: Consult your owner’s manual to identify the fuse responsible for the tail lights.
- Inspect the fuse: Carefully examine the fuse. If the filament inside is broken, the fuse is blown and needs to be replaced.
- Check the relay: Find the relay associated with the tail lights, usually located in the fuse box.
- Test or
Investigate the Tail Light Assembly
Sometimes, the problem lies within the tail light assembly itself. Water can get inside, causing corrosion and short circuits. Check the tail light housing for any damage or cracks. Inspect the bulb sockets for corrosion or loose connections. A loose or corroded connection can cause the lights to stay on. Also, make sure the bulbs are the correct type and wattage, as incorrect bulbs can also cause problems. Examine the condition of the lenses; moisture buildup or damage can also lead to electrical issues.
- Examine the lenses: Check the lenses for any cracks, damage, or cloudiness. Damaged lenses can allow moisture to enter the assembly.
- Inspect the bulb sockets: Examine the bulb sockets for corrosion or any signs of damage. Make sure the connections are secure.
- Check the bulbs: Ensure the bulbs are the correct type and wattage for your Hyundai model.
- Look for moisture: Check for any signs of moisture buildup inside the tail light assembly. Water can cause corrosion and electrical problems.
- Replace as needed: If you find any damage or corrosion, consider replacing the tail light assembly or individual components.
Diagnostic Tools and Expert Advice
For more complex issues, using diagnostic tools and getting expert advice might be necessary. A scan tool can check for error codes that point to the cause of the problem. A professional mechanic has advanced equipment and experience to troubleshoot electrical problems. They can quickly diagnose the issue and implement the best solution. If you are not comfortable working with electrical systems, it is better to seek professional assistance. Mechanics can also address issues that you might not be able to identify on your own.
- Use a scan tool: Connect an OBD-II scan tool to your Hyundai’s diagnostic port to check for error codes. These codes can provide valuable clues about the problem.
- Consult an expert: If the issue is complex or you are not comfortable working on electrical systems, seek advice from a professional mechanic.
- Describe the issue: Provide the mechanic with a detailed description of the problem, including when it started and any other relevant symptoms.
- Ask for a diagnosis: Request a thorough diagnosis to pinpoint the exact cause of the tail lights staying on.
- Get a repair plan: Obtain a clear explanation of the necessary repairs, along with a cost estimate before any work is performed.
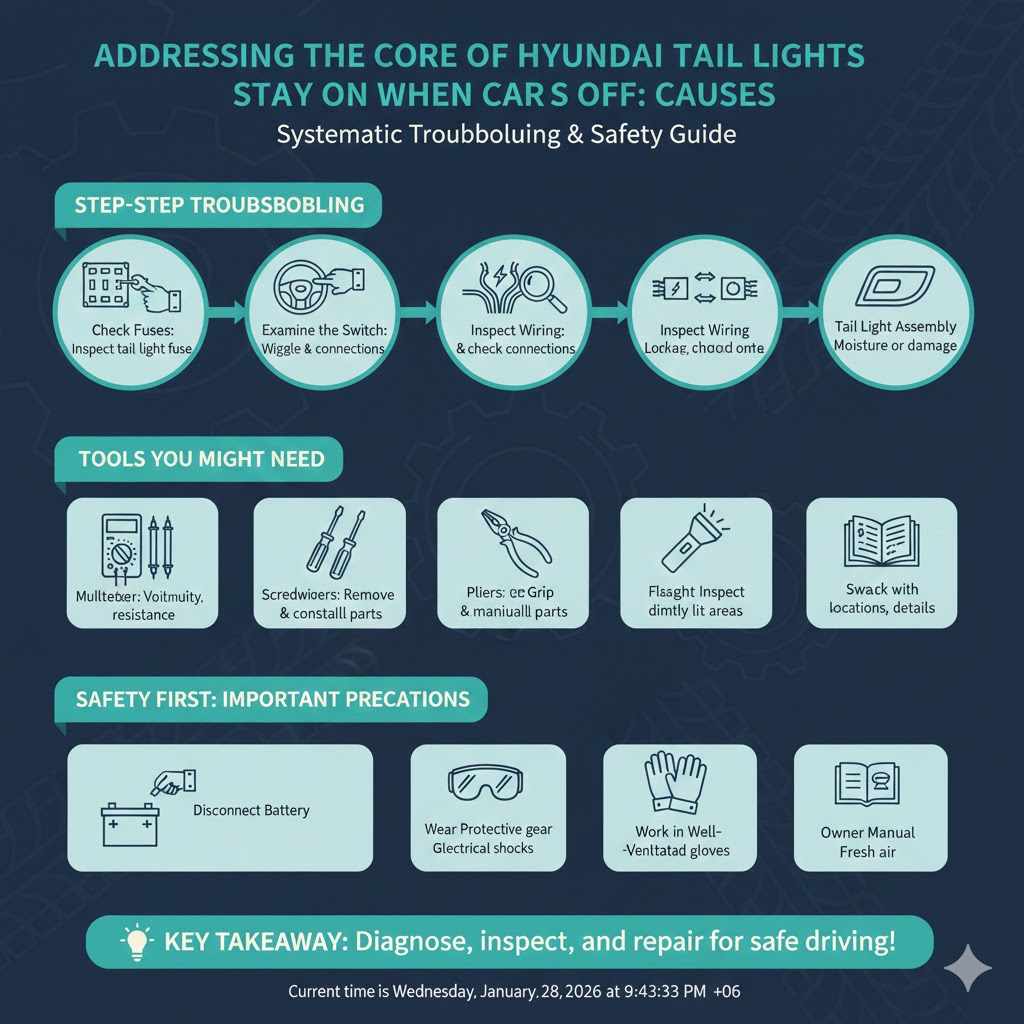
Addressing the Core of “Hyundai Tail Lights Stay On When Car Is Off: Causes”
To fully address the issue of the Hyundai Tail Lights Stay On When Car Is Off: Causes, it is vital to approach the situation logically. Begin by eliminating the obvious things. This process is key to a successful repair. Then, move on to the more complex areas, following a systematic approach. By breaking down the problem into smaller parts, you can easily troubleshoot and fix the issue. This systematic method makes the whole process less stressful.
Step-by-Step Troubleshooting
Use a step-by-step approach to pinpoint the issue. Start by checking the easiest components, like fuses and switches, then move on to more complex components. Take notes as you go, and carefully document any changes. Be patient and persistent, as the cause might not be obvious at first. With careful troubleshooting, you’ll be able to identify the root cause. This methodical approach can help you prevent future problems too.
- Check fuses: Inspect the tail light fuse in the fuse box.
- Examine the switch: Wiggle the light switch and brake light switch to see if it affects the lights. Look for any loose connections.
- Inspect wiring: Carefully examine the wiring for the tail lights, looking for any damage, corrosion, or shorts.
- Check the relays: Swap out the tail light relay with a known working relay to see if that fixes the issue.
- Look at the tail light assembly: Inspect the tail light assembly for any signs of moisture or damage.
Tools You Might Need
You’ll need a few essential tools to perform these tests and repairs. These tools will help you to diagnose the issue and get your tail lights working again. Investing in quality tools will help you work safely and effectively. It’s often better to buy good tools once rather than repeatedly replacing cheap ones. Make sure you use the right tools to avoid any damage.
- Multimeter: Used to test for voltage, continuity, and resistance in the electrical system.
- Screwdrivers: A set of screwdrivers, both flathead and Phillips head, for removing and reinstalling parts.
- Pliers: For gripping and manipulating wires, connectors, and other small parts.
- Flashlight: To provide light in dimly lit areas and inspect the components.
- Owner’s manual: Your car’s owner’s manual will provide information on fuse locations and other key details.
Safety First: Important Precautions
Before working on your car’s electrical system, safety is important. Disconnect the negative battery cable to avoid electrical shocks. Always wear safety glasses and gloves, and make sure to work in a well-ventilated area. If you are not familiar with car repairs, consider seeking professional help. By taking these precautions, you can reduce the risk of injury and avoid causing further damage to your car. Remember that safety is your top priority.
Frequently Asked Questions
Question: Why do my tail lights stay on even when the car is turned off?
Answer: There are many possible reasons, including a faulty light switch, brake light switch issues, wiring problems like shorts, or a stuck relay. It’s a matter of exploring the components to identify the cause.
Question: How do I check the fuses for my tail lights?
Answer: Locate the fuse box, find the fuse marked for tail lights in your owner’s manual, and carefully examine it. If the filament inside is broken, the fuse is blown, and needs replacement.
Question: Can a bad brake light switch cause this problem?
Answer: Yes, if the brake light switch is faulty or out of alignment, it can signal the tail lights to stay on even when the brake pedal isn’t pressed, thus keeping the lights illuminated.
Question: What should I do if I find damaged wiring?
Answer: If you discover damaged wiring, it is recommended to replace the damaged wire segments or have a qualified mechanic repair it. Make sure all connections are secure and properly insulated.
Question: When should I seek professional help?
Answer: If you’re not comfortable working with electrical systems, or if you’ve tried troubleshooting and haven’t found the issue, seeking a mechanic’s advice is the best course of action. It can prevent further damage and ensure a safe and effective repair.
Final Thoughts
Addressing the issue of Hyundai Tail Lights Stay On When Car Is Off: Causes involves looking at the car’s lights, checking for issues, and taking safety precautions. By checking the switches, wiring, fuses, and assemblies, you can pinpoint the reason your lights stay on. Following a step-by-step process with the right tools, and knowing when to ask for help, makes the entire process easier. Remember to always put safety first, and don’t hesitate to seek advice from a mechanic if you feel uncertain. With a little effort, you can solve this problem and get back on the road confidently. Happy driving!