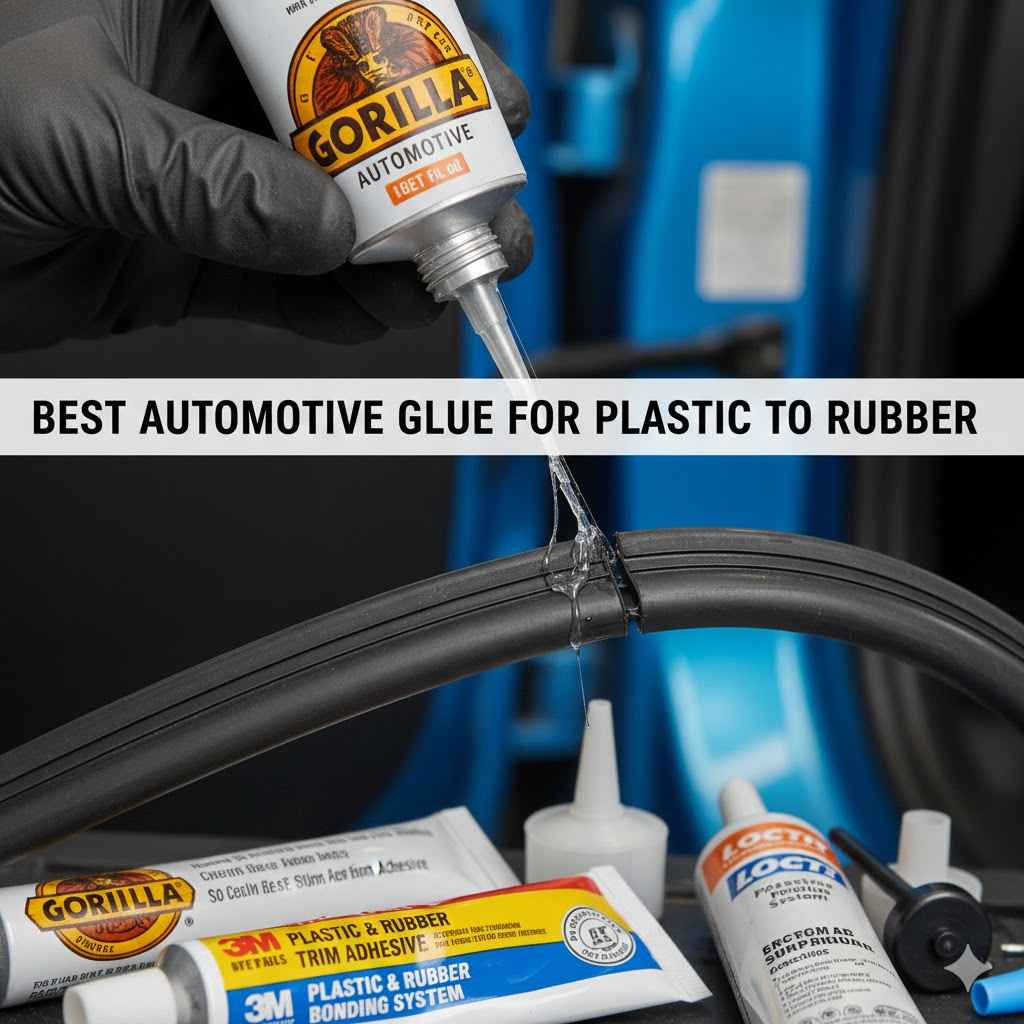
Best Automotive Glue for Plastic to Rubber
Fixing car parts can be tricky, especially when you need to stick plastic to rubber. Many beginners find it hard to know which glue works best for these different materials. You might worry about the repair not holding up or looking messy.
Don’t worry, this guide makes it super simple. We’ll walk you through choosing and using the Best Automotive Glue for Plastic to Rubber. Get ready to fix things like a pro.
Choosing the Best Automotive Glue for Plastic to Rubber
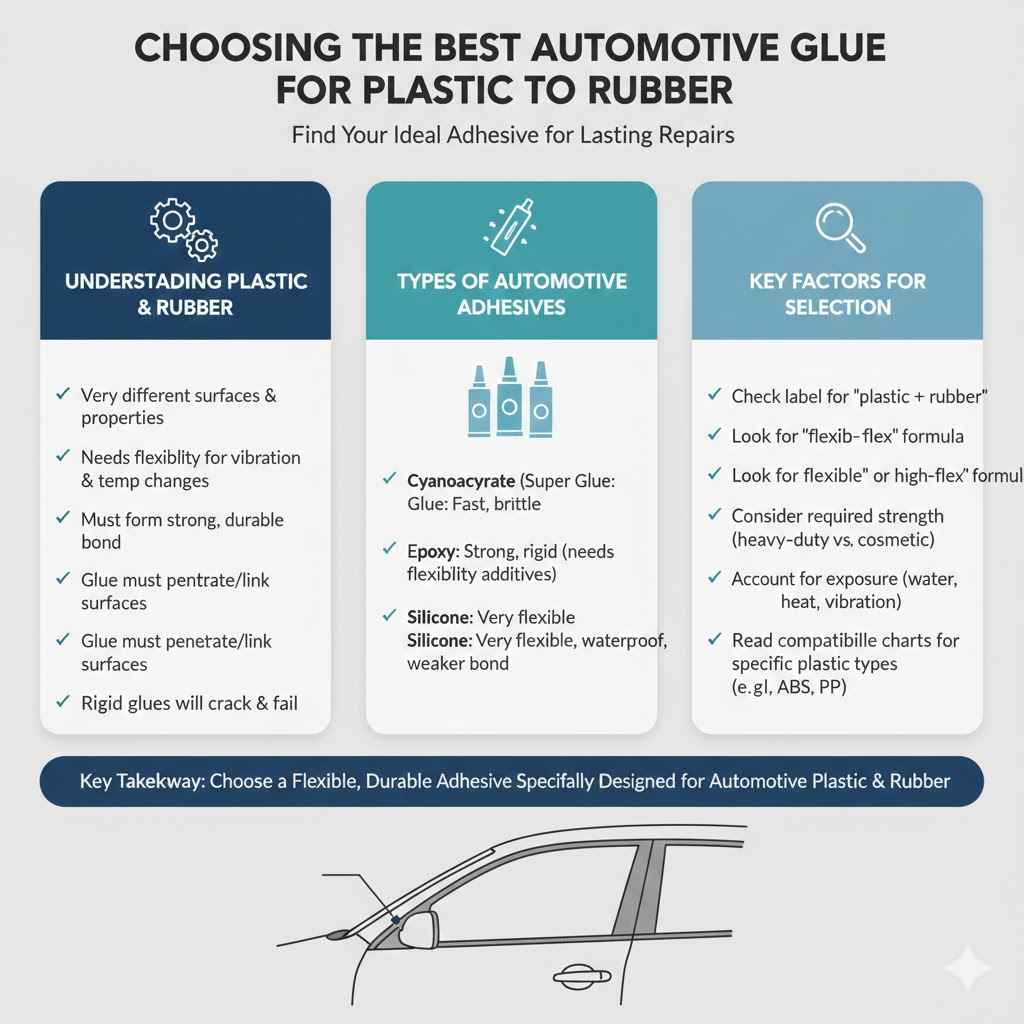
Finding the right adhesive is key to a lasting repair when bonding plastic to rubber in your car. These two materials have very different surfaces and properties, making a one-size-fits-all approach unlikely to succeed. The best glues for this job need to be flexible enough to handle vibrations and temperature changes common in vehicles.
They also need to form a strong, durable bond that won’t crack or peel over time. This section explores what makes a glue suitable for these specific automotive needs, helping you make an informed choice for your DIY projects.
Understanding Plastic and Rubber Bonding
Plastic and rubber are not like gluing two pieces of wood. Plastic types vary a lot, and rubber can be naturally oily or have special coatings. Some plastics are smooth and hard, while others are softer and more porous.
Rubber can be dense or foamy. Because these materials are so different, a glue needs to be able to grab onto both surfaces effectively. It must also be able to withstand the tough conditions inside a car.
This includes heat from the engine, cold from winter, and the constant shaking from driving.
For successful bonding, the glue must penetrate slightly into the surfaces or create a strong physical and chemical link. It also needs to remain flexible after drying. A rigid glue might crack under stress, breaking the bond.
Think about a bumper trim piece that flexes when you hit a speed bump. The glue holding it needs to flex too. If it can’t, the trim will likely detach.
Types of Automotive Adhesives
There are several kinds of glues you’ll see for car repairs. Some are super glues, called cyanoacrylates. These dry fast but can be brittle.
Others are epoxies, which are strong two-part glues. They offer good strength but can be stiff. Flexible adhesives are often polyurethane or silicone-based.
These are usually the best for plastic to rubber because they stay pliable. They can handle movement and changes in temperature much better than rigid glues.
When you’re looking for the Best Automotive Glue for Plastic to Rubber, check the label carefully. It should specifically say it works on both plastics and rubber. It should also mention flexibility.
Some glues are designed for specific plastics, like polypropylene or ABS, which are common in cars. Always check the product details to ensure compatibility.
Cyanoacrylate Glues (Super Glues)
Cyanoacrylate glues, commonly known as super glues, are popular for quick fixes. They form a strong bond very fast, often in seconds. This makes them appealing for small repairs.
However, they tend to be very rigid and can become brittle over time, especially when exposed to vibrations or temperature changes. This brittleness can cause the bond to break apart in automotive applications.
While some advanced cyanoacrylates offer slightly more flexibility with the addition of rubber particles, they are generally not the top choice for bonding plastic to rubber on a car. The materials often experience movement. If the glue can’t move with them, it will likely fail.
They are better suited for minor cosmetic repairs where no stress or flexibility is required.
Epoxy Adhesives
Epoxy adhesives are known for their incredible strength. They typically come in two parts, a resin and a hardener, that you mix together. Once mixed, a chemical reaction begins, creating a very strong bond.
Epoxies are great for filling gaps and bonding different types of materials. However, most standard epoxies are also quite rigid.
For automotive use, especially when bonding flexible materials like rubber to plastic, a flexible epoxy formulation is needed. These specialized epoxies contain additives that allow them to remain somewhat pliable after curing. They offer a good balance of strength and flexibility, making them a viable option for more demanding repairs.
It’s important to ensure the epoxy is rated for both plastic and rubber and can handle the stresses of a vehicle.
Polyurethane Adhesives
Polyurethane adhesives are excellent choices for automotive repairs. They are known for their strong, durable bonds and their high degree of flexibility. This makes them ideal for applications where movement and vibration are expected.
Polyurethane glues create a waterproof and weather-resistant bond, which is essential for car parts exposed to the elements.
They bond well to a wide range of materials, including many types of plastics and rubber. Their curing process can sometimes take longer than other adhesives, but the resulting bond is often superior in terms of durability and flexibility. Many professional auto body shops prefer polyurethane adhesives for trim work, seals, and even some structural repairs due to their reliable performance.
Silicone Adhesives and Sealants
Silicone-based adhesives and sealants are highly flexible and waterproof. They are excellent at sealing gaps and bonding materials that might expand or contract with temperature changes. This flexibility is a major advantage when dealing with plastic and rubber.
Silicone glues remain pliable even in extreme temperatures, making them suitable for many automotive exterior and interior parts.
However, the bonding strength of silicone can sometimes be lower than that of epoxies or polyurethanes. They are often better for sealing or bonding lighter-duty parts. It’s important to choose a silicone product specifically designed for automotive applications and for bonding to plastics and rubber.
Some silicones can also be difficult to paint over if that’s a concern for your repair.
Top Picks for Best Automotive Glue for Plastic to Rubber
Selecting the right glue is vital for a successful and long-lasting repair on your vehicle. When it comes to joining dissimilar materials like plastic and rubber, certain adhesives stand out for their performance, flexibility, and durability. This section highlights some of the top-rated products that are frequently recommended by automotive repair professionals and DIY enthusiasts alike.
We’ll look at what makes them so effective for this specific task, considering factors like ease of use, bonding strength, and resistance to automotive conditions.
Loctite Plastics Bonding System
The Loctite Plastics Bonding System is often a go-to for many DIYers dealing with plastic repairs. It’s a two-part system that includes a special primer and a super glue. The primer is designed to prepare the plastic surface, allowing the cyanoacrylate adhesive to form a stronger bond, even on challenging plastics like polyethylene and polypropylene.
While it’s primarily for plastics, some users have reported success using it to bond plastics to rubberized materials.
The advantage here is the primer’s ability to enhance adhesion on difficult surfaces. The super glue component dries very quickly. However, because it is still a cyanoacrylate at its core, the flexibility of the bond can be a concern for rubber-to-plastic applications where movement is expected.
It’s best for smaller, less flexible repairs.
How it Works
This system works by first applying a liquid primer to the plastic surface. This primer modifies the surface energy of the plastic, making it more receptive to the adhesive. After a short drying time, a specialized cyanoacrylate adhesive is applied.
The adhesive then rapidly bonds the two surfaces together. The combination of the primer and adhesive creates a surprisingly strong bond, especially on plastics that are notoriously hard to glue.
Best Use Cases
This system is excellent for repairing broken plastic trim pieces, cracked dashboards, or attaching plastic components where minimal flex is required. It’s also good for small, precise repairs where speed is important. However, for areas that need significant flexibility, like weather stripping or flexible rubber components attached to plastic, other types of glues might be more suitable due to the potential for brittleness in cyanoacrylates.
Permatex Plastic Welder
Permatex Plastic Welder is a unique product that chemically bonds plastics together, creating a very strong and durable bond that often looks like a weld. It’s a two-part acrylic adhesive. It works by essentially melting and fusing the plastic surfaces.
This method is particularly effective for rigid plastics commonly found in automotive parts like bumpers, grilles, and interior panels.
While it excels at plastic-to-plastic bonding, its effectiveness on rubber can be limited. Rubber’s different chemical makeup means it doesn’t always fuse well with this type of acrylic. For plastic-to-rubber applications, it’s often recommended to use a different adhesive or to prepare the rubber surface very carefully to accept the bond.
Some people have found success using it in conjunction with a rubber-specific primer or by roughening the rubber surface significantly.
How it Works
The Permatex Plastic Welder is a two-part system that requires mixing. When mixed, it creates a chemical reaction that softens and fuses the plastic parts together. It doesn’t just stick them; it creates a continuous piece of plastic.
This results in a bond that is incredibly strong and can even be sanded and painted after it cures. It’s a more permanent solution than many glues.
Best Use Cases
This product is ideal for repairing structural plastic components where strength is paramount. Think about cracked bumpers, broken interior plastic housings, or torn plastic brackets. It’s less suitable for flexible rubber parts or for bonding to rubber itself, as rubber doesn’t typically fuse in the same way rigid plastics do.
Gorilla Glue – Original Formula
Gorilla Glue, in its original brown formula, is a popular choice known for its versatility and strength. It’s a polyurethane glue that expands as it cures, filling gaps and forming a very strong bond. It is known to bond to a wide variety of materials, including plastic, metal, wood, and ceramic.
When used on plastic and rubber, its expanding nature can help create a strong grip.
The key advantage of Gorilla Glue is its ability to bond to dissimilar materials and its resistance to water and extreme temperatures. However, the expansion can be messy if not controlled, and the bond, while strong, can still be somewhat rigid once fully cured. For very flexible rubber parts, there might be better, more specifically formulated options.
How it Works
The original Gorilla Glue is activated by moisture. When you apply it to a surface and introduce a small amount of water, a chemical reaction occurs, causing the glue to expand. This expansion allows it to get into tiny cracks and imperfections on both surfaces, creating a powerful mechanical bond.
It cures into a hard, durable material.
Best Use Cases
This glue is great for general-purpose repairs around the house and in the garage. For automotive use, it can fix various plastic and rubber items, like attaching a rubber seal to a plastic window frame or repairing a cracked plastic interior panel. However, because it expands and can be a bit stiff, it’s best for repairs where there isn’t a lot of constant, high flexing.
3M Super 77 Multipurpose Spray Adhesive
While not a “glue” in the traditional sense, spray adhesives like 3M Super 77 are surprisingly effective for bonding lightweight plastic and rubber components, especially in large areas. This spray adhesive creates a strong, permanent bond that is resistant to moisture and temperature changes. It’s easy to apply evenly over large surfaces.
The benefit of a spray adhesive is its ability to coat surfaces quickly and evenly, ensuring good contact. It’s particularly useful for attaching foam, fabric, or thin rubber to plastic. The bond formed is flexible, which is great for parts that might shift slightly or experience minor vibrations.
It’s important to note that this is not for heavy-duty structural repairs but rather for lighter applications like attaching weather stripping or interior trim.
How it Works
This spray adhesive works by creating a tacky surface on both materials you want to join. You spray an even coat onto one or both surfaces, let it become tacky (usually a minute or two), and then press the parts together. The adhesive bonds on contact and continues to cure over time, creating a durable connection.
It’s designed to be fast-drying and create a strong bond that doesn’t yellow or degrade easily.
Best Use Cases
This spray adhesive is excellent for reattaching headliners, adhering sound deadening material, attaching foam gaskets to plastic housings, or securing lightweight rubber trim. It’s a good choice when you need to cover a large area quickly and require a flexible bond. It is less suitable for small, intricate parts or where a very rigid bond is needed.
Marine Grade Adhesives (e.g., 3M 5200 or Sikaflex 291)
Adhesives designed for marine environments are often excellent choices for automotive repairs because they are built to withstand harsh conditions, including water, salt, UV rays, and extreme temperature fluctuations. Products like 3M 5200 or Sikaflex 291 are polyurethane-based sealants and adhesives known for their incredible strength, flexibility, and waterproof properties. They are specifically formulated to bond to a wide variety of surfaces, including plastics and rubber.
These adhesives typically cure slowly, allowing ample time for positioning parts perfectly. The resulting bond is extremely durable and remains flexible, which is perfect for automotive applications where materials might expand and contract. While they are often considered “permanent” and can be difficult to remove, their performance in demanding conditions makes them a top contender for the Best Automotive Glue for Plastic to Rubber in many scenarios.
How it Works
Marine-grade polyurethane adhesives work by reacting with moisture in the air to cure. They form a strong, flexible, and waterproof bond. They adhere well to many materials, creating a seal that prevents water ingress and resists degradation from the elements.
The slow curing time allows for precise placement, and the final bond is exceptionally strong and durable, capable of handling significant stress and movement.
Best Use Cases
These adhesives are ideal for sealing and bonding exterior automotive parts, attaching rubber trim, weather stripping, or even for repairing hull or deck components if you have a boat. They excel in areas exposed to the elements or requiring a waterproof seal. Their flexibility is a major advantage for components that experience vibration or expansion/contraction due to temperature changes.
They are generally not recommended for interior parts where aesthetics are critical unless painted.
How to Prepare Surfaces for Bonding Plastic and Rubber
Getting the surfaces ready is just as important as picking the right glue. A clean surface lets the glue stick properly. This means no dirt, grease, or old glue is left behind.
For plastics, you might need to scuff them up a bit so the glue has something to grip. Rubber often has oils or silicones that prevent glue from sticking, so cleaning is extra important there. Following these steps makes sure your repair lasts.
Cleaning Plastic Surfaces
Start by cleaning the plastic part thoroughly. Use a mild soap and water solution. Rinse it well and let it dry completely.
If there’s still some residue or a greasy film, use a plastic-safe cleaner or isopropyl alcohol. A clean surface is crucial for any adhesive to bond effectively. Make sure the area is free of dust, oils, and any automotive waxes or silicones.
For some plastics, like polyethylene (PE) or polypropylene (PP), which are very common in car bumpers and trim, you might need to use a special plastic primer. These plastics have a low surface energy, making them difficult for most adhesives to stick to. A primer chemically treats the surface, allowing the glue to adhere much better.
Always check the adhesive’s instructions to see if a primer is recommended or required.
Preparing Rubber Surfaces
Rubber can be a bit trickier. Many types of rubber contain oils or waxes that can prevent adhesives from bonding. You need to clean the rubber surface very well.
Use a mild detergent and water, and then rinse thoroughly. After it dries, wipe it down with isopropyl alcohol. This helps remove any remaining contaminants.
For some rubber compounds, you might need to lightly abrade the surface. Use fine-grit sandpaper (around 220-320 grit) to create a slightly rough texture. This gives the adhesive more surface area to grip.
Be careful not to sand too aggressively, as you don’t want to damage the rubber. After sanding, clean the area again with isopropyl alcohol to remove any dust.
Surface Roughening (Scuffing)
Creating a slightly rough surface, often called scuffing or abrading, significantly improves the bond strength for many adhesives. This is especially true for smooth plastics and dense rubbers. You can use fine-grit sandpaper (like 220-400 grit) or a Scotch-Brite pad.
The goal isn’t to remove material but to create microscopic scratches.
These small scratches provide more surface area for the adhesive to anchor onto. It breaks the surface tension and allows the glue to penetrate into the tiny imperfections. After scuffing, it is essential to wipe the area clean with a degreaser or isopropyl alcohol to remove all dust and debris.
A clean, scuffed surface is the foundation for a strong and lasting bond.
Using Primers and Adhesion Promoters
For particularly challenging materials, such as certain types of plastics (e.g., polyethylene, polypropylene) or highly resistant rubbers, using a primer or adhesion promoter is highly recommended. These products are specifically designed to chemically alter the surface of difficult-to-bond materials, making them more receptive to adhesives. They create a bridge between the adhesive and the substrate, ensuring a much stronger and more durable bond.
Always follow the manufacturer’s instructions for the specific primer or adhesion promoter you are using. Typically, they are applied as a thin coat after cleaning and before applying the main adhesive. Ensure the primer is fully dry according to its instructions before proceeding with the glue.
This step is often overlooked but can be the difference between a repair that fails and one that lasts for years.
Application Techniques for Best Results
Applying the glue correctly is just as important as choosing the right one. You need to get a good, even coat. Too little glue, and the bond won’t be strong.
Too much, and it can squeeze out and make a mess. Following the steps for application will help ensure your repair is strong and looks good. Patience is key here.
Applying the Adhesive
When applying the adhesive, work in a well-ventilated area. If using a two-part adhesive, mix the components according to the manufacturer’s instructions. Be sure to mix them thoroughly to ensure they cure properly.
Apply a thin, even layer of the adhesive to one or both surfaces, depending on the product’s recommendation. Some glues require application to both surfaces, while others only need it on one.
Avoid applying too much glue, as excess adhesive can ooze out from the joint. This can create a weak spot or make the repair look untidy. If you are using a spray adhesive, hold the can the recommended distance from the surface and use a steady, sweeping motion for even coverage.
For tube glues, apply a bead or spread it thinly with a spatula or the applicator tip.
Clamping and Fixturing
Once the adhesive is applied, bring the two surfaces together. For many adhesives, applying gentle pressure or clamping the parts is essential to ensure good contact between the surfaces and the adhesive. This pressure helps the adhesive spread evenly and forces out any air bubbles that might weaken the bond.
Use clamps, tape, or weights to hold the parts in place while the adhesive cures.
The type of clamp or fixture you use will depend on the size and shape of the parts you are bonding. For small items, masking tape or rubber bands might suffice. For larger or heavier parts, C-clamps, bar clamps, or even specialized fixtures might be necessary.
Ensure the clamping pressure is firm but not so excessive that it squeezes all the adhesive out of the joint.
Curing Time and Full Strength
Every adhesive has a specific curing time, which is the time it takes to reach its full strength. This can range from a few minutes for super glues to several days for some high-strength epoxies or marine sealants. It’s crucial to let the adhesive cure for the full recommended time before putting any stress on the repaired part.
Check the product packaging for exact curing times.
Be patient during the curing process. Rushing this step can lead to a weak bond that fails prematurely. For adhesives that require clamping, leave the clamps in place for the entire recommended curing period or at least until the adhesive is firm to the touch.
Some adhesives continue to strengthen over several days, even after they feel dry.
Testing the Bond
After the adhesive has fully cured, it’s a good idea to gently test the strength of the bond. Apply light pressure or pull on the repaired area to ensure it’s holding firmly. Don’t immediately subject the repair to heavy loads or extreme conditions.
Gradually increase the stress over time if possible.
If the bond feels weak, or if the parts separate with gentle testing, the adhesive may not have been the right choice, or the surfaces may not have been prepared correctly. In some cases, you might be able to clean off the old adhesive and try again with a different product or by improving surface preparation. For most successful repairs, the bond should feel solid and secure.
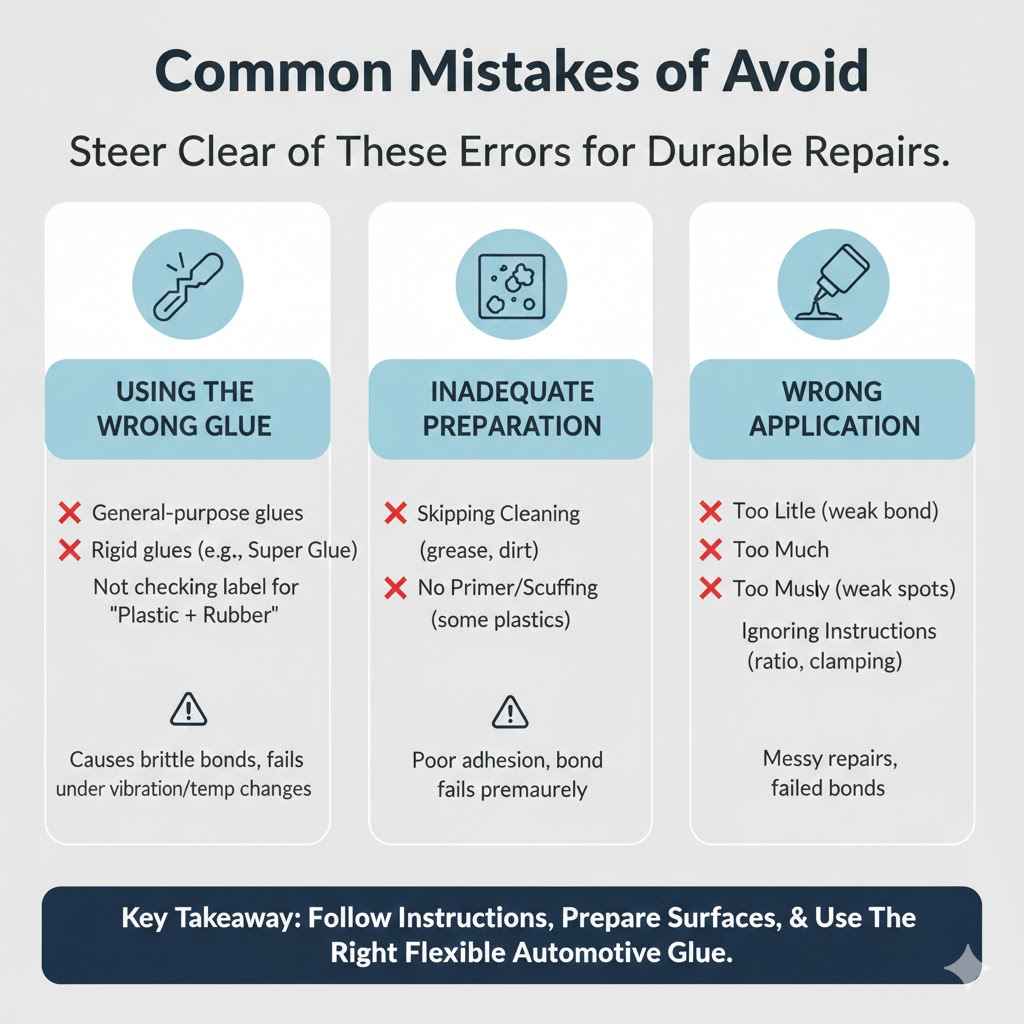
Common Mistakes to Avoid
Even with the best glue, mistakes can happen. These often involve skipping important steps like cleaning or not letting the glue dry long enough. Another common error is using the wrong kind of glue for the job.
Avoiding these simple errors will help you get a repair that lasts and looks great. This section covers the most frequent slip-ups so you can steer clear of them.
Using the Wrong Type of Glue
One of the most frequent mistakes is using a general-purpose glue when a specialized automotive adhesive is needed. Not all glues are made for the same materials or conditions. For example, using a wood glue on plastic and rubber will likely fail quickly.
Similarly, a super glue that becomes brittle might crack under the vibrations of a car. Always read the product label to ensure it’s suitable for plastics, rubber, and automotive use.
Using a glue not rated for flexibility can also be a problem. Car parts often flex and move, especially with temperature changes. A rigid glue will crack and break the bond.
Look for adhesives that explicitly state they are flexible or designed for bonding dissimilar materials that experience movement.
Inadequate Surface Preparation
Skipping or rushing the cleaning and preparation of surfaces is a major cause of adhesive failure. Dirt, grease, oil, wax, or old adhesive residue will prevent the new glue from bonding properly. Even a thin layer of invisible film can compromise the bond.
Always clean both the plastic and rubber surfaces thoroughly using appropriate cleaners like isopropyl alcohol.
For plastics, particularly those like polyethylene and polypropylene, surface activation through priming or scuffing is often necessary. For rubber, light abrasion can create a better surface for the adhesive to grip. Neglecting these steps means the glue is sticking to contaminants rather than the actual material, leading to premature failure.
Applying Too Much or Too Little Adhesive
Both extremes can cause problems. Applying too little adhesive means there isn’t enough contact area for a strong bond. You might think you’re being neat, but you’re weakening the repair.
On the other hand, applying too much adhesive can be just as bad. Excess glue can squeeze out of the joint, creating a messy appearance and potentially forming a weak spot if it’s not allowed to cure properly.
The best approach is to apply a thin, even layer of adhesive. For many glues, this means just enough to cover the surface without building up thick globs. If using a two-part adhesive, ensure the mix is correct; an incorrect ratio can affect curing and strength.
Always follow the manufacturer’s guidelines for application.
Not Allowing Enough Curing Time
Patience is a virtue, especially when it comes to adhesive curing. Many adhesives need significant time to reach their full strength, even if they feel dry to the touch within minutes or hours. If you put stress on the repaired part before the adhesive has fully cured, you can break the newly formed bond.
This is a very common mistake that leads to repairs failing prematurely.
Always check the product packaging for the recommended curing time, paying attention to both “set time” (when it’s dry to the touch) and “full cure time” (when it reaches maximum strength). For critical repairs or parts that will experience significant stress, it’s often wise to err on the side of caution and allow even more time than recommended.
Ignoring Manufacturer Instructions
Each adhesive product is formulated differently and has specific requirements for surface preparation, application, and curing. Ignoring these instructions, whether it’s the mixing ratio for a two-part adhesive, the required drying time for a primer, or the clamping pressure needed, can lead to failure. Manufacturers test their products extensively to determine the best way to achieve optimal performance.
Taking the time to read and follow the instructions on the adhesive’s packaging is essential. This includes understanding any special handling requirements, ventilation needs, or compatibility warnings. Deviating from these instructions is a gamble that often results in a weakened bond or complete failure of the repair.
Frequently Asked Questions
Question: What is the best type of glue for flexible plastic to rubber car parts?
Answer: For flexible plastic to rubber car parts, polyurethane or silicone-based adhesives are generally the best choices. These types of glues remain pliable after curing, which allows them to accommodate the movement and expansion/contraction of these materials in a vehicle.
Question: Can I use super glue to fix a rubber seal on my car door?
Answer: While super glue might stick rubber to plastic temporarily, it’s generally not recommended for rubber seals on car doors. Super glue tends to be brittle once cured. Rubber seals need flexibility to maintain a proper seal, and a brittle glue will likely crack and fail quickly under constant movement and temperature changes.
Question: How do I make sure the glue sticks to a greasy rubber bumper?
Answer: To ensure glue sticks to a greasy rubber bumper, you must thoroughly clean the surface. Use a strong degreaser or dish soap and water, then rinse very well. Follow up with isopropyl alcohol to remove any residual oils or contaminants.
Lightly sanding the rubber surface can also help create a better grip for the adhesive.
Question: Is there a way to bond different types of plastics to rubber?
Answer: Yes, bonding different types of plastics to rubber is possible with the right adhesive. Look for a flexible, multi-material adhesive, often a polyurethane or a specialized rubber and plastic bonding agent. Proper surface preparation on both the plastic and rubber is critical for a strong bond.
Question: How long does automotive glue for plastic to rubber usually take to dry?
Answer: Drying times vary greatly depending on the adhesive. Some super glues for plastics might set in seconds, but full cure could take hours. Flexible adhesives like polyurethanes or silicones can take 24-72 hours to reach full strength.
Always check the product’s instructions for specific curing times.
Summary
Choosing the right adhesive for plastic to rubber automotive repairs ensures your fix lasts. Focus on flexible options like polyurethanes or silicones. Proper cleaning and surface prep on both materials are vital.
Always follow the glue’s instructions for application and curing time. With the right glue and careful work, you can achieve a strong, lasting repair.