How Much Clear Coat to Paint a Car
Hey there, friend! So, you’re thinking about giving your car a fresh, glossy look with a new paint job, but you’re wondering, “How much clear coat do I need?” I totally get it—painting a car is exciting but can feel overwhelming when you’re figuring out supplies. I’ve been down this road myself, experimenting with paint jobs on my old pickup and helping buddies spruce up their rides. Getting the right amount of clear coat is key to a smooth, professional finish without wasting money or running short.
In this article, I’m going to break it all down for you—how much clear coat you need, what affects that amount, and tips to make your paint job shine. Whether you’re a DIY newbie or a seasoned gearhead, I’ve got you covered with practical advice from my own experience. Let’s dive in and get that car looking showroom-ready!
Quick Answer
A small car needs about 1-1.5 gallons of mixed clear coat for 2-3 coats, a mid-size car 1.5-2 gallons, and a full-size SUV or truck 2-3 gallons. A single hood or panel only needs about 1 quart. Buy 10-20% extra to cover mistakes and overspray.
What Is Clear Coat and Why Does It Matter
Let’s start with the basics. Clear coat is the shiny, protective layer you apply over your car’s base paint. It’s like a shield that guards against scratches, UV rays, and road grime while giving your car that glossy, wet look. When I painted my first car, I didn’t realize how important clear coat was until I saw how it transformed a dull base color into a mirror-like finish.
Clear coat is usually a two-part system: the clear paint and a hardener that makes it durable. It comes in cans, gallons, or quarts, and you mix it before spraying. Without enough clear coat, your paint job might look uneven or wear out fast. Too much, and you’re wasting cash. Knowing how much you need depends on your car’s size and a few other factors, which I’ll explain next.
Factors That Affect Clear Coat Quantity
I’ve learned that no two paint jobs are the same. Several things decide how much clear coat you’ll need. Here’s what I consider before buying:
- Car Size: A compact car like a Honda Civic needs less clear coat than a big SUV or truck. I painted a sedan once and used way less than when I tackled my full-size pickup.
- Number of Coats: Most paint jobs need 2-3 coats of clear for a smooth, durable finish. I usually go for three to be safe, especially for high-wear areas like the hood.
- Application Method: Spraying with a professional HVLP (high-volume, low-pressure) gun uses less clear coat than a rattle can. I’ve tried both, and spray cans waste more due to overspray.
- Surface Condition: If your car has dents or rough spots, you might need extra clear coat to build up a smooth finish. My old car had some scratches, and I used a bit more to even it out.
- Coverage Area: Are you painting the whole car or just a panel? A full paint job needs more clear coat than touching up a fender.
These factors help me estimate how much to buy. Let’s get into the specifics of how much clear coat different cars need.
Estimating Clear Coat for Different Car Sizes
Figuring out how much clear coat you need starts with your car’s size. After painting a few vehicles, I’ve got a rough guide that works for most projects. Here’s what I’ve found:
- Small Cars (e.g., Honda Civic, Toyota Corolla): These usually need 1-1.5 gallons of mixed clear coat for a full paint job with 2-3 coats. I painted my buddy’s Civic with about 1.25 gallons and had a little left over.
- Mid-Size Cars (e.g., Toyota Camry, Ford Fusion): Plan on 1.5-2 gallons. My sedan took just under 2 gallons for three solid coats.
- Large Vehicles (e.g., SUVs, trucks, vans): You’ll need 2-3 gallons, depending on the size. My pickup used nearly 2.5 gallons for a full job.
- Motorcycles or Small Parts: For smaller projects like a bike or a single panel, a quart (32 ounces) or two is usually enough.
These are rough estimates for spraying with an HVLP gun. If you’re using spray cans, you’ll need more—think 8-12 cans for a small car and up to 20 for a large one. Always buy a bit extra to account for mistakes or touch-ups. I learned this after running out mid-job and scrambling to find a matching clear coat.
Choosing the Right Clear Coat
Not all clear coats are created equal. I’ve tried a few brands, and picking the right one makes a big difference. Here’s what I look for:
- Urethane vs. Acrylic: Urethane clear coats are tougher and more common for cars. I use urethane for its durability and gloss. Acrylic is cheaper but doesn’t last as long.
- Gloss Level: Most car paints use a high-gloss clear coat for that showroom shine. I’ve used semi-gloss for a custom matte look, but it’s less common.
- Mixing Ratio: Check the mixing instructions. Most urethane clear coats mix at 4:1 (four parts clear to one part hardener). I messed this up once and ended up with a sticky mess.
- Brand Quality: I stick to trusted brands like PPG, DuPont, or Sherwin-Williams. They cost more but give a better finish. Cheap clear coats can yellow or peel over time.
When I painted my truck, I went with a high-quality urethane clear coat from PPG. It was pricier, but the results were worth it—my truck still shines years later.
Calculating Clear Coat for Your Project
To get a precise amount, I use a simple formula based on surface area and coats. A gallon of mixed clear coat covers about 150-200 square feet with one coat, depending on your spraying technique. Here’s how I break it down:
- Measure Your Car’s Surface Area: Small cars have about 100-150 square feet of paintable surface. Mid-size cars are 150-200, and large vehicles are 200-300.
- Account for Coats: Multiply the surface area by the number of coats (2-3). For example, a mid-size car (175 sq ft) with three coats needs 525 sq ft of coverage.
- Divide by Coverage Rate: If a gallon covers 200 sq ft, divide 525 by 200. That’s about 2.6 gallons. Round up to 3 gallons to be safe.
For spray cans, one 12-ounce can covers about 10-15 square feet. So, a small car needing 450 sq ft (150 sq ft x 3 coats) would take 30-45 cans. I always add 10-20% extra for overspray or errors.
How Much Clear Coat for Just the Hood or a Single Panel?
A lot of people searching this aren’t repainting the whole car — they’re just redoing a hood, fender, or door panel. An average car hood is roughly 15-20 square feet. At 2-3 coats, that’s 30-60 sq ft of coverage, which works out to about 1 quart (32 oz) of mixed clear coat for most hoods — not the full gallon a whole-car job needs. A single door or fender needs even less, often just 8-16 oz mixed.
If you’ve seen someone ask whether 8oz will cover a hood: it won’t, at least not for a proper 2-3 coat job. 8oz mixed is closer to what you’d use for a small scratch touch-up or a single quarter-panel repair, not a full hood.
For anyone working in liters instead of gallons (common if you’re sourcing clear coat for an older or imported car, like a classic Camaro): 1 US gallon equals about 3.785 liters, so a small car’s 1-1.5 gallon estimate translates to roughly 3.8-5.7 liters, and a large vehicle’s 2-3 gallons is about 7.6-11.4 liters.
Tools and Equipment for Applying Clear Coat
Applying clear coat right takes the right tools. I’ve learned this from trial and error—cheap tools lead to a messy finish. Here’s what I use:
- HVLP Spray Gun: This gives a smooth, even coat with less waste. I got a decent one for about $100, and it’s paid for itself.
- Compressor: You’ll need an air compressor with enough power for the spray gun. Check the gun’s requirements.
- Mixing Supplies: Get mixing cups, stir sticks, and a strainer to ensure a clean mix. I forgot the strainer once, and dirt ruined my finish.
- Protective Gear: Wear a respirator, gloves, and goggles. Clear coat fumes are no joke—I felt dizzy after skipping the mask once.
- Sandpaper and Tape: Use 800-1500 grit sandpaper for prepping and painter’s tape to mask off areas like windows.
If you’re using spray cans, you don’t need a compressor or gun, but you’ll still need masking supplies and protective gear. I’ve found spray cans are easier for beginners, but harder to get a pro-level finish.
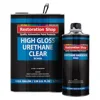
Our Pick: Restoration Shop 1.25 Gallon 2K Clear Coat Kit
A full 4:1 urethane clear + hardener kit sized right for a mid-size car’s 2-3 coat job, with enough left over for touch-ups.
View Our Pick on Amazon
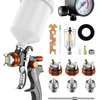 HVLP Spray Gun Best for: even coverage with far less overspray waste than rattle cans. Check on Amazon → |
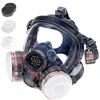 Full Face Respirator Best for: real fume protection, not just a dust mask — clear coat solvents are no joke. Check on Amazon → |
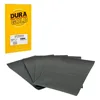 2000-Grit Wet/Dry Sandpaper Best for: leveling between coats and fixing minor orange peel or runs. Check on Amazon → |
Step-by-Step Guide to Applying Clear Coat
Here’s how I apply clear coat to get a glossy, durable finish:
- Prep the Surface: Sand the base coat with 800-grit sandpaper until it’s smooth. Clean it with rubbing alcohol to remove dust and oils. I spent hours prepping my truck to avoid a bumpy finish.
- Mask Off Areas: Use painter’s tape and plastic sheeting to cover windows, lights, and trim. I forgot to tape once and spent days scraping clear coat off my windshield.
- Mix the Clear Coat: Follow the mixing ratio (e.g., 4:1). Stir gently to avoid bubbles. I use a digital scale for accuracy.
- Apply the First Coat: Spray in thin, even passes, holding the gun 6-8 inches from the surface. Start with light coats to avoid runs. I move in a side-to-side motion for even coverage.
- Wait and Sand: Let each coat dry for 10-20 minutes (check the can’s instructions). Lightly sand with 1500-grit sandpaper between coats for a smooth finish.
- Apply Additional Coats: Two or three coats are usually enough. I go for three for extra protection.
- Polish and Buff: After the final coat dries (24-48 hours), buff with a polishing compound for maximum shine. This made my sedan look like it just rolled off the lot.
Take your time—rushing leads to drips or uneven spots. I learned patience after ruining a panel by spraying too thick.
Common Mistakes to Avoid
I’ve made plenty of mistakes painting cars, so let me save you some trouble:
- Not Prepping Enough: Skipping sanding or cleaning leaves dirt or bumps in the finish. I had to redo a fender because of this.
- Overmixing: Stirring too fast creates bubbles that show up in the clear coat. Mix slowly and strain the mix.
- Spraying Too Thick: Heavy coats cause runs or sags. I ruined a door by getting impatient and spraying too much at once.
- Wrong Weather: Don’t paint in high humidity or extreme heat. I tried painting on a humid day, and the clear coat took forever to dry.
- Skipping Protective Gear: Fumes and overspray are harmful. I felt sick after skipping my respirator once—never again.
Avoid these, and your paint job will look pro-level.
Gloss vs. Matte Clear Coat: What Changes
Matte (or satin/low-gloss) clear coat uses roughly the same 2-3 coat count as standard high-gloss urethane, so the coat count itself doesn’t really change. What changes is what you can do after spraying:
| Factor | High-Gloss Clear Coat | Matte/Satin Clear Coat |
|---|---|---|
| Typical coat count | 2-3 coats | 2-3 coats |
| Wet sanding after cure? | Yes — standard step | No — ruins the flat finish |
| Buffing/polishing? | Yes — brings out the shine | No — creates uneven gloss patches |
| Best for | Showroom shine, daily drivers | Custom/stealth builds, restomods |
The wet-sand-and-buff step that gives gloss clear coat its mirror shine is exactly what you have to skip with matte — sanding or polishing a matte finish burnishes the flatting agent unevenly, leaving shiny patches that can’t be blended back in without repainting the whole panel.
Cost of Clear Coat and Budgeting Tips
Clear coat costs vary, but here’s what I’ve seen:
- Urethane Clear Coat: $50-$150 per gallon, depending on stick to trusted brands for quality. I’ve used cheaper ones and regretted it when they yellowed.
- Spray Cans: $5-$10 per can. You’ll need more cans, so the costs add up.
- Equipment: An HVLP gun ($50-$200), compressor ($100-$500), and supplies like tape and sandpaper ($20-$50).
For a small car, expect to spend $100-$300 on clear coat and supplies. Larger vehicles or pro setups can hit $500 or more. I budget extra for mistakes—buying a half-gallon more saved me when I had to redo a panel.
Troubleshooting Table: Clear Coat Quantities and Tips
Here’s a quick guide I use for planning clear coat projects:
| Car Type | Clear Coat Needed (Gallons) | Spray Cans Needed | Tips |
|---|---|---|---|
| Small Car | 1-1.5 | 8-12 | Light coats, check for runs |
| Mid-Size Car | 1.5-2 | 12-16 | Sand between coats for smoothness |
| Large Vehicle | 2-3 | 16-20 | Clean condenser thoroughly |
| Motorcycle/Parts | 0.25-0.5 (quarts) | 2-4 | Use high-quality urethane for durability |
This table helps me plan and avoid running out mid-job.
Too much clear coat warning: Spraying overly thick, full-wet coats — rather than several thin passes — traps solvent underneath the surface. That trapped solvent can cause cracking as it slowly tries to escape, or “orange peel” texture if the material is too thick to level out smoothly before it starts to set.
I once got impatient on a fender repair and laid down one heavy, glossy-looking coat instead of two thin ones. Two days later it had cracked in a spiderweb pattern right where I’d built it up thickest. There was no fixing that spot — I had to sand it back to bare metal and start the whole panel over.
— Md Meraj, The Daily Automotive
My Personal Experience Painting a Car
Let me share a story. When I painted my old pickup, I underestimated how much clear coat I’d need. I bought 2 gallons, thinking it was plenty, but ran out halfway through the third coat on the bed. I had to rush to the store, and the new batch didn’t match perfectly, leaving a slight color difference. It taught me to always buy extra and stick to one brand. The truck still looked great, but that mistake stuck with me. Hopefully, my tips will help you avoid the same hassle!
When to Call a Professional
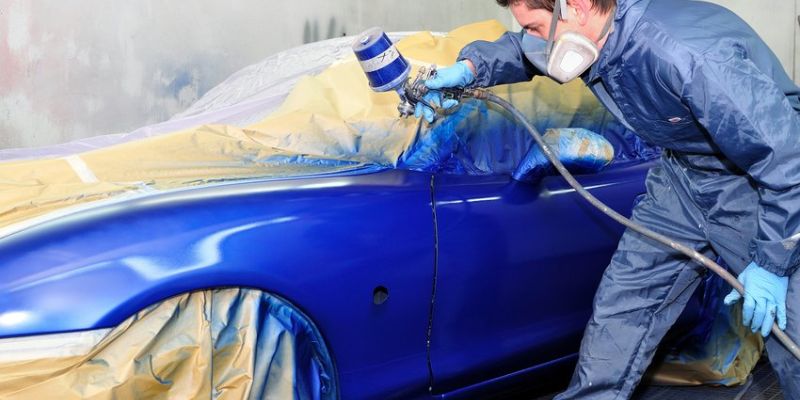
If DIY feels too daunting, a pro paint shop is a good option. I’ve gone this route for a show car where I wanted perfection. Pros have the tools and experience for a flawless finish, but it costs $2,000-$5,000 for a full job. They’ll handle prep, spraying, and curing, ensuring no runs or uneven spots. If you’re painting a high-end car or want a show-quality finish, it’s worth the investment.
Preventing Clear Coat Issues
To keep your new paint job looking great, here’s what I do:
- Wash Regularly: Dirt and grime can scratch the clear coat. I wash my car every two weeks.
- Wax It: Apply wax every 3-6 months for extra protection. It keeps my truck’s finish glossy.
- Park Smart: Avoid direct sun to prevent UV damage. I park in a garage when I can.
- Fix Scratches Fast: Small scratches can worsen. I use a touch-up pen for quick fixes.
These habits keep my paint jobs looking fresh for years.
Conclusion: Shine Bright with the Right Clear Coat
Painting your car with a clear coat is a rewarding project that can make your ride look brand new. Figuring out how much clear coat you need comes down to your car’s size, the number of coats, and your application method. From small cars needing 1-1.5 gallons to big trucks requiring up to 3, planning saves time and money. Use quality urethane clear coat, prep thoroughly, and apply thin, even coats for a pro-level finish. My experiences—both the wins and the mistakes—have taught me that patience and preparation are everything.
With the tips I’ve shared, you’re ready to tackle your paint job with confidence. Whether you’re spraying a compact sedan or a monster SUV, you’ll get that glossy, head-turning look. Got a paint job story or a tip I missed? I’d love to hear it! Here’s to making your car shine and cruising in style!
Frequently Asked Questions
How many coats of clear coat should I apply?
Two to three coats are ideal. I use three for extra durability and shine, but two can work for lighter jobs.
Can I use spray cans instead of a spray gun?
Yes, but spray cans waste more and give a less even finish. I’ve used them for small jobs, but a spray gun is better for full paint jobs.
How long does the clear coat take to dry?
It takes 10-20 minutes between coats and 24-48 hours to fully cure. I wait a full day before buffing to avoid smudging.
What happens if I use too little clear coat?
The finish might be uneven or less durable. I always buy extra to ensure full coverage.
Can I paint in my garage?
Yes, if it’s well-ventilated and dust-free. I use fans and plastic sheeting to keep my garage clean while painting.
How do I fix runs in the clear coat?
Sand the area with 1500-grit sandpaper, clean it, and reapply a light coat. I’ve fixed runs this way, but it’s a pain, so spray lightly to avoid them.
What happens if I use too much clear coat?
Spraying overly thick, full-wet coats traps solvent underneath the surface, which can cause cracking as it tries to escape, or orange-peel texture if the material can’t level out before it sets. Minor orange peel can be wet-sanded (2000-grit) and buffed out once fully cured; deep cracking usually means sanding back to bare metal and redoing that panel.
How many coats of matte clear coat should I use?
About the same as gloss — 2-3 coats. The real difference is what comes after: never wet-sand or buff a matte finish, since that burnishes the flatting agent unevenly and leaves shiny patches that can’t be blended back in without repainting the panel.
Products related to this article
Sponsored / affiliate links. As an Amazon Associate I earn from qualifying purchases. I may earn additional commission from eligible campaigns.