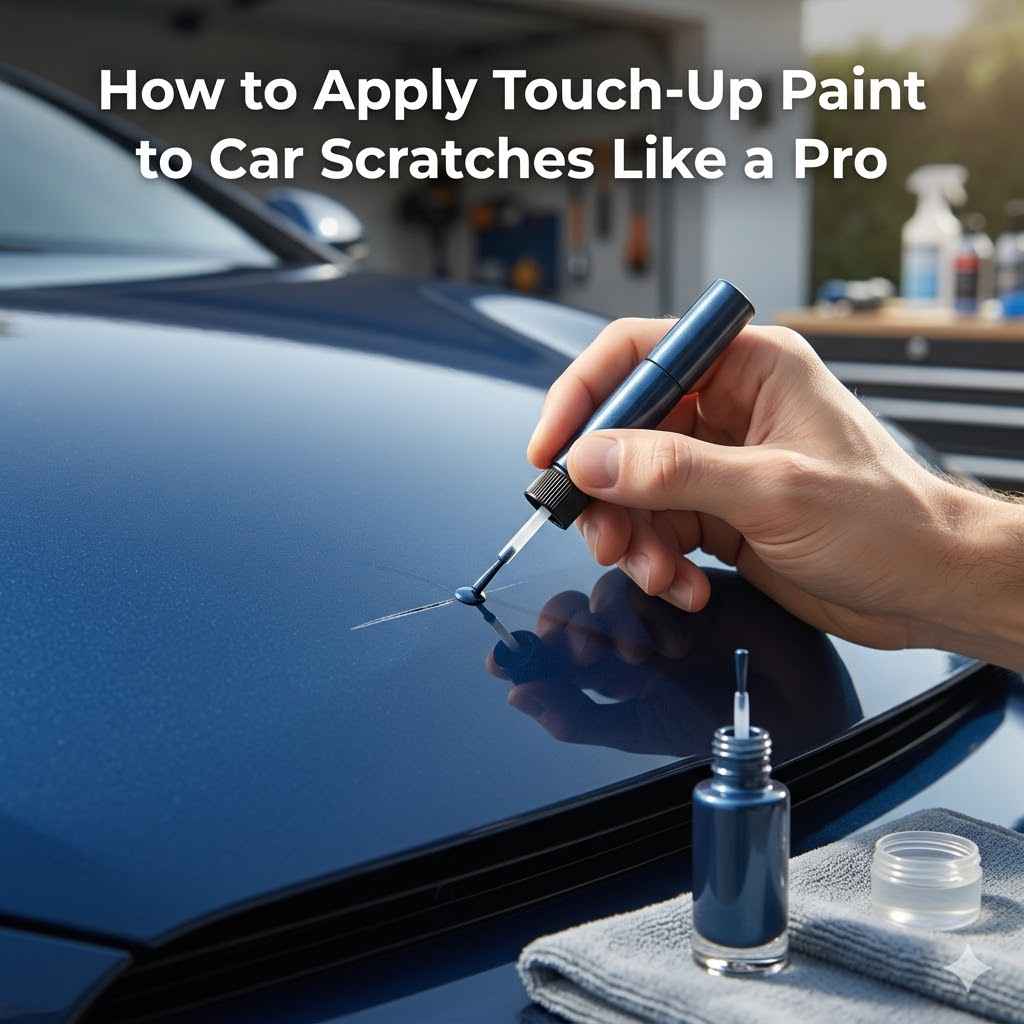
How to Apply Touch-Up Paint to Car Scratches Like a Pro
Figuring out how to apply touch-up paint to car scratches like a pro can seem tricky at first. Many folks worry about making the scratch look worse or ending up with a patch that doesn’t match. But it doesn’t have to be hard! This guide breaks down the whole process into simple, easy steps. We’ll walk you through everything you need to know to fix those little paint nicks and make your car look great again. Get ready to learn how to make those scratches disappear.
Gathering Your Tools for Scratch Repair
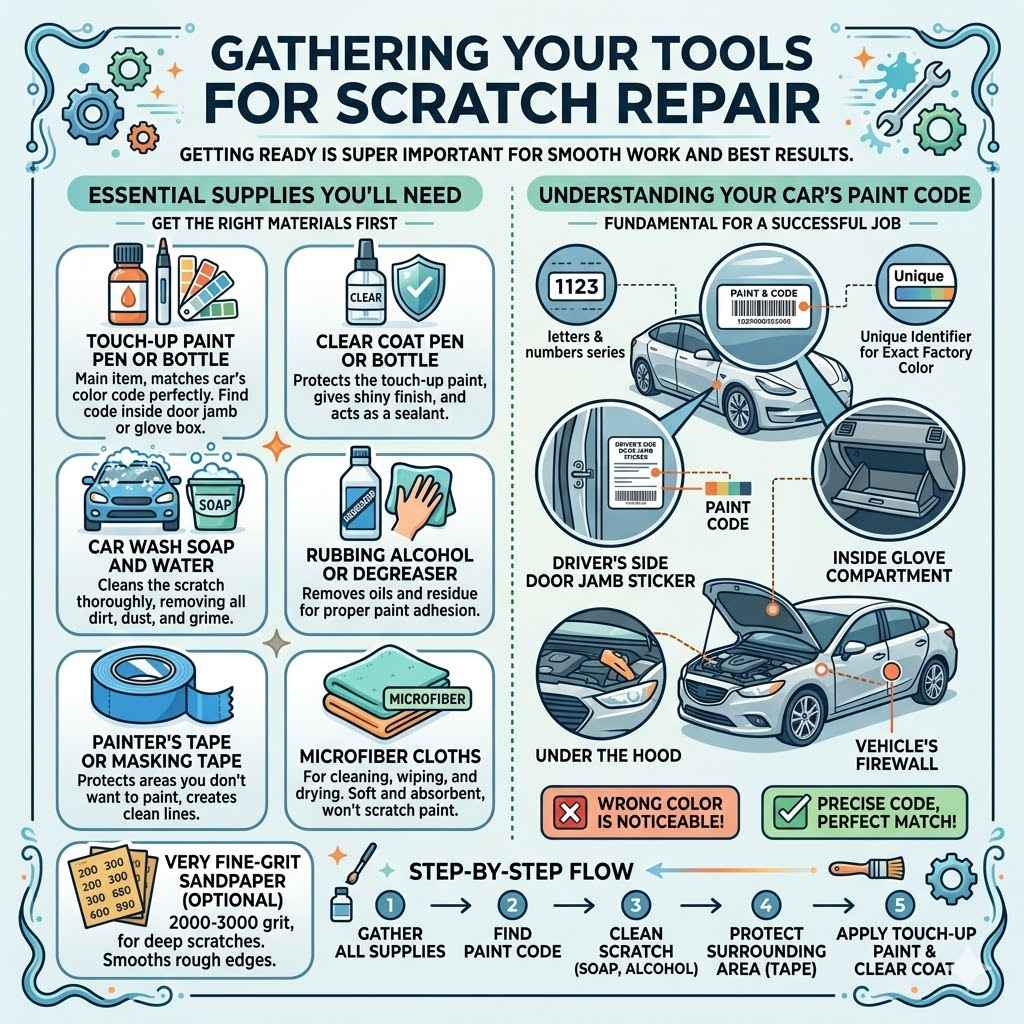
Getting ready for your car scratch repair is super important. Having all the right supplies on hand means you can work smoothly and get the best results. It’s like a painter having their brushes and colors ready before starting a masterpiece. If you miss even one small item, it can slow you down or mean you can’t finish the job properly. This section covers what you need before you even think about touching a paint pen.
Essential Supplies You’ll Need
Getting the right materials is the first step in knowing how to apply touch-up paint to car scratches like a pro. You don’t want to start and then realize you’re missing something vital. Having everything ready will make the job much easier and more successful.
Touch-up paint pen or bottle: This is the main item. Make sure it matches your car’s color code perfectly.
This touch-up paint is specially made for your car’s make and model. It usually comes in a small bottle with a brush or a pen applicator. Finding the right color code is key. You can usually find this code on a sticker inside your car’s door jamb, in the glove box, or in your owner’s manual. Using the wrong color will be very noticeable and won’t look good.
Clear coat pen or bottle: This protects the touch-up paint and gives it a shiny finish.
The clear coat acts like a sealant. It helps the new paint blend in with the surrounding original paint. It also adds a layer of protection against dirt, water, and the sun. Without a clear coat, the repaired area might look dull or feel rougher than the rest of your car’s paint.
Car wash soap and water: To clean the scratched area thoroughly.
Cleaning is a crucial step that can’t be skipped. You need to get rid of all dirt, dust, wax, and grime from the scratch and the surrounding paint. Any debris left behind can get trapped in the paint or cause the new paint to not stick well. Using a good car wash soap designed for vehicles is best.
Rubbing alcohol or degreaser: To remove any oils or residue.
Even after washing, there might be invisible oils or residues on the paint surface. These can come from your hands, car wax, or road film. Rubbing alcohol or a dedicated automotive degreaser will lift these contaminants. This ensures the touch-up paint adheres properly to the metal or primer underneath.
Painter’s tape or masking tape: To protect areas you don’t want to paint.
This tape is used to create clean lines. It stops you from accidentally getting touch-up paint on good paint, trim, or glass. Good quality painter’s tape is designed to stick well but peel off without damaging the surface. This is important for a professional-looking finish.
Microfiber cloths: For cleaning and wiping.
Microfiber cloths are soft and absorbent. They won’t scratch your car’s paint. You’ll use them to dry the area, apply cleaners, and wipe away any excess touch-up paint. Having a few clean ones ready is important.
Very fine-grit sandpaper (optional, for deeper scratches): Like 2000-3000 grit.
For scratches that have gone through the paint and down to the primer or even metal, a very fine sandpaper might be needed. It’s used to gently smooth out any rough edges around the scratch. This helps the new paint lay down more evenly. Using it requires a light touch to avoid making the problem worse.
Understanding Your Car’s Paint Code
Knowing your car’s paint code is fundamental to a successful touch-up job. It’s the unique identifier for the exact color your car was painted at the factory. Without this precise code, any paint you buy might be a close match but not perfect. A slight color difference can be very noticeable, especially in bright sunlight. This can make the repair more obvious than the original scratch.
The paint code is usually a series of letters and numbers. It’s often found on a sticker located in a few common places.
Inside the driver’s side door jamb.
Under the hood.
Inside the glove compartment.
On the vehicle’s firewall.
Sometimes, the owner’s manual will also list this information. If you can’t find it, your car dealership’s parts department can help you identify it using your car’s Vehicle Identification Number (VIN). Always double-check the code before ordering your touch-up paint.
Step-by-Step Guide How to Apply Touch-Up Paint to Car Scratches Like a Pro
Now that you have all your supplies, it’s time to get to work. Following these steps carefully will help you achieve a smooth, professional finish on your car’s scratches. This process is designed to be easy to follow, even if you’ve never done it before. We’ll guide you through each part of fixing your car’s paint.
Cleaning the Scratch Area
Before applying any paint, the scratched area must be perfectly clean. Any dirt, dust, or grease will prevent the new paint from sticking properly. It can also get trapped in the paint, leaving a rough or bumpy finish. A clean surface is the foundation for a good repair.
Start by washing the area around the scratch with car wash soap and water. Rinse it thoroughly.
Then, use a microfiber cloth dampened with rubbing alcohol or a degreaser. Gently wipe down the scratch and the surrounding paint. This removes any oils or residues that the soap might have missed. Make sure the area is completely dry before proceeding.
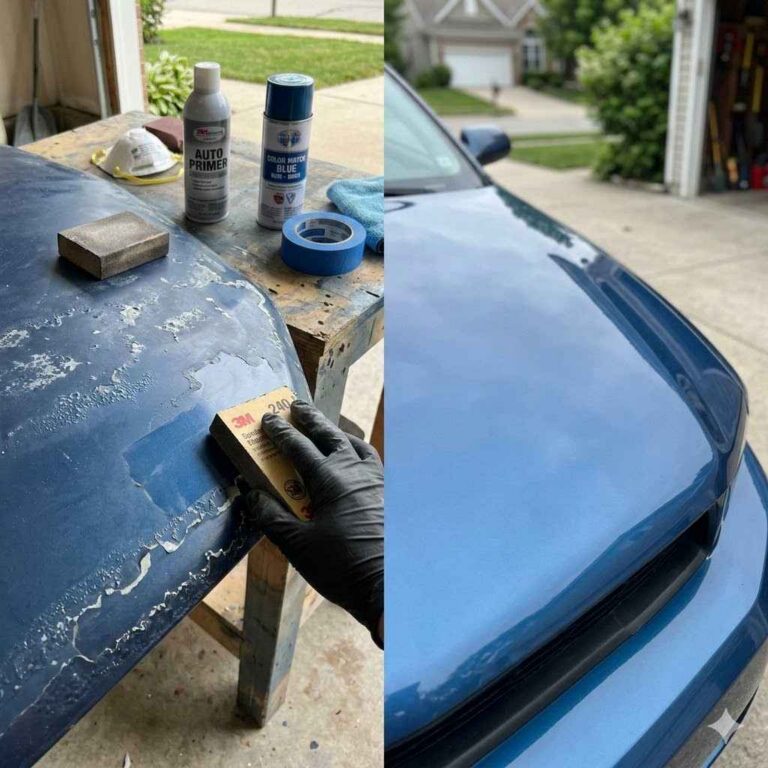
Preparing the Scratch for Paint
For very light scratches that haven’t gone through the clear coat, you might only need to clean the area. However, for deeper scratches, some preparation is needed to ensure the paint adheres well.
If there are any loose bits of paint around the edge of the scratch, you can carefully remove them with a toothpick or a very fine-grit sanding sponge. Be gentle. The goal is to create a smooth edge, not to make the scratch bigger.
If the scratch has gone down to the primer or metal, you might need to apply a tiny bit of primer first. Some touch-up paint kits include a primer pen. If yours doesn’t, you may need to buy a small amount of automotive primer. Apply a very thin layer only inside the scratch. Let it dry completely according to the product instructions.
Applying the Touch-Up Paint
This is the core of knowing how to apply touch-up paint to car scratches like a pro. Patience and a light touch are key here. You’ll want to build up thin layers of paint rather than trying to fill the scratch in one go.
Shake the touch-up paint pen or bottle well for about 30 seconds. This mixes the pigment evenly.
Carefully apply a thin coat of paint directly into the scratch. Use the brush or pen tip to guide the paint. Try to keep the paint within the lines of the scratch. If you get paint on the surrounding areas, wipe it off immediately with a clean microfiber cloth.
Let the first coat dry completely. This can take anywhere from 30 minutes to a couple of hours, depending on the paint and the humidity.
Once dry, apply a second thin coat if needed. You may need several thin coats to build up the paint to the level of the surrounding surface. Again, let each coat dry thoroughly.
Applying the Clear Coat
After the color coat has dried completely, it’s time for the clear coat. This step is vital for protecting the repair and making it look like the rest of your car’s paint.
Shake the clear coat pen or bottle well.
Apply a thin, even coat of clear coat over the dried color paint. Extend it slightly over the edges of the scratch. This helps to blend the new paint with the old.
Let the clear coat dry completely. This usually takes a few hours.
Once the clear coat is dry, you can apply a second coat if desired. This adds extra protection and shine.
Finishing and Buffing
After the clear coat has fully cured (this might take 24 hours or more), you can finish the repair. This step helps to make the repaired area blend in seamlessly.
If you notice any high spots or unevenness, you can gently wet sand the area. Use very fine-grit sandpaper (2000-3000 grit) with a sanding block or a foam applicator. Sand very lightly in a circular motion. The goal is to level the clear coat, not to sand through it.
After sanding, clean the area again with water and dry it with a microfiber cloth.
Now, use a fine automotive polishing compound. Apply a small amount to a clean microfiber cloth and gently rub it over the repaired area. This will remove any haze from sanding and bring back the shine.
Finally, apply a coat of car wax to the entire area to protect your fresh repair.
Dealing with Different Types of Scratches
Not all car scratches are the same. Some are just surface marks, while others are deep and go down to the metal. Knowing the difference helps you pick the right approach and tools for the job. This part helps you understand how to tackle common scratch problems.
Clear Coat Scratches
These are the easiest to fix. They are only in the top layer of paint, the clear coat. You might feel them with your fingernail, but they don’t go deeper.
What they look like: These often appear as white or hazy lines. They are caused by things like car washes, brushes, or light abrasions.
How to fix them:
- Clean the area thoroughly.
- Use a fine-grit polishing compound.
- Rub the compound onto the scratch with a soft cloth.
- Work in small circles.
- Buff the area until the scratch disappears and the shine returns.
Sometimes, a scratch-fill product can also work wonders here by filling in the tiny gaps in the clear coat.
Paint Scratches
These scratches go through the clear coat and into the color coat of the paint. You can usually see the color of your car underneath the scratch.
What they look like: These scratches will show the base color of your car. If they are deep, you might see a different color underneath, like grey primer or even bare metal.
How to fix them:
- Clean the scratch well.
- Apply a thin layer of touch-up paint that matches your car’s color code.
- Let it dry completely.
- Apply more thin layers until the scratch is filled and level with the surrounding paint.
- Apply a clear coat over the dried color paint.
- Let it cure and then buff as needed.
This process is where understanding how to apply touch-up paint to car scratches like a pro really pays off in careful layering.
Deep Scratches and Gouges
These are the most severe. They go through all paint layers and often reach the primer or bare metal. You might even see a dent.
What they look like: These are very noticeable. You’ll see the primer (often grey) or the silver/black of the bare metal.
How to fix them:
- Clean the scratch thoroughly.
- If there’s rust, you’ll need to remove it first with sandpaper or a rust remover.
- Apply a rust inhibitor if you treated bare metal.
- Apply a thin layer of automotive primer directly into the scratch.
- Let it dry.
- Apply thin layers of color-matched touch-up paint, letting each dry.
- Apply clear coat.
- Let it cure and then buff.
For very deep gouges or dents, professional repair might be the best option for a perfect result.
Tips for a Professional Finish
Even with the right tools, a few extra tips can make your touch-up job look much better. These small details make a big difference in how smooth and unnoticeable the repair is. They help you go from just fixing a scratch to making it look like it was never there.
Work in Good Lighting
Good light is your best friend when doing touch-up paint. You need to see exactly what you’re doing.
Natural daylight is ideal. Try to do the repair outside or in a well-lit garage during the day.
Artificial lights can cast shadows or distort colors. If you have to use indoor lights, make sure they are bright and positioned so you can see clearly without glare. This helps you avoid mistakes and ensure an even application.
Apply Thin Coats
This is one of the most important rules for a pro finish. Don’t try to fill the scratch all at once.
Thin coats build up gradually. This allows each layer to dry properly. It also helps prevent drips and runs.
If you put too much paint on at once, it can pool in the scratch and dry unevenly. This makes the repair more visible and harder to fix later. Patience with thin layers will give you a smoother, more level result.
Use a Steady Hand
Control is key when applying touch-up paint. Your hand should be as steady as possible.
Rest your elbow or wrist on a stable surface if needed. This can help prevent shaky movements.
Move slowly and deliberately. It’s better to take your time and apply the paint precisely than to rush and make a mess. A steady hand ensures the paint goes exactly where you want it.
Don’t Rush the Drying Time
Each layer of paint needs adequate time to dry. Rushing this step is a common mistake.
Check the paint manufacturer’s instructions for recommended drying times. Humidity and temperature can affect how long it takes.
If you apply a new coat before the previous one is dry, you can ruin the paint job. It might bubble, wrinkle, or not adhere correctly. Waiting the full drying time is crucial for a smooth, durable repair.
Practice on a Hidden Area (Optional but Recommended)
If you’re feeling unsure, try practicing on an inconspicuous part of your car first.
The bottom edge of the bumper or an area under the car can be good practice spots.
This helps you get a feel for how the paint flows from the applicator. You can also practice your steady hand technique. Seeing how the paint dries and looks after clear coat will give you confidence for the main repair.
FAQ
Question: How do I find my car’s paint color code?
Answer: Your car’s paint color code is usually found on a sticker inside the driver’s side door jamb, under the hood, or in your owner’s manual. It’s a series of letters and numbers that precisely identifies your car’s original paint color.
Question: Can I use nail polish for car scratches?
Answer: While nail polish might seem like a quick fix, it’s not recommended. Car paint has a specific formula for durability and matching. Nail polish is too thick, doesn’t adhere well to car surfaces, and won’t match your car’s color or texture, likely making the scratch more noticeable.
Question: How long does touch-up paint take to dry?
Answer: Drying times vary depending on the paint type, temperature, and humidity. The color coat might take 30 minutes to a couple of hours to be dry to the touch, but it needs longer to cure fully. Clear coat usually needs several hours to dry and up to 24 hours or more to cure before buffing.
Question: What if the touch-up paint doesn’t match perfectly?
Answer: Minor color variations can happen. Ensure you’ve entered the correct paint code. If there’s still a slight mismatch, sometimes applying multiple thin coats helps.
For significant mismatches, you might need to have a professional color-match and repaint the panel.
Question: Do I need to sand the scratch before applying touch-up paint?
Answer: You only need to sand for deeper scratches or if there are rough edges. For very light scratches in the clear coat, cleaning and polishing might be enough. For deeper ones, very fine-grit sandpaper (2000-3000 grit) can smooth edges but requires a very gentle touch.
Summary
Learning how to apply touch-up paint to car scratches like a pro is achievable with patience and the right steps. By cleaning the area well, using thin layers of matching paint and clear coat, and allowing proper drying time, you can effectively fix minor paint damage. This guide provides the clear instructions needed to make those scratches nearly disappear and keep your car looking its best. You can now confidently tackle those small paint imperfections.