How to Paint Correct a Car: Machine Polishing Guide
Paint correction removes swirl marks, oxidation, and shallow scratches by machine-polishing the clear coat rather than repainting it.
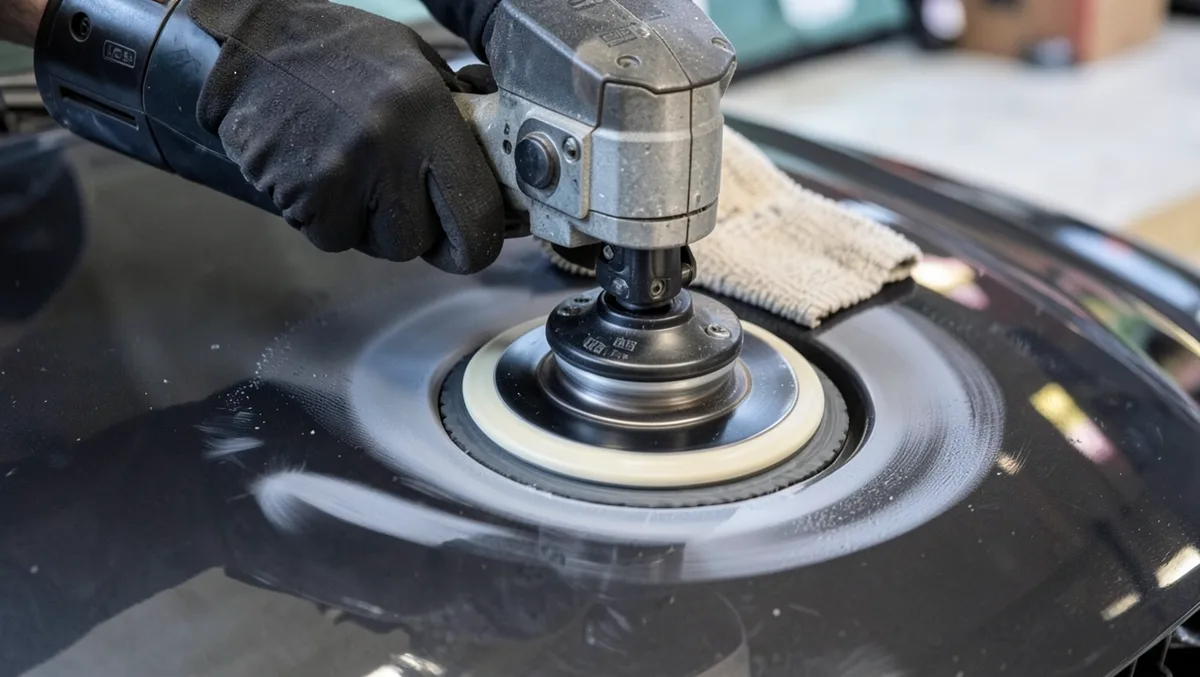
Most cars pick up the same kind of damage over the years: fine swirl marks from washing, hazing from UV exposure, and the occasional scratch that catches the light at the wrong angle. None of that means the paint needs to be redone. A proper correction cuts down through the top layer of clear coat with an abrasive compound, then refines that cut with a finishing polish until the reflection is clean again – the same paint, just leveled back to how it looked before years of washes and weather got to it.
Done right, correction is closer to precision sanding and buffing than it is to painting. It rewards a slow, methodical approach far more than it rewards expensive gear, and most of the mistakes people make come from rushing a stage rather than from using the wrong product. This guide walks through prepping the car, choosing the right compound and pad for the damage you actually have, and finishing the job so the shine holds up instead of fading again in a few months.
Preparation Steps
RECOMMENDED TOOL
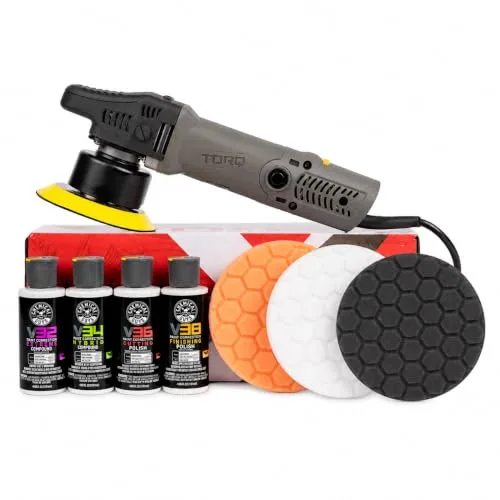 |
Chemical Guys TORQX Random Orbital Polisher Kit – $189.19 A dual-action polisher is the tool that makes safe, at-home paint correction possible, since it oscillates and rotates to cut and polish without the burn risk of a rigid rotary buffer.
|
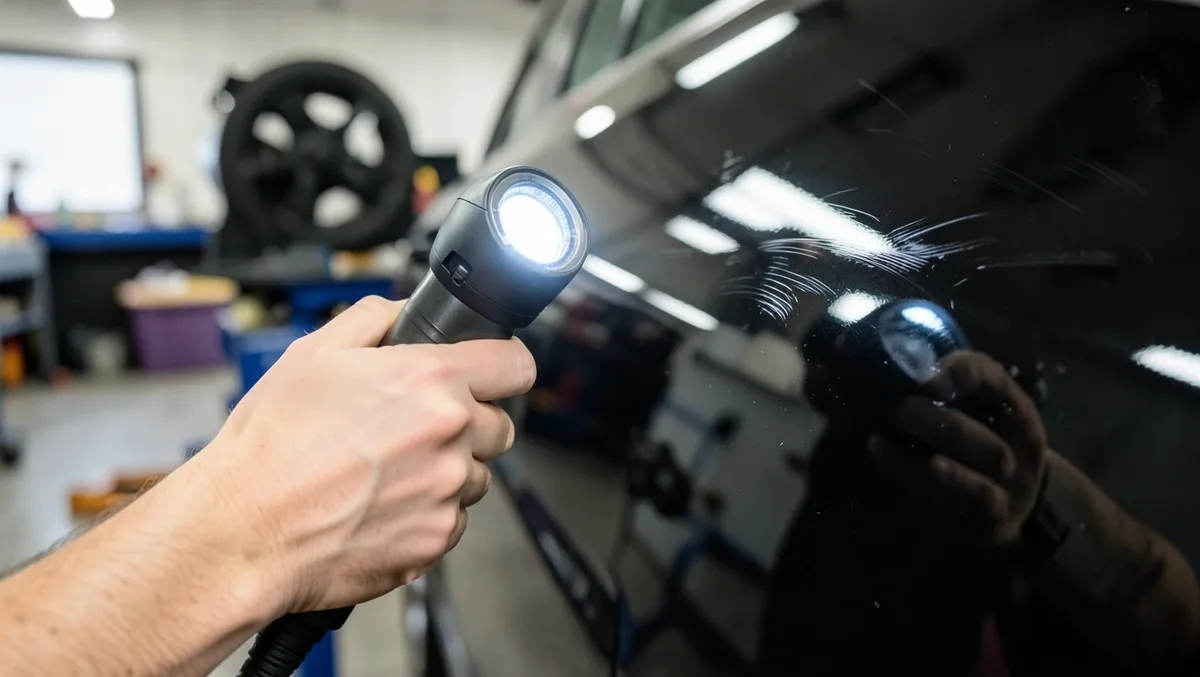
Start by laying out the gear rather than the paint. You’ll want a dual-action or rotary polisher, a set of foam or wool pads matched to different cutting strengths, a cutting compound and a separate finishing polish, and a stack of clean, edgeless microfiber towels – one towel used for wiping a light polish and then reused for heavy compound residue will drag grit right back across the paint. Painter’s tape to protect rubber trim, plastic cladding, and badges is worth the ten minutes it takes, since a polisher pad that catches on a trim edge can throw compound everywhere or chew into the trim itself. An LED inspection light (sometimes sold as a swirl-finder lamp) matters more than most first-timers expect, because ordinary garage lighting hides exactly the kind of fine scratching a correction is meant to remove.
Work in a shaded bay or an indoor space if you can manage it, and avoid direct sun entirely. Heat makes compound and polish flash and dry too fast to be worked properly, and it raises the risk of the paint itself getting hot enough to blister under a pad that lingers too long. If the car has ever had paintwork done before – a repair, a repaint, or a previous correction – a paint thickness gauge is worth the modest cost, since it tells you how much clear coat is actually left to work with before you start cutting into it. Buy a bit more compound and a couple of spare pads than you think the job needs; heavier cutting stages eat through both faster than people expect.
Surface Cleaning
Clean the car’s surface well before a single pass of the polisher ever touches it. Wash with a dedicated car wash soap and the two-bucket method – one bucket for soapy water, one for rinsing the wash mitt – since a standard sponge-and-hose wash tends to drag the grit it just picked up right back across the paint. Rinse thoroughly and check the panels in good light; any dirt left behind at this stage ends up trapped under the polishing pad, where it scratches the paint you’re trying to fix.
Once the car is washed, run a clay bar or clay towel over every panel. Regular washing doesn’t remove bonded contamination – rail dust, tree sap residue, industrial fallout, light overspray – and that material sits just above the paint surface, invisible to the eye but easy to feel as roughness under a plastic bag pulled over your hand. An iron remover spray, applied and left to dwell before the clay step, dissolves a lot of that embedded metal on its own and turns purple as it works, which makes it easy to see where it’s doing the job. Dry the car with a plush microfiber towel or a blower rather than letting it air-dry, since a standard drying towel is one of the more common sources of the very swirl marks you’re about to correct.
Sanding Techniques
Wet sanding isn’t a step every correction needs – it’s reserved for defects a compound alone can’t fix, like factory orange peel texture or a scratch too deep to polish out. Because it removes clear coat permanently, it’s the most aggressive tool in a correction and should be treated as a last resort rather than a routine part of the process.
Selecting Sandpaper Grits
Stick to fine grits made for this job, not the coarse paper used to strip old paint down to bare metal. A 1500 to 2000 grit paper levels heavier orange peel texture, while 3000 grit takes a lighter touch and leaves less work for the compounding stage afterward. If a panel has already been corrected once before, check its remaining clear coat thickness with a gauge first – there’s a real limit to how many times a surface can be sanded and compounded before there’s nothing left to cut.
Sanding The Surface Evenly
Sand wet, with plenty of lubricant on the paper, and move in one consistent direction rather than circles – crossing over your own pattern makes it harder to judge how much texture is actually gone. Use light, even pressure and rinse the paper often, since a clogged sheet stops cutting evenly and starts gouging instead. Check your progress every few passes with a squeegee across the panel; as soon as the surface looks level, stop. The compounding stage that follows restores the gloss the sanding just took away, so there’s no benefit to sanding past the point the texture is corrected.
Priming The Car
Every correction eventually runs into its own limit, and this is the point worth understanding before you start: if compounding uncovers a dull, chalky patch that won’t polish out, or a spot where the surface feels rough at the center and smooth around the edges, you’ve likely worked through the clear coat into the primer or bare panel underneath. No amount of additional compounding brings that color back, because at that point the paint itself is gone, not just hazed over. That’s the boundary between correction and repair – the panel needs feathering and a proper respray with primer, color-matched basecoat, and fresh clear coat from a body shop rather than another pass with a pad.
The way to avoid reaching that point by accident is to check your work constantly rather than push through a stubborn defect. Tape off adjacent panels and trim so a slip doesn’t spread a mistake, and if you’re chasing a scratch that isn’t responding to a lighter pad, take a paint thickness reading before switching to something more aggressive. Readings dropping toward four or five mils of clear coat remaining are a signal to back off, not to keep cutting – a corrected panel with thin clear coat left has very little margin before the next wash or the next correction pushes it past repair.
Color Application
Matching the right compound to the right pad matters more than most people expect walking into their first correction, and manufacturers lean on color to make that easier. A heavy-cut compound on an orange or wool pad tackles deep swirls and oxidation, but it leaves its own fine marring behind. A medium polish on a white or gray foam pad refines that marring into a cleaner shine. A finishing polish on a soft black or blue foam pad removes what’s left of the haze and brings out full gloss. The catch is that color codes aren’t standardized between brands – an orange pad from one manufacturer isn’t necessarily as aggressive as another’s – so match the pad to what the compound’s own instructions recommend rather than assuming color alone tells the whole story. Test whatever combination you land on in a low-visibility spot, like a door jamb, before working the whole car with it.
Running the polisher itself is a skill that develops with a few panels of practice. Keep the pad flat against the surface and let the machine’s speed and the compound do the actual cutting instead of leaning on it – pressing down harder doesn’t correct the paint faster, it just raises the risk of burning through clear coat, especially on edges and dark colors where there’s less material to work with. Work in roughly two-foot sections with slow, overlapping passes, keeping about fifty percent overlap between them so you don’t leave thin, unblended strips of untouched paint. If a section starts feeling warm to the touch, move on and come back once it’s cooled – friction heat builds up faster than it seems, and it’s the single most common reason a DIY correction burns through paint that a slower pass would have saved.
Drying And Curing
Correction doesn’t involve drying new paint, but timing still matters at two points in the process: how long a compound or polish stays workable on the panel, and how long a protection product needs to cure once the correction itself is finished.
Understanding Drying Times
Every compound and polish has a working window before it dries and cakes on the panel, and covering too large a section lets it flash before you’ve actually finished working it – leaving dried residue that takes extra scrubbing to remove instead of a clean wipe-off. Once the correction passes are done and it’s time to seal the paint, temperature and humidity come into play again: a wax or paste sealant typically needs ten to twenty minutes to haze before it can be buffed off, while a ceramic coating can take twenty-four to forty-eight hours to fully cure and reach its rated hardness. Warm, dry conditions speed all of this along; cold or humid air slows it down and can leave a sealant streaky if it’s buffed off before it’s actually ready.
Avoiding Common Mistakes
Don’t wash the car or let it get rained on until any sealant or coating has finished curing – uneven water beading or a hazy film that won’t wipe clean is usually a sign it got wet too soon. Compound and polish residue left to dry hard in trim gaps or rubber seals is easy to miss in the moment and much harder to clean out later, so wipe those edges down as you go rather than saving the whole job for the end. And working in direct sunlight causes the same problem experienced detailers keep running into: the panel heats up, the product flashes too fast to be worked properly, and a section that should have taken one pass ends up needing two or three.
Final Touches
The last stage of a correction is about finishing what the compound started, not adding more abrasion. A soft finishing polish removes the fine marring the cutting stage left behind, and sealing the paint afterward is what actually keeps the result looking new.
Polishing The Surface
Switch to a finishing polish and a soft foam pad once the cutting stage is done. This pass doesn’t remove much material – its job is to erase the light marring the heavier compound left behind and bring the panel up to full, swirl-free gloss. Check your progress with an inspection light held at a low angle; it’s the only reliable way to confirm the cutting stage actually removed the original scratches rather than just made them shallower. Work the finishing polish in the same overlapping pattern as the compound, then buff off the residue with a clean, dry microfiber towel before it fully cures on the surface.
Applying A Clear Coat
A fresh clear coat only enters the picture if the correction went far enough to expose bare paint, or if wet sanding cut through – at that point you’re into body shop repair rather than a DIY finish. Short of that, the equivalent last step is sealing the paint you just corrected: a synthetic paint sealant, a carnauba wax, or a ceramic coating, applied in thin, even coats and left to fully cure before the car gets wet. A coat of sealant or wax typically holds up for a few months; a properly applied ceramic coating can protect the finish for a year or more, though it needs a genuinely clean, fully cured base underneath it – any defect left in the paint gets sealed in right along with the shine.
Maintenance Tips
Paint correction isn’t a one-time fix if the results are supposed to last. Keeping a corrected finish looking that way comes down to a regular wash routine, a clay treatment whenever the surface starts feeling gritty again, and a fresh layer of protection – wax, sealant, or a topper for an existing ceramic coating – reapplied every few months depending on what’s actually on the paint.
A corrected finish has less clear coat margin than paint that’s never been polished, so the habits below matter as much as the correction itself.
Protecting The Paint Job
Keep the car out of direct sun whenever parking allows it – UV exposure breaks down wax and sealant faster than almost anything else, and a shaded spot or a breathable car cover buys the protection layer real extra life. Parking under trees carries its own risk, since sap and bird droppings are acidic enough to etch clear coat if left sitting for more than a day or two; wipe them off with a soft microfiber cloth and a quick rinse rather than letting them bake on in the sun. Skip anything abrasive on a spot like that – a fingernail, a plastic scraper, even a rough shop rag – since a corrected panel has less spare clear coat to give up before a fresh scratch means starting the correction over. A ceramic coating adds a genuinely tougher layer on top of all this if fewer touch-ups between full corrections is the goal.
Regular Cleaning Guidelines
Stick to washing every one to two weeks with a dedicated car wash soap – dish soap and household cleaners strip wax and sealant fast, which undoes the point of protecting paint that was just corrected. The two-bucket method keeps grit out of the wash mitt and cuts down on new swirl marks forming during an ordinary wash. Dry with a plush microfiber towel instead of letting the car air-dry, since water spots etch into clear coat if left to bake on in the sun. Topping up wax or sealant every couple of months keeps the protection active, and skipping automatic tunnel washes is worth the extra five minutes at home – their brushes are one of the most common causes of fresh swirl marks on a finish that’s just been corrected.
Frequently Asked Questions
How To Paint Correct Your Car Yourself?
Clean and sand the damaged area thoroughly. Apply primer and let it dry completely. Choose the correct matching paint color. Use even strokes to spray the paint, maintaining a consistent distance. Finish with a clear coat to protect and shine.
Always work in a well-ventilated area.
How Much Does It Cost To Paint Correct An Entire Car?
The cost to paint correct an entire car ranges from $500 to $2,500. Prices depend on the vehicle’s condition and location. High-end services can exceed $3,000. Always get quotes from multiple detailers to ensure competitive pricing.
What Are The Three Stages Of Paint Correction?
Paint correction involves three stages: cutting, polishing, and finishing. Cutting removes deep scratches and oxidation. Polishing refines the surface, enhancing gloss. Finishing delivers a smooth, mirror-like shine, protecting the paint. This process restores a car’s paint to its original beauty, enhancing its appearance and longevity.
How Do You Fix Messed Up Paint On A Car?
Clean the area and sand the damaged paint. Apply primer, then repaint with matching car paint. Finish with a clear coat.
Conclusion
Paint correction rewards patience over speed. Work through the stages in order – decontamination, then cutting, then a finishing polish – rather than jumping straight to whichever step promises the most shine, and stop to check progress under an inspection light along the way instead of assuming more time under the pad always means a better result.
Seal the finish while it’s at its best, and a swirl-free result holds up far longer than the correction itself took to achieve. Get the process right once, and every touch-up afterward gets faster, since you’re maintaining a clean finish instead of digging out years of accumulated haze and scratches.
Products related to this article
Sponsored / affiliate links. As an Amazon Associate I earn from qualifying purchases. I may earn additional commission from eligible campaigns.