How to Charge a Car Battery Without a Charger
Charging a car battery without a charger might seem impossible, but several effective methods exist when you’re in a pinch. Whether your car battery is dead and you’re miles from a parts store or you simply need to revive it, knowing these alternative techniques can save you time and hassle. This guide will walk you through the most common and reliable ways to get your car battery back to a usable state, ensuring you can get back on the road.
Simply put, you can charge a car battery without a dedicated charger by using another running vehicle to jump-start it, or by employing a DIY setup with common household items and a bit of caution. While not as efficient or safe as using a proper charger, these methods can provide a temporary power boost.
Key Takeaways
- Jump-starting your car battery with another vehicle is the most common and accessible method when a charger isn’t available.
- A DIY charger alternative using a power supply can work, but requires careful voltage and amperage management to avoid damaging the battery or causing a hazard.
- Understanding the risks associated with each method is crucial for safe and effective battery charging.
- Ensure the battery is not permanently damaged before attempting to charge it without a charger.
- Properly disposing of old or irreparable batteries is an important environmental consideration.
What is Jump-Starting and How Does It Work?
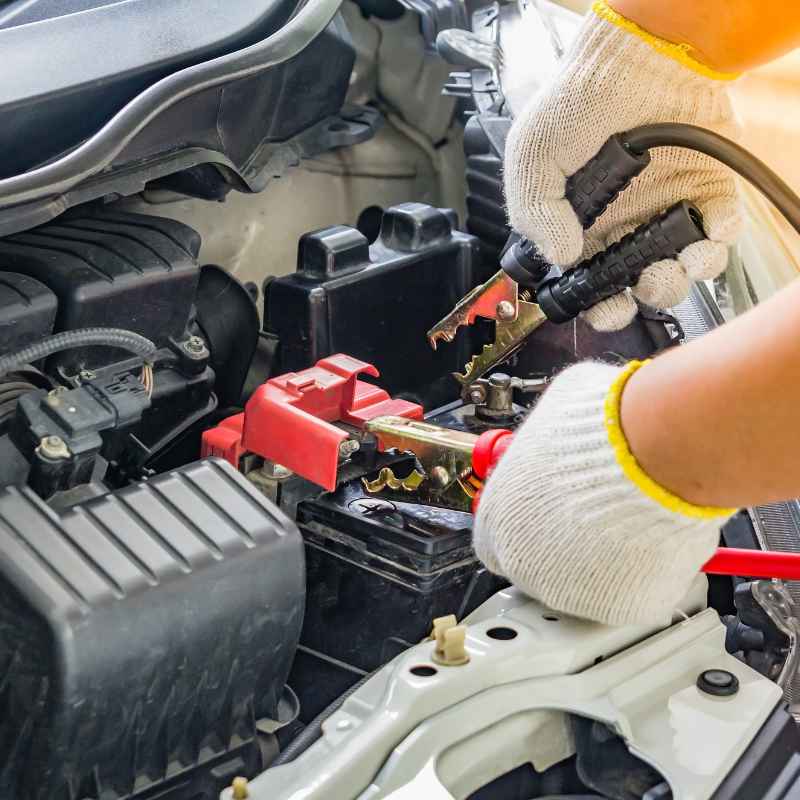
Jump-starting is the process of using a healthy, fully charged battery from another vehicle to provide the initial power needed to start a car with a dead battery. It’s essentially borrowing electricity to get your car’s engine running, which then allows your car’s alternator to start charging the battery.
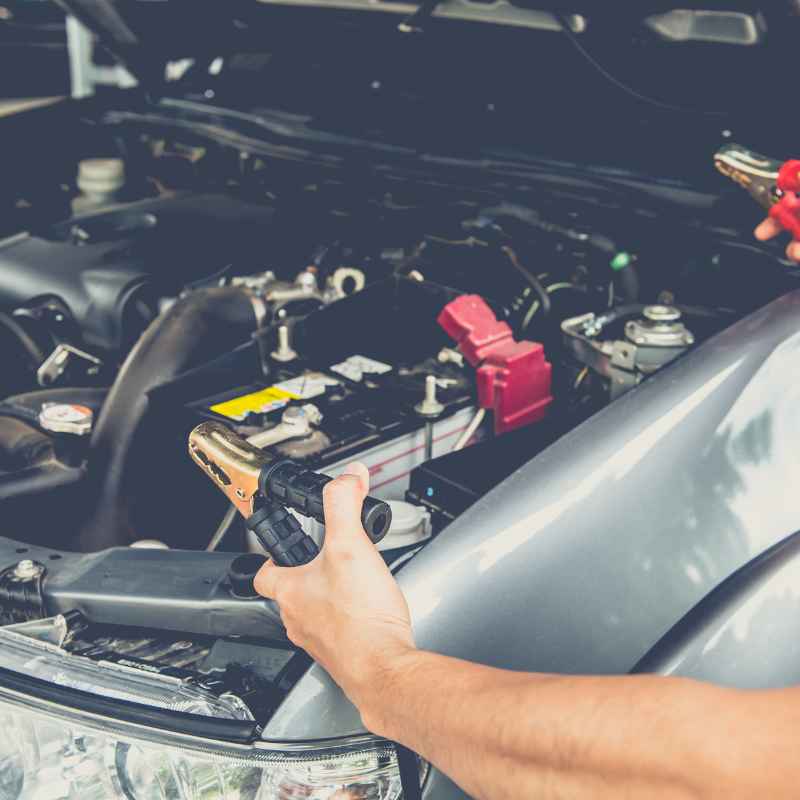
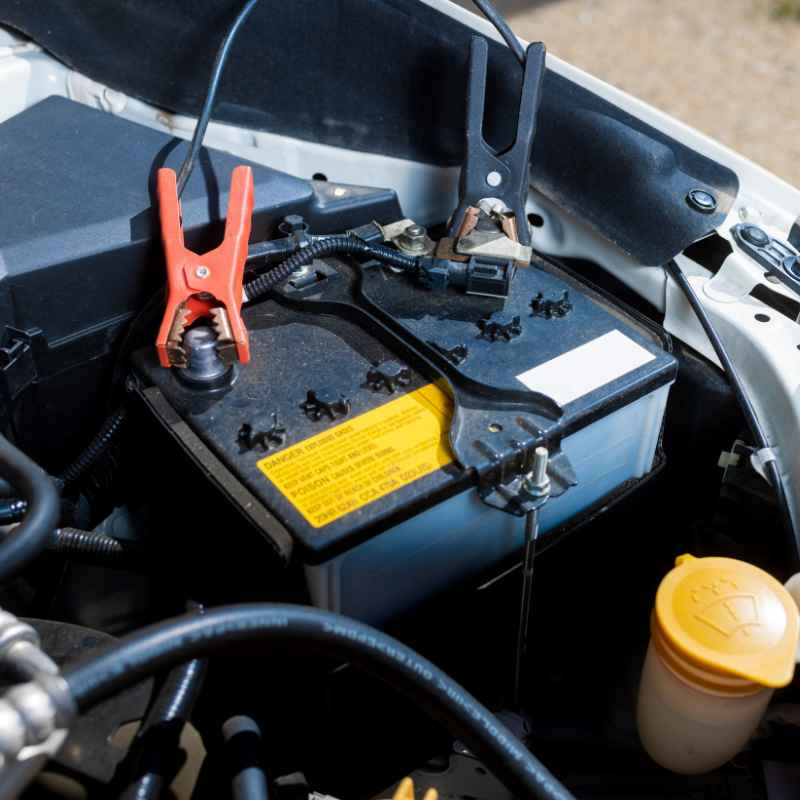
The process involves connecting jumper cables between the two vehicles’ batteries. The positive terminal of the dead battery is connected to the positive terminal of the good battery, and the negative terminal of the good battery is connected to an unpainted metal surface on the engine block of the car with the dead battery (not directly to the negative terminal of the dead battery, to minimize spark risk).
Steps for a Safe Jump-Start:
- Park the working car close enough to the dead car to allow the jumper cables to reach comfortably, but without touching.
- Turn off both vehicles’ engines and remove the keys from the ignition.
- Open the hoods of both vehicles and locate the batteries.
- Identify the positive (+) and negative (-) terminals on both batteries.
- Connect the red (positive) clamp of the jumper cable to the positive terminal of the dead battery.
- Connect the other red (positive) clamp to the positive terminal of the good battery.
- Connect the black (negative) clamp of the jumper cable to the negative terminal of the good battery.
- Connect the other black (negative) clamp to an unpainted metal surface on the engine block of the car with the dead battery, away from the battery and moving parts.
- Start the engine of the working car and let it run for a few minutes to charge the dead battery slightly.
- Attempt to start the car with the dead battery. If it starts, let it run for at least 15-20 minutes to allow the alternator to charge the battery.
- If the car doesn’t start, wait another 5 minutes with the working car running and try again.
- Once the dead car is running, carefully disconnect the jumper cables in the reverse order of connection: black from the engine block, black from the good battery, red from the good battery, and finally red from the previously dead battery.
Pros and Cons of Jump-Starting:
- Pros: Quick, accessible, doesn’t require special equipment beyond jumper cables, effective for temporary power.
- Cons: Requires another vehicle, risk of electrical damage if done incorrectly, doesn’t fully charge the battery, may not work if the battery is severely damaged.
Best For: Getting your car started when the battery is only moderately discharged.
Understanding DIY Battery Charging Methods
While professional chargers are designed for safety and efficiency, there are unconventional ways to provide a charge to a car battery using alternative power sources. These methods require a keen understanding of electrical principles and a significant amount of caution, as incorrect application can lead to battery damage, fire, or electrical shock.
The core principle behind these DIY methods is to create a controlled flow of direct current (DC) electricity into the battery. A typical car battery requires about 12-14 volts to charge effectively. The challenge lies in ensuring the voltage and amperage are within safe limits and that the power source provides DC power, not alternating current (AC) which can destroy the battery.
Method 1: Using a DC Power Supply (e.g., Old Laptop Charger, Bench Power Supply)
A common DIY approach involves repurposing a DC power supply. For instance, a high-amperage laptop charger or a dedicated adjustable DC bench power supply can be modified or used directly. The key is to match the voltage and control the amperage.
Important: Ensure your DC power supply outputs a stable DC voltage between 13.5V and 14.7V for optimal charging. If you are using an adjustable power supply, set the amperage limit to around 2-5 amps to prevent overheating and damage. Never exceed 10 amps for a standard car battery unless specified by the battery manufacturer.
You will need to connect the positive output of the power supply to the positive terminal of the battery and the negative output to the negative terminal. It’s crucial to verify polarity before connecting. If you connect it backward, you can cause significant damage to the battery and potentially the power supply.
Method 2: Using a Modified AC-to-DC Converter
Another method, often found in more advanced DIY circles, involves modifying an AC-to-DC power converter. This typically involves adding a diode to ensure current flows in only one direction and potentially a resistor to regulate amperage. This is a more technical approach and carries higher risks if not executed perfectly.
A properly configured rectifier diode (like a 1N5408 or higher) is essential to convert AC to DC. Without it, you risk sending AC directly into the battery, which will ruin it. Furthermore, a ballast resistor or a variable resistor setup might be needed to control the current.
The exact resistance values depend on the AC source voltage and the desired charging current.
Steps for DIY Charging with a DC Power Supply:
- Gather Your Materials: You’ll need your DC power supply (e.g., laptop charger, bench power supply), jumper wires or suitable gauge wires with connectors, a multimeter to check voltage and polarity, and safety gear (gloves, eye protection).
- Verify Power Supply Output: Using your multimeter, check the voltage and polarity of the DC power supply’s output. Ensure it is stable and within the 13.5V-14.7V range. If using an adjustable supply, set the voltage and amperage limit (2-5A is a safe starting point).
- Prepare the Battery: Ensure the battery is in a well-ventilated area. Clean the battery terminals with a wire brush to remove any corrosion for a good connection.
- Connect the Wires: Attach one wire from the positive (+) terminal of the power supply to the positive (+) terminal of the car battery. Attach another wire from the negative (-) terminal of the power supply to the negative (-) terminal of the car battery. Double-check polarity.
- Monitor the Charging Process: Let the battery charge for several hours. Periodically check the battery voltage with your multimeter. The voltage should gradually increase.
- Check for Overheating: Feel the battery and the wires for excessive heat. If anything is getting too hot, disconnect immediately.
- Disconnect Safely: Once the battery voltage reaches a satisfactory level (typically around 14.4V, but do not exceed 15V), disconnect the power supply.
Pros and Cons of DIY Charging:
- Pros: Can be a viable option if no other charger is available, educational for those interested in electronics.
- Cons: High risk of battery damage, fire, or explosion if done incorrectly; requires specific knowledge and tools; time-consuming; may not fully charge the battery as effectively as a dedicated charger.
Best For: Technically inclined individuals who understand electrical safety and have the necessary equipment, as a last resort.
Assessing Battery Health and Safety Precautions
Before you attempt to charge your car battery using any method, especially without a dedicated charger, it’s vital to assess its condition. Not all dead batteries are salvageable, and attempting to charge a damaged or severely degraded battery can be dangerous.
Car batteries contain sulfuric acid and can release explosive hydrogen gas, particularly when charging. Therefore, safety must be the absolute top priority in any charging attempt. Working in a well-ventilated area is paramount, and avoiding any sparks or open flames near the battery is non-negotiable.
When NOT to Attempt Charging:
- Cracked or Leaking Battery Case: If the battery casing is physically damaged, it is unsafe to charge. Leaking acid is corrosive and poses a significant hazard.
- Frozen Battery: A battery that has frozen (often due to being discharged in freezing temperatures) should never be charged without thawing it first. Attempting to charge a frozen battery can cause it to explode.
- Swollen Battery: A battery whose sides bulge outwards indicates internal damage or overcharging. This is a sign the battery is compromised and should be replaced, not charged.
- Signs of Extreme Age or Damage: If the battery is very old, corroded beyond simple cleaning, or shows other signs of significant wear and tear, it may not hold a charge or could pose a risk.
Essential Safety Precautions for All Methods:
- Ventilation: Always work in a well-ventilated area, preferably outdoors, to dissipate any gases released by the battery.
- Eye Protection: Wear safety glasses or goggles at all times to protect your eyes from acid splashes or potential battery explosions.
- Gloves: Use rubber or nitrile gloves to protect your skin from corrosive battery acid.
- Remove Jewelry: Take off any metal jewelry, watches, or rings, as they can cause short circuits if they come into contact with battery terminals.
- No Smoking or Flames: Keep all ignition sources away from the battery. Car batteries can release flammable hydrogen gas.
- Proper Connection Order: Always follow the correct connection sequence, especially when jump-starting, to minimize the risk of sparks.
- Check Polarity: Double-check positive (+) and negative (-) terminal connections meticulously. Reverse polarity can cause severe damage.
Understanding Battery Voltage and Amperage:
A standard car battery operates at 12 volts (nominal). During charging, the voltage typically rises to between 13.5 and 14.7 volts. Amperage (current) is the rate of electrical flow.
For charging a car battery without a dedicated charger, keeping amperage low (2-10 amps) is crucial to prevent overheating and damage. A trickle charger typically provides 1-2 amps, while a standard charger might provide 10-20 amps. High amperage without proper regulation can boil the battery’s electrolyte and create excessive gas.
| Safety Factor | Importance | Consequences of Neglect |
|---|---|---|
| Ventilation | High | Accumulation of flammable hydrogen gas, increasing explosion risk. |
| Eye Protection | Critical | Acid splashes can cause severe and permanent eye damage. |
| Correct Polarity | Crucial | Damage to battery, alternator, and vehicle’s electrical system. |
| Amperage Control | High | Overheating, boiling of electrolyte, gas buildup, potential explosion, and battery damage. |
Following these safety guidelines is non-negotiable to ensure you can charge your car battery without incident.
Alternative Techniques and Considerations
Beyond jump-starting and DIY power supplies, some less common or more niche methods might be considered, though they often come with their own set of limitations and risks.
One such consideration is using a solar charger. While often marketed as “chargers,” many portable solar panels designed for cars are actually trickle chargers or maintainers. They are not designed for a rapid recharge of a deeply discharged battery but can slowly replenish a battery over days or maintain its charge when the vehicle is not in use.
Using a Solar Panel (Trickle Charge):
A small solar panel (e.g., 5-20 watts) can be placed on the dashboard or windshield to provide a slow, continuous charge. This is more of a battery maintenance tool than a rapid charging solution.
- How it Works: Solar panels convert sunlight into electricity, which is then fed directly to the battery, usually through a charge controller to prevent overcharging.
- Pros: Environmentally friendly, sustainable, can maintain battery health on parked vehicles.
- Cons: Very slow charging speed, dependent on sunlight, not suitable for dead batteries, often requires a charge controller.
- What to Look For: Ensure the panel has a built-in or compatible charge controller. Look for panels specifically designed for automotive use.
Driving to Recharge the Battery:
If your battery is not completely dead but just weak, driving your car for an extended period can allow the alternator to recharge it. However, this is not a substitute for a proper charge if the battery is significantly depleted or has a fault.
- Duration: You generally need to drive for at least 30-60 minutes at highway speeds to achieve a meaningful charge. Shorter trips with frequent stops won’t be as effective.
- Alternator Condition: This method relies entirely on your car’s alternator functioning correctly. If the alternator is faulty, the battery will not charge while driving.
- Battery State: This method is most effective for batteries that have been slightly drained (e.g., by leaving lights on) and not for batteries that are completely dead or have been discharged for a long time.
A common statistic is that an alternator can recharge a partially drained battery in about an hour of driving, but a fully discharged battery can take much longer, and some modern batteries may not fully recover from deep discharge without a specialized charger.
Potential for Battery Damage:
It’s crucial to reiterate that attempting to charge a car battery without a proper charger carries inherent risks. Modern car batteries are complex sealed units, and their performance can degrade significantly with deep discharges. A battery that is several years old and suffers a deep discharge might not be able to hold a full charge even after being jump-started or partially recharged by DIY methods.
In some cases, a battery that appears dead might have an internal short circuit. Trying to charge a battery with a short will cause it to overheat rapidly and can lead to a dangerous situation. Always monitor for excessive heat during any charging attempt.
Frequently Asked Questions
What is the safest way to charge a car battery without a charger?
The safest and most common method is jump-starting your car with another running vehicle. This uses the functioning alternator of the second car to recharge your battery. If you must use a DIY method, carefully using a regulated DC power supply with a low amperage is the next safest option, provided you have the knowledge and equipment to monitor voltage and polarity correctly.
Can I use a regular wall outlet to charge my car battery?
No, you cannot directly plug into a standard wall outlet (which supplies AC power) to charge a car battery. Car batteries require direct current (DC) power at a specific voltage range. Connecting AC power directly to a car battery will destroy it and could be extremely dangerous.
You would need a proper AC-to-DC converter and rectifier to modify the power, which is complex and risky.
How long does it take to charge a car battery with jumper cables?
Jump-starting doesn’t “charge” the battery in the traditional sense; it provides enough power to start the engine. Once the engine is running, the car’s alternator begins to recharge the battery. It typically takes at least 30-60 minutes of driving at highway speeds for the alternator to significantly recharge a partially drained battery.
A completely dead battery might require much longer or a dedicated charger.
What happens if I connect the jumper cables backwards?
Connecting jumper cables backward (positive to negative and negative to positive) can cause immediate and severe damage. It can create a large spark, potentially ignite hydrogen gas from the battery, damage the electrical systems of both vehicles (including the alternator, battery, and onboard computers), and even cause the battery to explode. Always double-check your connections before starting the engine.
Is it worth charging an old car battery?
It depends on the battery’s age and the reason for its discharge. If the battery is old (more than 3-5 years) and has been deeply discharged, it may not hold a charge effectively anymore and might need replacement. If it’s a relatively new battery that was simply drained, charging it might revive it.
However, repeatedly needing to charge an older battery can be a sign it’s nearing the end of its lifespan.
Final Thoughts
While dedicated battery chargers are the safest and most efficient way to maintain your car battery, understanding how to charge a car battery without one can be a crucial skill in emergencies. Jump-starting with another vehicle is the most practical alternative for most drivers. DIY methods offer potential solutions but demand a high level of caution and technical understanding due to inherent risks.
Always prioritize safety, assess your battery’s condition, and consider professional help if you’re unsure.
Products related to this article
Sponsored / affiliate links. As an Amazon Associate I earn from qualifying purchases. I may earn additional commission from eligible campaigns.