How to Connect a Trickle Charger to a Car Battery
Learning how to connect a trickle charger to a car battery might seem tricky at first. Many people find this task a little confusing because batteries involve electricity. But don’t worry, it’s actually quite simple.
We’ll walk you through it step-by-step. You’ll see how easy it is to keep your car battery ready to go. We’ll cover everything you need to know.
Understanding Trickle Chargers For Car Batteries
A trickle charger is a handy device that keeps your car’s battery topped up with a small amount of power. This is great if your car sits for a long time, like during winter storage or if you don’t drive it every day. Without a trickle charger, your battery can lose its charge over time, which means your car might not start when you need it.
This section will explain what a trickle charger does and why it’s useful for your car battery.
What Is A Trickle Charger
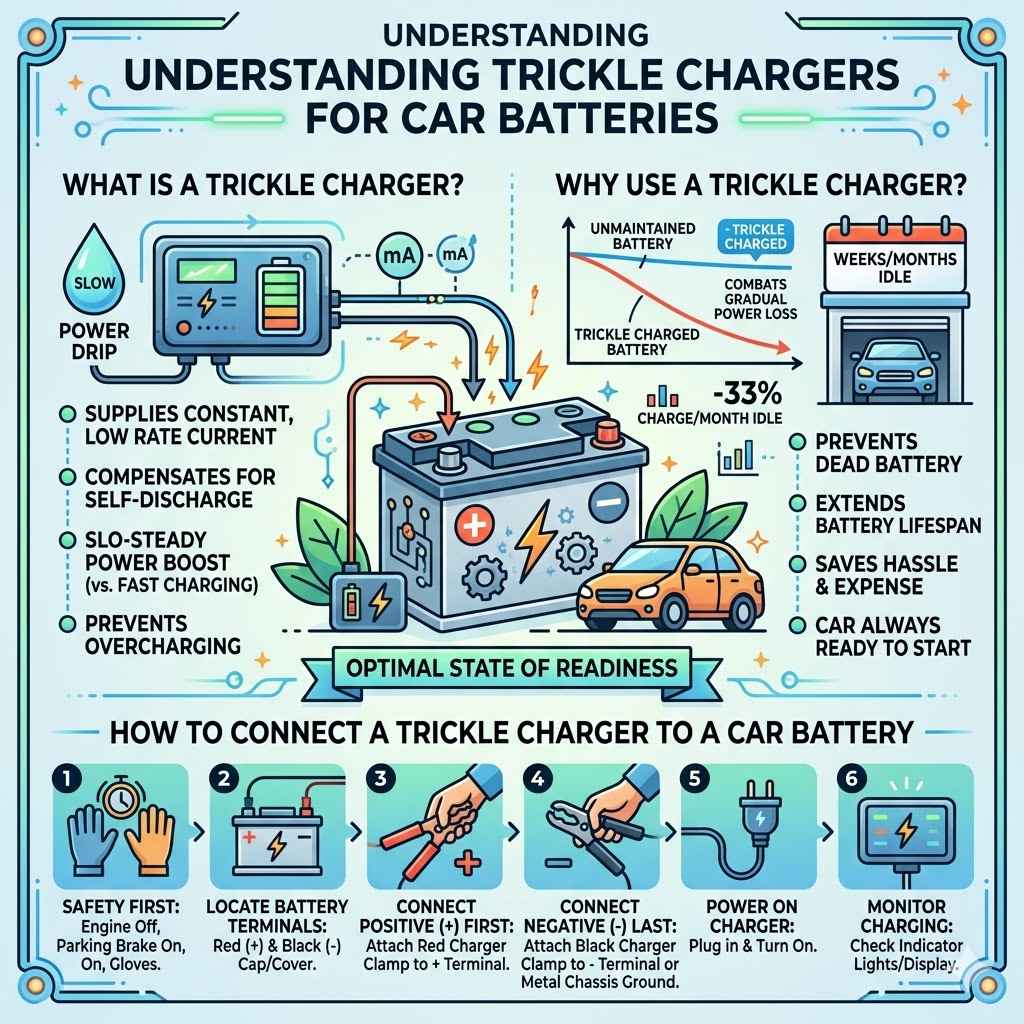
A trickle charger is an electronic device designed to supply a constant, low rate of current to a rechargeable battery. Its primary purpose is not to rapidly charge a depleted battery, but rather to compensate for the battery’s natural self-discharge over time. Think of it as a slow, steady drip of power that keeps the battery in an optimal state of readiness.
This low current prevents overcharging, which can damage the battery.
The term “trickle” refers to the very small amount of electricity it delivers, often measured in milliamps. This is significantly less than what a standard battery charger uses. This gentle approach is crucial for maintaining battery health.
It extends the lifespan of the battery by preventing deep discharges and the harmful effects that come with them.
Why Use A Trickle Charger
Using a trickle charger is especially beneficial for vehicles that are not used regularly. If a car sits idle for weeks or months, its battery will slowly lose power. This gradual loss, called self-discharge, can lead to a dead battery.
A dead battery won’t have enough power to start the engine.
A trickle charger combats this problem by providing a continuous small charge. This ensures the battery always has enough juice. It’s like giving your battery a little snack every so often to keep its energy levels up.
This proactive approach saves you the hassle and expense of jump-starting or replacing a battery prematurely.
Statistics show that car batteries can lose up to 33% of their charge per month when left idle. This means a battery can become critically low in just a few months without any charging.
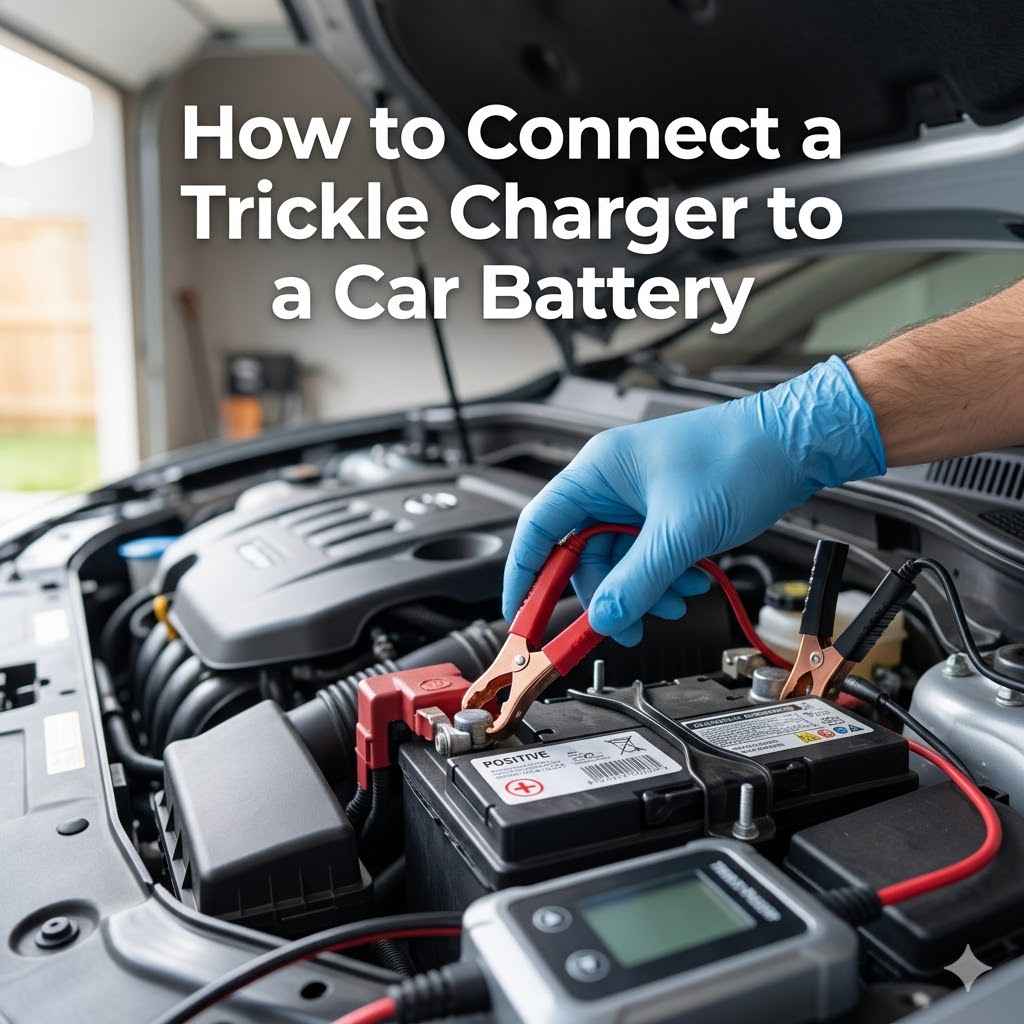
How To Connect A Trickle Charger To A Car Battery
This is the core of what you need to know. Connecting a trickle charger is a straightforward process that anyone can do with a little care. It involves connecting specific clamps from the charger to the correct terminals on your car’s battery.
We will cover the steps to ensure you do it safely and correctly. This knowledge empowers you to maintain your car’s battery without needing professional help.
Preparing For Trickle Charger Connection
Before you start connecting anything, it’s important to get prepared. This means gathering the right tools and ensuring a safe working environment. Proper preparation prevents mistakes and makes the actual connection process much smoother.
We’ll guide you through what you need and how to set things up safely.
Essential Tools And Safety Gear
You don’t need many fancy tools for this job. Most importantly, you will need your trickle charger itself. Make sure it’s designed for 12-volt car batteries, which is the standard for most cars.
You might also want a wire brush or a battery terminal cleaner. This helps ensure a good connection by removing any corrosion.
Safety is key when working with car batteries. Always wear safety glasses to protect your eyes from any potential sparks or battery acid. Gloves are also a good idea to keep your hands clean and protected.
It’s also wise to have a clean, dry cloth nearby to wipe up any spills.
Choosing A Safe Location
You should connect your trickle charger in a well-ventilated area. Car batteries can release small amounts of hydrogen gas, which is flammable. Therefore, avoid connecting the charger in enclosed spaces like a closed garage.
An open garage or an outdoor space is ideal.
Make sure the area is dry. Water and electricity don’t mix well. Keep the trickle charger and its cords away from any standing water.
Also, ensure the battery itself is clean and free from excessive dirt or corrosion. This not only helps with the connection but also improves the battery’s overall performance.
Inspecting Your Car Battery
Before connecting, take a close look at your car battery. Check for any signs of damage, such as cracks in the casing or leaking fluid. If you see any damage, do not use the trickle charger and consider getting the battery inspected or replaced by a professional.
Also, check the battery terminals. These are the metal posts where you will connect the charger clamps. They should be clean.
If they look dirty or have a powdery white or blue-green substance on them, this is corrosion. Corrosion can prevent a good electrical connection. You can clean it gently with a wire brush or a dedicated battery terminal cleaner.
Step-By-Step Guide To Connect A Trickle Charger
Now that you are prepared, it’s time to connect the trickle charger. This process is designed to be simple. We will break it down into clear, easy-to-follow steps.
Following these steps carefully will ensure your battery gets charged safely and effectively.
Step 1 Locate Your Car Battery
The first step is to find your car battery. In most cars, the battery is located under the hood, usually towards the front or side. Some vehicles might have it in the trunk or under a seat.
Check your car’s owner’s manual if you are unsure.
Once you open the hood or access the battery compartment, you’ll see the battery. It’s a rectangular box, often black, with two large metal posts sticking up from it. These posts are where the battery cables connect.
Step 2 Identify The Battery Terminals
Your car battery has two terminals: a positive (+) terminal and a negative (-) terminal. The positive terminal is usually marked with a plus sign and is often covered with a red cap or has a red wire attached. The negative terminal is usually marked with a minus sign and might have a black wire attached.
It’s crucial to identify these correctly. Connecting the charger to the wrong terminals can cause damage to your car’s electrical system or the charger itself. Always double-check the markings on the battery before proceeding.
Step 3 Connect The Positive Clamp
Take the positive clamp from your trickle charger. This clamp is usually red. Carefully attach this red clamp to the positive (+) terminal of your car battery.
Ensure the clamp makes firm contact with the metal post.
Do not let the clamp touch any other metal parts of the car while you are connecting it to the battery terminal. This could cause a spark. Once attached, give it a gentle wiggle to make sure it’s secure and has a good connection.
Step 4 Connect The Negative Clamp
Next, take the negative clamp from your trickle charger. This clamp is usually black. Attach this black clamp to the negative (-) terminal of your car battery.
Again, ensure a firm and secure connection.
In some cases, it is recommended to connect the negative clamp to a ground point on the car’s chassis instead of directly to the negative battery terminal. This is often a clean, unpainted metal bolt or bracket away from the battery. This provides an extra layer of safety by reducing the risk of sparks near the battery, as hydrogen gas can accumulate there.
Consult your trickle charger’s manual for specific recommendations.
Step 5 Plug In The Trickle Charger
With both clamps securely attached to the battery terminals, it’s time to plug the trickle charger into a power outlet. Make sure the outlet is working and is suitable for the charger’s power requirements.
Most trickle chargers have an indicator light that will show when it’s connected and charging. This light might be green, red, or amber, depending on the charger model. Refer to your charger’s manual to understand what the lights mean.
Step 6 Monitor The Charging Process
Once plugged in, the trickle charger will begin its work. Most modern trickle chargers are “smart” chargers. This means they monitor the battery’s voltage and adjust the charging current automatically.
They can also detect when the battery is fully charged and switch to a maintenance mode, delivering just enough power to keep it topped up.
It’s a good idea to check on the charger and battery periodically, especially in the first few hours. Look for any unusual heat or sounds. The charger’s indicator lights will tell you if the battery is charging, fully charged, or if there’s an issue.
Maintenance And Troubleshooting
Once you have successfully connected your trickle charger, there are a few things to keep in mind for ongoing maintenance and what to do if something doesn’t seem right. Proper maintenance ensures the charger continues to work effectively and that your battery stays in good condition.
Regular Battery Health Checks
Even with a trickle charger, it’s wise to perform occasional checks on your car battery. Look for any signs of corrosion building up on the terminals again. You should also ensure the charger is still plugged in and functioning correctly.
Most smart trickle chargers don’t require much user intervention. They are designed to be left connected for extended periods. However, a quick visual inspection every month or so can give you peace of mind.
This helps catch any potential problems early.
Troubleshooting Common Issues
If your trickle charger isn’t working as expected, there are a few common issues to consider. First, double-check that the charger is properly plugged into a working power outlet. Make sure the clamps have a solid connection to both battery terminals.
Another common problem is a faulty connection. Corrosion on the battery terminals can prevent the charger from sending power. Clean the terminals thoroughly if you suspect corrosion.
Also, ensure the charger itself is not damaged.
Some trickle chargers have an indicator light that signals a problem. For instance, a blinking red light might indicate an error or a severely discharged battery. Always refer to your trickle charger’s manual for a detailed explanation of its indicator lights and error codes.
When To Seek Professional Help
If you’ve followed all the steps and troubleshooting tips but are still experiencing issues, it might be time to call a professional. This is especially true if you notice any physical damage to the battery, such as swelling or leaking. These are serious signs that the battery needs attention from a qualified mechanic.
Also, if your car battery is very old, it might not hold a charge well, even with a trickle charger. In such cases, replacement might be necessary. A mechanic can properly diagnose battery health and recommend the best course of action.
The Benefits Of Maintaining Your Car Battery
Keeping your car battery in good shape offers many advantages. It saves you time, money, and stress. A well-maintained battery ensures your car is always ready when you need it.
This section explores why this maintenance is so valuable.
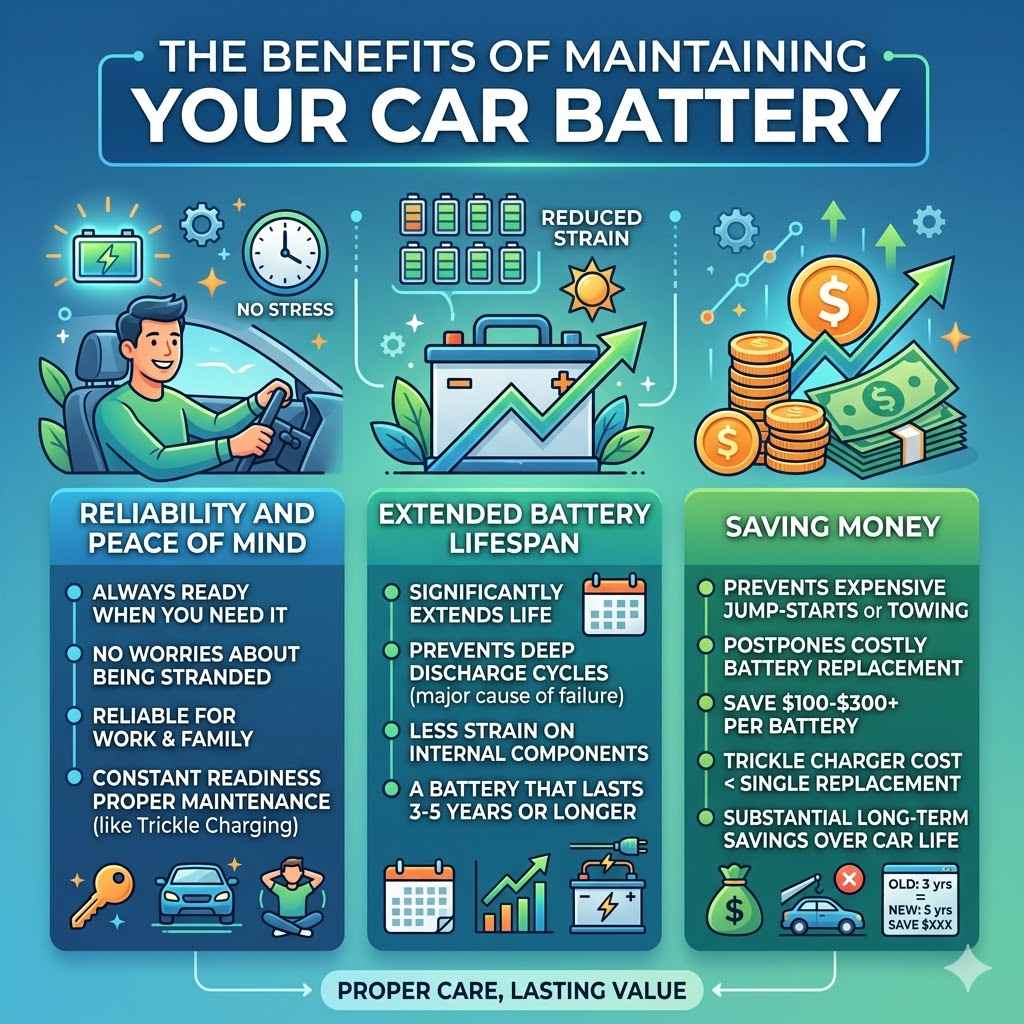
Reliability And Peace Of Mind
One of the biggest benefits is reliability. Knowing your car will start every time you turn the key provides immense peace of mind. You won’t have to worry about being stranded or being late for important appointments because of a dead battery.
This reliability is especially important for people who rely on their vehicles for work or family. It ensures your daily routine is not interrupted. This constant readiness is a direct result of proper battery maintenance, like using a trickle charger when needed.
Extended Battery Lifespan
Car batteries don’t last forever, but you can significantly extend their lifespan with proper care. Trickle charging helps prevent deep discharge cycles, which are a major cause of premature battery failure. By keeping the battery topped up, you reduce the strain on its internal components.
A typical car battery might last 3 to 5 years. However, consistent use of a trickle charger on a vehicle that sits idle can help it reach the upper end of this range, or even beyond. This saves you the cost of buying a new battery sooner than necessary.
Saving Money
Maintaining your battery can save you money in several ways. Firstly, it prevents the need for frequent jump-starts or towing services. These services can be expensive.
Secondly, extending your battery’s life means you won’t have to replace it as often.
New car batteries can cost anywhere from $100 to $300 or more, depending on the type and your vehicle. By taking simple steps like trickle charging, you can postpone this expense for years. The cost of a trickle charger is usually much less than a single battery replacement.
For example, a battery that needs replacing every 3 years might last 5 years with good maintenance. This saves the cost of one battery replacement. Over the life of a car, this can add up to substantial savings.
Frequently Asked Questions
Question: Can I leave a trickle charger connected all the time
Answer: Yes, most modern smart trickle chargers are designed to be left connected continuously. They monitor the battery and only supply a small charge when needed, preventing overcharging and maintaining battery health.
Question: What happens if I connect the positive and negative clamps incorrectly
Answer: Connecting the clamps incorrectly can cause sparks, damage to the car’s electrical system, the battery, or the trickle charger itself. Always double-check the battery terminal markings before connecting.
Question: Do I need to disconnect my car battery before connecting a trickle charger
Answer: It is generally not necessary to disconnect the battery when using a trickle charger, especially if connecting to a chassis ground for the negative terminal. However, always check your trickle charger’s manual for specific instructions.
Question: How long does it take for a trickle charger to fully charge a car battery
Answer: Trickle chargers are not designed for rapid charging. Their primary function is maintenance. If your battery is significantly discharged, a trickle charger will take a very long time to bring it back to full charge, often days.
For faster charging, a standard battery charger is needed.
Question: Can I use a trickle charger on a brand new car battery
Answer: Yes, you can use a trickle charger on a new battery. It helps maintain its optimal charge and can contribute to its overall lifespan, especially if the car is not driven frequently.
Summary
Learning how to connect a trickle charger to a car battery is a simple skill that offers big benefits. You’ve learned about the charger’s purpose, the tools you need, and a clear step-by-step process. By following these guidelines, you can ensure your car’s battery stays healthy, reliable, and ready for your next drive.