How to Disconnect Car Battery Terminals: Order, Tools & Sizes
Get the terminal order backward when you disconnect a car battery, and you risk more than an inconvenient spark — on many modern cars, a stray tool touching the chassis can trip fault codes or damage a control module that costs far more than the battery itself. Whether you’re swapping in a new battery, doing electrical work, or just storing the car for winter, the order matters. Here’s the correct sequence, the wrench sizes different brands use, and what to reset afterward.
Quick Answer
Always disconnect the negative (black, -) terminal first, then the positive (red, +) — this keeps a stray tool from completing a circuit against the chassis. When reconnecting, do the reverse: positive first, then negative. Most terminal bolts take a 10mm or 13mm wrench, torqued to about 5-8 Nm (44-70 in-lb).
Why You Might Need to Disconnect Your Car Battery
There are several good reasons why you might need to temporarily disconnect your car’s battery. Understanding these will help you appreciate why this skill is so valuable for any car owner who likes to get hands-on.
Common Scenarios for Battery Disconnection:
- Battery Replacement: This is the most common reason. When your old battery is dying or has died, you’ll need to remove it to install a new one. Disconnecting prevents short circuits during the swap.
- Electrical System Repairs: Working on alternators, starters, or any part of your car’s electrical wiring? Disconnecting the battery is a crucial safety step to avoid electrical shocks and prevent damage to sensitive electronic components.
- Deep Cleaning and Maintenance: If you’re planning a thorough engine bay cleaning or working in tight spaces where accidental contact with battery terminals could occur, disconnecting offers peace of mind.
- Preventing Battery Drain: If your car is going to be stored for an extended period (e.g., several months), disconnecting the battery can prevent parasitic drain from slowly discharging and potentially damaging the battery. A battery tender is often a better long-term solution, but disconnection is an option.
- Resetting Car Electronics: In rare cases, disconnecting the battery can help reset certain electronic modules in your car, similar to rebooting a computer. This is usually a last resort for troubleshooting minor glitches.
Safety First! What You Need to Know Before You Start
Before we even think about touching a wrench, let’s talk safety. Working with car batteries involves electricity, and sometimes acidic substances. Taking a few precautions will ensure you stay safe and prevent any accidental damage to your car.
Essential Safety Precautions:
- Wear Protective Gear: Always wear safety glasses to protect your eyes from any potential sparks or battery acid. Gloves are also a good idea to keep your hands clean and protected.
- Work in a Well-Ventilated Area: Car batteries can produce explosive hydrogen gas, especially when charging. Ensure good airflow to prevent gas buildup.
- No Smoking or Open Flames: Never smoke or have any open flames or sparks near the battery. This is a major fire and explosion hazard.
- Keep Metal Objects Away: Avoid dropping wrenches or other metal tools across the battery terminals. This can create a short circuit, cause sparks, and damage tools or the battery.
- Understand Battery Acid: Battery acid is corrosive. If you get any on your skin or clothes, rinse immediately with plenty of water. See OSHA’s guidance on safe battery handling for more detail on protective equipment and spill response.
- Check Your Owner’s Manual: Your car’s specific electrical system might have unique requirements. Always consult your owner’s manual for any model-specific advice regarding battery disconnection.
Tools You’ll Need
You don’t need a whole mechanic’s toolbox for this job. A few basic tools will do the trick. Having the right tools makes the job faster, easier, and safer.
Your Go-To Toolkit:
- Wrench Set or Socket Set: The most common sizes for battery terminal bolts are 10mm and 13mm. A small adjustable wrench can also work in a pinch, but a socket wrench often provides a better grip and leverage.
- Wire Brush or Battery Terminal Cleaner: To clean off any corrosion from the terminals and cable clamps.
- Rag or Paper Towels: For wiping things clean.
- Anti-Corrosion Spray or Dielectric Grease (Optional, but recommended): For protecting the terminals after cleaning.
Best Battery Terminal Cleaning Kit Pick
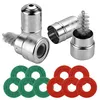
Battery Terminal Cleaner Tool Kit (2-Pack Wire Brush + Anti-Corrosion Washers)
A dedicated wire-brush tool that fits directly over top-post terminals and clamps to scrub off corrosion in seconds, plus 10 fiber washers to slow future buildup.
- Best for: Step 6 (cleaning corrosion) in this guide
- Why we picked it: Purpose-built shape reaches inside the clamp, unlike a flat wire brush
- Main drawback: Metal case can rust if left in a damp toolbox
Compare more battery terminal tools
 Option 1 Lisle 54150 Battery Terminal and Wiper Arm Puller
|
 Option 2 Permatex 22058 Dielectric Tune-Up Grease, 3oz
|
 Option 3 7pcs Battery Service Kit (Pliers, Wrench, Brush, Spreader, Puller)
|
As an Amazon Associate we earn from qualifying purchases.
Step-by-Step Guide: How to Disconnect Car Battery Terminals
Alright, we’ve covered the ‘why’ and the ‘safety’. Now, let’s get to the ‘how’. This is the core of our guide, and we’ll break it down into simple steps. Remember, the order is crucial!
Step 1: Locate Your Car Battery
First things first, find your car battery. In most cars, it’s under the hood, usually on one side. Some vehicles, like certain European models, might have the battery in the trunk or under a seat. Your owner’s manual is your best friend here if you’re unsure.
Step 2: Identify the Terminals
Once you’ve found the battery, you’ll see two metal posts sticking up. These are the terminals. One is marked with a plus sign (+) and often has a red cover or cable; this is the positive terminal. The other is marked with a minus sign (-) and usually has a black cover or cable; this is the negative terminal. If covers are missing, look for the size of the posts – the positive terminal is typically slightly larger.
Step 3: Loosen the Negative Terminal Clamp
This is the MOST important step for safety. You MUST disconnect the negative (black, -) terminal first. Use your wrench or socket to loosen the nut on the clamp that attaches the black cable to the negative terminal. You don’t need to remove the nut completely, just loosen it enough so the clamp can be wiggled off the terminal post.
Why negative first? Disconnecting the negative terminal first ensures that if your wrench accidentally touches any metal parts of the car while you’re loosening the nut, it won’t complete a circuit. This prevents sparks and potential damage. Think of it as disabling the “path” back to the car’s body first.
“I’ve had a wrench slip and brush against a fender while a battery was still fully hooked up — the spark left a small burn mark on the paint. Since then, negative-first isn’t optional for me on any car, even a quick 5-minute job.”
Step 4: Remove the Negative Cable
Once the clamp is loose, gently twist and pull the black cable upwards and away from the negative terminal post. If it’s stuck, a little wiggle should free it. Once removed, ensure it’s positioned so it cannot accidentally touch the terminal post or any other metal part of the car. You can often tuck it to the side or even rest it on top of the battery if it’s long enough and doesn’t contact anything else.
Step 5: Loosen and Remove the Positive Terminal Cable
Now that the negative terminal is safely disconnected, you can move on to the positive terminal. Using your wrench, loosen the nut on the clamp for the red cable attached to the positive (red, +) terminal. Again, you just need to loosen it enough to remove the clamp.
With the nut loosened, gently twist and pull the red cable clamp upwards and away from the positive terminal post. Set it aside, making sure it doesn’t touch the negative terminal or any other metal part of the car.
Step 6: Clean the Terminals (Optional but Recommended)
If you see any white or bluish powdery corrosion on the battery posts or inside the cable clamps, it’s a good time to clean them. Use a wire brush or a dedicated battery terminal cleaner. You can also use a paste made of baking soda and water to neutralize any acid residue. Scrub until the metal is shiny. Make sure to wipe away any debris with a rag. Clean terminals ensure a good connection when you reconnect.
You have now successfully disconnected both car battery terminals! Take a moment to admire your work – you’ve just completed an important car maintenance task safely.
How to Reconnect Car Battery Terminals
Reconnecting the battery is essentially the reverse of disconnecting it. However, the order is just as critical for safety, albeit with slightly different reasoning.
Step 1: Reattach the Positive Terminal Cable
Start with the positive (red, +) terminal. Slide the positive cable clamp back onto the positive battery post. Make sure it sits firmly on the post. Use your wrench to tighten the nut on the clamp. You want it snug and secure, but don’t overtighten, as this could damage the clamp or the battery post.
Step 2: Reattach the Negative Terminal Cable
Now, attach the negative (black, -) terminal. Slide the negative cable clamp onto the negative battery post. Tighten the nut with your wrench until the clamp is secure. Again, don’t overtighten.
Why positive first when reconnecting? When reconnecting, you attach the positive terminal first. If you were to accidentally touch the metal of the car with the wrench while tightening the positive clamp, it wouldn’t matter much because the negative terminal isn’t connected yet. Once the positive is connected, you then connect the negative terminal, completing the circuit. The safety concern here is ensuring that by the time you’re tightening the negative terminal, the positive is already connected and isolated from accidental contact. It’s a bit like closing the circuit without creating a dangerous path mid-process.
Step 3: Apply Anti-Corrosion (Optional)
If you have anti-corrosion spray or dielectric grease, apply a small amount to the outside of the terminals and inside the clamps. This helps prevent future corrosion and ensures a good electrical connection.
Step 4: Double-Check Connections
Give both cable clamps a gentle tug to make sure they are firmly attached to the battery posts and won’t wiggle loose. Ensure the cables are routed properly and aren’t rubbing against any moving parts.
What to Do After Reconnecting: Idle Relearn and Other Resets
Getting the cables back on is only half the job on newer cars. Disconnecting the battery clears the adaptive memory your engine and body control modules had built up, so the first few minutes — and sometimes the first few miles — after reconnecting can feel a little off. Here’s what’s normal and what to actually do about it.
Idle Relearn: Why Your Engine May Idle Rough at First
With the ignition on but the engine off, give the electronic throttle body or idle air control valve a few minutes before starting the car. Once running, let it idle with no extra load (no A/C, no headlights, no blower motor) for 10-15 minutes. Idle speed fluctuating every 20-30 seconds during this window is normal — it’s the module relearning, not a fault.
Reintroduce Electrical Loads Gradually
After the idle settles, turn on one accessory at a time — A/C, then headlights — rather than everything at once, and let idle stabilize between each. A short mixed city-and-highway drive afterward lets the transmission and fuel-trim adaptives relearn your normal driving pattern.
Other Resets a Battery Disconnect Can Trigger
- Power window auto-up/down: Many cars lose the one-touch express window function after a disconnect. Manually hold the window switch up (or down) at the top of its travel for a few seconds to reprogram it — check your manual, since the exact hold time varies.
- Steering angle sensor: Some vehicles self-calibrate this during a slow, straight-line drive; others (often requiring a scan tool) won’t clear a related warning light until a dealer or shop performs a formal reset.
- Radio anti-theft code: Older factory stereos may ask for a 4-5 digit code the first time they power back on — check your owner’s manual wallet card or the glovebox before assuming the radio is broken.
One important caveat: a GM idle relearn, a Nissan procedure, and a Ford steering angle reset are not interchangeable. Always check the specific service procedure for your vehicle’s year, make, and engine rather than assuming a generic method will work on every car.
Understanding Battery Terminal Types and Sizes
While most car batteries use the standard top-mount posts, there are a few variations you might encounter. Knowing these can save you a headache if you’re working on different vehicles or older cars.
Common Battery Terminal Types:
-
Top Post Terminals: These are the most common, featuring posts that rise vertically from the top of the battery. They come in two sizes:
- SAE (Society of Automotive Engineers) Post: Standard size, easy to identify.
- GM Post (Side Post): Found in some General Motors vehicles, these terminals are on the sides of the battery and use bolts that screw directly into them.
- Threaded Post Terminals: Less common in passenger cars, often found in RVs, marine applications, or some heavy-duty vehicles. The cable attaches via a bolt into a threaded hole on the terminal.
Typical Clamp Sizes:
The size of the nut holding the clamp onto the post is usually consistent for the standard top posts:
| Terminal Type | Common Nut Size (Metric) | Common Nut Size (Imperial) |
|---|---|---|
| SAE Top Post | 10mm | 3/8 inch |
| GM Side Post | N/A (uses self-tapping screws) | N/A |
Always have a range of tools available, as some manufacturers may use slightly different sizes. A 10mm socket is your most frequent friend for this task on modern cars.
What Wrench Size Do You Need? (By Vehicle Brand)
The wrench size that fits your battery clamp bolt tends to follow the vehicle’s country of origin more than any single universal standard. Use this table as a starting point, then confirm with a quick test-fit before you commit to a size.
| Vehicle Type | Typical Wrench Size | Typical Clamp Torque |
|---|---|---|
| Domestic V6/V8 (GM, Ford, Chrysler) | 10mm | 5-8 Nm (44-70 in-lb) |
| Japanese compact/midsize (Toyota, Honda, Nissan) | 10mm | 5-8 Nm (44-70 in-lb) |
| European (BMW, Mercedes, VW) | 13mm | 5-8 Nm (44-70 in-lb) |
| GM side-post terminals | 5/16 in (8mm) | ~13 Nm (115 in-lb) |
Over-tightening is a common mistake: torquing much past 8 Nm on a standard top-post clamp can crack the post or strip the clamp threads. If you don’t have a torque wrench, snug is enough — the cable shouldn’t spin or wiggle by hand, but you’re not trying to muscle it down.
Troubleshooting Common Issues
Even with clear instructions, sometimes things don’t go exactly as planned. Here are a few common issues and how to handle them:
- Stuck Terminal Clamp: If a clamp won’t budge, try gently tapping around the base of the clamp with the handle of your wrench. A battery terminal puller tool is specifically designed to help remove stubborn clamps without damaging the battery.
- Corrosion is Heavy: If corrosion is extensive and covers a large portion of the battery post or clamp, you might need a more thorough cleaning. A baking soda and water paste is excellent for neutralizing acid and cleaning. For very thick, hardened corrosion, you might need to use a scraper carefully.
- Stripped Nut or Bolt: If the nut or bolt becomes stripped and you can’t get a grip with your wrench, you might need to carefully break it off using a nut splitter or by cutting it with a Dremel tool. This is a more advanced repair and might require replacing the cable clamp.
- Battery Still Not Working After Reconnection: If your car doesn’t start or has electrical issues after reconnecting, double-check that both terminals are firmly tightened and in the correct order. It’s also a sign that the battery itself might be dead, or there could be another underlying electrical problem.
FAQs About Disconnecting Car Battery Terminals
Here are some frequently asked questions to help clarify any lingering doubts.
Why is disconnecting the negative terminal first so important?
Disconnecting the negative terminal first is a critical safety measure. It prevents accidental short circuits. If your wrench touches the car’s metal body while loosening the negative clamp, nothing happens because the circuit isn’t complete. If you were to do this on the positive terminal first, you’d create a spark or even a dangerous short circuit. For more on the physics behind the rule, see our guide on which terminal to disconnect first on a car battery.
Do I need to disconnect the battery to jump-start my car?
No, you do not disconnect the battery to jump-start your car. Jump-starting involves connecting jumper cables from a good battery to your car’s battery to provide a temporary power boost. Disconnecting is only necessary when you’re planning to remove the battery or work on the electrical system itself.
Will disconnecting the battery erase my car’s radio presets and settings?
Yes, disconnecting the battery will reset your car’s clock, radio presets, and sometimes even learned engine parameters (which the car will relearn over time). Some newer vehicles might have a backup power source to retain certain settings, but it’s common for most settings to be lost.
How long can I leave my car battery disconnected?
You can leave a car battery disconnected for extended periods, even months. However, if left disconnected for too long, the battery may eventually lose its charge over time. For long-term storage, it’s often best to use a battery maintainer (trickle charger) to keep the battery topped up and healthy.
Is it safe to touch the battery terminals with my bare hands?
It’s best to avoid touching the battery terminals with your bare hands. While they usually aren’t covered in acid (unless there’s a leak), they can be dirty, greasy, and sometimes have residual corrosion. Always wear gloves for cleanliness and protection. The main danger of touching is if two terminals are bridged by a conductive object while connected to the battery.
What happens if I reconnect the terminals in the wrong order?
If you reconnect the terminals in the wrong order (negative first, then positive), you risk creating a spark and potentially damaging the car’s sensitive electronics or even the battery itself. The electrical surge from completing the circuit incorrectly can be harmful.
Can I use a pair of pliers to loosen the battery terminal nuts?
While pliers might work in a pinch if you have absolutely no other tools, it’s highly discouraged. Pliers don’t provide a good grip and can easily slip, rounding off the nuts, making them impossible to loosen or tighten properly. A proper wrench or socket set is the only recommended tool for this job.
Do I need to do an idle relearn after every battery disconnect?
Not always, but it’s common enough to expect it. Most cars self-correct within a 10-15 minute idle period plus a short drive. If rough idle, stalling, or warning lights persist well past that window, treat it as a real fault rather than normal relearning and have it checked.
Conclusion
There you have it – a complete guide on how to disconnect and reconnect your car battery terminals. We’ve covered why it’s important, the safety measures you absolutely must follow, the simple tools you need, and the exact steps to get the job done right. Remember, always disconnect the negative cable first and reconnect the positive cable first. Following these rules ensures your safety and protects your car’s electrical system.
Taking on tasks like this yourself saves you money and builds confidence in maintaining your vehicle. If at any point you feel unsure or uncomfortable, it’s always best to consult a professional mechanic.
Products related to this article
Sponsored / affiliate links. As an Amazon Associate I earn from qualifying purchases. I may earn additional commission from eligible campaigns.