How To Remove A Car Radio Without Breaking Anything
Taking out a car radio can feel like a puzzle. You want to upgrade it or maybe fix something. But the thought of prying wrong and snapping plastic parts can make you freeze.
Many folks feel this way. It’s a common worry when you’re not sure where to start. We’ve all been there, staring at a dashboard and thinking, “How do I even begin?” This guide is here to help.
We’ll walk through it step-by-step. You’ll learn what you need and how to do it safely. Let’s get your radio out without any trouble.
Safely removing a car radio involves gathering the right tools, identifying your car’s specific mounting system, and carefully releasing clips or screws. Always disconnect the battery first. Gentle prying and knowing when to stop are key to avoiding damage to your dashboard or the radio itself.
Understanding Your Car Radio Removal
Car radios, or head units, are more than just music players now. They connect to our phones. They offer navigation.
They can be complex electronic boxes. Getting one out without hurting it or your car’s interior needs a bit of know-how. Most cars have specific ways their radios are held in.
This is usually to make them secure. It also helps stop theft.
The way a radio is fitted depends on the car maker. Some use simple screws. Others use hidden clips.
Some need special tools. These tools are often called radio removal keys. They slide into slots on the radio’s face.
This releases the locking tabs inside. Knowing what kind of system your car has is the first big step. You can often find this out by looking online for your car model.
When you try to force a radio out, that’s when bad things happen. You can crack the plastic trim around it. You might bend metal brackets.
The worst is damaging the wiring harness. This can cause electrical issues later. It’s not just about getting the radio out.
It’s about keeping everything else in good shape too. This means taking your time and being gentle.
Think of it like building with LEGOs. You can’t just yank a brick off. You need to wiggle it a bit.
You need to find the connection points. Car radios are a bit like that, but with more delicate parts. So, the goal is to understand the attachment method.
Then, you use the right technique to release it. No brute force is needed. Just a little knowledge and patience.
My Own Radio Removal Scare
I remember the first time I tried to swap out my old car radio. It was a beat-up Honda Civic from the early 2000s. The radio was basic, but I wanted Bluetooth.
I’d watched a few YouTube videos. They made it look so easy. I grabbed a flathead screwdriver and went to work.
I pushed and wiggled. Then, I heard a sickening crack.
Panic set in immediately. I’d chipped a piece off the plastic trim around the radio. It wasn’t huge, but it was noticeable.
My heart sank. This was exactly what I wanted to avoid. I felt a rush of annoyance, mostly at myself.
I had been too impatient. I hadn’t fully looked at how it was attached. The videos showed cars with removable bezels.
Mine didn’t have one.
I stopped. I took a deep breath. Then I got online and searched for “Honda Civic radio removal.” I found a forum post with pictures.
It showed tiny slots on the sides of the radio face. It said I needed specific keys. I learned that my car’s radio wasn’t held by screws behind a panel.
It used those hidden clips. The screwdriver had just been forcing against the plastic. I had to order the keys.
Waiting for them felt like forever. But when they arrived, it took me maybe three minutes to slide them in and pop the radio out perfectly. That lesson stuck with me: always check first.
Essential Tools for Radio Removal
Before you even think about touching your dashboard, you need the right gear. Trying to use common household items can lead to disaster. Think of it like a chef using the right knife for a delicate task.
For car radio removal, a few specific tools make a world of difference.
Your Radio Removal Toolkit
1. Radio Removal Keys: These are the most common. They often look like metal U-shapes or flat blades.
Each car brand might use a different style. You can buy sets online that cover many types. They slide into slots on the radio and release clips.
2. Trim Panel Removal Tools: These are usually made of strong plastic. They are shaped to get under plastic panels without scratching them.
They help you pry open bezels or trim pieces. They are much safer than a metal screwdriver.
3. Phillips Head Screwdriver: You’ll likely need one of these. Some radios or mounting brackets use screws.
Make sure you have a few sizes handy. A magnetic tip is a bonus. It helps keep small screws from falling away.
4. Small Socket Wrench Set: Less common for radio removal itself. But sometimes, the radio or its mounting cage is held by small nuts.
Having a small set can be a lifesaver.
5. Needle-Nose Pliers: These are useful for grabbing wires or small clips. Sometimes connectors are a bit tough to pull off.
Pliers give you better grip.
6. Small Container or Magnetic Tray: You will have screws. You might have clips.
Keep them safe! A small bowl or a magnetic tray for screws stops them from rolling away. Losing a tiny screw can be very frustrating.
The most important item is often the radio removal keys. If your car uses them, don’t skip this. You can find keys specific to your car’s make online.
Many companies sell universal sets. These sets have several different types of keys. You pick the ones that fit the slots on your radio face.
Trim tools are your next best friends. They are designed to pop clips. They spread the force over a wider area.
This means less chance of bending or breaking plastic. They come in different shapes. Some are flat like a wedge.
Others have a hook or notch. They are essential for removing the trim pieces that surround the radio.
Don’t forget the basics. A good set of screwdrivers is crucial. Make sure they are the right size.
A worn-out screwdriver can strip a screw head. This makes removal much harder. Keep all your small parts organized.
Losing a screw is a common mistake. It can make reinstallation difficult or even impossible. So, have a system ready for your parts.
Safety First: Disconnecting the Battery
This step is non-negotiable. Seriously. Before you do anything else, disconnect your car’s battery.
Why? Because you’ll be working with electrical connections. These connect to your car’s main power.
If you accidentally touch a live wire to metal, you can cause a short circuit. This can fry your radio. It can damage your car’s electrical system.
It can even deploy airbags.
Think of it as turning off the main switch. It makes everything safe to handle. You don’t want any power flowing.
To do this, you’ll need a wrench that fits your battery terminal nuts. Usually, it’s a 10mm wrench. You’ll typically want to disconnect the negative terminal first.
It’s usually black. Sometimes it has a minus (-) symbol. Loosen the nut on the negative terminal.
Then, wiggle the cable off the post. Tuck it away so it can’t touch the post again.
Why the negative terminal? It’s the ground. Disconnecting it breaks the circuit.
If you were to touch the positive (red) terminal first with your wrench and the car’s metal body, you’d create a spark. Disconnecting negative first prevents this if you accidentally touch the body with the wrench while loosening it.
Once the negative is off, you can disconnect the positive terminal. This is usually red and has a plus (+) symbol. Loosen its nut and remove the cable.
Be careful not to let it touch anything metal. It’s a good idea to cover the terminals with a dry cloth or even some electrical tape. This is just an extra safety measure.
This step takes less than two minutes. But it saves you hours of potential headaches. It also gives you peace of mind.
Knowing the power is off means you can focus on the mechanical part of the job. It’s a simple habit that shows you’re serious about doing it right. And doing it safely.
Step-by-Step: Removing the Radio
Now for the main event. Remember, patience is your best friend here. Don’t rush.
Every car is a little different. So, the exact steps might vary slightly. But the general process is quite similar for most vehicles.
Your Step-by-Step Radio Removal Guide
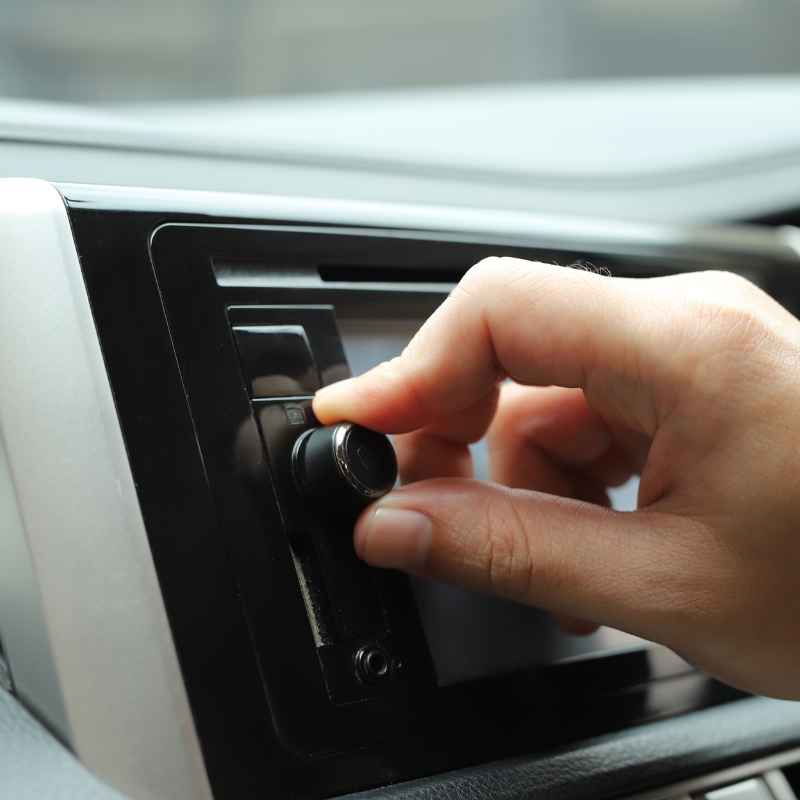
Step 1: Identify Your Radio Mount Type
Look closely at your radio. Do you see small horizontal or vertical slots on the sides? These usually mean radio removal keys are needed.
If you don’t see these, look for screws. They might be visible on the face. Or, they might be hidden behind a removable trim piece.
Step 2: Remove the Trim Bezel (If Necessary)
Many cars have a plastic trim piece, or bezel, around the radio. This might need to be removed first. Use your plastic trim removal tools.
Start at an edge. Gently work your tool under the bezel. Pry slowly and carefully.
Listen for the release of clips. Work your way around the entire bezel.
Step 3: Use Radio Removal Keys (If Applicable)
If your radio has slots, insert the correct removal keys. You might need two keys. Slide them in until you feel them click or seat properly.
This means they’ve disengaged the locking tabs. Once the keys are in, you should be able to slide the radio out. Sometimes you need to gently wiggle the keys or the radio.
Step 4: Unscrew the Radio (If No Keys)
If your radio is held by screws, unscrew them. Keep them in your container. Once screws are out, the radio should be loose.
You might still need to gently pull it out from the dashboard opening.
Step 5: Gently Pull the Radio Out
Once it’s loose, gently pull the radio out of its housing. Don’t yank it. It will still be connected by wires.
Pull it out just enough so you can see the back.
Step 6: Disconnect Wiring Harnesses and Antenna
On the back of the radio, you’ll see one or more wiring harnesses. There will also be an antenna cable. The harnesses usually have a tab you need to press to release them.
The antenna cable often pulls straight out. Be firm but gentle. Don’t pull on the wires themselves.
Pull on the connector body.
Step 7: Remove the Radio Completely
Once all connections are off, you can remove the radio from the car. Place it somewhere safe. You might need to remove a metal mounting cage from the old radio.
This cage stays in the car. You’ll likely install a new one with your new radio.
Let’s break down that trim bezel part. Sometimes, the trim is held by just clips. You might hear a pop as they release.
Other times, there are screws hidden under small covers. These covers might be on the vents or around the gear shift. You’ll need to carefully pry these covers off.
Again, plastic trim tools are best. A small flathead screwdriver can work, but be extremely careful. You don’t want to leave marks.
For the radio removal keys, it’s not always a smooth slide. Sometimes, you have to the clips disengage. If you’re using a universal set, try different keys if the first one doesn’t seem to work. There are usually two slots on each side of the radio face.
You’ll insert keys into both slots.
When you disconnect the wires, pay attention to what goes where. Some connectors are unique. They only fit one way.
Others might look similar. Taking a quick photo with your phone before you disconnect them is a smart move. This helps a lot when you’re ready to put a new radio in.
You’ll know which plug goes into which port. The antenna cable is usually a simple plug. Just pull it straight out.
Don’t twist it.
Common Pitfalls to Avoid
Even with the best intentions, things can go wrong. Knowing what others have struggled with can help you steer clear of those same problems. Most issues come down to a few key mistakes.
They are often related to impatience or using the wrong approach.
Radio Removal Blunders to Sidestep
Blunder 1: Forcing It
This is the big one. If the radio isn’t moving, don’t apply more force. Stop and re-assess.
You’re likely missing a screw, a clip, or not using the right tool.
Blunder 2: Using Metal Tools on Plastic
A screwdriver can easily scratch or crack your dashboard trim. Plastic trim tools are designed to be gentler. They spread the pressure.
Always reach for them first for prying.
Blunder 3: Not Disconnecting the Battery
We stressed this, but it’s worth repeating. Electrical shorts can be costly. Always disconnect the negative battery terminal first.
Blunder 4: Yanking Wires
When disconnecting the wiring harness, pull the connector itself, not the wires attached to it. Pulling wires can break internal connections.
Blunder 5: Losing Small Parts
Screws and clips are tiny. They love to disappear. Use a magnetic tray or a small container to keep them safe.
It makes reassembly so much easier.
Blunder 6: Not Identifying the Mount Type
Assuming all cars use screws can lead you to waste time. Identifying if you need specific radio keys saves you effort and prevents damage.
One really common issue is when a screw is stripped. The screwdriver just spins. This happens if the screw head is damaged.
Or if the screwdriver isn’t the right size. If a screw is stripped, you might need a screw extractor kit. Or, sometimes, a thin, flathead screwdriver can be wedged into the head to turn it.
But this is tricky. It’s much better to prevent it.
Another tricky part can be stubborn connectors. The clips designed to hold them can get stiff with age. Or they might have a bit of corrosion.
Don’t use excessive force. Try wiggling the connector gently. Sometimes, a tiny bit of electrical contact cleaner can help.
But use it sparingly. And only on the connector itself, not inside the radio or car wiring.
When removing trim panels, some cars have an order. You might have to remove a lower panel before you can get to an upper one. Or vice versa.
If a panel feels stuck, double-check if there are hidden screws or clips you missed. Try to find a YouTube video specific to your car model. Seeing someone else do it can reveal hidden steps.
Working with Different Car Brands
As we’ve touched on, not all cars are built the same. Different brands have different design philosophies. This means their radio mounting systems can vary a lot.
Knowing what to expect for your car’s brand can save you time and frustration. It’s like knowing the secret handshake.
Brand-Specific Radio Removal Insights
American Brands (Ford, Chevrolet, Dodge):
These often use a combination of visible screws and plastic trim pieces. Some Fords might have a bezel that pops off easily. Chevys can sometimes have screws located at the bottom of the radio opening.
Always look for screws first after removing any trim.
Japanese Brands (Toyota, Honda, Nissan, Subaru):
Many Japanese cars, especially older models, rely heavily on radio removal keys. These keys are often U-shaped. They slide into slots on the sides or face of the radio.
Trim panels might also need careful prying. Toyota and Honda are particularly known for using specific key slots.
German Brands (BMW, Mercedes-Benz, Audi, Volkswagen):
German car interiors are often built with precision. They might use a mixture of screws and clips. Some higher-end models might have more integrated systems where the radio is part of a larger dashboard unit.
This can sometimes make removal more involved. Look for screws around the edges of the radio or behind a climate control panel.
Korean Brands (Hyundai, Kia):
Similar to Japanese brands, many Korean cars utilize radio removal keys. They also tend to have plastic trim pieces that require careful prying. The design is often straightforward but requires the correct tools.
For example, if you drive a Ford F-150 from the late 90s, you might find that the radio is held by four screws. These screws are usually visible once you can access the radio. You’ll likely need to pry off a small section of the dash around it.
However, a newer Ford might have a more integrated touch-screen system. This could involve removing a larger dashboard section.
Honda and Toyota often use a system where you insert two U-shaped keys. These keys go into slots on the left and right sides of the radio. Once inserted, you push them in.
Then you often have to push the radio back in slightly. This action releases internal clips. Then you can pull the radio out.
If you try to pry without the keys, you’ll likely damage the plastic around the radio face.
Mercedes-Benz and BMW can sometimes be trickier. They often have well-integrated dashboards. The radio might be part of a larger module.
You might need to remove climate controls or other panels first. Some models have screws hidden behind small pop-off covers. Researching your specific model on an owner’s forum or YouTube is invaluable here.
The key takeaway is to do your homework. A quick search for your car’s make, model, and year plus “radio removal” will usually bring up helpful guides or videos. This upfront research saves time and prevents damage.
It’s a small effort for a big reward: a smooth, damage-free removal.
Reassembly: Putting It Back Together
Putting the radio back in is often easier than taking it out. But it’s also a place where mistakes can happen. The most common issue is forgetting to reconnect something.
Or forcing a connection that isn’t aligned.
First, make sure your car’s battery is still disconnected. This keeps things safe. Align the radio with its opening.
Carefully plug in the main wiring harness(es). Make sure they click into place. Don’t force them if they feel stiff.
Check the orientation. Then, plug in the antenna cable. It should slide in easily.
Once the connections are secure, slide the radio back into its mounting cage or dashboard opening. If you removed a metal mounting cage, you’ll need to install that first. Then slide the radio into it.
Guide it gently. Make sure no wires are getting pinched behind it.
If you removed trim pieces, reattach them. Start with the smallest ones. Then work your way up.
Ensure all clips snap into place. You should hear them click. Go around and press on the edges to make sure they are fully seated.
This prevents rattles later.
Now, for the crucial step: reconnecting the battery. Reattach the positive terminal first. Then reconnect the negative terminal.
Tighten the nuts securely on both. Once the battery is connected, you can turn on your car. Test the radio.
Check all its functions. Does it power on? Do the speakers work?
Does the display light up?
If everything works, congratulations! You did it. If something isn’t right, don’t panic.
It’s usually a simple fix. Double-check all your connections. Make sure the battery is still disconnected when you re-check.
Often, a connection might be slightly loose. Or a wire might have been pinched during reinstallation.
When to Call a Professional
While removing a car radio can be a DIY project, it’s not always the best path for everyone. Sometimes, calling in an expert is the wisest choice. If you’re feeling unsure, or if your car’s system is very complex, it might be worth it.
Signs It’s Time for Professional Help
1. No Confidence: If you’ve read this guide and still feel nervous or overwhelmed, that’s a valid reason to seek help. Your peace of mind is important.
2. Complex Systems: Modern cars have intricate infotainment systems. Some have integrated displays that are not designed for easy removal.
If your car has a large, complex screen or many integrated features, professional help might be safer.
3. Lack of Tools: If you don’t have the specific radio removal keys or plastic trim tools, and buying them for a one-time job isn’t practical, a pro has them.
4. Previous Damage: If you’ve already attempted removal and caused some damage, a professional might be able to fix it as well as complete the job.
5. Valuable/Vintage Cars: If you own a classic or high-value vehicle, the risk of making a mistake is higher. The cost of repair could far exceed the cost of professional installation.
Car audio shops or car dealerships are good places to turn. They have trained technicians who do this sort of work daily. They have all the specialized tools.
They also understand the electrical systems of various cars. This is especially true for newer cars with advanced electronics.
For example, some luxury cars have their radios tied into other vehicle modules. Disconnecting the wrong thing could affect things like climate control, navigation, or even vehicle diagnostics. A professional will know how to navigate these complexities.
They also often offer a warranty on their work. This gives you extra security.
If you’re just swapping out an old, basic radio for a standard aftermarket unit, it’s usually straightforward. But if you’re dealing with complex double-DIN units, touch screens, or cars with integrated dashboards, consider the professional route. It’s an investment in protecting your vehicle and ensuring the job is done right the first time.
Frequently Asked Questions
Common Questions About Car Radio Removal
How do I know if I need special radio removal tools?
Look at the front of your car radio. If you see small horizontal or vertical slots on the sides, it’s very likely you’ll need radio removal keys. These slots are designed for specific tools to release internal clips.
Can I use a coat hanger to remove my car radio?
While some old guides might suggest this, it’s generally not recommended. Coat hangers can be too flimsy or sharp. They can easily bend or scratch your dashboard.
Using the correct, purpose-built radio removal tools is much safer and more effective.
How long does it typically take to remove a car radio?
For most standard car radios, if you have the right tools and know the process, it can take anywhere from 15 minutes to an hour. The longest part is often identifying the mounting method or carefully removing trim panels without damage.
What should I do if I lose a screw during removal?
Try to retrace your steps and look carefully in the area where you were working. If you can’t find it, you might be able to get a replacement screw from an auto parts store or a dealership. Sometimes, a similar-sized screw from another non-critical location might work, but be cautious.
Will removing my car radio affect my car’s warranty?
In most cases, removing a car radio for replacement or repair does not void your car’s overall warranty, especially if done carefully and correctly. However, if you cause damage during the removal process, that specific damage might not be covered. It’s always a good idea to check your warranty documents or ask your dealership.
Is it okay to leave the battery connected while removing the radio?
Absolutely not. It is extremely important to disconnect the negative battery terminal before working on the radio. This prevents electrical shorts, damage to the radio or car’s electrical system, and potential airbag deployment.
Final Thoughts on Radio Removal
Taking out your car radio doesn’t have to be a scary event. With the right tools and a little patience, you can do it safely. Remember to disconnect the battery.
Use plastic trim tools. And research your car’s specific setup beforehand. This makes all the difference.
It’s a task that offers a sense of accomplishment. You’ve tackled a technical job. You’ve saved yourself some money.
And you’ve learned something new about your car. Just take your time. Be gentle.
And when in doubt, don’t hesitate to call a professional. Happy upgrading!