How To Hide Stone Chips: Proven Essential Fix
Don’t let stone chips dim your car’s shine! Learn simple, effective ways to hide those annoying marks and restore a smooth, flawless finish to your vehicle’s paintwork. This guide provides easy-to-follow steps using essential tools and materials, making it a perfect DIY solution for any car owner.
Watching a tiny rock fly up from the road and hit your car can be a heart-stopping moment. Those little impacts leave behind unsightly chips and dings in your paint, making your beloved vehicle look older and less cared for than it deserves. It’s a super common problem, and if left untreated, these chips can even lead to rust down the line. But don’t worry! You don’t need to be a professional to fix them. This guide is here to walk you through, step-by-step, on how to effectively hide stone chips yourself, saving you time and money. We’ll cover everything you need to know to get your car looking its best again.
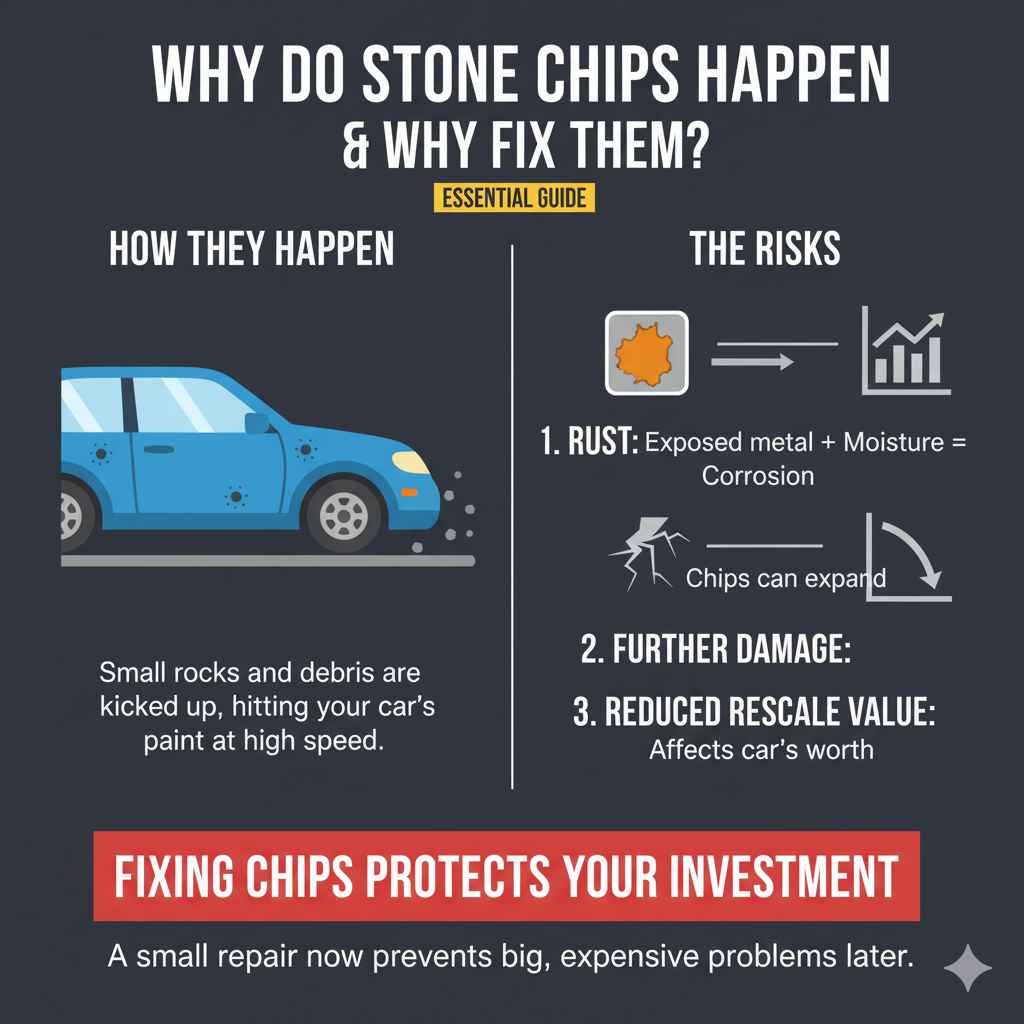
Why Do Stone Chips Happen and Why Fix Them?
Stone chips are an unfortunate reality of driving. They occur when small stones, rocks, or other debris on the road are kicked up by your tires or the tires of other vehicles. When these tiny projectiles hit your car’s paint at speed, they can chip away at the protective layers, exposing the metal underneath.
Fixing these chips isn’t just about looks, though that’s a big part of it! Leaving chips exposed to the elements can lead to:
- Rust: Once the metal is exposed, moisture can get in and start the rusting process. This is especially true for steel parts. Rust is much harder and more expensive to fix than a simple chip.
- Further Damage: Small chips can sometimes expand or weaken the surrounding paint, making it more susceptible to future damage.
- Reduced Resale Value: A car with consistent paintwork and minimal damage will always fetch a higher price when you decide to sell it.
Essential Tools and Materials You’ll Need
Before you dive in, let’s gather what you’ll need. The good news is you probably have some of these items already, and the rest are readily available at auto parts stores or online.
For Cleaning and Prep:
- Car Wash Soap and Water: To thoroughly clean the affected area.
- Microfiber Towels: For gentle drying and wiping away residue.
- Rubbing Alcohol or Isopropyl Alcohol (IPA): To degrease the paint around the chip, ensuring good adhesion for touch-up paint.
- Masking Tape or Painter’s Tape: To protect areas around the chip you don’t want to get touch-up paint on, especially if you’re not using a very fine applicator.
For Repair:
- Automotive Touch-Up Paint: This is crucial. You’ll need paint that matches your car’s color code. Most car manufacturers have a unique paint code, often found on a sticker in the driver’s side door jamb, under the hood, or in your owner’s manual. You can usually buy this matched paint in a small bottle with a brush, a pen applicator, or even a spray can.
- Automotive Clear Coat: This is a protective layer that goes over the color coat to add shine and durability.
-
Applicator Tools:
- Fine-tip brush: Often included with touch-up paint bottles, or you can buy specialized fine-line paint pens or micro-brushes (like those used for makeup application).
- Toothpicks: Can be surprisingly effective for applying very small amounts of paint.
- Automotive Pinstriping Brush: For more advanced users wanting a finer line.
- Optional: Polish and Wax: For finishing and blending the repair.
Pro Tip: When ordering touch-up paint, make sure you get the correct color code for your specific car model and year. A quick search on your car’s door jamb or in the manual should help you find it. Websites like PaintCode.co.uk (linking to a reputable resource for finding paint codes) can be very helpful if you’re struggling to locate it.
Step-by-Step Guide: How to Hide Stone Chips on Your Car
Hiding stone chips is a process that requires patience and a steady hand. But with these clear steps, you’ll be well on your way to a much smoother finish.
Step 1: Thoroughly Clean the Area
This is the most important first step. Any dirt, grime, or wax on the paint can prevent the touch-up paint from sticking properly. Wash your car as you normally would, paying special attention to the area around the stone chip. Make sure to rinse away all soap residue. After washing, dry the area completely with a clean microfiber towel.
Step 2: Degrease the Chip and Surrounding Paint
Once the area is clean and dry, use rubbing alcohol or IPA on a clean microfiber cloth or cotton swab. Gently wipe around the stone chip. This removes any residual oils or contaminants that might interfere with the paint adhesion. Let the area air dry completely.
Step 3: Prepare Your Touch-Up Paint
If you’re using a touch-up paint bottle, you’ll need to prepare it. Some paints require shaking to mix the pigments thoroughly. For paints with a ball bearing inside, shake the bottle vigorously for about a minute. If the paint seems too thick, you might be able to thin it slightly with a specific automotive reducer, but this is usually not necessary for small chip repairs. For pens, follow the manufacturer’s instructions, which often involve clicking the pen or pressing the tip to start the flow of paint.
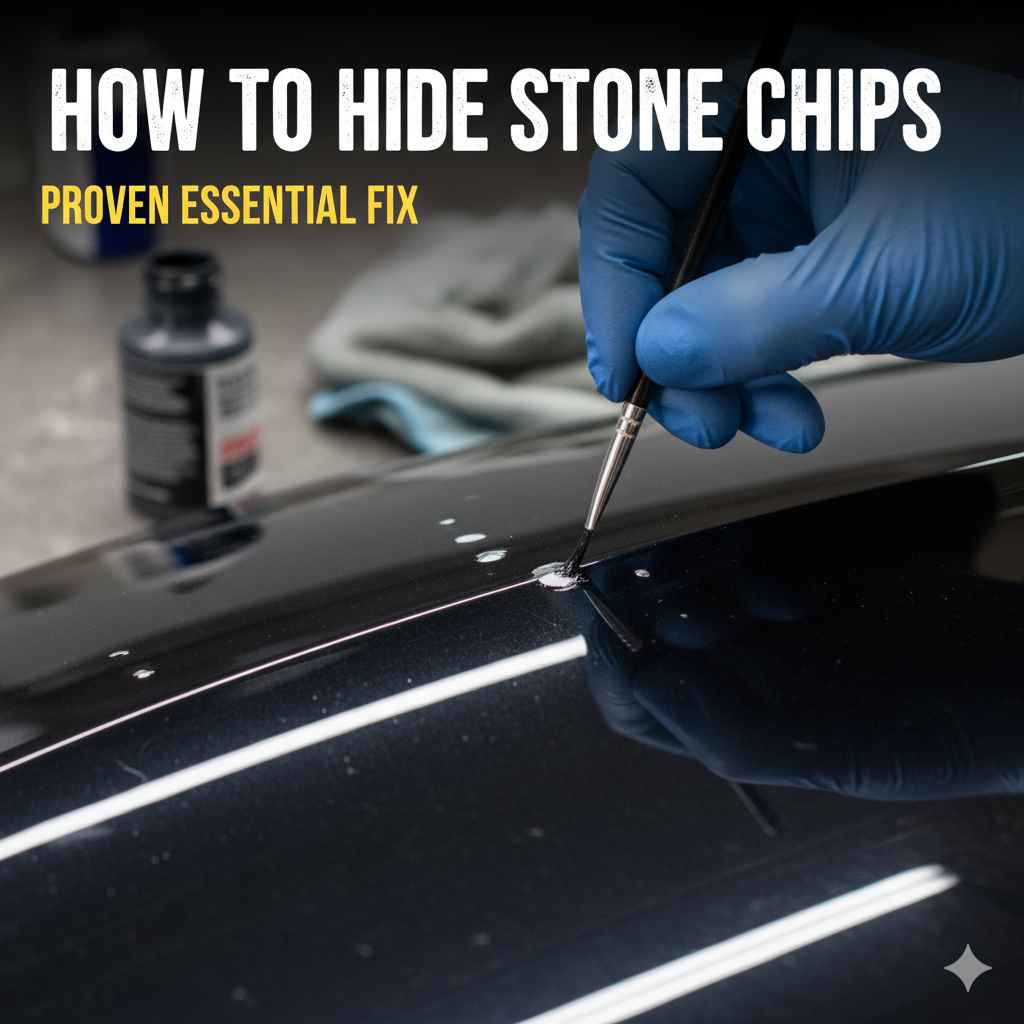
Step 4: Apply the Color Coat
This is where the steady hand comes in!
- Assess the Chip: Look closely at the chip. If there’s any loose paint around the edges, you can gently try to remove it with a plastic razor blade or a toothpick, but be careful not to scratch the good paint.
- Load Your Applicator: Dip your fine-tip brush, toothpick, or pen tip very lightly into the touch-up paint. You want just a small amount of paint on the tip, not a big blob.
- Apply to the Chip: Carefully dab the paint directly into the chipped area. The goal is to fill the void created by the chip. Try to lay the paint flat and avoid thick blobs that will stand out. Work in thin layers. It’s better to apply multiple thin coats than one thick one.
- Multiple Coats (If Needed): Let the first coat dry completely (this might take 15-30 minutes, or longer if it’s humid). Then, apply another thin coat if the chip isn’t fully filled. You’re aiming to bring the paint level up to the surrounding paint surface, but don’t overfill it.
Step 5: Apply the Clear Coat
Once the final color coat has dried thoroughly (usually at least an hour, but check the product’s instructions), it’s time for the clear coat.
- Load your applicator with a small amount of clear coat.
- Carefully apply a thin layer of clear coat over the dried color coat, extending slightly beyond the edges of the color repair. This helps to seal and protect the color and blend it in.
- Allow the clear coat to dry completely. This can take several hours, or even overnight, depending on the product and conditions.
Step 6: Level and Blend (Optional but Recommended)
After the clear coat has cured for at least 24 hours, it might still feel slightly raised compared to the surrounding paint. You can gently level it to make the repair nearly invisible.
- Wet Sanding (Advanced): For a truly seamless finish, some people use very fine-grit sandpaper (2000-3000 grit) with a sanding block. Wet the sandpaper and the surface, and very lightly sand the raised clear coat until it’s flush with the surrounding paint. This requires a very delicate touch to avoid damaging the original paint. A safer alternative is using a polishing compound.
- Using a Polishing Compound: Apply a small amount of automotive polishing compound to a clean microfiber applicator pad. Gently rub the polished area in a circular motion. This will help to smooth out any texture and blend the repaired area with the surrounding paint.
- Follow Up with Wax: After polishing, clean the area and apply a coat of car wax to protect the new finish.
Alternative Methods and Advanced Techniques
While touch-up paint is the most common DIY method, there are other options and techniques to consider for more persistent or larger chips.
Paint Pens vs. Brushes
Touch-up paint often comes in small bottles with a brush, or as a pen applicator.
| Method | Pros | Cons | Best For |
|---|---|---|---|
| Small Bottle with Brush | Traditional, good control for small chips, can be thinned for finer application. | Brush can be too thick for very tiny chips, requires a steady hand. | Small to medium chips, multiple applications. |
| Paint Pen | Convenient, consistent line, cleaner application for some. | Tip can sometimes get clogged, less control over paint flow than a brush for very precise work. | Fine lines, quick touch-ups, consistent application. |
| Toothpick/Micro-brush | Extremely fine application, highly controlled. | Can be time-consuming, requires multiple dips. | Tiny pinprick chips, precise filling. |
Professional Paint Chip Repair Kits
Some companies offer more comprehensive kits that include tools for cleaning, filling, and even buffing. These can be a good investment if you have multiple chips or want a more polished result without professional help. They often come with instructions specific to their products, guiding you through a multi-step process that might include leveling compounds and polishing agents.
When to Call a Professional
For very large chips, deep gouges, or if the damage has affected body panels or primer, it might be best to consult a professional auto body shop. They have specialized tools and expertise to handle more significant paint damage, ensuring a factory-like finish and proper protection against rust. For instance, if a chip has gone past the primer and you can see bare metal, it’s a prime candidate for professional repair to prevent corrosion. Reputable services often offer paintless dent repair (PDR) for minor imperfections or full panel resprays for more extensive damage.
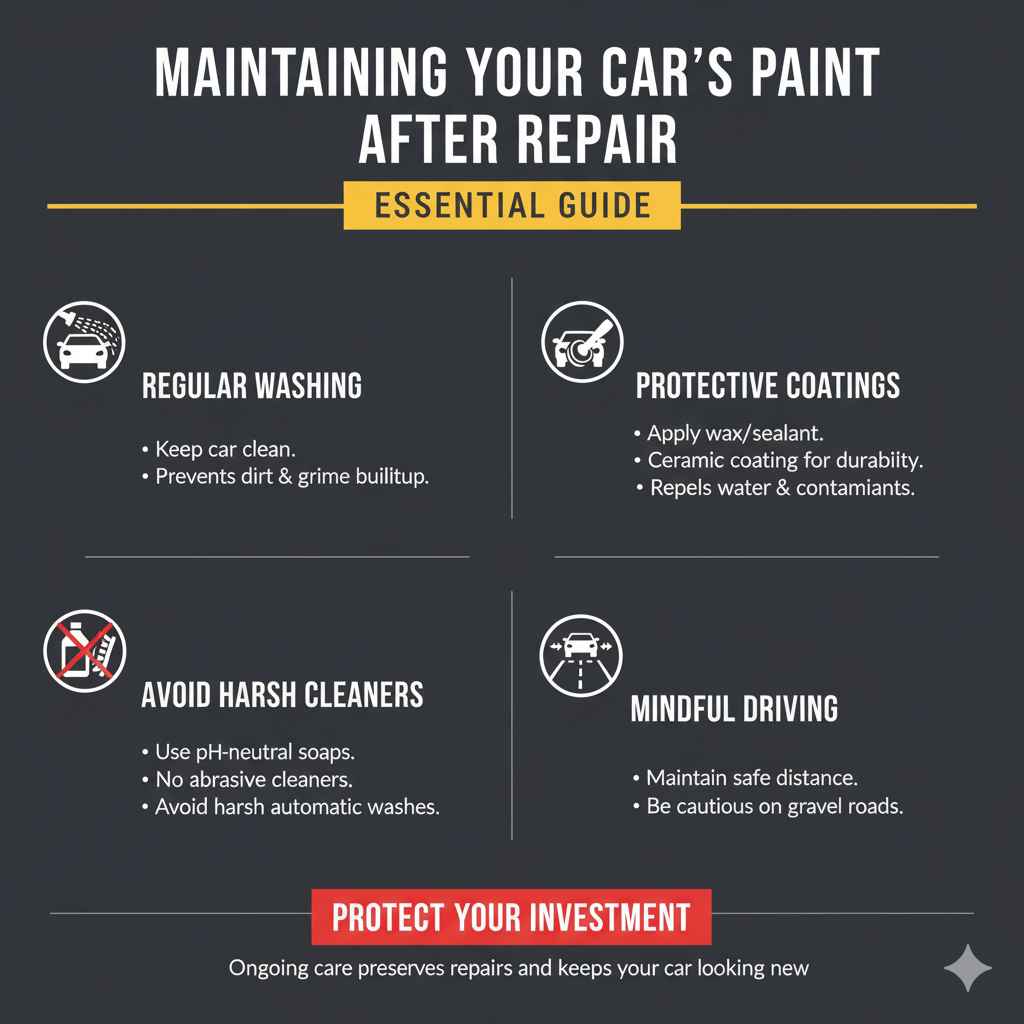
Maintaining Your Car’s Paint After Repair
Once you’ve successfully hidden those stone chips, a little bit of ongoing care will help protect your hard work and keep your car looking great.
- Regular Washing: Keep your car clean to prevent dirt and grime from accumulating, which can hide the repair or even cause new damage.
- Protective Coatings: Apply a good quality car wax or sealant every few months. A ceramic coating offers even more durable protection against the elements and minor scratches. This creates a hydrophobic barrier that repels water and contaminants.
- Avoid Harsh Cleaners: Stick to pH-neutral car soaps and avoid abrasive cleaners or automatic car washes with harsh brushes, which can scratch delicate paintwork and potentially damage your repair.
- Mindful Driving: While you can’t always avoid road debris, try to maintain a safe distance from vehicles in front of you, especially on gravel roads or construction zones.
Frequently Asked Questions (FAQ)
Q1: How do I find my car’s paint code?
Your car’s paint code is usually found on a sticker or plate located in the driver’s side door jamb, under the hood, or sometimes in the glove compartment or trunk. Check your owner’s manual if you can’t find it. You can also often find this information through online VIN decoders if you have your vehicle identification number handy. Reputable automotive paint suppliers also have online tools where you can input your car’s make, model, and year to find the correct color code.
Q2: Can I really hide stone chips myself?
Yes! For most small to medium stone chips, you can effectively hide them yourself with the right touch-up paint and a careful application. The key is patience, using the correct matching paint, and applying thin, even coats rather than one thick one.
Q3: What’s the difference between touch-up paint and a clear coat?
Touch-up paint (the color coat) is what provides the actual color to fill the chip. The clear coat is a protective, transparent layer applied over the color coat to protect it from the elements, UV rays, and to add a glossy finish that helps blend the repair into the surrounding paint.
Q4: How long does touch-up paint take to dry?
Drying times can vary depending on the type of paint, humidity, and temperature. The color coat typically takes about 15-30 minutes to feel dry to the touch, but it’s best to wait at least an hour before applying a clear coat. The clear coat can take several hours to cure, and the entire repair might need 24 hours or more to fully harden before you attempt any polishing or waxing. Always refer to the manufacturer’s instructions for your specific product.
Q5: What if I apply too much touch-up paint and it’s lumpy?
Don’t worry, this is a common issue! If the paint is still wet or slightly tacky, you might be able to gently wipe away the excess with a very fine-tipped cotton swab lightly dampened with rubbing alcohol. If the paint has dried and is lumpy, you can try to carefully level it down using a very fine grit (2000-3000 grit) sandpaper with water, or by using a polishing compound as described in Step 6. If it’s significantly lumpy, you might need to gently remove the dried touch-up paint and reapply a thinner layer.
Q6: Can stone chips lead to rust?
Yes, absolutely. When a stone chip penetrates through the paint layers and exposes the bare metal (like steel), it creates an opening for moisture and oxygen to reach the metal. This is the beginning of the corrosion process, commonly known as rust. It is very important to repair chips promptly, especially on older vehicles or in areas prone to rust, to prevent this from happening. A good touch-up and clear coat application acts as a protective barrier.
Conclusion
Caring for your car’s appearance doesn’t have to be complicated or expensive. By understanding how to hide stone chips, you can maintain your vehicle’s aesthetic appeal and protect its value. With a little patience and the right tools, you can effectively tackle these common paint imperfections yourself. Remember to always start with a clean surface, use paint that closely matches your car’s color code, apply in thin layers, and finish with a protective clear coat. Don’t be discouraged if your first attempt isn’t absolutely perfect; practice makes perfect, and even a good touch-up job is far better than leaving bare metal exposed. So, grab your touch-up kit, take a deep breath, and give your car the care it deserves. You’ve got this!