How to Install an Infant Car Seat Correctly Every Time
Installing an infant car seat correctly is the single most important step you can take to protect your baby on every trip. Yet research from Safe Kids Worldwide shows that 73% of car seats are not used or installed correctly. This guide walks you through the exact process step by step, so you can install an infant car seat base with confidence and pass the 1-inch test every time — see our related guides, Can I Bring My Own Car Seat for Uber? Yes, and No Help Installing and What Is the Safest Car? 2026 IIHS Top Picks.
Simply put, correct infant car seat installation comes down to five things: read both manuals, place the base in the back seat, secure it with LATCH or the seat belt, confirm the recline angle, and tighten until the base moves less than 1 inch. If any step fails, restart. A certified technician can check your work for free at most fire stations and hospitals.
Key Takeaways
- Installing an infant car seat correctly lowers crash injury risk by up to 82%, according to the CDC.
- Choose one installation method: LATCH or seat belt. Using both together is dangerous.
- The base must not move more than 1 inch at the belt path once tightened.
- Keep your baby rear-facing until at least age 2, per AAP guidance.
- Never use a car seat past its expiration date or after a moderate crash.
What You Need Before Installing an Infant Car Seat
Before you touch the car, gather everything you need. Start with the car seat base, the infant carrier, and both instruction manuals. A flat surface and a few minutes of calm, distraction-free time will also make the job much easier.
You also need to know your vehicle’s anchor system. Most cars made after 2002 have LATCH anchors in the back seat. The National Highway Traffic Safety Administration (NHTSA) reports that around half of all car seats are installed incorrectly, and skipped manual reading is the top reason why.
- Infant car seat base and carrier
- Vehicle owner’s manual
- Car seat instruction manual
- Pool noodle or rolled towel, only if your seat manual allows it
- 15 minutes of focused time with no distractions
- A fully charged phone to look up recall and registration info
Tip: Keep both manuals inside your car or take photos of the key pages on your phone. You will need them again when you switch cars or move the base to a new seat position.
Check the LATCH weight limits before you start. Most rear-facing bases have a LATCH limit of 30 to 40 pounds. If your baby weighs more, plan to use a seat belt installation instead.
| Checklist Item | Why It Matters |
|---|---|
| Expiration date on the base | Plastic degrades and weakens over time |
| Recall status at NHTSA.gov | Recalled seats can fail in a crash |
| LATCH anchors in your car | Confirms which install method to use |
| Manual kept in the car | You will need it for troubleshooting |
Gathering these items before you start prevents half-finished installations and unsafe shortcuts. A few minutes of prep saves you from a loose base that shifts in an emergency.

Step 1: Read the Car Seat and Vehicle Manuals
Your vehicle manual tells you where the LATCH anchors are, how many there are, and which seating positions work best. The car seat manual explains the base’s recline angle, weight limits, and approved belt paths. Both are equally important.
Never rely on memory or your experience with an older car seat model. Designs change. Anchor locations differ from car to car.
Safe Kids Worldwide reports that many installation errors come down to skipped instructions that parents assumed they already knew.
- Open your vehicle manual and find the LATCH anchor diagram.
- Check the rear-facing height and weight limits in the car seat manual.
- Locate the recline angle indicator on the side of the base.
- Confirm whether your seat allows pool noodles or rolled towels.
- Search for recalls at NHTSA.gov before your first install.
Warning: Never use a car seat with an unknown history, missing labels, or broken parts. If you cannot verify its condition, buy a new seat.
Manual reading also prevents a common mistake: using the wrong belt path. Some bases have one path for LATCH and another for the seat belt. Using the wrong one can make the base feel tight when it is actually not secure.
Step 2: Place the Base in the Back Row
The safest placement for an infant car seat is the center of the back seat. This position keeps your baby farther from impact zones in side crashes. But the center seat only works if the base fits tightly there and the vehicle has proper anchors or a seat belt that locks.
Many vehicles do not have LATCH anchors in the center position. In that case, use the seat belt method in the center. A tight seat belt install is just as safe as LATCH.
If the center base rocks or slides, move to an outboard rear seat instead.
- Center rear seat: safest option when the base fits snugly
- Outboard rear seats: acceptable alternative for tight installation
- Front passenger seat: never allowed with an active airbag
- Rear-facing top tether: some seats and vehicles support it
- Seat position compatibility: check your vehicle manual first
Warning: Never put a rear-facing infant car seat in the front seat. A deploying passenger airbag can seriously injure or kill an infant. The back seat is the only safe place.
The American Academy of Pediatrics (AAP) recommends keeping children rear-facing in the back seat until they outgrow the height or weight limits of the seat. For infant bases, that usually means the middle position in the back row. For more on what age you can stop using a car seat, see our full guide.
Step 3: Secure the Base With LATCH or the Seat Belt
LATCH stands for Lower Anchors and Tethers for CHildren. It uses metal anchors built into your vehicle seats. The seat belt method uses the car’s lap or lap-and-shoulder belt.
Both are safe and tested when installed correctly. Never use both methods at the same time.
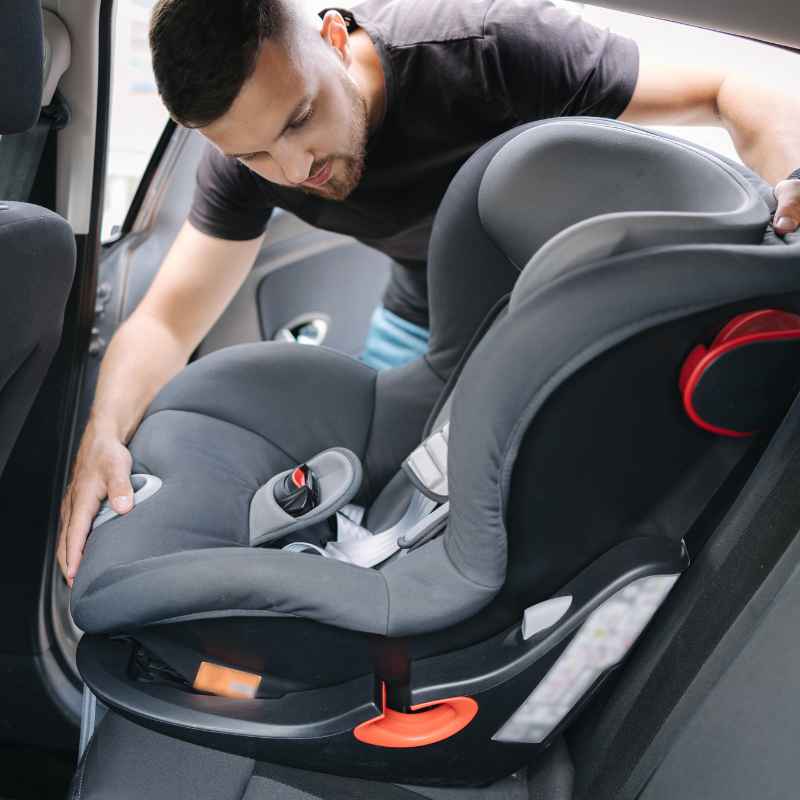
To start, place the base firmly against the seat back. Attach the LATCH connectors to the lower anchors until you hear a click. Then press down on the base with one hand or knee while pulling the strap tight.
Repeat this tighten-and-press cycle two or three times to remove all slack.
| Feature | LATCH | Seat Belt |
|---|---|---|
| Availability | Most vehicles since 2002 | Every vehicle |
| Weight limit | Usually 30 to 40 pounds | No upper limit |
| Tightening feel | Click and pull | Lock and tug |
| Common errors | Wrong anchors, loose strap | Belt not locked, slack left |
If your base moves more than 1 inch, loosen it and start over. A tight install is the goal. If you drive an older car without lower anchors, the seat belt method is still a proven, reliable option.
- Place the base pressed firmly against the seat back.
- Attach LATCH connectors until both click.
- Press down on the base while pulling the tightener strap.
- Repeat the press-and-pull cycle 2 to 3 times.
- If using a seat belt, lock the retractor and pull out all slack.
- Finish with the movement test before buckling in your baby.
Important: The top tether on a rear-facing seat is not always required. Check your car seat manual. Some brands require it, some forbid it, and some make it optional.
How to Set the Correct Recline Angle for Your Baby
A rear-facing infant seat must sit at the right recline angle, usually between 30 and 45 degrees. This keeps your baby’s head from falling forward, which can block the airway. Every base has a built-in angle indicator to guide you.
Newborns need a more reclined position, closer to 45 degrees. Older infants with better neck control can ride more upright. Always follow the angle marker on your specific base because it is calibrated for that exact seat.
- Read the angle indicator on the side of the base.
- Adjust with the built-in foot or approved pool noodle.
- Use a tightly rolled towel if your manual permits it.
- Re-check the angle after every reinstallation.
- Never wedge unapproved items under the base for support.
Tip: If your baby has reflux, keep the base at the angle your manual says. Never raise the head of the seat on your own. Some seats have a wedge attachment made just for this purpose.
The right angle also prevents the base from rocking. A base that sits too upright can slide during a sudden stop. Take an extra minute to confirm the angle before you buckle the carrier in.
Step 5: Tighten the Base and Perform the 1-Inch Test
Once the base is secured, test it. Grasp the base at the belt path and pull it side to side and front to back. If it moves more than 1 inch, loosen, press down harder, and retighten.
Repeat until the base feels like it is part of the car.
Certified Child Passenger Safety Technicians (CPSTs) use this 1-inch test on every install. It is the standard for both LATCH and seat belt methods. A base that shifts less than 1 inch meets federal safety guidelines.
- Grip the base where the LATCH strap or seat belt passes through.
- Push firmly from side to side with moderate force.
- Push from front to back as well.
- Measure any visible movement with your hand or a ruler.
- If it moves more than 1 inch, press down and tighten again.
Important: A loose base can shift several inches in a crash. That extra movement can cause the carrier to detach or strike the front seat, which increases the risk of head injury.
The 1-inch test is not optional. Even a slightly loose base is considered an incorrect install. If you feel any give at all, redo the tightening steps.
Most technicians can fix a loose base in under two minutes once the cause is clear.
How to Avoid Common Mistakes When Installing an Infant Car Seat
Even careful parents make errors. Certified technicians see the same issues again and again. Here are the most common problems found at car seat check events.
- Using LATCH and the seat belt together
- Leaving the harness too loose on the baby
- Placing the chest clip too low instead of at armpit level
- Installing with twisted or frayed belts
- Forgetting to lock the seat belt retractor
- Turning the child forward-facing too soon
- Reclining the base at the wrong angle
Safe Kids Worldwide found that 73% of car seats are misused in at least one way. The good news is that most problems are easy to fix once you know what to look for.
| Common Mistake | Quick Fix |
|---|---|
| Loose harness | Tighten until you cannot pinch webbing at the shoulder |
| Chest clip too low | Move it to armpit level, flat across the chest |
| Base moves more than 1 inch | Press down and retighten the LATCH strap or belt |
| Twisted straps | Remove the carrier and untwist all webbing |
| Wrong belt path | Re-read the manual and route the belt correctly |
If you are not sure about your installation, book a free check with a CPST. Many fire departments, police stations, and children’s hospitals offer these inspections year-round. It takes about 30 minutes and gives you total peace of mind.
When to Replace an Infant Car Seat
Infant car seats have expiration dates. Most last 6 to 8 years from the manufacture date. Plastic degrades over time and can crack in a crash.
Check the label on the base and the carrier for the model number and expiration date.
You also need to replace a seat after any moderate or severe crash. NHTSA provides clear guidance on what counts. A minor crash does not require replacement if the car was drivable, the door nearest the seat was undamaged, no one was injured, and the seat showed no visible damage.
- The printed expiration date has passed
- Visible cracks, rust, or faded plastic
- The seat was involved in a moderate or severe crash
- Labels or manuals are missing
- The manufacturer issued a recall for the model
- The seat has been used in a crash or dropped from height
Warning: If you buy a used infant car seat, confirm its history, check the labels, and look up the expiration date. A seat with unknown crash history is not worth the risk.
Register your new car seat with the manufacturer as soon as you buy it. Registration lets the company notify you directly if the seat is recalled. You can also sign up for recall alerts through NHTSA’s website.
Frequently Asked Questions
How do I know if my infant car seat is installed correctly?
After installation, the base should not move more than 1 inch in any direction at the belt path. The recline angle must match the indicator on the base, and the harness must pass the pinch test. You can also get a free inspection from a certified Child Passenger Safety Technician.
Can I use both LATCH and the seat belt at the same time?
No. Use one method or the other. Using both together puts extra stress on the seat’s connectors and can cause the seat to fail in a crash.
Manufacturers test seats with one method at a time.
When should my baby switch to a convertible car seat?
Move your baby when they exceed the height or weight limit of the infant carrier. Most infant seats allow up to 30 to 35 pounds and around 32 inches. Keep them rear-facing in the convertible seat until at least age 2, per AAP recommendations.
Do I need the base to install an infant car seat?
No. Many infant carriers can be installed without the base using the vehicle seat belt. The carrier has built-in belt paths for this purpose.
Always follow the manual for the exact belt routing. The base is convenient, but it is not required for safe travel.
How tight should the harness be on my baby?
The harness should be snug with no slack. You should not be able to pinch any webbing between your fingers at the shoulder. The chest clip must sit at armpit level.
If you can fit more than one finger under the straps, tighten them again.
Final Thoughts
Installing an infant car seat correctly takes practice, but the steps are simple: read the manuals, place the base in the back seat, secure it tightly, check the angle, and test for movement. Get your installation checked by a certified technician if you have any doubt. A few extra minutes of care can make all the difference in keeping your baby safe on every ride.
Products related to this article
Sponsored / affiliate links. As an Amazon Associate I earn from qualifying purchases. I may earn additional commission from eligible campaigns.