How To Polish A Car At Home For A Showroom Shine
It’s frustrating when your car’s paint just doesn’t pop anymore. You wash it, you wax it, but it still looks dull. That deep, wet shine you see on showroom cars seems out of reach.
You might think you need fancy tools or a professional detailer to get that look. But what if I told you that you can achieve a truly amazing shine right in your own driveway? It takes a little know-how and some patient work, but the results are incredibly rewarding.
We’ll walk through it all, making it simple and clear.
Achieving a showroom car shine at home involves careful preparation, the right polishing techniques, and protective steps. It’s a process that removes imperfections and restores depth to your car’s paintwork, making it look brand new.
Understanding Car Paint and Polishing
Car paint isn’t just a single color layer. It’s actually quite complex. Most modern car paints have a base coat for color.
Then, they have a clear coat on top. This clear coat is what gives your car its shine and protects the color layer. Over time, this clear coat can get damaged.
It can develop tiny scratches. It can also get swirled marks from washing. Oxidation can make it look dull and faded.
Polishing is the key to fixing these issues. It’s not about adding more paint. It’s about leveling out the clear coat.
Polishing uses very fine abrasive compounds. These compounds gently remove a thin layer of the damaged clear coat. This process smooths out the surface.
It removes scratches and swirls. When the surface is smooth and flat, it reflects light much better. This is what gives you that deep, glossy shine.
It makes the paint look wet and new again.
Think of it like sanding very fine sandpaper. You’re not taking off much material. You’re just making the surface perfectly smooth.
This is different from waxing. Waxing adds a protective layer. It can fill in some minor imperfections.
But wax doesn’t remove them. Polishing is the step that truly restores the paint’s clarity and depth. It’s the secret to that stunning showroom look everyone desires.
Your First Polishing Experience: A Story
I remember my first attempt at really polishing my car. It was a bright red sedan. I loved that car, but the paint looked tired.
It had what I now know are spiderweb scratches. They were faint but always there. I’d seen how professional detailers made cars gleam.
I bought a polishing kit from the auto parts store. It had a bottle of polish and a couple of soft pads. I was so excited to make my car look amazing.
It was a sunny Saturday morning. I parked my car in the shade. I washed and dried it very carefully.
Then, I applied a small amount of polish to a foam pad. I started rubbing in small circles, just like the instructions said. After a few minutes, I wiped off the residue.
My heart sank a little. It didn’t look much different. I pressed harder, using more polish.
Still not the dramatic change I expected. I started to feel a bit defeated.
Then, I noticed something. I had missed a small section. I went back to that spot and tried a different motion.
Instead of circles, I used straight back-and-forth strokes. I kept my pressure light but consistent. When I wiped it off, that tiny section gleamed.
It looked deeper, richer. A small spark of hope lit up. I realized I had been doing it wrong.
The method mattered. It wasn’t just about rubbing hard. It was about technique and patience.
That moment changed how I approached car care forever.
Essential Tools for Polishing
Gathering the right supplies makes a big difference. You don’t need a garage full of gear, but a few key items are important.
- Polishing Compound: This is your abrasive. Choose a fine-cut polish for most tasks.
- Applicator Pads: Foam pads are common. Microfiber applicator pads work too.
- Microfiber Towels: You need many for wiping off polish and buffing.
- Gloves: Protect your hands from the polish chemicals.
- Bucket and Wash Mitt: For cleaning the car before you start.
- Shade: Always work out of direct sunlight.
Preparation is Key: Getting Ready to Polish
Before you even touch a bottle of polish, your car needs to be perfectly clean. This is super important. If you don’t wash your car well, you’ll just rub dirt into the paint.
This can cause more scratches. So, wash your car thoroughly. Use a good car wash soap.
Rinse it really well. Then, dry it completely with clean microfiber towels. Make sure no water spots are left behind.
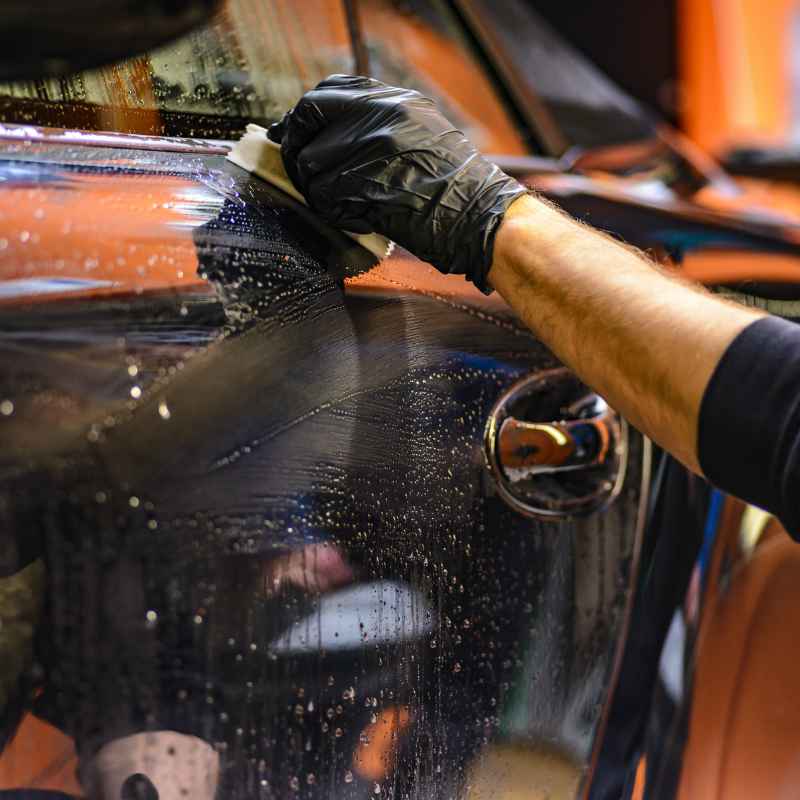
Next, you need to decontaminate the paint. This means removing things stuck to the paint that washing can’t get. Think of things like tar, bug residue, or tree sap.
You can use a clay bar for this. A clay bar is a special type of synthetic clay. You use it with a spray lubricant.
You rub the clay bar over the paint. It grabs and lifts off the contaminants. Your paint will feel super smooth after this step.
Inspect your paint in good light. Look for scratches, swirls, and oxidation. This will help you choose the right polish.
If you have very deep scratches, polishing might not remove them completely. But for most common swirl marks, a fine polish is enough. Make sure the surface is cool.
Working on hot paint is a big no-no. It can cause the polish to dry too fast. It can also make it hard to work with.
Finally, tape off any areas you don’t want to polish. This includes plastic trim, rubber seals, and headlights. Polish can stain or damage these parts.
Use painter’s tape for this. It’s easy to remove. Taking these preparation steps ensures you get the best results.
It also protects your car’s other parts.
Choosing the Right Polish
There are many types of car polishes. They range from very mild to quite aggressive. For most home users, a fine-cut polish is the best choice.
These polishes have very small abrasive particles. They are designed to remove light swirls and oxidation. They won’t remove deep scratches, but they will significantly improve the shine.
They are safe for most paint types and colors.
If you have heavier scratches or oxidation, you might need a more aggressive polish. These are often called “compounds.” Compounds have larger abrasive particles. They remove more material.
You should use these with caution. They can easily damage the paint if used incorrectly. Always start with the least aggressive product first.
You can always move to something stronger if needed.
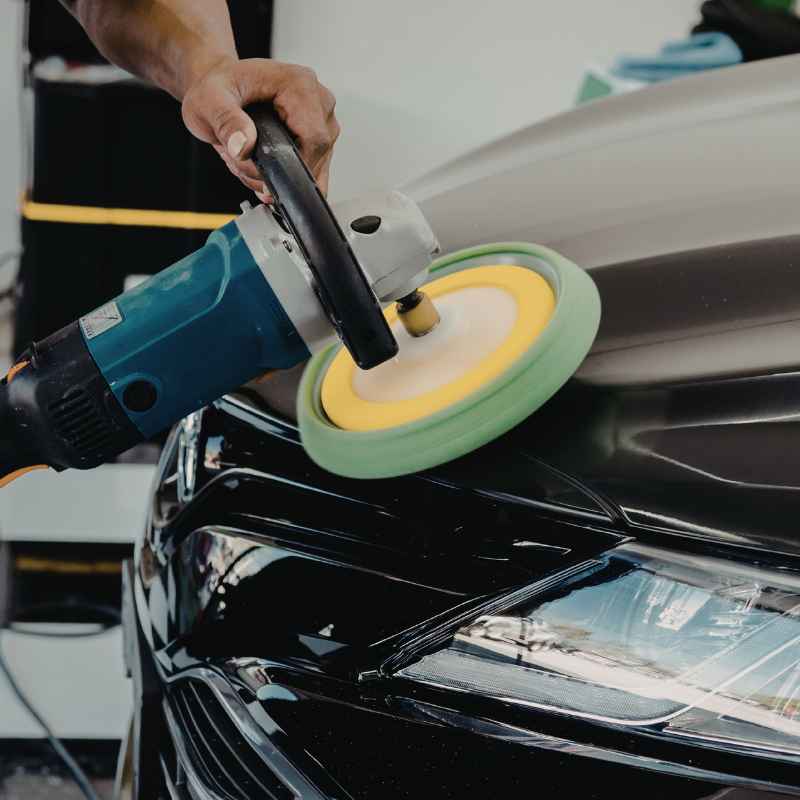
Some polishes are designed for machine use. Others are for hand application. If you’re a beginner, hand application is often easier to control.
It forces you to be more deliberate. If you decide to use a machine polisher, like a random orbital polisher, read the instructions carefully. These machines can speed up the process but also require skill.
Consider the color of your car too. Darker colors tend to show imperfections more. They also show the results of polishing more dramatically.
Lighter colors might benefit from a polish that enhances gloss. Always test a small, inconspicuous area first. This lets you see how the polish performs on your specific paint.
It helps you get a feel for the product before you commit to the whole car.
Hand Polishing vs. Machine Polishing
Both methods can work, but they have pros and cons.
Hand Polishing
Pros: Easy to learn, great control, lower initial cost, good for small areas.
Cons: Takes much longer, can be tiring, harder to get consistent results everywhere.
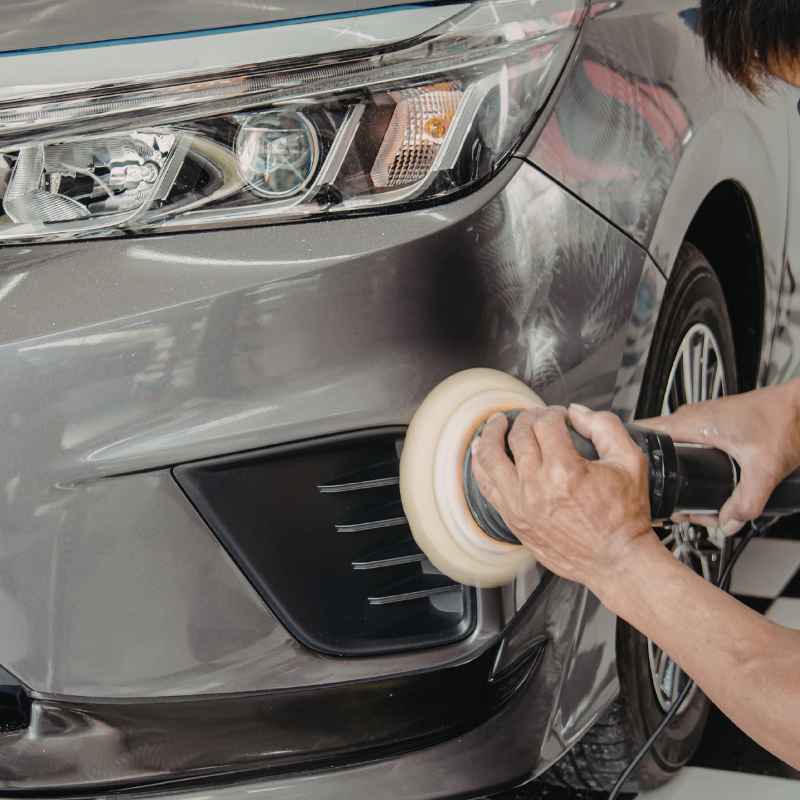
Machine Polishing
Pros: Faster, more consistent results, less physical effort, can handle heavy correction.
Cons: Higher cost for tools, learning curve, risk of paint damage if used wrong.
The Polishing Process: Step-by-Step
Now, let’s get to the actual polishing. Work on one small section at a time. This is usually about 2 feet by 2 feet.
Don’t try to do the whole car at once. Apply a small amount of polish to your applicator pad. A dime-sized amount is usually enough to start.
Place the pad flat onto the paint. Start to move the pad in overlapping, straight lines. Go side-to-side, then up-and-down.
Imagine you are drawing a grid over the paint. This helps ensure you cover the whole area evenly. Apply light to moderate, consistent pressure.
You are not scrubbing; you are gliding.
Work the polish for about 30-60 seconds. You should see the polish start to become clear. It will lose its milky look.
This means the abrasives have done their job. Don’t let it dry completely on the paint.
Take a clean, soft microfiber towel. Fold it into quarters. Gently wipe away the polish residue.
Flip the towel to a dry side as it gets loaded with product. Inspect the area you just polished. Look at it in good light.
You should see a noticeable improvement. The swirls and light scratches should be gone. The paint should look much glossier.
Move to the next section. Slightly overlap the area you just finished. Continue this process around the entire car.
Be patient. This takes time. It’s better to do it slowly and well.
Don’t rush through it. The results are worth the effort. If you’re using a machine, follow its specific instructions.
But the general idea of working in small sections and using overlapping passes remains the same.
Dealing with Stubborn Imperfections
Sometimes, you’ll encounter scratches that polish doesn’t fully remove. These might be deeper than you initially thought. Or, they might be etched into the paint.
For these, you might need a slightly more aggressive polish. Or, you might need to make more passes over the area. Always be gentle.
Too much pressure can burn through the clear coat.
If you see the paint color showing through, stop immediately. That means you’ve gone too far. You’ve removed all the clear coat in that spot.
This requires professional repair. This is why using a finer polish first is so important. It minimizes the risk of damage.
For very old or oxidized paint, you might need to repeat the polishing process. Sometimes, two or even three passes are needed. This helps to gradually remove the damaged layers.
It reveals the fresh paint underneath. Always clean your pad and towel frequently. Dirty pads or towels can re-introduce scratches.
Consider the type of polish you are using. Some polishes are “all-in-one” products. They contain polish and sealants.
These can be great for a quick shine. But for deep correction, a dedicated polish is usually better. It focuses solely on removing imperfections.
Common Paint Defects and How Polishing Helps
Understanding what you’re looking at helps you fix it.
Swirl Marks
What they look like: Fine circular scratches. Caused by improper washing. Polishing removes them by leveling the clear coat.
Oxidation
What it looks like: Dull, chalky, faded paint. Happens when the clear coat breaks down. Polishing buffs away the damaged layer.
Scratches
What they look like: Lines on the paint. Light scratches disappear with polishing. Deep ones may need more work or professional help.
Beyond Polishing: Protection and Shine
After you’ve polished your car, the paint is smooth and ready to shine. But this bare surface is also vulnerable. It needs protection.
This is where waxes and sealants come in. They add a layer of defense against the elements. They also enhance the gloss you just worked so hard to achieve.
Car wax is made from natural carnauba or synthetic blends. It’s easy to apply. It gives a warm, deep glow.
Waxes offer good protection for a few weeks to a couple of months. They need to be reapplied more often.
Paint sealants are synthetic polymer-based products. They offer longer-lasting protection. Some can last 6 months or even longer.
They tend to give a sharper, more reflective shine. Sealants are a bit more durable than traditional waxes.
You can also use ceramic coatings. These are more advanced. They form a very hard, protective layer.
They can last for years. Ceramic coatings offer superior protection against chemicals, UV rays, and minor scratches. However, they often require more careful application.
Some may need specialized prep work.
Whichever you choose, apply it thinly and evenly. Buff off any excess with a clean microfiber towel. This protective layer will keep your car looking its best.
It will also make future cleaning easier. The water will bead up and roll off. Dirt won’t stick as easily.
Maintaining Your Showroom Shine
Keeping your car looking like it just left the dealership isn’t a one-time job. It’s about regular care. Frequent washing is crucial.
Always use the two-bucket method when washing. One bucket has soapy water. The other has clean rinse water.
This prevents grit from the car going back onto your wash mitt. Rinse the mitt in the clean water before getting more soap.
Avoid automatic car washes with brushes. These can quickly put new swirl marks back into your paint. If you must use an automatic wash, opt for the touchless ones.
Always dry your car immediately after washing. Water spots can etch into the clear coat. Use clean, soft microfiber towels for drying.
Touch up any new scratches or chips as soon as you notice them. Use a touch-up pen or paint. This prevents rust.
It also stops small damages from becoming bigger problems. Regularly inspect your paint. Look for any new spots or issues.
Periodically, you might need to reapply wax or sealant. The frequency depends on the product and your local weather conditions. Even just a quick spray wax after a wash can boost shine and add a little protection.
This consistent attention is what turns a good shine into a lasting showroom look. It shows you care about your car.
Quick Shine Boosters
Need a quick touch-up between full details?
- Spray Wax: Adds gloss and slickness in minutes. Great for after washes.
- Detailing Spray: Cleans light dust and fingerprints. Restores shine instantly.
- Tire Dressing: Makes tires look new and adds a deep black finish.
- Glass Cleaner: Clean windows make the whole car look better.
Real-World Car Paint Issues You Might See
In everyday driving, cars face a lot. Sun exposure is a big one. The UV rays can break down the clear coat over years.
This causes fading and dullness. Bird droppings and bug splatters are acidic. If left on the paint, they can eat into the clear coat.
This leaves permanent etch marks that polishing might not fix.
Tree sap is another common enemy. It hardens on the paint. It can be very difficult to remove without scratching.
Road salt in winter climates is also harsh. It can cause corrosion and damage the paint. Even simple things like parking too close to sprinklers can leave mineral deposits.
These can etch into the paint.
Parking garages can sometimes be an issue. Overhead doors or dripping pipes can leave marks. Car covers, if not clean, can rub against the paint and cause scratches.
The environment your car lives in plays a huge role in its paint condition. This is why understanding your car’s exposure helps you prevent problems.
Many people don’t realize how much their daily habits affect their car’s paint. For example, using a dry towel to wipe off dust. Or using dish soap to wash your car.
These seem harmless, but they can cause damage over time. Being aware of these common issues is the first step to avoiding them. It helps you protect that shine.
When is it Normal, and When Should You Worry?
It’s completely normal for car paint to develop minor swirl marks over time. These come from regular washing and drying. Most cars, even new ones, have a few faint scratches.
Fading on older cars is also normal if they’ve been parked outside a lot. A slight dullness in the paint is not usually a cause for alarm.
You should start to worry if you see deep scratches. These are ones you can easily feel with your fingernail. If you see paint chips that expose the metal underneath, that’s a concern.
Rust can start to form there. If you notice large areas of paint that look like it’s bubbling or peeling, that’s a serious issue.
Etch marks from bird droppings or bug guts that don’t come out with washing or light polishing are also concerning. They mean the damage goes deeper than the surface. If you notice any clear coat failure, like the paint flaking off in large sheets, this is a major problem.
This usually happens on much older cars or cars that were poorly repainted.
If you’re unsure, it’s always best to ask a professional detailer. They can assess the damage. They can tell you if polishing is enough or if a repair is needed.
Many offer free consultations. They can also advise on the best course of action for your specific car’s paint condition. Don’t let minor issues become major headaches.
Simple Checks and Quick Fixes
Check Your Wash Mitt: After washing, run your fingers over your wash mitt. If it feels gritty, it’s picked up dirt. Rinse it thoroughly in your clean water bucket before getting more soap.
This is a simple way to avoid re-scratching your car.
The Fingernail Test: Gently run your fingernail across a scratch. If your nail catches on it, it’s likely too deep for basic polishing. It might need professional attention or a more aggressive compound.
Inspect Your Towels: Always use clean, high-quality microfiber towels. If a towel has been dropped on the ground or is old and stiff, don’t use it on your paint. It can cause damage.
Wash them separately from other laundry.
Quick Polish Boost: If your paint looks a little dull between full polishes, try a spray wax or detailing spray. These products are quick to apply and buff off. They add shine and slickness.
They are not a replacement for polishing but help maintain the look.
Headlight Restoration: Sometimes, yellowed or hazy headlights can make an otherwise shiny car look old. There are simple kits to restore them. This makes a big visual difference.
Wheels and Tires: Don’t forget your wheels and tires! Clean wheels and tires dressed to look new complete the showroom look. Use a wheel cleaner and a tire dressing.
It’s a quick step that has a big impact.
Protecting Against the Sun
The sun is a car’s worst enemy for paint.
Park in Shade: Always try to park your car in a garage or under a shade structure whenever possible. Even for short periods.
Use a Car Cover: A quality car cover can shield your car from UV rays when parked outdoors for extended periods. Ensure the cover is clean and soft to avoid scratches.
Ceramic Coating or Wax: These layers offer UV protection. They help the paint withstand the sun’s harsh effects.
Frequently Asked Questions About Car Polishing
How often should I polish my car?
For most cars, polishing once or twice a year is enough. This depends on how much you drive and where you park. If your car sits outside a lot or you notice dullness, you might polish more often.
Too much polishing can thin out the clear coat.
Can I use household cleaners to polish my car?
No, absolutely not. Household cleaners are too harsh. They can strip away protective layers and damage the clear coat.
Always use products specifically designed for automotive paint. They have the right balance of cleaning power and abrasives.
What is the difference between polishing and waxing?
Polishing is about correcting the paint surface. It removes imperfections like scratches and swirls. Waxing is about protecting the corrected surface.
It adds a layer of gloss and defense. You always polish first, then wax.
How do I know if I’m applying enough pressure when polishing?
You want firm, consistent pressure. It shouldn’t be so light that the pad just glides without working. It also shouldn’t be so hard that you feel like you’re digging into the paint.
The polish should spread evenly and feel like it’s being worked into the surface. Listen to the sound of the pad on the paint; it should be a smooth glide.
Can polishing remove deep scratches?
Polishing can remove light to moderate scratches. Deep scratches that you can feel with your fingernail are often too deep to remove with regular polishing. These usually require wet sanding or professional repair.
Always start with the least aggressive method to see what works.
What is the best way to remove tar from car paint?
Specialized tar and bug removers are available at auto parts stores. You can also use isopropyl alcohol for small spots. Apply the remover to a microfiber cloth and gently rub the tar.
Work in a small area. Rinse the area afterward. This should be done before polishing.
Can I polish a brand new car?
Yes, you can. Even new cars can have minor imperfections from the factory or transport. A light polish can remove these.
It ensures the paint is in perfect condition before you apply protection like wax or sealant.
Bringing it All Together for a Lasting Shine
Achieving that coveted showroom shine at home is totally within your reach. It’s a journey that starts with understanding your car’s paint and ends with regular care. You’ve learned that polishing isn’t magic; it’s a careful process of smoothing out imperfections.
It reveals the true beauty of your car’s color.
By preparing your car properly, choosing the right products, and working with patience, you can transform dull paint into a mirror-like finish. Remember to protect that new shine with quality waxes or sealants. Consistent washing and simple maintenance will keep your car looking its best for years to come.
Enjoy the satisfaction of a job well done!