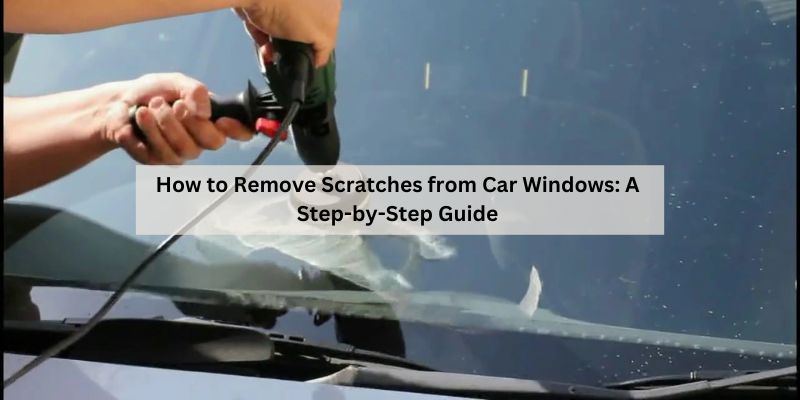
How to Remove Scratches from Car Windows: A Step-by-Step Guide
Hey there, friend! You know that sinking feeling when you spot a scratch on your car’s window? I’ve been there, staring at a pesky mark on my windshield, wondering if I’d need to replace the whole thing. Scratches on car windows can be annoying, but the good news is, many can be fixed at home with a little know-how.
Over the years, I’ve tackled scratches on my cars, from tiny surface marks to deeper gouges, and I’ve learned what works and what doesn’t. In this guide, I’m sharing my tried-and-true methods for removing scratches from car windows. We’ll go step by step, so whether you’re a car enthusiast or just want your ride looking sharp, you can follow along. Let’s get those windows crystal clear again!
Understanding Car Window Scratches
First, let’s talk about what we’re dealing with. Car windows, usually made of tempered glass or laminated glass (for windshields), are tough but not scratch-proof. Scratches happen from all sorts of things—grit on wiper blades, improper cleaning, or even a stray rock. I once got a scratch on my side window from a tree branch that brushed against it during a storm.
There are two main types of scratches: surface scratches and deep scratches. Surface scratches are shallow and only affect the top layer of glass. These are the ones I’ve had the most success fixing. Deep scratches go further into the glass and are trickier to remove. Knowing the type helps you decide how to tackle it. I always start by running my fingernail over the scratch—if it catches, it’s likely deep. If it glides over, it’s probably a surface scratch.
Why Fixing Scratches Is Worth It
You might wonder if a small scratch is worth fixing. I used to think that way until a tiny scratch on my windshield started distracting me while driving. Scratches can mess with visibility, especially when sunlight or headlights hit them. They can also weaken the glass over time, leading to cracks. I learned this when a small scratch on my old sedan’s windshield spread after a cold winter.
Fixing scratches also saves money. Replacing a windshield can cost $200-$1,000, depending on your car. I’ve fixed scratches for under $20 with the right tools. Plus, a clear window just makes your car look better. It’s like polishing a pair of glasses—it’s amazing how much clearer everything is.
What You’ll Need to Remove Scratches
Before we start, let’s gather the tools. I’ve tried a bunch of methods, and having the right supplies makes the job easier. Here’s what I keep in my garage for scratch removal:
| Item | Purpose | Where to Find It |
|---|---|---|
| Microfiber cloths | Cleans glass without scratching | Auto stores, supermarkets |
| Glass cleaner | Removes dirt and grime before polishing | Auto stores, supermarkets |
| Cerium oxide powder | Polishes out scratches on glass | Auto stores, online |
| Baking soda | Mild abrasive for light scratches | Supermarkets, home |
| Toothpaste (non-gel) | Alternative for light scratches | Supermarkets, home |
| Spray bottle with water | Mixes with cerium oxide or baking soda | Hardware stores, supermarkets |
| Polishing pad or soft cloth | Applies polishing compound | Auto stores, hardware stores |
| Electric buffer (optional) | Speeds up polishing for deeper scratches | Auto stores, hardware stores |
| Masking tape | Protects surrounding areas | Hardware stores, auto stores |
| Gloves and safety glasses | Keeps hands and eyes safe | Hardware stores, supermarkets |
Most of these are cheap and easy to find. Cerium oxide is my go-to for most scratches—it’s a fine powder used by professionals to polish glass. I got a small tub online for about $15, and it’s lasted me years.
Step 1: Clean the Window Thoroughly
The first thing I do is clean the window. Dirt or grime can make scratches look worse or mess up your polishing. I start by spraying glass cleaner on the window and wiping it with a microfiber cloth. I work in small sections to avoid streaks. For stubborn spots, like bug splatter, I let the cleaner sit for a minute before wiping.
If the scratch is on the windshield, I clean both sides—inside and out. I once skipped cleaning the inside and realized later the haze I saw was from smudges, not the scratch. After cleaning, I dry the window with a fresh microfiber cloth to make sure it’s spotless. This step takes just a few minutes but sets you up for success.
Step 2: Assess the Scratch
Next, I check how bad the scratch is. I run my fingernail over it to see if it catches. If it’s smooth, I know it’s a surface scratch I can likely fix at home. If it catches, it’s deeper, and I might need extra effort or professional help.
I also look at the scratch’s location. If it’s in the driver’s line of sight on the windshield, I’m extra careful—any polishing mistakes could distort visibility. For side or rear windows, I have a bit more wiggle room. I once fixed a scratch on my passenger window, and it was easier because it didn’t affect my driving view.
Step 3: Try a Household Remedy for Light Scratches
For light surface scratches, I start with stuff I already have at home. Baking soda and non-gel toothpaste are my favorites. I’ve used both with good results on minor scratches, like ones from wiper blades.
Here’s how I do it with baking soda: I mix two parts baking soda with one part water in a small bowl to make a paste. I apply the paste to the scratch with a microfiber cloth, rubbing gently in circular motions for about 30 seconds. Then I rinse it off with water and check the scratch. I had a faint scratch on my rear window that disappeared after two rounds of this.
Toothpaste works similarly. I dab a small amount on the scratch and rub with a soft cloth for a minute. It’s like polishing a jewel—the mild abrasive in toothpaste smooths the glass. I used this on a side window once, and the scratch was gone in minutes. If the scratch is still there after a couple of tries, I move to a stronger method.
Step 4: Use Cerium Oxide for Deeper Scratches
For scratches that baking soda or toothpaste can’t handle, I break out the cerium oxide. This stuff is like magic for glass. I mix it with water in a spray bottle to make a slurry—about one tablespoon of powder to two tablespoons of water. I shake it well to mix.
Before polishing, I tape off the area around the scratch with masking tape to protect the paint or rubber seals. I learned this after accidentally getting cerium oxide on my car’s trim—cleanup was a hassle. Then I apply the slurry to a polishing pad or soft cloth and rub it over the scratch in circular motions. I keep the area wet by spritzing with water from the spray bottle.
If I’m dealing with a stubborn scratch, I use an electric buffer on a low setting. I tried this on a windshield scratch once, and it cut the work time in half. I polish for 2-3 minutes, then wipe the area clean and check my progress. It might take a few rounds for deeper scratches, but the results are worth it. My windshield looked brand new after fixing a wiper-blade scratch this way.
Step 5: Clean and Inspect the Window
After polishing, I clean the window again with glass cleaner to remove any residue. I use a fresh microfiber cloth to avoid spreading leftover compound. Then I inspect the scratch under different lights—sunlight, shade, or a flashlight—to make sure it’s gone.
Sometimes, the scratch looks gone but feels slightly rough. If that happens, I do another light polish with cerium oxide. I fixed a side window scratch that seemed fine but still caught my fingernail. One more round did the trick. If the scratch is still visible and deep, I consider professional help.
Step 6: Protect the Window
Once the scratch is gone, I protect the window to prevent future damage. I apply a glass sealant or wax designed for car windows. It adds a protective layer that repels water and grime, making the glass less prone to scratches. I used a sealant on my windshield after fixing a scratch, and it stayed clearer for months.
I also make sure my wiper blades are in good shape. Worn blades can cause new scratches, especially if dirt gets trapped. I replace mine every 6-12 months, and it’s made a big difference. I learned this after a bad blade scratched my windshield during a rainstorm.
When to Call a Professional
Not every scratch can be fixed at home. I’ve run into a few that were too deep or in tricky spots. If the scratch is deep enough to catch your fingernail strongly or if it’s in the driver’s line of sight, I recommend a professional. They have stronger tools, like diamond-tipped polishers, that can handle serious damage.
I once had a deep windshield scratch that I couldn’t fix myself. I took it to a glass shop, and they polished it out for about $75. It was worth it to avoid replacing the whole windshield. If you’re unsure, most shops offer free inspections, so it’s worth a quick visit.

Common Causes of Car Window Scratches
Understanding what causes scratches helps prevent them. Here’s what I’ve noticed:
- Wiper blades: Dirt or grit trapped in blades can scratch glass. I always clean my blades regularly.
- Improper cleaning: Using rough cloths or harsh chemicals can mark windows. I stick to microfiber and glass cleaner.
- Road debris: Small rocks or sand can nick windows, especially on highways. I’ve had this happen on long drives.
- Tree branches or bushes: Parking near overgrown plants can scratch side windows. I learned this after a camping trip.
Being mindful of these has helped me keep my windows in better shape.
Maintenance Tips to Prevent Scratches
Keeping your windows scratch-free takes a little effort. Here’s what I do:
- Use microfiber cloths: They’re soft and won’t scratch. I keep a stack in my car for quick cleanups.
- Clean wiper blades: Wipe them with a damp cloth every month to remove grit. I also replace them regularly.
- Park smart: Avoid parking near bushes or construction sites where debris can hit your windows.
- Use glass cleaner: It’s safer than household cleaners. I avoid ammonia-based ones on tinted windows.
- Apply sealant: A glass sealant every few months adds protection. I noticed fewer scratches after starting this.
These habits have saved me from new scratches and kept my windows looking great.
Common Mistakes to Avoid
I’ve made my share of goofs fixing scratches, so let me save you some trouble. Don’t use abrasive tools like steel wool—it’ll make things worse. I tried it once on a side window and ended up with more scratches. Also, don’t skip cleaning the window first—dirt can make scratches deeper during polishing.
Another mistake: don’t over-polish with cerium oxide. Too much can create a hazy spot. I did this once and had to redo the area carefully. And don’t try to fix deep scratches in critical areas like the windshield’s driver side—leave those to pros.
Why It’s Worth the Effort
Fixing scratches on your car windows is so satisfying. I love seeing a clear, smooth window after a bit of elbow grease. It’s not just about looks—clear windows mean safer driving and better visibility. Plus, it’s a budget-friendly fix compared to replacing glass. I’ve saved hundreds of dollars doing this myself, and it’s empowering to tackle it without a shop.
Whether it’s a tiny wiper mark or a deeper scratch, you can make your windows look amazing with the right tools and patience. It’s like giving your car a mini-makeover, and it feels great every time you get behind the wheel.
Conclusion
Removing scratches from car windows might seem daunting, but it’s totally doable with a little care and the right approach. I’ve shared my journey—from using household tricks like toothpaste to mastering cerium oxide for tougher scratches. Each step, from cleaning to protecting, brings you closer to a crystal-clear view. Whether you’re fixing a small mark or tackling a bigger challenge, this process is rewarding and saves you money. So grab your supplies, find a shady spot, and give your car’s windows some love. You’ll be amazed at how great they look, and you’ll drive with a smile knowing you did it yourself. Here’s to clear views and happy travels!
FAQs
Can all scratches on car windows be fixed at home?
Light surface scratches can usually be fixed at home. Deep scratches might need professional tools or glass replacement.
Is toothpaste safe for car windows?
Yes, non-gel toothpaste is safe for light scratches. It acts as a mild abrasive to polish the glass.
How long does it take to remove a scratch?
Light scratches take 5-10 minutes with toothpaste or baking soda. Deeper ones with cerium oxide might take 20-30 minutes.
Will fixing a scratch affect my windshield’s strength?
Light polishing won’t weaken the glass. But deep scratches or over-polishing in critical areas can, so be cautious.
Can I use cerium oxide on tinted windows?
Yes, but go gently to avoid damaging the tint. Test in a small area first.
How do I prevent scratches on my car windows?
Use microfiber cloths, clean wiper blades regularly, and apply a glass sealant to protect against debris.