How to Remove Sticker from Car: Proven, Safe!
To remove a sticker from your car safely and effectively, gently heat the sticker with a hairdryer, then carefully peel it using a plastic scraper or your fingernail. For stubborn residue, use a specialized automotive adhesive remover. Always test removers on an inconspicuous area first to protect your car’s paint.
Got a sticker that’s seen better days? Whether it’s an old racing decal, a promotional sticker, or something you just don’t want anymore, removing them can feel like a daunting task. Will it leave sticky residue? Will it scratch your precious paint? Don’t worry! I’m here to walk you through, step-by-step, how to remove stickers from your car safely and without any hassle. You’ll be proud of your clean car finish in no time. Let’s get started!
Why Removing Car Stickers Matters
Stickers, while sometimes fun or informative, can degrade over time. The sun’s UV rays can bake them onto your car, making removal tougher. Old stickers can also look unsightly, potentially decreasing your car’s resale value. More importantly, improper removal techniques can easily damage your car’s paint, leading to costly touch-ups. Knowing the right way to remove them preserves your car’s appearance and protects your investment. This guide will equip you with the knowledge and confidence to tackle any sticker, leaving your car looking its best.
Gathering Your Tools: What You’ll Need
Before we begin, it’s essential to have the right tools. Using the wrong items can lead to scratches or paint damage. Here’s a list of commonly used and safe materials:
- Hair Dryer: A standard home hair dryer works perfectly.
- Plastic Scraper or Old Credit Card: Avoid metal scrapers, which can easily scratch.
- Microfiber Cloths: Soft and won’t scratch paint. Have a few on hand.
- Warm, Soapy Water: Mild dish soap is great for cleaning.
- Automotive Adhesive Remover (Optional but Recommended): Products like Goo Gone or 3M Adhesive Remover are designed for this purpose. Always choose automotive-specific products.
- Rubbing Alcohol (Isopropyl Alcohol): A diluted solution can help with residue.
- Gloves (Optional): To keep your hands clean, especially when using removers.
Step-by-Step Guide: The Safe Sticker Removal Process
Removing a sticker from your car is a straightforward process when you follow these steps carefully. We’ll cover everything from loosening stubborn adhesives to tackling any lingering residue.
Step 1: Clean the Area
Start by thoroughly cleaning the area around the sticker. Use warm, soapy water and a microfiber cloth to remove any dirt, dust, or debris. This prevents grit from being dragged across the paint during the removal process, which could cause micro-scratches. A clean surface also allows the heat and removers to work more effectively.
Step 2: Apply Low Heat
This is the most crucial step for loosening the adhesive. Attach your hair dryer to a medium heat setting. Hold it about 6-8 inches away from the sticker. Move the hair dryer back and forth across the entire sticker surface for about 30-60 seconds. The heat softens the adhesive, making the sticker easier to peel off without tearing or leaving much residue behind.
Caution: Do not overheat the area. Excessive heat can damage the paint or the sticker itself. Keep the hair dryer moving constantly.
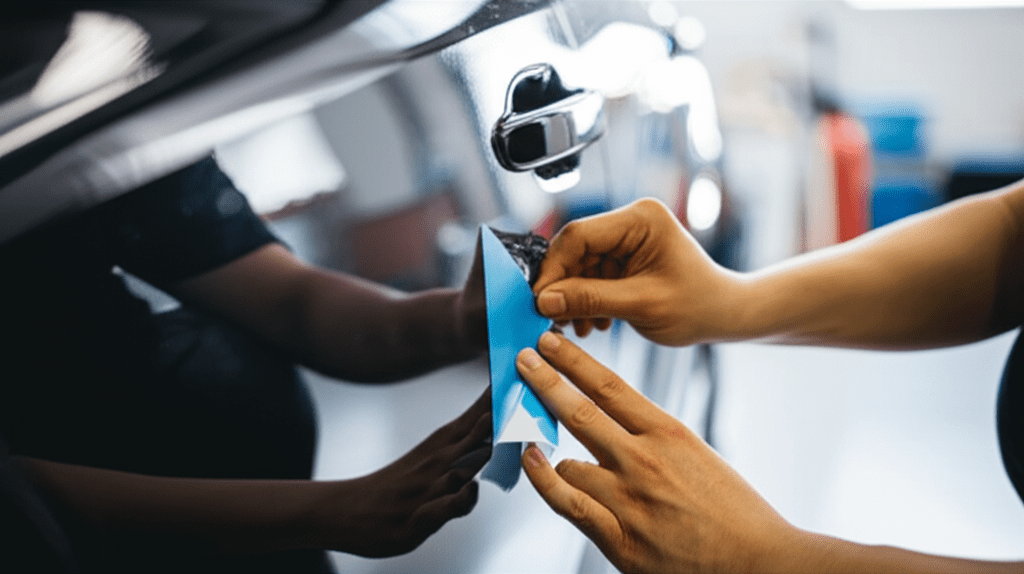
Step 3: Start Peeling
Once the sticker has been heated, attempt to lift a corner. You can use your fingernail or the edge of a plastic scraper or old credit card. Begin to gently peel the sticker away from the car’s surface. Try to peel it slowly and at a shallow angle. If the sticker starts to tear or resist, heat it again for another 30 seconds and continue peeling.
Continue heating and peeling until the entire sticker is removed. If you encounter any difficult spots, be patient and reapply heat as needed.
Step 4: Removing Leftover Residue
After the sticker itself is gone, you might find some sticky residue or adhesive marks left behind. This is common, especially with older or sun-damaged stickers. Here’s how to tackle it:
Option A: Using an Automotive Adhesive Remover
This is often the most effective method for tough residue. Spray a small amount of your chosen automotive adhesive remover onto a clean microfiber cloth. Gently rub the area with the residue. Allow the remover to sit for the time recommended on the product label (usually a few minutes). Then, wipe away the residue with the cloth. For stubborn spots, you might need to repeat applications. You can find great automotive adhesive removers at most auto parts stores or online retailers.
For reference, 3M is a well-regarded manufacturer of automotive products, and their Automotive Adhesive Remover is specifically formulated for safe use on car paint.
Option B: Using Rubbing Alcohol
If you don’t have an automotive-specific remover, a diluted solution of rubbing alcohol (70% isopropyl alcohol mixed with an equal part of water) can also work. Apply the mixture to a microfiber cloth and gently rub the residue. Like the adhesive remover, let it sit for a minute before wiping. Be sure to test this in an inconspicuous area first.
Option C: Warm Soapy Water and Gentle Scrubbing
For very light residue, sometimes a bit of elbow grease with warm, soapy water and a clean microfiber cloth is enough. You can gently scrub the area. If it’s still sticky, move to the other methods.
Step 5: Final Clean Up
Once all the sticker and residue are gone, wash the area again with warm, soapy water and a clean microfiber cloth. This removes any remaining adhesive remover or alcohol. Completely dry the area with another clean, dry microfiber cloth. This ensures your paint is clean and protected.
Best Practices for Safe Sticker Removal
To ensure the best results and avoid any paint damage, keep these tips in mind:
- Always Test First: Before using any chemical remover, test it on a small, hidden area of your car (like under the bumper or inside the door jamb) to ensure it doesn’t discolor or damage the paint.
- Patience is Key: Don’t rush the process. Gentle, persistent effort is far better than aggressive scrubbing or scraping, which can cause permanent damage.
- Avoid Harsh Chemicals: Never use abrasive cleaners, oven cleaners, or harsh solvents like acetone or nail polish remover. These can strip paint and damage clear coats.
- Work in Moderate Temperatures: Avoid removing stickers in direct sunlight or extreme cold. Mild temperatures (around 60-80°F or 15-27°C) are ideal.
- Protect Your Surroundings: If possible, park your car in a shaded area to avoid overheating.
When to Seek Professional Help
While most stickers can be removed with these DIY methods, there are a few situations where you might want to consult a professional detailer:
- Very Old or Baked-On Stickers: If a sticker has been on your car for many years and is severely degraded, it might be too difficult to remove without risking paint damage.
- Aftermarket Paint Jobs: If your car has a custom paint job, it might be more sensitive. Professionals have experience with various paint types.
- Valuable or Classic Cars: For rare or valuable vehicles, it’s always safer to let experienced professionals handle the task.
- Concerns About Paint Condition: If your car’s paint is already showing signs of wear, peeling clear coat, or rust, it might be best to have an expert assess it before attempting sticker removal.
A professional detailer has specialized tools and knowledge to remove stickers safely, ensuring the pristine condition of your car’s paintwork.
Common Sticker Types and Removal Tips
Different types of stickers can present unique challenges. Here’s a quick look:
| Sticker Type | Removal Considerations | Recommended Tools/Methods |
|---|---|---|
| Vinyl Decals (e.g., racing stripes, custom graphics) | Often use strong adhesive. Heat is crucial. May leave clear transfer tape residue. | Hair dryer, plastic scraper. For residue: automotive adhesive remover. Check Consumer Reports for car care advice. |
| Paper or Static Cling Stickers (e.g., inspection stickers, toll tags) | Generally easier to remove. Paper can disintegrate if wet. | Peel slowly. Warm water and soap are usually sufficient. |
| Bumper Stickers (often vinyl or paper-based) | Can be baked on by the sun. Adhesive is usually tough. | Hair dryer, plastic scraper, automotive adhesive remover for residue. |
| Residue-only Stickers (e.g., dealership temporary stickers) | The sticker is gone, but the adhesive remains. | Automotive adhesive remover or rubbing alcohol. |

Frequently Asked Questions (FAQ)
Q1: Can I remove a sticker using a hot water soak?
A1: Yes, soaking a cloth in very hot (but not boiling) water and holding it against the sticker for a few minutes can help loosen the adhesive, similar to a hairdryer. However, a hairdryer offers more targeted heat and control for harder-to-reach areas.
Q2: Will WD-40 remove sticker residue?
A2: WD-40 can sometimes help break down adhesives, but it’s not specifically designed for automotive paint and can leave an oily residue that needs thorough cleaning. Automotive-specific adhesive removers are generally safer and more effective for car paint.
Q3: Is it safe to scrape a sticker off with a razor blade?
A3: It is generally NOT recommended to use a razor blade on car paint, as it can easily cause deep scratches. Plastic scrapers, old credit cards, or specialized plastic razor blades for automotive use are much safer alternatives. For more information on car care, you might find resources from organizations like the National Highway Traffic Safety Administration (NHTSA) useful, though they focus more on safety than aesthetics.
Q4: What if the sticker is on a plastic bumper?
A4: Plastic bumpers can be more sensitive to heat than metal. Use the lowest heat setting on your hair dryer and keep it further away. Test any adhesive removers on an inconspicuous spot first, as some chemicals can dull or damage plastic finishes.
Q5: Can I use a pressure washer to remove a sticker?
A5: It’s best to avoid using high-pressure water directly on stickers, especially around edges. The intense pressure can force water under the sticker, potentially damage the paint, or even lift the sticker in an uncontrolled way that leaves more residue.
Q6: How do I get rid of a faint ghosting or outline after removing a sticker?
A6: Faint outlines are often from faded paint where the sticker protected it. A good polish or rubbing compound, applied gently with a microfiber cloth, can sometimes help blend the finish. If the color difference is significant, professional paint correction might be needed.
Conclusion
You’ve now got all the knowledge you need to confidently remove unwanted stickers from your car. Remember to work patiently, use heat wisely, and choose the right products for any stubborn residue. By following these steps, you can achieve a clean, smooth finish without damaging your car’s appearance. Taking pride in your ride means keeping it looking its best, and mastering simple tasks like sticker removal is a fantastic way to do just that. Go ahead and give your car that fresh, new look!