How to Easily Remove Trunk Cover on BMW X3: Expert Tips
To remove the trunk cover on a BMW X3, simply locate the fastening clips, release them, and lift the cover off. The process is straightforward and can be done without any special tools or professional assistance.
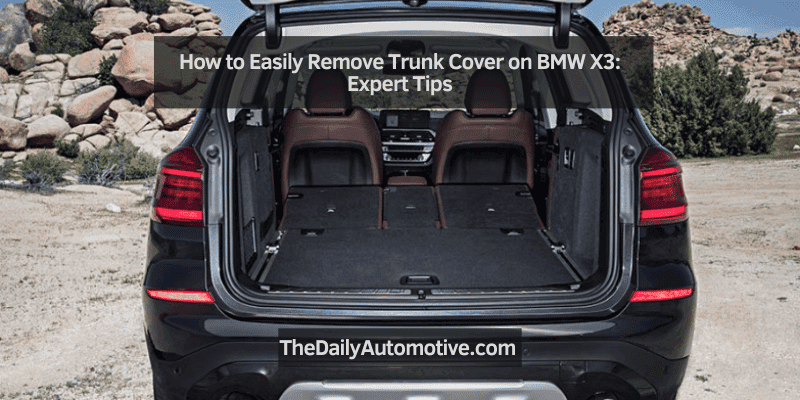
The trunk cover on a BMW X3 serves as a protective barrier for the items stored in the trunk. However, there may be times when you need to remove the cover to accommodate larger items or perform maintenance. Knowing how to remove the trunk cover is a useful skill that can save you time and effort.
In this guide, we will provide a step-by-step explanation of the process, allowing you to easily remove the trunk cover of your BMW X3. You don’t need any special tools or expertise; just follow the instructions below, and you’ll be able to remove the trunk cover in no time.
Tools You’Ll Need
To remove the trunk cover of your BMW X3, you’ll need a set of basic tools, including a screwdriver, pliers, and a trim removal tool. These tools will help you safely detach the cover and access the trunk space without causing any damage.
Essential Tools For Removing The Trunk Cover:
- Flathead screwdriver: A flathead screwdriver is essential for prying open any clips or fasteners on the trunk cover.
- Torx screwdriver: Depending on the model of your BMW X3, you may need a Torx screwdriver to remove specific screws holding the trunk cover in place.
- Trim removal tool: To avoid scratching or damaging the interior of your vehicle, a trim removal tool is crucial for gently removing any panels or trim pieces on the trunk cover.
- Gloves: It’s always important to protect your hands while working on your vehicle. Wear a pair of gloves to prevent any injuries or cuts during the removal process.
- Flashlight: Since the trunk area can be dimly lit, a flashlight will help you see any hidden screws or clips that need to be removed.
- Soft cloth: A soft cloth can be useful for wiping away any dirt or debris on the trunk cover, ensuring a clean surface for reinstallation.
- Plastic bag or container: As you remove screws or small parts from the trunk cover, it’s important to keep them organized and prevent them from getting lost. Use a plastic bag or container to store these items safely.
Remember, having the right tools for the job will make the process of removing the trunk cover on your BMW X3 much easier and safer. With these essential tools in hand, you’ll be well-prepared to tackle the task ahead.
Locating The Trunk Cover Release Latch
To locate the trunk cover release latch on a BMW X3, simply look for the interior trim panel near the trunk opening. Remove the panel to access the latch and release the trunk cover easily.
Understanding The Placement Of The Trunk Cover Release Latch
Have you been struggling to find the release latch for your BMW X3’s trunk cover? Well, look no further! In this section, we will guide you through the process of locating the trunk cover release latch, making it easier for you to remove it when needed.
Identifying The Location Of The Trunk Cover Release Latch
To find the trunk cover release latch in your BMW X3, follow these simple steps:
- Start by opening the trunk of your BMW X3.
- Look towards the top of the trunk, near the edge where it meets the roof of the car.
- Direct your gaze to the center of the trunk, just above the latch where you normally close it.
- There, you will notice a small lever or button, typically in the shape of a release symbol or labeled “trunk cover release.”
- Once you have located the latch, press or pull it to release the trunk cover.
That’s it! You have successfully identified the location of the trunk cover release latch in your BMW X3. Now you can remove the trunk cover with ease whenever you need to access the storage compartment.
Remember, locating the trunk cover release latch may vary slightly depending on the BMW X3 model year, so it’s always a good idea to consult your vehicle’s manual for specific instructions.
With these simple steps, you can now confidently remove the trunk cover on your BMW X3. Happy journeying and rest assured knowing that your belongings are easily accessible when needed.
Removing The Trunk Cover
To remove the trunk cover of a BMW X3, begin by locating the release lever on the driver’s side. Pull the lever to release the cover and carefully lift it off to access the trunk space.
Step 1: How To Unlatch The Trunk Cover
To begin with, removing the trunk cover of your BMW X3 requires unlatching it properly. Follow these steps:
- Find the trunk release button located on the driver’s side door panel.
- Press the button to unlock the trunk.
- Move to the rear of the vehicle and locate the trunk latch.
- Firmly grasp the latch and lift it upwards to unlock the trunk cover.
Step 2: Gently Lifting The Trunk Cover Off Its Hinges
Once the trunk cover is unlatched, it’s time to lift it off its hinges. Here’s how:
- Stand behind the vehicle and position yourself near the trunk cover.
- Place your hands on both sides of the cover and ensure a secure grip.
- Lift the cover gently, using your leg muscles for added support.
- Slowly raise the cover until it is fully open, allowing easy access to the trunk compartment.
Step 3: Safely Removing The Trunk Cover From The Bmw X3
Now that the trunk cover is lifted, it’s important to remove it safely without causing any damage. Follow these guidelines:
- Check for any obstacles or loose items on the cover before removal.
- Make sure there is enough space to safely maneuver the cover out of the vehicle.
- Tilt the trunk cover slightly towards you to disengage it from the hinges.
- Carefully lift the cover out of the trunk, ensuring it does not scrape against the body of the vehicle.
Step 4: Storing The Trunk Cover In A Secure Location
After removing the trunk cover, it’s crucial to store it properly to prevent any damage. Consider the following:
- Find a secure location to store the trunk cover, such as a garage or a designated storage space.
- Ensure the storage area is clean and free of any sharp objects or potential hazards.
- Place the trunk cover in the storage area, making sure it is in a flat position to avoid warping.
- If possible, cover the trunk cover with a soft cloth or plastic wrap to protect it from dust and scratches.
Remember, removing the trunk cover of your BMW X3 is a simple process that can provide you with easier access to your trunk compartment. Follow these steps carefully to ensure a smooth and hassle-free experience.
Tips For Trunk Cover Removal
Learn how to easily remove the trunk cover on your BMW X3 with these helpful tips. Follow step-by-step instructions for hassle-free removal and gain access to your trunk space in no time.
When it comes to removing the trunk cover of your BMW X3, it’s important to follow the right steps to avoid any damage or scratches. Taking proper precautions and handling the trunk cover with care will ensure that you can safely remove and store it without any problems.
Here are some useful tips to keep in mind:
Tip 1: Avoiding Any Damage To The Trunk Cover During Removal
- Start by locating the trunk cover release handle, usually located on the inside of the trunk lid.
- Gently pull the release handle to disengage the trunk cover from its locked position.
- Once the trunk cover is released, avoid yanking or pulling it forcefully. Use steady, even pressure to remove it without causing any damage.
- Be mindful of any hooks or clips that may be securing the trunk cover in place. Look for these attachments and release them before attempting to remove the cover completely.
Tip 2: Taking Precautions To Prevent Any Scratches Or Dents On The Vehicle
- Before attempting to remove the trunk cover, clean any dirt or debris that may be present on the surface.
- Consider using a soft cloth or towel as a protective barrier between the trunk cover and the vehicle’s body to prevent potential scratches or dents.
- Take care not to lean or place any heavy objects on the cover while it is removed, as this can cause damage to both the cover and the vehicle.
Tip 3: Proper Handling And Storing Of The Trunk Cover
- Once the trunk cover is removed, find a safe and clean area to place it temporarily.
- Avoid storing the trunk cover in areas that are exposed to extreme temperatures or moisture, as this can cause damage to the cover.
- If the trunk cover is in multiple pieces, ensure that they are properly aligned and stacked on top of each other to prevent any distortion or misalignment.
- When storing the trunk cover for extended periods, consider covering it with a cloth or protective sheet to keep it clean and dust-free.
By following these tips, you can remove the trunk cover of your BMW X3 safely and efficiently, while minimizing the risk of damage or scratches. Remember to handle the cover with care, take precautions to protect the vehicle’s body, and store it properly to ensure its longevity.
Cleaning And Maintenance Of The Trunk Cover
Learn how to remove the trunk cover of a BMW X3 with these easy steps for optimal cleaning and maintenance. Keep your trunk organized and free from debris by following this simple guide.
Cleaning The Trunk Cover For A Polished Appearance:
Cleaning the trunk cover of your BMW X3 is essential to ensure a polished and tidy appearance. Regular maintenance will not only keep the trunk cover looking its best but also help to prolong its lifespan. Follow these simple steps to clean your trunk cover effectively:
- Begin by removing all items from the trunk: Before you start cleaning the trunk cover, make sure to empty the trunk of any items or debris. This will provide clear access to the cover and prevent any damage during the cleaning process.
- Vacuum or brush off loose dirt and dust: Use a vacuum cleaner or soft brush to remove any loose dirt or dust from the trunk cover. Pay attention to the corners and crevices where dirt can accumulate.
- Prepare a gentle cleaning solution: Mix a mild detergent with warm water to create a gentle cleaning solution. Avoid using harsh chemicals or abrasive cleaners that can potentially damage the trunk cover.
- Dampen a microfiber cloth or sponge: Dip a clean microfiber cloth or sponge into the cleaning solution, ensuring it is damp but not soaking wet. Excess water can seep into the trunk and cause damage.
- Wipe the trunk cover: Starting from one end of the trunk cover, gently wipe the surface in a back-and-forth motion, working your way towards the other end. Pay attention to any stains or stubborn dirt and give them some extra attention.
- Rinse and dry the trunk cover: Once you have thoroughly wiped the trunk cover, rinse the cloth or sponge and dampen it with fresh water. Rinse the trunk cover to remove any traces of the cleaning solution. Finally, use a dry microfiber cloth to pat the trunk cover dry, ensuring there is no excess moisture left behind.
- Apply a protective spray or conditioner: To further enhance the appearance and protect the trunk cover, consider applying a specialized trunk cover spray or conditioner. This will help maintain its quality and prevent cracking or fading over time.
Preventative Maintenance To Prolong The Lifespan Of The Trunk Cover:
Taking proactive measures to maintain your trunk cover will significantly contribute to its longevity. Here are some preventative maintenance tips to keep your trunk cover in optimal condition:
- Avoid placing heavy or sharp objects: To prevent unnecessary wear and tear, avoid placing heavy or sharp objects directly onto the trunk cover. Use protective mats or organizers to distribute weight evenly and minimize the risk of scratches or dents.
- Regularly remove dirt and debris: Make it a habit to regularly remove any dirt, leaves, or debris that may accumulate on the trunk cover. Use a soft brush or vacuum to gently clean the surface, including the crevices.
- Keep the trunk cover properly lubricated: Lubrication is key to ensuring smooth and hassle-free operation of the trunk cover mechanism. Apply a silicone-based lubricant to the moving parts to reduce friction and prevent rust.
- Inspect for damage or wear: Regularly inspect the trunk cover for any signs of damage, such as cracks, tears, or loose components. Promptly address any issues to prevent further damage and maintain the functionality of the trunk cover.
- Protect from extreme temperatures: Extreme temperatures can impact the quality and performance of the trunk cover. Park your BMW X3 in shaded areas or use a sunshade to shield the trunk cover from direct sunlight. Likewise, during winter, remove ice and snow carefully to avoid damaging the cover.
- Follow manufacturer guidelines: Always refer to the manufacturer’s guidelines and recommendations for specific cleaning and maintenance instructions for your BMW X3’s trunk cover. Each model may have unique requirements, and following these guidelines will ensure the best care for your trunk cover.
By following these cleaning and maintenance practices, you can keep your BMW X3’s trunk cover in excellent condition, ensuring a polished appearance and prolonging its lifespan. Take the time to care for your trunk cover regularly, and it will repay you with years of functionality and aesthetic appeal.

Credit: www.amazon.com
Reinstalling The Trunk Cover
Learn how to reinstall the trunk cover of your BMW X3 with these easy steps. Remove the cover effortlessly and follow the instructions to secure it back in place securely. Keep your trunk organized and protected with this simple process.
Step 1: Aligning The Trunk Cover With The Hinges
- Make sure the trunk area is clear of any items or debris before reinstalling the trunk cover.
- Carefully align the trunk cover with the hinges located on the sides of the trunk area.
- Ensure that the trunk cover is positioned evenly and sits flush with the trunk area.
Step 2: Securing The Trunk Cover Back Into Place
- Gently push the trunk cover down onto the hinges until you hear a clicking sound, indicating that it is securely in place.
- Double-check that the trunk cover is properly aligned and fully seated on the hinges.
- Take a moment to inspect the edges of the trunk cover to ensure they are lined up correctly and fit snugly.
Step 3: Testing The Trunk Cover For Proper Functionality
- Open and close the trunk to ensure that the trunk cover operates smoothly without any obstructions or resistance.
- Verify that the trunk cover securely latches and stays in place when the trunk is closed.
- Test the trunk cover by applying light pressure to different areas to check for any looseness or movement.
By following these steps, you can easily remove and reinstall the trunk cover of your BMW X3. Proper alignment, secure attachment, and functional operation are crucial for keeping your trunk organized and protected. Take care to ensure that the trunk cover is aligned with the hinges, securely secured back in place, and tested for proper functionality.
With these easy steps, your BMW X3’s trunk cover will be back in action in no time.
Expert Tips For Trunk Cover Removal On Bmw X3
Learn the expert tips for removing the trunk cover on your BMW X3 with ease. Follow these simple steps to safely and efficiently remove the trunk cover without any hassle.
If you find yourself needing to remove the trunk cover on your BMW X3, it’s important to follow the right steps to avoid damaging the cover or the vehicle. In this section, we’ll share expert tips to help you smoothly remove the trunk cover and troubleshoot common issues along the way.
So, let’s get started!
Expert Tip 1: Troubleshooting Common Issues During The Removal Process
During the trunk cover removal process, you may encounter a few challenges. Here are some common issues you might face and how to troubleshoot them:
- Issue: Difficulty in locating the fastening points:
- Ensure the trunk is empty to have better access.
- Refer to the owner’s manual for exact locations of the fastening points.
- Use a flashlight to aid in locating hard-to-see fasteners.
- Issue: Stuck or stubborn fasteners:
- Apply a penetrating oil to loosen the fasteners.
- Use a screwdriver or pry tool with caution to avoid scratching the trim or paint.
- If necessary, seek professional assistance to prevent further damage.
- Issue: Trunk cover doesn’t budge:
- Double-check if all fasteners have been removed.
- Gently wiggle the cover to loosen any hidden or stuck fasteners.
- Seek guidance from a BMW technician if the cover remains stubbornly in place.
Expert Tip 2: Additional Recommendations For A Seamless Removal Experience
To ensure a hassle-free trunk cover removal process, consider the following recommendations:
- Protect your vehicle: Before starting, place a soft cloth or protective material on the rear bumper and any other potential contact areas to prevent scratches or damage to the vehicle’s exterior.
- Use proper tools: Utilize the right tools, such as a trim panel removal tool, to prevent damage to the cover or surrounding parts. Avoid using excessive force and work slowly to avoid mishaps.
- Document the removal process: Take pictures or make notes while removing the trunk cover. This documentation will help you during reinstallation if needed.
- Store the trunk cover safely: Once removed, store the trunk cover securely in a clean and dry area to avoid any potential damage. Cover it with a cloth or bag to prevent dust accumulation.
- Seek professional assistance if unsure: If you’re unfamiliar with the removal process or encounter any difficulties, it’s always advisable to consult a BMW dealership or a qualified technician who can guide you through the process.
Remember, successfully removing the trunk cover on your BMW X3 requires patience, caution, and the right approach. By following these expert tips, your trunk cover removal experience will be smoother and stress-free.
Frequently Asked Questions On How To Remove Trunk Cover Bmw X3
How Do You Remove The Trunk Shield On A Bmw?
To remove the trunk shield on a BMW, follow these steps carefully:
1. Open the trunk of your BMW.
2. Use a screwdriver to remove the screws holding the trunk shield in place.
3. Gently pry the trunk shield off, starting from one edge and working your way around.
4. Once all the screws have been removed and the shield is detached, carefully lift it out of the trunk. Note: Make sure to handle the trunk shield with care to avoid damaging it or the surrounding area.
How To Remove Trunk Cover In Bmw X5?
To remove the trunk cover in a BMW X5: Locate the release latch and pull it towards you.
How Do You Open The Back Hatch On A Bmw X3?
To open the back hatch on a BMW X3, locate the button or handle and press or pull it.
How Do You Open The Trunk Of A Bmw X3 With The Foot?
To open the trunk of a BMW X3 with your foot, simply wave your foot under the rear bumper.
Conclusion
Removing the trunk cover from your BMW X3 is a simple task that can be done in just a few steps. By following the instructions provided in this blog post, you can easily remove the trunk cover and gain access to the trunk space of your BMW X3.
With the right tools and a little bit of patience, you can remove the trunk cover without any hassle. Whether you need to replace the trunk cover or simply clean out the trunk, knowing how to remove it is essential.
So, next time you need to remove the trunk cover from your BMW X3, refer back to this blog post for a step-by-step guide. Happy removing!