How To Rotate Tires On A Front Wheel Drive Car At Home
Tire rotation on a front-wheel drive car involves moving the front tires to the rear and the rear tires to the front, often in a specific pattern to ensure even wear. This process helps to extend the life of your tires and maintain balanced handling and traction. It’s a crucial maintenance step for any vehicle owner.
Understanding Tire Rotation
So, what exactly is tire rotation? It’s simply the practice of moving your car’s wheels from one position to another. Think of it like shuffling your feet when you walk; you want to use them all evenly.
Cars wear down tires in different ways. Front tires often wear faster because they do most of the steering and braking. They also carry more weight from the engine in a front-wheel drive car.
Rotating your tires helps them wear more evenly. This means you get more miles out of them. It also helps your car handle better.
Unevenly worn tires can make your car pull to one side. They can also make the ride feel bumpy or noisy. Doing this regularly can prevent future problems and save you money on premature tire replacements.
Why is this extra important for front-wheel drive (FWD) vehicles? In an FWD car, the front wheels are responsible for both steering and powering the vehicle. This puts them under a lot more stress than the rear wheels.
They handle the forces of acceleration, braking, and turning. This means the front tires tend to wear down much faster. They might show more signs of “feathering” or “cupping” wear patterns.
The rear tires on an FWD car usually just roll along for the ride. They don’t have to do the heavy lifting of power delivery or steering. Because of this, they often look almost new when the front tires are ready for
The main goal is to achieve uniform wear across all four tires. This maximizes their lifespan. It also ensures optimal performance.
This includes good traction in different weather conditions. It helps keep your braking distances consistent. Plus, a smooth, quiet ride is always a plus!
Many car manufacturers recommend a tire rotation every 5,000 to 7,500 miles. Some suggest it should be done with every oil change. This is a good rule of thumb to follow.
Check your car’s owner’s manual for the exact recommendation for your specific make and model. They might have a particular pattern they suggest.
The type of tire also plays a role. Directional tires, for example, can only be moved side-to-side on the same side of the car. Non-directional tires offer more flexibility.
Most common passenger car tires are non-directional. This makes the rotation process simpler. We’ll focus on the most common scenario here: non-directional tires on a standard FWD car.
My Own Experience: The Day I Learned to Value Rotation
I remember the first time I really noticed how much a difference tire rotation made. It was a few years ago. I had bought a used sedan.
It was a great car, but the tires were looking a bit sad. The front ones were almost bald on the edges. The rear ones still had plenty of tread.
I didn’t think much of it at first. I figured I’d just replace the front two when they were completely gone.
Then came a rainy Tuesday. I was driving on a slick highway, and I noticed something strange. When I braked, the car felt a little wobbly.
It didn’t feel as stable as it used to. It was subtle, but it was there. I started to get a little anxious.
The rain was picking up, and the road was getting slicker.
That evening, I was talking to my neighbor, a retired mechanic. I told him about the weird feeling with the car. He asked me about my tires.
When I told him about the worn fronts and barely used rears, he just shook his head. “Son,” he said, “you’re missing out on a critical step. Your tires are wearing unevenly.
That’s why you’re feeling unstable.” He explained the whole FWD situation to me.
He then showed me how to do a basic rotation. It wasn’t complicated at all. We used a jack, some jack stands, and a lug wrench.
Within an hour, we had swapped the front tires to the back and the rear tires to the front. The next day, driving in the same rain, the difference was night and day. The car felt planted.
It felt secure. I kicked myself for not doing it sooner. That experience really drove home the importance of this simple maintenance task.
Front-Wheel Drive Tire Wear Patterns
Common Issues:
- Outer Edge Wear: This is very common on FWD cars. It happens when the tires are underinflated or if there’s too much negative camber.
- Inner Edge Wear: Less common, but can happen with overinflated tires or too much positive camber.
- Feathering: This looks like little teeth on the edge of the tread blocks. It’s often caused by alignment issues.
- Cupping: This looks like dips or scalloped areas on the tire tread. It’s usually a sign of worn suspension parts like shocks or struts.
Regular tire rotation helps to counteract these patterns by moving tires to positions where they experience different forces.
Gathering Your Tools and Preparing Your Car
Before you even think about jacking up your car, you need to make sure you have the right tools. Safety is the number one priority here. Don’t skip any steps.
You wouldn’t want your car to fall while you’re working on it. That would be a very bad day.
Here’s a list of what you’ll need:
- Owner’s Manual: This is your best friend. It will tell you the recommended tire pressure and the correct lug nut torque. It also shows the recommended rotation pattern for your car.
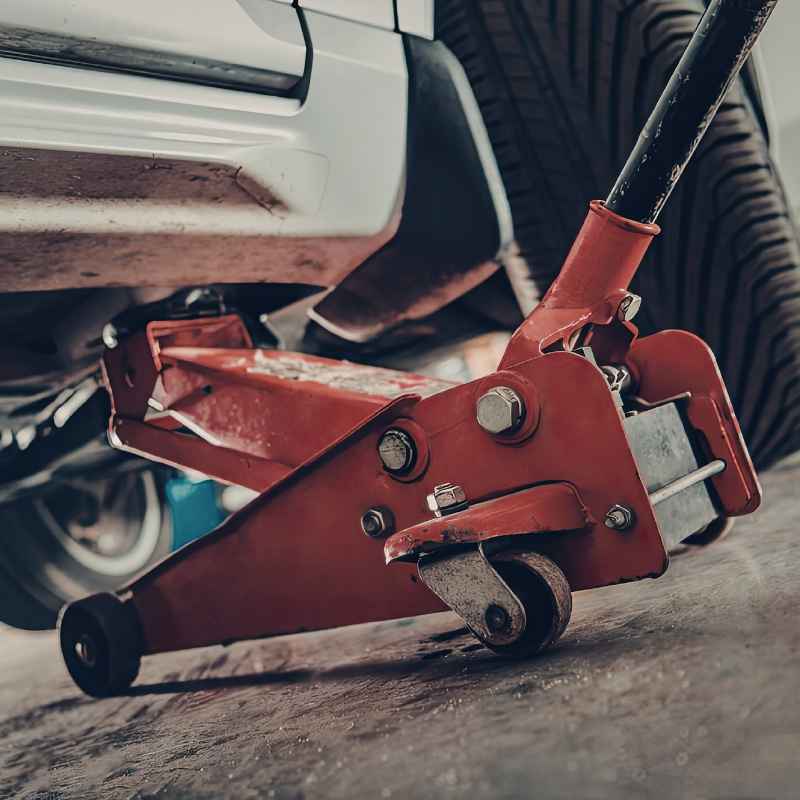
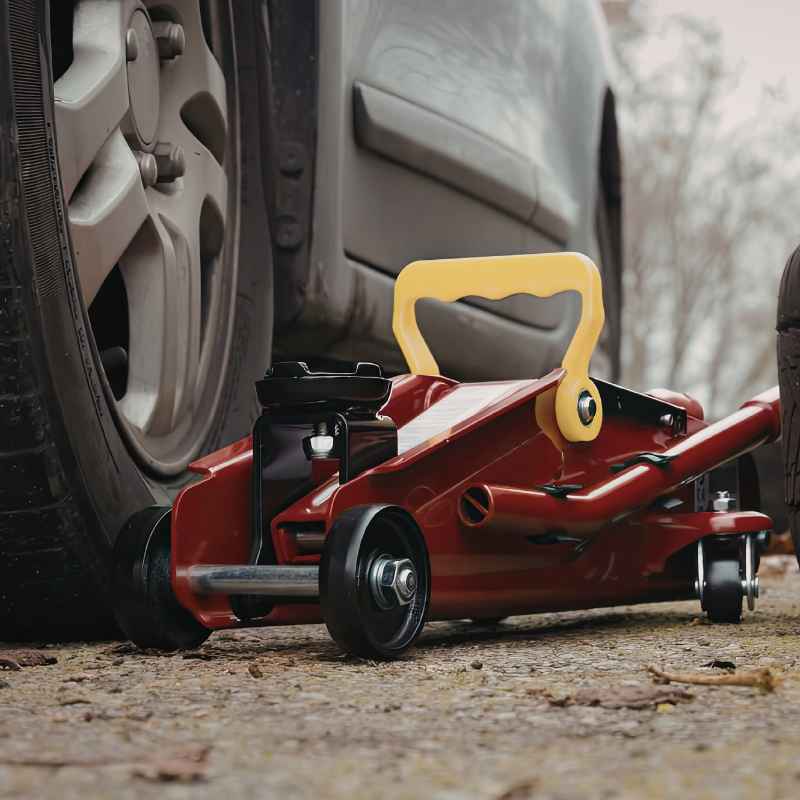
- Jack: You’ll need a sturdy hydraulic floor jack. A scissor jack that came with your car might work, but it can be harder to use safely for all four tires. Make sure it’s rated for your vehicle’s weight.
- Jack Stands: Never, ever work under a car supported only by a jack. You need at least two sturdy jack stands. Four is even better if you’re lifting all four wheels at once.
- Lug Wrench: This tool removes the lug nuts that hold your wheels on. Make sure it fits your lug nuts. Some cars have special locking lug nuts that require a key.
- Tire Pressure Gauge: You’ll need this to check and adjust your tire pressure after the rotation.
- Wheel Chocks: These are wedges you place behind your rear wheels to prevent the car from rolling. Use them even if you’re on a flat surface.
- Gloves: To keep your hands clean.
- Safety Glasses: Protect your eyes from dirt and debris.
- Optional: Torque Wrench: This is highly recommended for tightening lug nuts to the correct specification. Over-tightening can damage the studs. Under-tightening can cause a wheel to come loose.
- Optional: Wire Brush: To clean off any rust or debris from the wheel studs and lug nuts.
- Optional: Penetrating Oil: If your lug nuts are really stuck, a little spray can help.
Once you have your tools, find a good spot. You need a flat, level, and solid surface. A concrete driveway or garage floor is ideal.
Avoid soft ground or a sloped driveway. You don’t want the car shifting while you’re working.
Engage your parking brake firmly. If your car has a manual transmission, put it in first gear or reverse. For automatic transmissions, put it in Park.
This adds an extra layer of safety. Then, place your wheel chocks behind the opposite wheel. For example, if you’re working on the front right wheel, put chocks behind the rear left wheel.
It’s also a good idea to let your tires cool down if you’ve been driving. Hot tires can be a bit softer and harder to work with. They also expand slightly, affecting pressure readings.
Waiting an hour or two after driving is usually sufficient.
Quick Tool Checklist
- Essential: Jack, Jack Stands (2+), Lug Wrench, Tire Pressure Gauge, Wheel Chocks.
- Highly Recommended: Owner’s Manual, Torque Wrench.
- Good to Have: Gloves, Safety Glasses, Wire Brush.
The Front-Wheel Drive Tire Rotation Pattern
For front-wheel drive cars, there are a couple of common rotation patterns. The most recommended one for FWD vehicles is the “Rearward Cross” pattern. This pattern moves the front tires directly to the rear.
It moves the rear tires to the opposite front corner. This helps to even out the wear between front and rear axles.
Here’s how the Rearward Cross pattern works:
- Front Left Tire → Rear Left Tire
- Front Right Tire → Rear Right Tire
- Rear Left Tire → Front Right Tire
- Rear Right Tire → Front Left Tire
This is often shown as an “X” pattern when you look at it from above. The front tires go straight back. The rear tires cross over to the opposite front side.
This is the pattern most auto manufacturers suggest for FWD vehicles.
Another pattern you might see is the “Forward Cross.” This is more common for rear-wheel drive or all-wheel drive vehicles. In this pattern, the front tires cross to the opposite rear corners, and the rear tires go straight to the front. For FWD, you generally want to avoid crossing the front tires to the rear.
This is because they might be directional or have wear patterns that don’t benefit from crossing over.
Some tires are “directional.” They have a specific pattern that only allows them to rotate in one direction. They usually have an arrow on the sidewall indicating the direction of rotation. If you have directional tires, you can only move them from front to back on the same side of the car (Front Left to Rear Left, Front Right to Rear Right).
You cannot move them to the opposite side.
Always check your owner’s manual. It’s the best source of information for your specific car. It will show you the correct pattern and any specific instructions.
Understanding Rotation Patterns
- Rearward Cross (FWD Recommended): Fronts go straight back. Rears cross to opposite front corners.
- Forward Cross (RWD/AWD): Fronts cross to opposite rear corners. Rears go straight forward.
- Directional Tires: Can only move front-to-back on the same side. Check sidewall for arrow.
- Non-Directional Tires: Most flexible. Can be rotated using various patterns.
Step-by-Step: Rotating Your FWD Tires
Okay, you’ve got your tools, you’ve found a safe spot, and you know your rotation pattern. Let’s get started! Take your time.
It’s better to be slow and safe than fast and sorry.
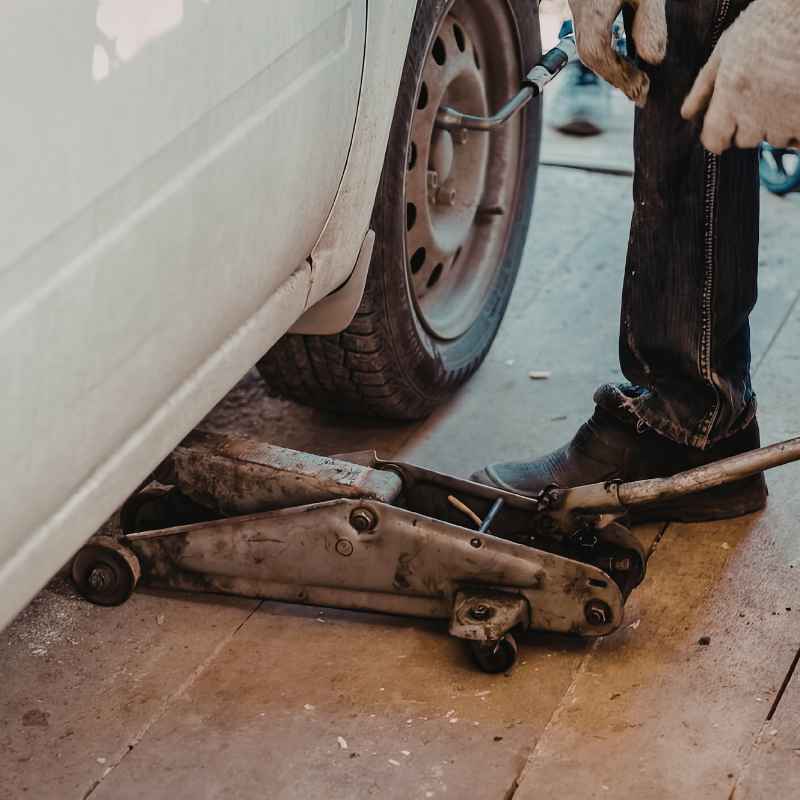
Step 1: Loosen the Lug Nuts
Before you lift the car, you need to break loose the lug nuts on each wheel. Use your lug wrench. Turn them counter-clockwise.
You only need to loosen them about half a turn to a full turn. Don’t remove them completely yet. They will be very tight, and it’s much easier to loosen them while the wheel is still on the ground.
If they’re extremely tight, you might need to use some body weight on the wrench. Be careful not to strip them.
Step 2: Lift the Car
Now it’s time to lift. Consult your owner’s manual for the correct jacking points. These are reinforced areas on your car’s frame.
Using the wrong spot can damage your car. Place the jack under the designated jacking point for the front axle. Lift the car until the front tires are about 6 inches off the ground.
Make sure the car is stable on the jack.
Step 3: Secure with Jack Stands
Slide your jack stands under the designated support points, usually on the frame rails near the jack points. Slowly lower the jack until the car’s weight rests securely on the jack stands. Give the car a gentle shake to ensure it’s stable.
Never rely solely on the jack.
Step 4: Remove the Front Tires
Now you can fully unscrew the lug nuts you loosened earlier. Keep them in a safe place, like a small container or bowl. This way, you won’t lose them.
Once the lug nuts are off, pull the front wheel straight towards you. It might be a bit heavy. Set it aside in a safe place.
Step 5: Repeat for the Rear (if needed for access)
For a standard FWD rotation, you’ll need to lift the rear of the car as well. You can either do this in stages or lift all four corners at once if you have enough jack stands. If lifting in stages, follow the same procedure for the rear axle: lift, place jack stands, and then remove the rear wheels.
However, a common and easier method for FWD is to lift only the front, swap the front tires to the rear, and then lift the rear and swap the rear tires to the front. Or, lift the front, remove the front wheels, then lift the rear, remove the rear wheels, place the front wheels on the rear, and then place the rear wheels on the front. Let’s simplify this for clarity.
A practical approach: You’ll need to access all four wheel locations. A common method is to lift one end at a time.
Method A (One axle at a time):
- Lift the front of the car and place on jack stands.
- Remove front wheels.
- Now, lift the rear of the car and place on jack stands.
- Remove rear wheels.
- Now all four wheels are off.
Method B (Easier for FWD, usually):
- Lift the front of the car and place on jack stands.
- Remove front right tire. Place it carefully aside.
- Remove front left tire. Place it carefully aside.
- Now, lift the rear of the car and place on jack stands.
- Remove rear right tire. Place it carefully aside.
- Remove rear left tire. Place it carefully aside.
Let’s assume you’re doing it one axle at a time for clarity and safety. You have all four wheels off. You have your front tires and rear tires labeled (mentally or physically).
Remember your pattern: Front Left (FL) to Rear Left (RL), Front Right (FR) to Rear Right (RR), Rear Left (RL) to Front Right (FR), Rear Right (RR) to Front Left (FL).
Step 6: Mount the Rotated Tires
Now, place the tires onto their new locations according to your chosen pattern (Rearward Cross for FWD). For example, take the tire that was on the front left and put it on the rear left hub. Take the tire that was on the rear left and put it on the front right hub.
Align the wheel studs with the holes in the wheel. Push the wheel flush against the hub. It might take a little wiggling.
Don’t force it.
Step 7: Hand-Tighten the Lug Nuts
Put the lug nuts back on each stud. Screw them in by hand as far as they will go. This helps to ensure they’re not cross-threaded.
Once they’re all hand-tight, go around in a star pattern. This helps to seat the wheel evenly against the hub.
Step 8: Lower the Car
Carefully raise the car slightly with the jack to take the weight off the jack stands. Remove the jack stands. Then, slowly lower the car completely to the ground.
Once the car is on the ground, you can fully tighten the lug nuts.
Step 9: Tighten the Lug Nuts with a Lug Wrench
Using your lug wrench, tighten the lug nuts in a star pattern. Go around a couple of times to ensure they are all snug. This is where a torque wrench is really valuable.
If you have one, set it to the torque specification found in your owner’s manual and tighten each lug nut.
If you don’t have a torque wrench, tighten them as firmly as you can with the lug wrench, but don’t stand on it or use extreme force. You want them tight, but not so tight that you risk stripping the threads or breaking a stud.
Step 10: Repeat for the Other Axle
If you lifted one axle at a time, repeat steps 2-9 for the other axle. Ensure the car is always securely on jack stands before removing wheels.
Tightening Order is Key!
Always use a star pattern:
Imagine the lug nuts are numbered 1 through 5 (or 4 or 6, depending on your car).
Tighten them in this order:
- 1 → 3 → 5 → 2 → 4
This method ensures the wheel is pulled evenly onto the hub. It prevents wobbling or uneven pressure on the studs.
Final Checks and Considerations
You’re almost done! But there are a few crucial steps to take after the rotation is complete.
Step 11: Check Tire Pressures
This is super important. You moved the tires, so their pressures might have changed. Use your tire pressure gauge.
Check the pressure in all four tires. Adjust them to the recommended PSI (pounds per square inch) found on the sticker in your driver’s side doorjamb or in your owner’s manual. Make sure they are all set correctly.
Underinflated tires are dangerous and wear out faster. Overinflated tires lead to a harsh ride and uneven wear.
Step 12: Retorque the Lug Nuts
This is a critical safety step that many DIYers skip. After driving about 50 to 100 miles, the lug nuts can sometimes loosen slightly as the wheel settles onto the hub. You need to re-check their tightness.
Use your torque wrench to ensure they are still at the manufacturer’s specified torque setting.
If you don’t have a torque wrench, give them a good snug with your lug wrench. Again, firm but not excessive force. It’s worth the extra check to prevent a wheel from coming loose.
Step 13: Inspect Your Tires
While you have your tires off, or as you’re working around them, take a good look. Check for any unusual wear patterns, cuts, bulges, or embedded objects like nails. This is also a good time to check your tire tread depth.
You can use a tread depth gauge or the old penny test.
The Penny Test: Stick a penny into the deepest part of the tread. If you can see the top of Lincoln’s head, your tread is getting low and it’s time to consider new tires. Do this in several spots around each tire.
Tire Pressure Quick Guide
- Where to find it: Driver’s side doorjamb sticker or owner’s manual.
- Don’t use the number on the tire sidewall: That’s the maximum pressure, not the recommended operating pressure.
- Check when cold: Tire pressure increases as tires heat up from driving.
- Importance: Affects handling, fuel economy, tire wear, and safety.
When to Call a Professional
While rotating tires at home is certainly achievable, there are times when it’s best to let the experts handle it. If you’re not comfortable with any of these steps, or if you don’t have the necessary tools, it’s perfectly fine to take your car to a mechanic or a tire shop.
Here are some situations where professional help might be a good idea:
- You have locking lug nuts and no key: If you lost the key for your locking lug nuts, you won’t be able to remove the wheels.
- Your lug nuts are seized or damaged: If the lug nuts are rusted on or you’ve accidentally stripped one, it might require special tools to remove.
- You have a complex suspension system: Some vehicles have complex suspension setups that might require specific procedures for jacking or wheel removal.
- You don’t have a level, solid surface: Working on uneven ground or soft surfaces is dangerous.
- You lack confidence or proper tools: Your safety and your car’s well-being are paramount. If you’re unsure, get professional help.
- You have directional tires and aren’t sure how to handle them: While simple, it’s good to confirm if you’re unsure.
Tire shops also have specialized lifts that make the job quicker and easier. They can also perform wheel balancing at the same time, which is another important aspect of tire maintenance that you can’t easily do at home.
The cost of a professional tire rotation is usually quite reasonable. Many places offer it for free with a tire purchase or as part of a routine service package. It’s a small price to pay for peace of mind and proper execution.
DIY vs. Professional Rotation
- DIY: Cost-saving, satisfying, requires tools and confidence. Best for standard FWD cars without complications.
- Professional: Quicker, easier, no tools needed, expertise on complex systems, often includes balancing. Ideal for beginners or those with specialized tires/vehicles.
Frequently Asked Questions About FWD Tire Rotation
How often should I rotate my tires on a front-wheel drive car?
It’s generally recommended to rotate your tires every 5,000 to 7,500 miles. Many people find it convenient to do it along with their regular oil changes, which often fall within this mileage range.
Can I just swap front tires to the back on a FWD car without crossing?
For most non-directional tires on a FWD car, the recommended pattern is the “Rearward Cross” pattern. This moves the front tires straight to the rear and the rear tires to the opposite front corners. Simply swapping front to back without crossing the rear tires is not ideal for even wear on an FWD vehicle.
What happens if I don’t rotate my tires?
If you don’t rotate your tires, the front tires on your FWD car will wear out much faster than the rear ones. This leads to uneven tread wear, reduced tire lifespan, potentially compromised handling and braking, and you’ll end up replacing tires more frequently.
How do I know if my tires are directional?
Look at the sidewall of your tires. Directional tires will have an arrow indicating the direction of rotation. They usually also have the word “Rotation” or “Direction” printed nearby.
If you see this, you must keep the tires on the same side of the car when rotating.
Is wheel balancing necessary when rotating tires?
Wheel balancing is a separate service from tire rotation. While not strictly required with every rotation, it’s a good idea to have your wheels balanced periodically, especially if you notice vibrations or uneven wear. Many tire shops offer balancing when they rotate tires.
Can I use a scissor jack to rotate my tires?
While a scissor jack that comes with your car can lift the vehicle, it’s generally not recommended for a full tire rotation. Floor jacks are more stable and easier to use for lifting an entire axle. If you only have a scissor jack, ensure you are extremely careful and use jack stands for safety.
Conclusion
Taking care of your tires is a vital part of car maintenance. Rotating them regularly on your front-wheel drive vehicle is a simple yet effective way to extend their life and ensure your car handles safely. By following these steps and prioritizing safety, you can confidently tackle this task at home.
Remember to always consult your owner’s manual and double-check your work. Happy driving!