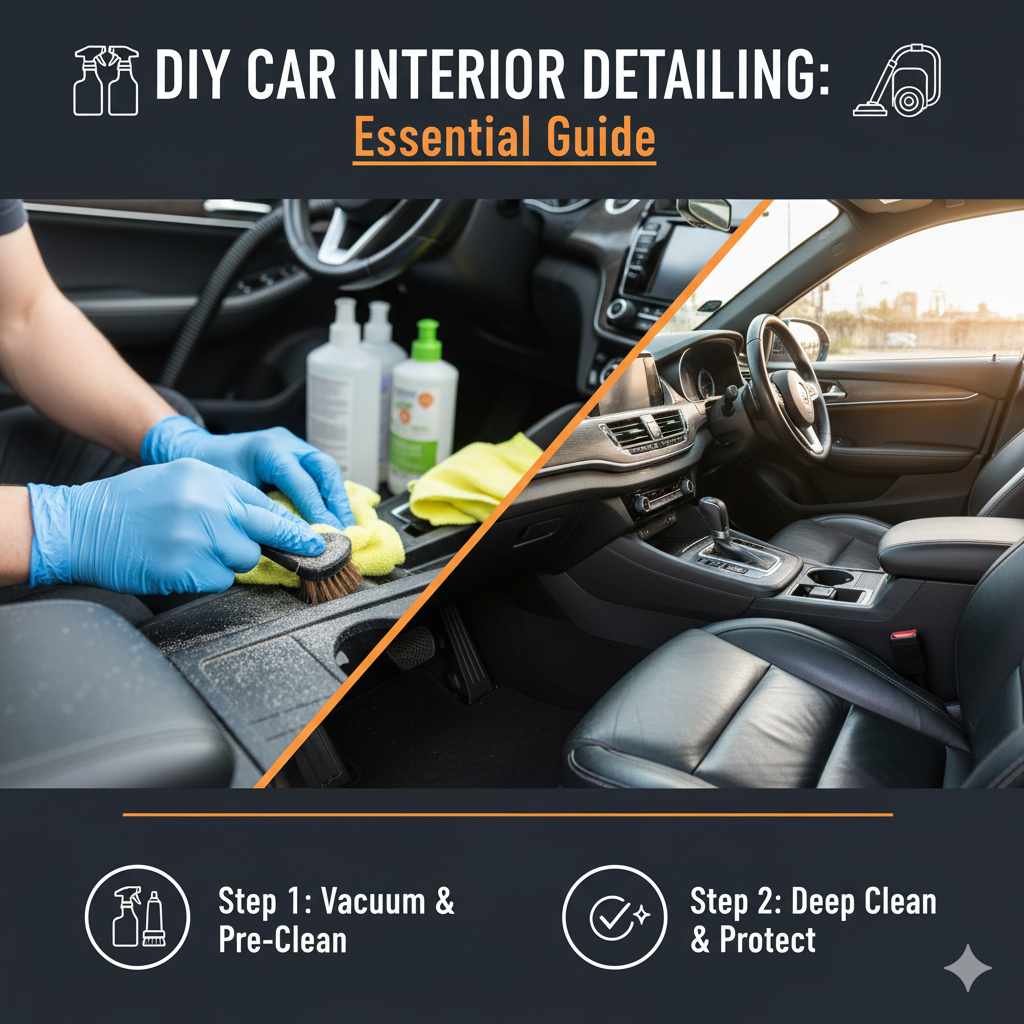
DIY Car Interior Detailing: Essential Guide
Transform your car’s inside from messy to marvelous with our easy DIY car interior detailing guide. Learn simple steps, essential tools, and quick tips to make your car’s cabin look and feel brand new. Save time and money while boosting your driving pleasure. Get ready for a spotless interior!
Hey there, car lovers! Ever hop into your car and feel a little… blah? Maybe there are crumbs on the seats, a dusty dashboard, or smudges on the windows? It happens to the best of us! Life gets busy, and our cars become mobile kingdoms for everything from coffee cups to forgotten gym bags. But here’s the good news: you don’t need a fancy detail shop to bring back that fresh-car feeling. With a little bit of know-how and some easy-to-find supplies, you can totally transform your car’s interior yourself. It’s more straightforward than you think, and the result is a cleaner, more pleasant space for you and your passengers. We’ll walk through it all, step by step, so you can feel confident tackling this project. Let’s get your car’s interior looking and feeling its best!
Why DIY Car Interior Detailing Matters
Keeping your car’s interior clean isn’t just about looks; it’s about comfort, health, and even the value of your vehicle. A clean interior makes every drive more enjoyable. Imagine commuting to work or heading out on a road trip in a space that feels fresh and organized. It reduces stress and makes your car a more welcoming environment. Plus, it can help prevent allergens and dust from accumulating, which is great for anyone with allergies or respiratory issues.
Over time, dirt, grime, and UV rays can wear down your car’s interior surfaces. Regular cleaning helps protect your dashboard, seats, and carpets, extending their lifespan and keeping them looking great. This attention to detail can also significantly impact your car’s resale value down the line. A well-maintained interior tells potential buyers that the car has been cared for, making it a more attractive prospect.

Getting Started: What You’ll Need
Before you dive in, it’s helpful to gather your supplies. Don’t worry, you probably have some of these already! The key is to have the right tools for the job, making the process efficient and effective. Here’s a breakdown of essentials:
Essential Tools and Supplies
- Vacuum Cleaner: A shop vac or a good household vacuum with crevice and brush attachments is ideal. A cordless car vacuum can also be very handy for quick touch-ups.
- Microfiber Towels: These are your best friends for cleaning and drying without scratching. Have plenty of them – for cleaning, drying, and polishing.
- Interior Cleaner/All-Purpose Cleaner (APC): Choose a cleaner specifically designed for car interiors. Look for pH-neutral formulas that are safe for various surfaces. Dilute APCs according to their instructions.
- Glass Cleaner: Ammonia-free glass cleaner is best to avoid damaging tinted windows.
- Detailing Brushes: A set of soft-bristled brushes in various sizes is perfect for agitating dirt in tight spots, vents, and seams.
- Upholstery Cleaner (if needed): For fabric seats and carpets, a dedicated upholstery cleaner can tackle tougher stains.
- Leather Cleaner & Conditioner (if applicable): If you have leather seats, these are crucial for cleaning and protecting them.
- Interior Protectant/Dressing: This adds a protective layer to plastic and vinyl surfaces, helping to prevent fading and cracking from sun exposure. Opt for a matte or satin finish if you dislike a greasy shine.
- Trash Bags: For obvious reasons!
- Bucket: For mixing solutions or rinsing towels.
- Gloves: To protect your hands from cleaners.
- Optional: Compressed Air Can: Great for blowing dust out of vents and tight crevices.
- Optional: Carpet Extractor/Spot Cleaner: For deep-cleaning stubborn carpet stains.
The Step-by-Step DIY Car Interior Detailing Process
Let’s break down the detailing process into manageable steps. Following this order ensures you work from dirtiest to cleanest, preventing you from re-soiling areas you’ve already finished.
Step 1: Declutter and Remove Trash
This is the easiest and most satisfying first step! Open all doors, remove floor mats, and gather all loose items like trash, personal belongings, coins, receipts, and anything else that doesn’t belong. Use small trash bags to collect debris as you go. Don’t forget to check under the seats, in seat pockets, and in the center console.
Step 2: Remove Floor Mats and Clean Them Separately
Take all floor mats out of the car. If they are rubber or all-weather mats, shake them out, spray them with an APC, scrub them with a stiff brush, rinse them thoroughly, and let them air dry in the sun. If they are carpet mats, vacuum them thoroughly. For stubborn stains on carpet mats, you might need an upholstery cleaner or spot cleaner.
Table: Floor Mat Cleaning Guide
| Mat Type | Cleaning Steps | Drying |
|---|---|---|
| Rubber/All-Weather | Shake loose debris. Spray with APC. Scrub with stiff brush. Rinse thoroughly. | Air dry in sun; can be wiped with a dry microfiber towel. |
| Carpet | Thoroughly vacuum. Spot treat stains with upholstery cleaner and scrub brush. Rinse if using a carpet cleaner. | Air dry in sun; ensure fully dry before returning to car to prevent mold. |
Step 3: Vacuum Everything Thoroughly
This is where you tackle the loose dirt, dust, and debris. Start from the top and work your way down. Use your vacuum’s crevice tool to get into seams between seats, along door panels, and in the center console. Use the brush attachment for carpets and upholstery to agitate embedded dirt and lift it out. Don’t forget the trunk! Vacuum the carpet, side panels, and spare tire compartment if accessible. Getting a good vacuum out of the way now makes subsequent cleaning much easier.
Tips for Effective Vacuuming:
- Work in Sections: Divide the car into manageable areas.
- Multiple Passes: Go over high-traffic areas a couple of times.
- Crevice Tool is Key: Use it everywhere!
- Brush Attachment: Helps to loosen dirt from fabric fibers.
- Don’t Forget Underneath: Get your hand or a tool under pedals and seat tracks.
Step 4: Clean Hard Surfaces (Dashboard, Doors, Console)
Now it’s time to address the surfaces you touch every day. Spray your chosen interior cleaner or diluted APC onto a microfiber towel, not directly onto the surface. This prevents overspray onto electronics or glass. Gently wipe down the dashboard, steering wheel, gear shift, center console, door panels, and any other plastic or vinyl trim. For vents and tight spots, use a detailing brush or a cotton swab dampened with cleaner to remove dust and grime. After cleaning, wipe with a separate, dry microfiber towel to remove any residue.
Step 5: Clean Upholstery and Carpets
This step tackles stains and ground-in dirt. For fabric seats and carpets, spray the upholstery cleaner lightly onto the stained area or the entire surface if a general refresh is needed. Agitate the cleaner with a soft brush or microfiber towel, working from the outside of the stain inward. Blot (don’t rub vigorously) the area with a clean, damp microfiber towel to lift the dirt and cleaner. For tougher stains, you might need a dedicated spot cleaner or a carpet extractor. Repeat if necessary.
Leather Care (If Applicable):
If your car has leather seats, use a dedicated leather cleaner. Apply it to a microfiber applicator or towel and gently wipe down the leather. Avoid harsh scrubbing. After cleaning, follow up with a leather conditioner to keep the leather soft, supple, and protected from drying and cracking. You can learn more about proper leather care from resources like those provided by automotive care manufacturers.
Step 6: Clean Interior Glass and Mirrors
Steer clear of ammonia-based glass cleaners if you have tinted windows, as they can damage the tint. Spray an automotive glass cleaner onto a clean microfiber towel. Wipe the inside of your windows and mirrors, using a second dry microfiber towel for a streak-free finish. Don’t forget the rearview mirror and the glass surfaces of your infotainment screen (use an electronics-safe cleaner for those, or just a slightly damp microfiber).
Step 7: Final Touches and Protection
Apply Interior Protectant/Dressing: Once all surfaces are clean and dry, apply a protectant to plastic and vinyl areas. This not only gives a nice finish but also protects against UV damage, which can cause fading and cracking. Apply a small amount to an applicator pad or microfiber towel and spread evenly. Buff off any excess with a clean towel. Choose a product with a finish you prefer – matte, satin, or a light gloss. For areas like the dashboard, it’s often best to apply the protectant directly to your applicator pad rather than spraying the dash itself, to avoid getting product into electronics or the instrument cluster.
Reinstall Floor Mats: Make sure your floor mats are completely dry before putting them back into the car. This prevents mold and mildew growth.
Final Wipe Down: Do a quick once-over with a dry microfiber towel to catch any missed spots or streaks.
Advanced Tips for a Showroom Shine
Want to take your DIY detailing to the next level? Here are a few extra tricks:
- Steam Cleaner: A steam cleaner can be incredibly effective for sanitizing and lifting stubborn dirt from upholstery, carpets, and hard surfaces without using harsh chemicals.
- Odor Eliminators: If lingering smells are an issue, consider using an odor bomb or an ozone generator (with proper safety precautions and ventilation).
- Brush Your Seats: Before vacuuming fabric seats, use a dedicated upholstery brush to agitate loose dirt and dust, making vacuuming more effective.
- Detailing Swabs: For extremely tight areas like air vents, button surrounds, and speaker grilles, specialized detailing swabs or even cotton buds can work wonders.
- Protect Your Paint (Even Inside!): Wiping down door jambs with a quick detailer can remove grime and leave a protective layer.
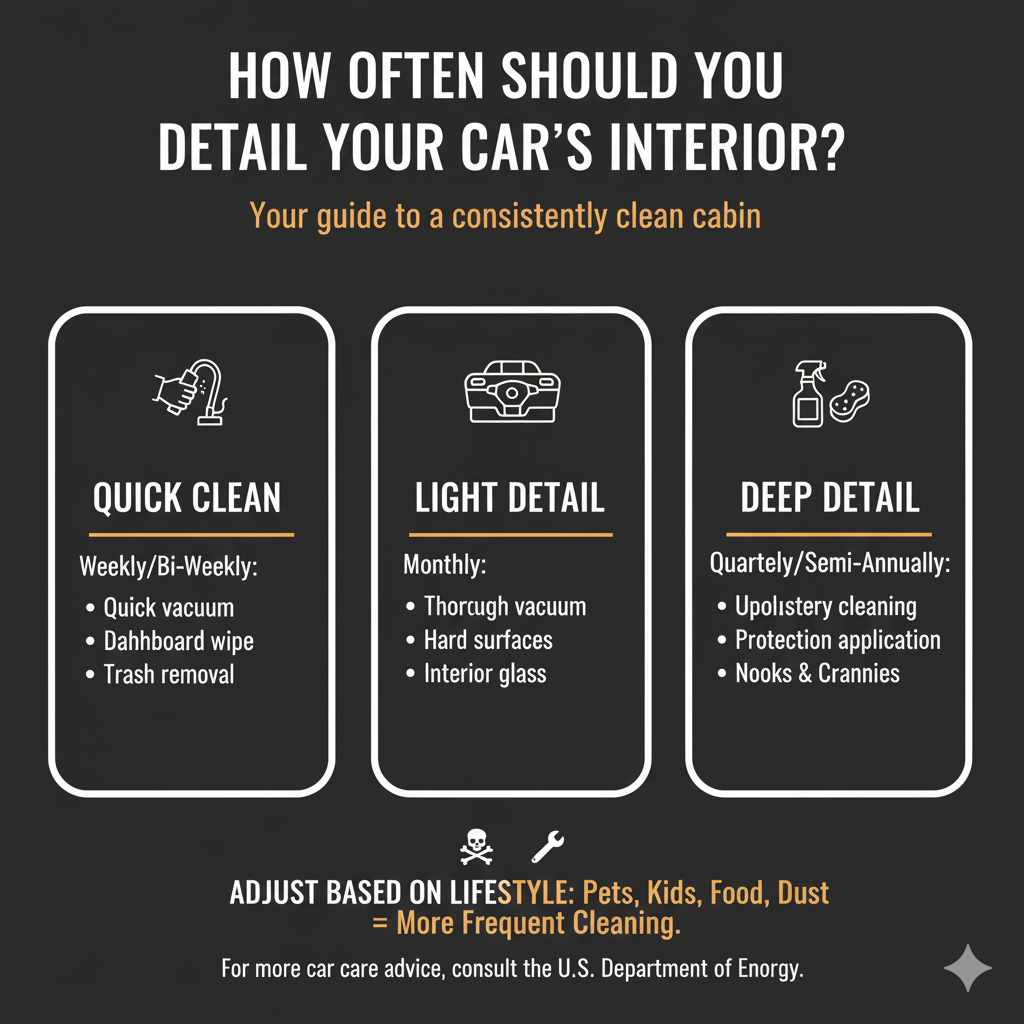
How Often Should You Detail Your Car’s Interior?
The frequency of DIY interior detailing depends on how you use your car and your personal standards. A good rule of thumb is:
- Quick Clean (Weekly/Bi-Weekly): A quick vacuum, dashboard wipe, and trash removal.
- Light Detail (Monthly): A more thorough vacuum, cleaning of hard surfaces, interior glass.
- Deep Detail (Quarterly/Semi-Annually): A full process including upholstery cleaning, protection application, and thorough cleaning of all nooks and crannies.
Factors like carrying pets, kids, frequent eating in the car, or living in dusty environments will mean you need to clean more often. For more on car maintenance schedules, the U.S. Department of Energy offers general advice on keeping your vehicle in good shape.
Common Car Interior Detailing FAQs
Q1: What’s the best way to remove pet hair from car seats?
A1: Pet hair can be tricky! A stiff-bristled brush or a rubber glove (dampened slightly) can help loosen it. Then, use a very strong vacuum, ideally with a brush attachment. Specialized pet hair removal tools are also available and can be very effective.
Q2: How do I get rid of lingering smells in my car?
A2: First, find and remove the source of the smell (like spilled food). A thorough cleaning of all surfaces, including carpets and upholstery, is essential. Using an odor eliminator spray or an odor bomb designed for cars can help neutralize persistent smells. Ensure good ventilation by leaving windows open when possible.
Q3: Can household cleaners be used on car interiors?
A3: It’s best to use cleaners specifically designed for automotive interiors. Household cleaners can sometimes be too harsh for delicate car surfaces like dashboards, plastics, and leather, potentially causing discoloration or damage. Always test a new cleaner in an inconspicuous area first.
Q4: My car windows are always streaky. What’s the secret?
A4: Streaks often come from using too much cleaner, not enough elbow grease, or using a dirty towel. Spray cleaner onto your towel, not the glass. Use one towel to clean and a second, dry microfiber towel to buff to a streak-free finish. Avoid cleaning windows in direct sunlight, as the cleaner can evaporate too quickly.
Q5: How do I clean smudges off my car’s infotainment screen?
A5: These screens are sensitive. The best method is to use a clean, dry microfiber cloth. If that doesn’t remove smudges, slightly dampen a separate microfiber cloth with distilled water or a screen-specific cleaner. Gently wipe, then buff dry with another clean, dry microfiber cloth. Never spray directly onto the screen.
Q6: What’s the difference between an interior cleaner and a protectant?
A6: An interior cleaner lifts dirt, grime, and stains from surfaces. A protectant, or dressing, is applied after cleaning to shield surfaces (like plastic and vinyl) from UV rays, prevent cracking, and provide a finished look, often with a matte or satin sheen.
Conclusion
Taking on your car’s interior detailing yourself is a rewarding experience. You’ve learned that with a few essential tools and a systematic approach, you can achieve impressive results. From decluttering and vacuuming to cleaning surfaces and applying protectants, each step contributes to a cleaner, healthier, and more enjoyable driving environment. Remember, consistency is key. Regular light cleaning will make your deeper detailing sessions much easier and keep your car looking and feeling great between washes. So grab your supplies, put on some music, and transform your car’s cabin. You’ll be amazed at what you can accomplish, saving money and gaining the satisfaction of a job well done. Happy detailing!