How To Adjust Graco Car Seat: Smart Tips
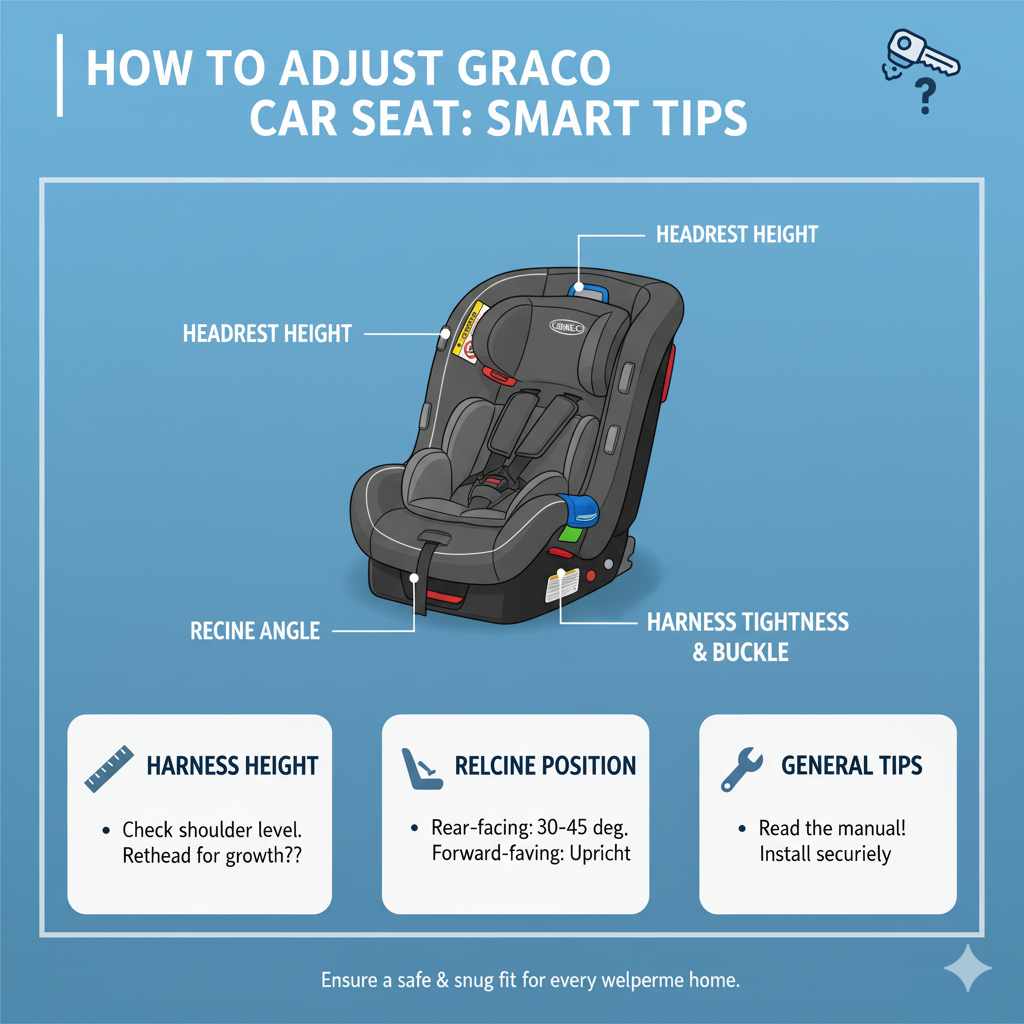
To adjust a Graco car seat, properly set the harness height, recline angle, and headrest for a secure and comfortable fit as your child grows. Always refer to your specific Graco manual for exact instructions, ensuring safety and compliance.
Keeping your little one safe and snug in their Graco car seat is super important. Life with kids is busy, and sometimes figuring out how to make those adjustments can feel a bit tricky. But don’t worry! We’re here to break it down into simple steps. You can totally master adjusting your Graco car seat, making sure it’s just right for your growing adventurer. Let’s get your car seat perfectly fitted, making every trip a little bit easier and a lot safer.
Why Adjusting Your Graco Car Seat Matters
As your child grows, their needs change. What fit perfectly a few months ago might not be safe or comfortable anymore. Adjusting the harness, recline, and headrest isn’t just about comfort; it’s a crucial safety step. A properly adjusted car seat keeps your child secure in case of sudden stops or accidents. Think of it like a perfectly tailored suit – it fits better and performs better when it’s made for you. For Graco car seats, this means ensuring the harness is at the right height, the recline is appropriate for their age and stage, and the headrest offers proper support.
Understanding Your Graco Car Seat Manual
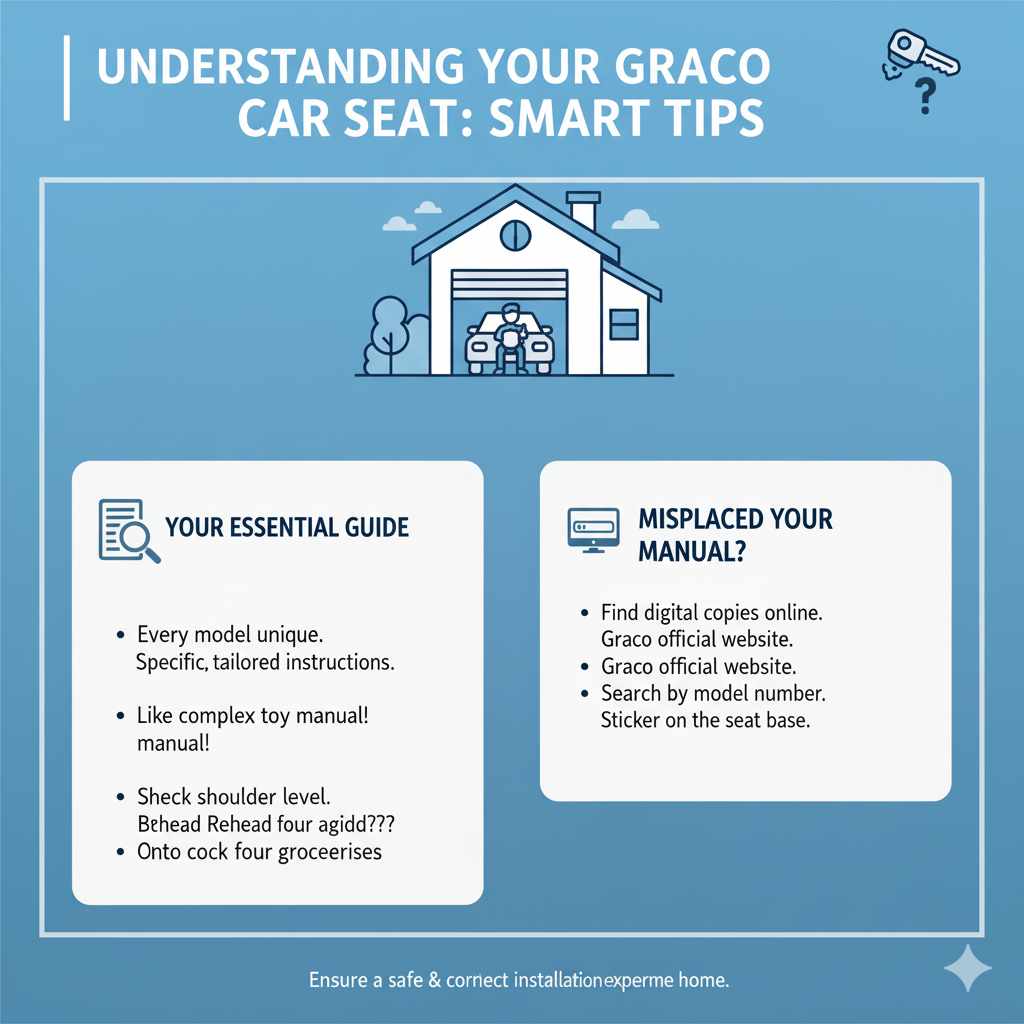
Every Graco car seat model is a little different, and the best friend you have when it comes to making adjustments is its user manual. This booklet is packed with specific instructions tailored to your exact seat. It’s like the instruction manual for a complex toy – you need it to make sure you’re doing it right! If you’ve misplaced it, don’t panic! You can almost always find a digital copy on the Graco official website. Just search for your specific model number; it’s usually found on a sticker on the car seat itself.
Adjusting the Harness: The Core of Safety
The car seat harness is your child’s primary restraint. Getting the height adjustment right is non-negotiable.
Harness Height: The “Strap-at-or-Above” Rule
This is probably the most frequent adjustment you’ll make. The rule is simple and vital:
- Infants (Rear-Facing): The harness straps should come from at or below the child’s shoulders. This ensures the straps are pulling down on the strong bones of the shoulders, keeping them securely in the seat.
- Older Children (Forward-Facing): The harness straps should come from at or above the child’s shoulders. This helps to keep them seated properly and prevents them from slouching out of the harness.
How to Adjust Harness Height
Graco car seats typically use one of two common harness adjustment systems:
1. No-Rethread Harness System (Easier!)
Many modern Graco seats feature a no-rethread harness. This is a lifesaver!
- Locate the headrest adjustment button or lever, usually at the top of the headrest itself.
- Gently squeeze or press this button/lever.
- While holding it, lift or lower the headrest to the desired height. As the headrest moves, the harness straps will automatically adjust their position accordingly.
- Ensure the headrest clicks into place at the correct level for your child’s shoulders.
2. Manual Re-threading Harness System
Older models or some specific Graco seats might require you to re-thread the harness straps through different slots in the seat back.
- First, unbuckle the chest clip and the buckle on the harness straps.
- Find the harness slots at the back of the car seat cover. You’ll need to pull the existing harness straps out from the slots they are currently in.
- Locate the desired new set of harness slots. Remember the rule: at or below for rear-facing, at or above for forward-facing.
- Carefully feed the harness straps through the new slots from the back. Make sure the straps are not twisted.
- Pull the straps through to the front of the seat.
- Ensure your child is sitting properly in the seat before re-buckling.
Tightening the Harness: The “Pinch Test”
Once the straps are at the correct height, you need to ensure they are snug.
- Place your child in the seat and buckle the chest clip and harness.
- Pull the harness tight using the adjustment strap (usually found at the bottom of the seat). The harness should be snug enough that you cannot pinch any slack in the webbing between your thumb and forefinger at your child’s collarbone. This is known as the “pinch test.” If you can pinch slack, it’s too loose.
- Fasten the chest clip at armpit level. It should be positioned so that the clip is directly under the child’s chin, not on their neck or stomach.
Adjusting the Recline Angle
The recline angle is critical for ensuring your child’s airway stays open, especially for younger babies who don’t have strong neck muscles.
Rear-Facing Recline
For infants and toddlers in a rear-facing seat, the angle is crucial. Most Graco seats have an angle indicator (often a bubble level or colored lines) on the side of the seat.
- Infants (Newborns): The recline should be set to the most reclined position suitable for a newborn to help keep their head from falling forward and obstructing their airway. This is typically indicated by a line or bubble showing the “infant” or “newborn” zone.
- Older Babies/Toddlers (Rear-Facing): As your child grows stronger, you can often move to a slightly more upright, but still reclined, position suitable for rear-facing. Always check the manual and the indicator.
Forward-Facing Recline
While forward-facing seats don’t require as much recline as rear-facing, some Graco models offer different recline positions for comfort as the child grows.
- Typically, the most upright position is used for older children, but consult your manual for recommendations regarding different seating positions.
How to Adjust Recline
The method for adjusting the recline varies by model:
- Look for a recline lever or button. This might be at the front of the seat base or accessible from the side.
- Press or lift the lever/button.
- While holding it, adjust the angle of the car seat base until it’s in the correct position.
- Ensure the recline indicator confirms the correct angle. The seat should click or lock into place.
Important Note: Always ensure the car seat is installed correctly in your vehicle according to the vehicle owner’s manual and the car seat manual, as proper installation can affect the recline angle.
Adjusting the Headrest
The headrest works in conjunction with the harness, especially if you have a no-rethread system, but it also provides essential head and neck support.
Headrest Height Guidelines
As mentioned earlier, when using a no-rethread harness system, the headrest height dictates the harness height. For proper fit:
- Rear-Facing: The headrest should be at a height such that the harness straps emerge from slots at or just below the child’s shoulders. The headrest padding should also be close to, but not pressing on, the child’s head.
- Forward-Facing: The headrest should be positioned so the harness straps emerge from slots at or just above the child’s shoulders. The headrest itself should be high enough to comfortably cradle your child’s head and neck, reaching about the top of their ears or higher.
How to Adjust the Headrest
For models with a no-rethread harness, adjusting the headrest is straightforward:
- Locate the adjustment lever or button, usually found at the very top of the headrest.
- Press or pull the lever/button.
- Slide the headrest up or down to the correct position.
- Release the lever/button; it should click into place.
If your model has a separate headrest adjustment that is not tied to the harness, follow the specific instructions in your manual.
When to Make Adjustments
Regularly checking your car seat fit is key. Here are the times you’ll most likely need to make adjustments:
- When Your Child Reaches a New Milestone: This includes significant growth spurts, learning to sit up better, or changes in their weight.
- Switching from Rear-Facing to Forward-Facing: This is a major transition that requires re-evaluating both harness height and recline.
- Using the Seat in a Different Vehicle: While not an adjustment of the seat itself, ensuring the car seat is installed correctly in a new vehicle is crucial and might reveal if adjustments are needed for better fit.
- After a Vehicle Accident: Even a minor accident can compromise the safety and integrity of a car seat. Manufacturers like Graco recommend replacing car seats after any crash, but if it’s deemed safe to continue use by professionals, it’s wise to check all adjustments and potentially have it inspected. Organizations like NHTSA (National Highway Traffic Safety Administration) provide resources on car seat safety guidelines post-accident.
- Monthly Growth Checks: A quick check every month can help you catch when a harness slot is becoming too low or too high before it becomes an issue.
Graco Car Seat Parts and Their Functions Table
Understanding the different parts can make adjusting much easier.
| Part Name | Function | Adjustment Point |
|---|---|---|
| Harness Straps | Restrain the child in the seat. | Height (through slots or via headrest) and Tightness. |
| Chest Clip (Harness Buckle) | Brings the harness straps together at the chest. | Positioned at armpit level. |
| Buckle (Tongue Pieces) | Connects to the chest clip to secure the harness. | None (integrated part of harness). |
| Headrest | Provides head and neck support; often adjusts harness height. | Height (up/down). |
| Recline Angle Adjuster | Sets the incline of the car seat base. | Lever/button to change angle. |
| Level Indicator | Shows if the recline angle is correct. | Visual guide, no manual adjustment. |
| Seat Pad/Cover | Comfort and protection for the child. | Removal for cleaning, but generally not adjusted for fit. |
Common Graco Car Seat Adjustment Scenarios
Let’s walk through some typical situations:
Scenario 1: Your baby is outgrowing their infant carrier (rear-facing mode).
Problem: The harness straps are now coming from below the child’s shoulders and starting to look too low, even on the highest setting.
Solution:
As your baby grows, you’ll likely need to move the harness straps to a higher slot.
If you have a no-rethread harness, simply adjust the headrest to its highest setting. The harness will automatically move up.
If you have a manual re-thread harness, you’ll need to pull the straps out from the current slots and thread them through the topmost slots available that are at or just above your baby’s shoulders.
Scenario 2: Your toddler is ready to face forward.
Problem: The car seat needs to be transitioned from rear-facing to forward-facing. This involves changing the harness orientation and potentially the recline.
Solution:
First, ensure your Graco seat is approved for forward-facing use and that your child meets the minimum weight and height requirements for forward-facing mode (check your manual).
Adjust the harness straps to come from above the child’s shoulders.
Re-check the recline angle. Forward-facing seats are typically more upright, but your manual will specify the correct angle, often indicated by the level indicator. Ensure it’s in the appropriate range for forward-facing.
Scenario 3: The harness feels too loose on your child.
Problem: You can pinch slack in the harness straps at the collarbone.
Solution:
Ensure the harness straps are at the correct starting height (at or below shoulders for rear-facing, at or above for forward-facing).
Place your child correctly in the seat, ensuring their back is against the seat back.
Pull the harness adjustment strap firmly until you can no longer pinch slack at the collarbone.
Buckle and position the chest clip at armpit level.
Tips for Easy Adjustments
Making adjustments should be straightforward. Here are some tips to help:
- Keep it Clean: A dirty or sticky harness adjustment strap can be tough to pull. Wipe it down periodically.
- Check Your Manual First: Even if you’ve done it before, models vary. A quick look at the manual saves confusion.
- Get a Second Pair of Eyes: Having another person check the harness tightness and headrest position can be helpful, especially when you’re in a rush.
- Practice: Don’t wait until you’re on the go. Practice making the adjustments at home so you’re comfortable with the process.
- Invest in a Car Seat Travel Bag: If you travel frequently, a good travel bag can protect your seat and make carrying it much easier, though adjustments shouldn’t be affected.
When to Seek Professional Help
While most Graco car seat adjustments are simple DIY tasks, there are times when you should get expert advice:
- If you are unsure about whether your child is properly fitted in the seat.
- If you’ve been in a car accident.
- If the car seat has expired (generally 6-10 years from manufacture date, check your manual).
- If any part of the car seat appears damaged or is not functioning correctly.
Certified Child Passenger Safety Technicians (CPSTs) are trained to help you with car seat installation and fitting. You can find one near you through organizations like Safe Kids Worldwide. They can provide invaluable, personalized guidance to ensure your child’s safety.

Frequently Asked Questions about Adjusting Graco Car Seats
Q1: How often should I adjust my Graco car seat harness?
A: You should check and adjust the harness height whenever your child reaches a new growth stage, typically when they outgrow their current harness slot height. Monthly checks are a good way to stay ahead of adjustments as they grow rapidly.
Q2: My Graco car seat harness is stuck and won’t adjust. What should I do?
A: First, check your manual for specific troubleshooting steps. Ensure there are no twists in the harness straps and that the adjustment strap is not caught on anything. If it’s still stuck, contact Graco customer support.
Q3: How do I know if the recline angle is correct for my rear-facing Graco car seat?
A: Most Graco seats have a built-in level indicator (a bubble or colored lines). You must ensure the indicator shows the correct angle for your child’s age and weight, specific to rear-facing mode, as detailed in your manual. For newborns, this is usually the most reclined position.
Q4: Can I loosen the harness straps to make it easier to get my child in and out?
A: No. The harness should be snug enough that you cannot pinch any slack at the collarbone. While it needs to be snug, it shouldn’t be so tight that it’s uncomfortable or restricts breathing. Always perform the pinch test after tightening.
Q5: What is the difference between a no-rethread harness and a manual re-thread harness on a Graco car seat?
A: A no-rethread harness allows you to adjust the harness height by moving the headrest up or down, and the harness straps adjust automatically. A manual re-thread harness requires you to physically detach the harness straps from one set of slots in the car seat back and re-insert them into a different set of slots as your child grows.
Q6: My child complains the chest clip is digging into their neck. How do I fix this?
A: The chest clip should always be positioned at armpit level. If it’s too high, it can press on the neck. Ensure the harness straps are correctly positioned and then slide the chest clip down so it is even with your child’s armpits. This makes sure the straps are pulling correctly across the chest and shoulders.
Conclusion
Mastering how to adjust your Graco car seat is a fundamental skill for any parent or caregiver. It’s not just about following instructions; it’s about ensuring your child’s safety and comfort on every journey. By understanding the harness height, recline angle, and headrest positioning, and by regularly checking these as your child grows, you’re actively contributing to their well-being. Remember to always consult your specific Graco car seat manual for the most accurate guidance, and don’t hesitate to seek help from a Certified Child Passenger Safety Technician if you ever feel unsure. With a little practice and attention, you can rest assured that your little one is riding safely and securely.