How to Install a Car Seat With a Seat Belt (1-Inch Test)
Installing a car seat with a seat belt is just as safe as using LATCH — thread the belt through the correct path, lock it with the seat belt’s automatic locking retractor or a locking clip on older belts, and confirm it moves less than 1 inch at the belt path. NHTSA found 74% of car seats checked in 2023 were installed incorrectly. This guide covers routing the belt, locking older seat belts, and passing the 1-inch test.
Quick Answer
To install a car seat with a seat belt: place the seat, thread the belt through the correct rear-facing or forward-facing belt path, buckle it, then lock the belt using the automatic locking retractor (or a locking clip on older belts). Push down on the seat and confirm it moves less than 1 inch side-to-side and front-to-back at the belt path.
What You’ll Need
You don’t need special tools to install a car seat with a seat belt — just these on hand before you start.
- Your car seat and its instruction manual — belt paths and requirements vary by model
- Your vehicle owner’s manual — to check whether your seat belts have an automatic locking retractor
- A locking clip — only needed if your vehicle is a 1996-or-older model without an automatic locking retractor
- Your body weight — you’ll press down on the seat with a knee or your full weight while you tighten the belt
Choosing The Right Car Seat
Car seats come in different types. Infant car seats are for babies and face the back of the car. Convertible car seats can face both directions — rear-facing first, then forward-facing later. Booster seats are for older kids and simply help the vehicle’s own seat belt fit correctly across their body. Choosing the right type for your child’s age, weight, and height matters more than the price tag.
Look for a certification label on the seat confirming it meets Federal Motor Vehicle Safety Standard 213, and always check the weight and height limits printed on the seat or in its manual. A seat your child has outgrown, or one that’s still too big, won’t protect them the way it’s designed to.
When You Must Use A Seat Belt Instead Of LATCH
LATCH (lower anchors and tethers) and seat belt installation are both federally regulated and equally safe when done correctly — the difference is where each one works. LATCH lower anchors are rated for a combined 65 lbs (child plus car seat weight) unless your specific vehicle owner’s manual allows more. Once your child and seat pass that combined weight, federal guidance requires switching to seat belt installation. If you’re shopping for a seat that installs easily without LATCH, see our picks for the best car seats for seat belt installation.
You’ll also need the seat belt method if:
- You’re installing in the middle rear seat without LATCH — many vehicles skip lower anchors there, but every seating position has a seat belt
- Your vehicle is an older model, or a third-row seat, without LATCH anchors in that position
- You already have two car seats using the two sets of lower anchors in the outboard seats — LATCH doesn’t allow a third seat to share the same anchors
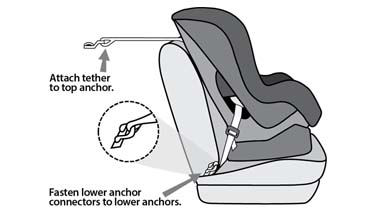
Never use the lower anchors and the seat belt together to secure the same seat — pick one method, not both, unless your car seat’s own manual explicitly says otherwise. The top tether for a forward-facing seat is the one exception: attach it regardless of whether you used the seat belt or LATCH lower anchors for the base, since it works independently of how the base is secured.
Best Seat-Belt-Friendly Car Seat Pick
Graco Extend2Fit Convertible Car Seat
Rear-facing to 50 lbs and forward-facing to 65 lbs, with a clearly marked belt path that makes seat-belt-only installs straightforward in any seating position.
- Best for: parents who need one seat to work in the middle seat, a third row, or any car without LATCH in that position
- Why we picked it: the extension panel keeps kids rear-facing longer without needing a bigger seat, and the belt path is wide and easy to thread
- Main drawback: heavier and bulkier than a basic convertible seat, which matters if you move it between cars often
Compare more seat-belt-install-friendly options
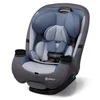 Option 1 Safety 1st Grow and Go All-in-One
|
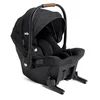 Option 2 Joie Mint Baseless Infant Seat
|
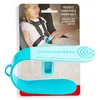 Option 3 UnbuckleMe Buckle Release Tool
|
As an Amazon Associate we earn from qualifying purchases.
Seat Belt Vs. LATCH: Which Should You Use?
Both methods pass federal crash tests when installed correctly — the right one depends on your seating position and your child’s size, not which is inherently safer.
| Method | Best For | Weight Limit | Key Rule |
|---|---|---|---|
| Vehicle seat belt | Middle seat, 3rd row, older vehicles, child + seat over 65 lbs | No car-seat-specific cap — rated for adult occupants | Must be locked (ALR or locking clip) |
| LATCH lower anchors | Outboard seats with anchor hardware | 65 lbs combined (check your vehicle manual) | Never combine with the seat belt |
| Top tether | Any forward-facing install | Not weight-limited | Use with either method — always attach it |
| Locking clip | Vehicles from 1996 or earlier without an ALR | N/A — supplemental hardware only | Rare on vehicles built after 1996 |
Preparing Your Vehicle
Check that your vehicle’s seat belts work well before you start — they should extend smoothly and retract without sticking. Test the belt by pulling it quickly; it should lock immediately. If it doesn’t lock at all, even during a hard, quick pull, contact your dealer or a certified technician before relying on it for a car seat install.
Clear the back seat of loose items, trash, and anything that could shift under the car seat during a crash. Wipe down the seat area — dust and grit under the base can keep the car seat from sitting flat, which throws off the recline angle and the belt path.
Positioning The Car Seat
Secure your child’s safety by properly installing the car seat with the seat belt. Follow the car seat manual, make sure the seat belt is tightly fastened, and confirm the seat doesn’t move more than an inch. Double-check every connection for a snug fit before you trust it on the road.
Finding The Safe Spot
Choose the rear seat position that gives the flattest, most stable base — the middle seat is often the safest if it fits securely, since it’s furthest from a side-impact crash. Check that the seat belt in that position is in good condition before you commit to it.
Face the car seat in the right direction: babies under 1 year (and ideally longer, per current guidance) ride rear-facing, older kids who’ve outgrown the rear-facing limit ride forward-facing. Use the seat’s recline adjustment to hit the angle marked on the seat’s built-in level indicator — too upright and a rear-facing infant’s head can fall forward; not upright enough and a forward-facing seat won’t protect properly in a crash.

How To Install A Car Seat With A Seat Belt: Step-By-Step
Once you’ve chosen the position and confirmed the belt locks, the install itself takes about 10–15 minutes.
- Place the seat correctly: Set the car seat in the back seat — rear-facing if your child is under your seat’s rear-facing weight or height limit, forward-facing once they’ve outgrown it.
- Thread the belt through the correct path: Find the belt path marked on the car seat — there’s usually a separate one for rear-facing and forward-facing — and pull the shoulder and lap belt through it with no twists.
- Buckle the seat belt: Click the belt into the vehicle’s buckle so the webbing lies flat against the car seat, not folded or bunched.
- Lock the belt: Engage the seat belt’s automatic locking retractor (pull the belt all the way out, then let it retract) or attach a locking clip if your vehicle doesn’t have one — see the locking section below.
- Remove the slack: Push down on the car seat with your knee or your full body weight and pull the excess belt through the retractor until it’s tight.
- Attach the tether (forward-facing only): Clip the top tether strap to the vehicle’s tether anchor point and tighten it — this limits how far the seat pitches forward in a crash.
- Run the 1-inch test: Grab the car seat at the belt path and try to move it side-to-side and front-to-back — it shouldn’t move more than 1 inch in either direction.
How To Lock A Seat Belt For A Car Seat (ALR, ELR & Locking Clips)
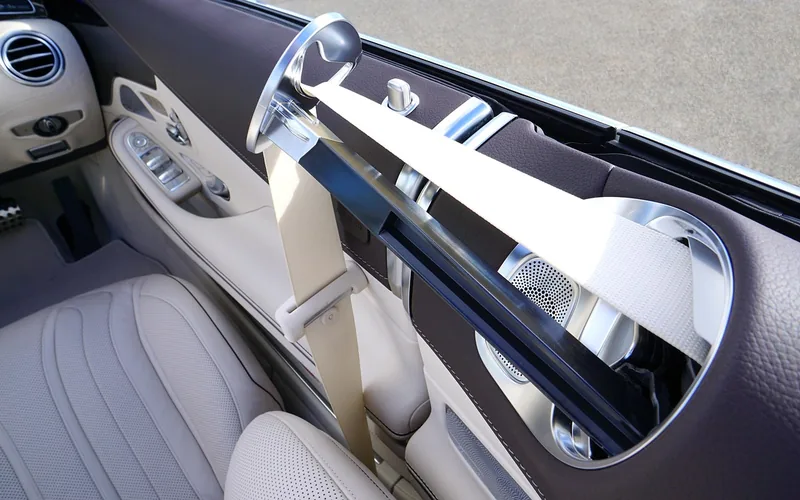
A car seat installed with an unlocked seat belt can loosen during normal driving and fail exactly when it matters most — so the belt has to be locked, not just buckled. Most vehicles built since September 1, 1996 have a seat belt with a switchable automatic locking retractor (ALR): pull the belt all the way out until it stops, then let it retract partway. You’ll feel it click into a ratcheting mode that only tightens from there — it won’t pull back out further, which is exactly what locks the car seat in place.
Vehicles older than that — or some imported models — may only have an emergency locking retractor (ELR), which stays loose during normal driving and only locks during a sudden stop. In that case the vehicle needs a locking clip: a metal H-shaped clip that clamps the lap and shoulder belt together at a fixed length so the webbing can’t feed back out. Locking clips are increasingly rare, since almost every U.S. vehicle on the road today has an ALR seat belt — but if your car seat’s manual calls for one and it wasn’t included in the box, contact the car seat manufacturer directly rather than substituting a different clip.
"If you choose to use a seat belt to install your car seat, pay close attention to how to lock your seat belt" — locking methods vary by vehicle, so check both the car seat manual and the vehicle owner’s manual before you trust the fit.
For a full breakdown of every locking method by belt type — including how to test which type your car has — see our dedicated guide on how to lock a seat belt for a car seat.
📊 Correctly used car seats reduce the risk of fatal injury by 71% for infants under 1 and 54% for toddlers ages 1–4 in passenger cars — yet 74% of car seats inspected in 2023 were installed or used incorrectly. Source: CDC, Child Passenger Safety Risk Factors, 2023
Adjusting The Car Seat
The harness must sit snugly on the child, with no loose straps anywhere along the strap. A good pinch test: try to pinch the strap at the shoulder — if you can pinch excess webbing, it’s too loose. See our full guide on how car seat straps should fit for the exact fit checks by age.
Adjust the seat’s recline for the angle your specific seat requires — most seats have a built-in bubble level or angle indicator for this. A rear-facing seat that’s too upright lets an infant’s head fall forward and can restrict their airway; a forward-facing seat that’s too reclined won’t control the child’s body correctly in a crash.
Testing The Installation
Push the car seat firmly at the belt path. It should not move more than 1 inch side-to-side or front-to-back — this is the same 1-inch test NHTSA uses at official car seat inspection stations. Wiggle it in both directions and check for any give at the connection points; if it moves more than an inch, go back and remove more slack from the belt.
Examine the belt itself: it should lie completely flat with no twists along its length, and the buckle should click audibly and firmly when engaged. Check the harness straps on the child separately — a tight vehicle belt doesn’t mean the harness is tight too. Repeat this check every few months, since seat belts and harness webbing can loosen slightly over normal use.
Troubleshooting Common Issues
The seat still moves more than 1 inch after locking the belt. Check that the belt is actually engaged in locking mode — pull it and confirm it won’t feed back out. If it’s locked and still loose, try a different seating position, since not every belt length works with every car seat and vehicle combination.
The belt keeps twisting as you thread it. Fully remove the belt from the buckle, lay it flat on the seat, and smooth out any twist along its entire length before rethreading it through the car seat’s belt path. A twisted belt doesn’t distribute crash force evenly across the webbing.
The buckle won’t click or engage. Check that you’re using the correct buckle for that seating position — some vehicles have buckles of different lengths on the same bench seat, and the wrong one may not seat properly with a thick car seat base underneath it.
Maintenance Tips
Properly installing a car seat with a seat belt only protects your child if the install stays correct over time — a seat that was tight in January can loosen by summer from everyday use.
Regular Checks
Check the car seat every month for wear and tear. Confirm it’s still passing the 1-inch test, and look for any cracks or damage on the plastic shell. Make sure the seat belt is not twisted and that the buckle still clicks firmly. Also confirm your car seat is still within its expiration window — the plastic shell degrades over time even without visible damage.
Cleaning Guidelines
Use a mild soap and water for cleaning — avoid strong chemicals or bleach on the harness webbing, which can weaken the fibers. Wipe the seat with a soft cloth, let it air dry, and remove crumbs and dirt regularly so nothing interferes with the harness buckle. Always follow your specific seat’s manual for cleaning instructions, since some fabric covers are machine washable and others aren’t.
Frequently Asked Questions
Can you install a car seat with a seat belt?
Yes. Every car seat sold in the U.S. is certified to install with either the vehicle’s seat belt or the LATCH system. A seat belt installation is just as safe as LATCH when the belt is threaded through the correct path, locked so it can’t loosen, and passes the 1-inch movement test at the belt path.
How do you attach a car seat with a seat belt?
Place the car seat in the back seat, thread the seat belt through its designated belt path, and buckle it. Lock the belt using the seat belt’s automatic locking retractor or a locking clip, then press down on the car seat and pull the excess belt through until it moves less than 1 inch at the belt path.
How do you install a car seat with a seat belt when there’s no LATCH?
Follow the same seat belt installation steps used for any seating position: thread the belt through the correct path, buckle it, lock it, and remove the slack. The middle rear seat, third-row seats, and older vehicles often lack lower anchors but always have a seat belt, so this method works in nearly every seating position.
Is it better to install a car seat with a seat belt or LATCH?
Neither is inherently safer than the other when installed correctly — choose whichever gets a tighter, more stable fit in your specific vehicle and seat combination. Switch to the seat belt once your child and car seat’s combined weight passes the LATCH system’s 65-pound limit, or in a seating position without lower anchors.
What is a locking clip and when do I need one?
A locking clip is a metal H-shaped clip that clamps the lap and shoulder belt together at a fixed length so the belt can’t loosen. You only need one if your vehicle was built in 1996 or earlier and its seat belt has no automatic locking retractor — nearly all vehicles made since then lock automatically.
How do I know if my seat belt has an automatic locking retractor?
Pull the seat belt all the way out until it stops, then let it retract partway. If you feel it click into a mode where it only tightens and won’t pull back out further, it has an automatic locking retractor (ALR). If it stays loose and only locks during a sudden stop, it’s an emergency locking retractor and needs a locking clip instead.
Can I use the seat belt and LATCH lower anchors together?
No — use one method or the other, never both, unless your specific car seat’s manual explicitly says otherwise. The one exception is the top tether on a forward-facing seat, which should always be attached regardless of whether you used the seat belt or LATCH lower anchors for the base.
Conclusion
Installing a car seat with a seat belt comes down to three things: thread the belt through the right path, lock it so it can’t loosen, and confirm it passes the 1-inch test. Both seat belt and LATCH installs are equally safe when done correctly — the seat belt is simply the method you’ll need in the middle seat, a third row, or once your child and seat outgrow LATCH’s 65-pound limit.
Recheck the install every month, since belts and harness webbing can loosen with normal use. If you’re ever unsure, a certified Child Passenger Safety Technician can check your specific install for free at many fire stations and hospitals — it’s worth the 20 minutes for peace of mind.
Products related to this article
Sponsored / affiliate links. As an Amazon Associate I earn from qualifying purchases. I may earn additional commission from eligible campaigns.
 Seat Belt Covers for Kids, 2 in 1 Car Seat Strap Covers & Auto Seatbelt Pillow for Kids nap, Car Travel Pillow & Strap Pads Cushion for headrest, Neck/Shoulder Support, fit Child, Adult, Grey;
 Universal Child Car Seat Chest Harness Clip – Kids Seat Belt Adjuster & Anti Escape Buckle Guard, Child Safety Car Seat Belt Lock Clip, Toddler Seatbelt Locking Clip for Stroller & Booster (Gray)