
Ultimate Guide: How to Change AC Compressor on 2014 Chevy Silverado
To change the AC compressor on a 2014 Chevy Silverado, follow these steps. In the scorching summer heat, a functioning air conditioning system is crucial for a comfortable driving experience.
However, if your 2014 Chevy Silverado AC compressor is faulty or damaged, it may need to be replaced. Changing the AC compressor is a task that should be carried out with precision and care. In this guide, we will walk you through the steps to help you successfully replace the AC compressor on your 2014 Chevy Silverado.
By following these instructions, you can ensure that your truck’s AC system will be up and running smoothly, keeping you cool during your summer drives.
Step-by-step Process
Learn the step-by-step process of changing the AC compressor on your 2014 Chevy Silverado. With careful guidance, you can successfully complete this task and keep your truck running smoothly.
Step 1: Gather Necessary Tools And Materials
Before you begin the process of changing the AC compressor on your 2014 Chevy Silverado, it’s important to gather all the necessary tools and materials to ensure a smooth and efficient repair. Here are some of the items you’ll need:
- Ratchet set
- Wrench set
- AC compressor kit
- New refrigerant oil
- Safety goggles
- Gloves

Step 2: Prepare The Vehicle
Once you have all the required tools and materials, it’s time to prepare your vehicle for the AC compressor replacement. Follow these steps:
- Make sure the engine is turned off and the keys are removed from the ignition.
- Put on safety goggles and gloves to protect yourself from any potential hazards.
- If your Silverado has been running, allow the engine to cool down for at least 30 minutes before proceeding.
Step 3: Disconnect The Battery
Disconnecting the battery is an important safety measure that needs to be taken before replacing the AC compressor. To do this:
- Locate the negative (-) terminal on the battery.
- Use a wrench to loosen the nut on the negative terminal.
- Once the nut is loose, gently remove the negative cable from the terminal. Be careful not to touch the positive terminal.
- Move the negative cable aside, ensuring it doesn’t come into contact with the battery terminal again.
Step 4: Remove The Old AC compressor
With the battery disconnected, you can now proceed to remove the old AC compressor:
- Locate the AC compressor under the hood of your Silverado.
- Using a ratchet and wrench set, carefully remove the bolts and brackets securing the old AC compressor in place.
- Once all the bolts and brackets are removed, detach the electrical connectors and hoses connected to the compressor.
- Remove the old AC compressor from the vehicle and set it aside.
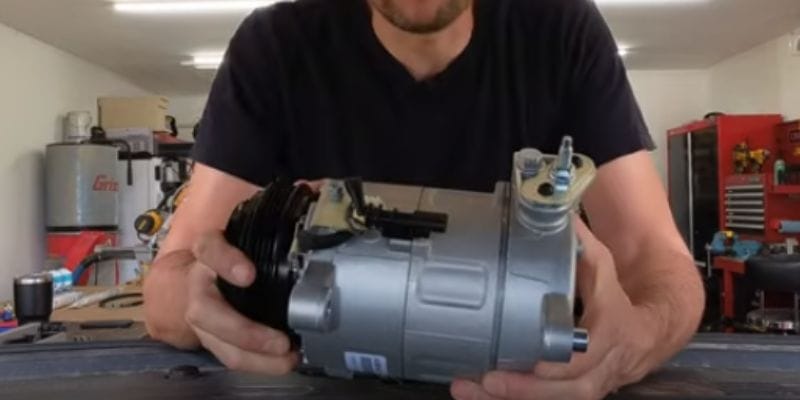
Step 5: Install The New AC compressor
Now that the old AC compressor has been removed, it’s time to install the new one:
- Take the new AC compressor from the kit.
- Attach the electrical connectors and hoses to the new compressor, ensuring they are securely fastened.
- Place the new compressor in the same position as the old one.
- Using the ratchet and wrench set, tighten the bolts and brackets to secure the new compressor in place.
Step 6: Reconnect The Battery
Now that the new AC compressor is installed, it’s time to reconnect the battery:
- Take the negative cable that was previously removed.
- Gently place the negative cable back onto the negative terminal of the battery.
- Tighten the nut on the negative terminal to secure the cable.
With the battery reconnected, you can now start your engine and test the new AC compressor to ensure it’s working properly. If you experience any issues, it’s recommended to consult a professional mechanic for further assistance.
Tips And Safety Precautions
When it comes to changing the AC compressor on your 2014 Chevy Silverado, it’s important to take the necessary precautions to ensure a safe and successful installation. Here are some tips and safety measures you should follow:
Wear Safety Goggles And Gloves
Before you begin any work on your AC system, it’s crucial to protect your eyes and hands. Wear safety goggles to shield your eyes from any debris or refrigerant that may be released during the process. Additionally, put on a pair of gloves to keep your hands safe from sharp edges and chemical exposure. This will help reduce the risk of personal injury and ensure a safer work environment.
Consult The Vehicle’s Manual
The vehicle’s manual is an invaluable resource when it comes to understanding the specifics of your Chevy Silverado’s AC system. It provides detailed instructions on how to safely change the AC compressor, as well as any other important information, such as the type of refrigerant your vehicle uses. Take the time to read through the manual thoroughly before starting the compressor replacement process.
Properly Dispose Of Refrigerant
Refrigerant is an environmentally harmful substance, and it’s crucial to handle and dispose of it properly. When removing the old AC compressor, make sure to collect and store the refrigerant in a designated container. Contact your local recycling center or AC repair facility to find out the proper way to dispose of the refrigerant. Improper disposal can have serious consequences for the environment and can even result in legal penalties, so be diligent in handling this substance correctly.
Test The AC system After the Installation
After you have successfully installed the new AC compressor, it’s important to test the system to ensure it’s functioning correctly. Start the engine and turn on the AC to its highest setting. Check for any leaks, unusual noises, or any other signs of malfunctioning. If everything appears to be in order, allow the system to run for a few minutes to ensure it is cooling the air properly. Testing the AC system after installation will give you peace of mind and ensure that it is working efficiently.
Conclusion
Replacing the AC compressor on your 2014 Chevy Silverado is a task that, with the right tools and guidance, can be successfully accomplished. By following the step-by-step instructions provided in this blog post, you can save money by performing the change yourself.
Remember to prioritize safety and consult your vehicle’s manual for any specific guidelines. With proper preparation and execution, you can enjoy a comfortable and well-functioning AC system in your Chevy Silverado.