How To Clean A Carburetor Without Removing It (Easy Way)
Cleaning a carburetor without removing it often involves using specialized spray cleaners and compressed air. This method is best for minor clogs and can help restore engine performance by dissolving varnish and debris from internal passages. Regular use of fuel stabilizers can prevent such issues in the first place.
Understanding Carburetor Clogs
Think of your carburetor like a tiny, intricate coffee maker for your engine. It takes liquid fuel and turns it into a fine mist that mixes with air. This air-fuel mix is what your engine burns to create power.
But over time, especially with gasoline that sits around, little bits of gunk can form. These are often called varnish or deposits.
These deposits can build up in the tiny passages and jets inside the carburetor. Imagine a straw with tiny bits of sticky candy inside. It’s hard to suck anything through, right?
That’s what happens to the fuel and air. The engine doesn’t get the right mix, and it acts up.
Common culprits for these clogs include:
- Old Fuel: Gasoline degrades over time. This is especially true if it contains ethanol, which can attract moisture.
- Dirt and Debris: Small particles can get into the fuel tank and travel to the carburetor.
- Water Contamination: Moisture can cause rust and deposits inside the fuel system.
- Infrequent Use: Engines that sit for long periods are prime candidates for clogs. The fuel evaporates, leaving sticky residue behind.
When these clogs happen, you’ll notice things like a rough idle, difficulty starting, loss of power, or even the engine dying unexpectedly. It’s frustrating because it feels like a big problem, but often, it’s something you can address with a bit of know-how and the right tools.
Carburetor’s Job in Simple Terms
The carburetor’s main goal is to create the perfect air-fuel blend. It uses the Venturi effect to draw fuel into the airflow. This mist then goes into the engine’s cylinders to be ignited.
If any part of this process is blocked, the engine won’t run right.
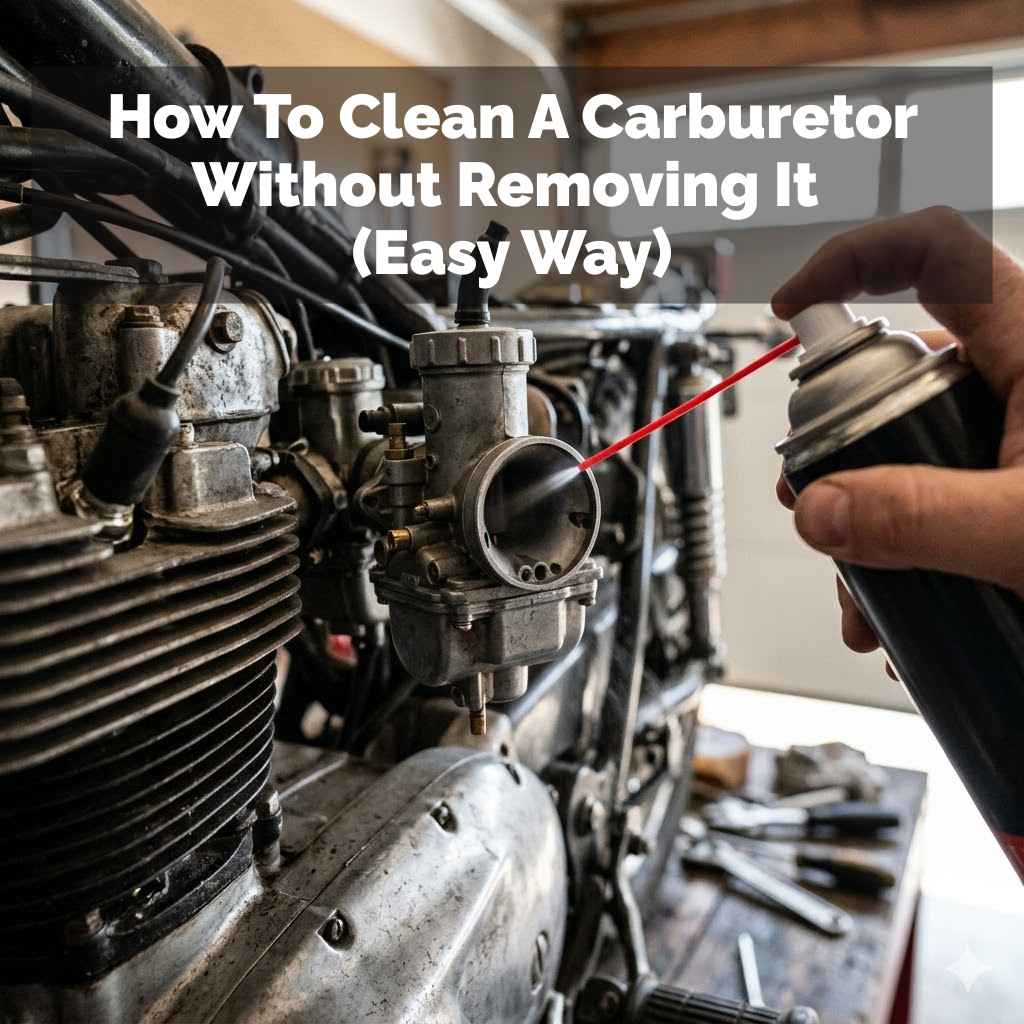
The “Spray and Pray” Method: Cleaning Without Full Removal
This is the method most people think of when they want to clean a carburetor without taking it apart. It involves using a specialized carburetor cleaner spray. These sprays are powerful solvents designed to dissolve the gunk that builds up.
It’s like a degreaser for your engine’s food dispenser.
You’ll need a can of carburetor cleaner. Make sure it’s designed for this job. Some cleaners are better than others.
You might also need some compressed air. This helps blow out the loosened debris.
Here’s a general idea of how it works:
- Safety First: Always work in a well-ventilated area. Carb cleaner fumes can be strong and harmful. Wear safety glasses and gloves.
- Locate the Carburetor: This is usually on the engine, connected to the air filter housing.
- Access the Carburetor’s Intake: You’ll need to spray the cleaner into the carburetor’s throat. Sometimes, you can do this by briefly removing the air filter. For some engines, you might need to loosen a clamp holding the air intake hose.
- Spray While Cranking (Carefully!): With the air filter removed, you can often spray the cleaner directly into the carburetor’s intake. You might need to have someone briefly crank the engine while you spray. The engine might sputter and try to run on the cleaner.
- Let it Sit: After spraying, let the cleaner sit for a few minutes to work on dissolving the deposits.
- Reassemble and Test: Put the air filter back on and try to start the engine.
This method is often effective for minor clogs. It’s a quick way to try and get an engine running again. However, it’s not a deep clean.
It might not reach the deepest parts of the carburetor.
When This Method Shines
This “spray and pray” technique works best when the clog is very light. It’s good for engines that have been sitting for a short time, maybe a few months. It’s also a good first step before trying more involved methods.
A Deeper Dive: Using Carburetor Cleaner and Compressed Air
If the simple spray method doesn’t quite do the trick, you can take it a step further without fully removing the carburetor. This involves more direct application of the cleaner and the use of compressed air to really blow out the gunk.
This approach usually requires removing the air filter assembly. You’ll then spray the cleaner directly into the carburetor’s opening. The goal is to get the cleaner into the fuel bowl, the jets, and the venturi.
You can also try to spray it up through the main fuel jet opening if you can access it.
How to try this:
- Remove the Air Filter: This is usually held on by screws or clips.
- Expose the Carburetor Throat: You’ll see a metal or plastic opening. This is where the air enters.
- Spray Cleaner In: With the engine off, spray the carburetor cleaner generously into this opening. Try to get it to flow down into the carburetor. Some cleaners have a straw attachment that can help direct the spray.
- Work the Throttle (if possible): If your carburetor has a visible throttle plate, you might be able to gently open and close it manually while spraying. This helps move the cleaner around.
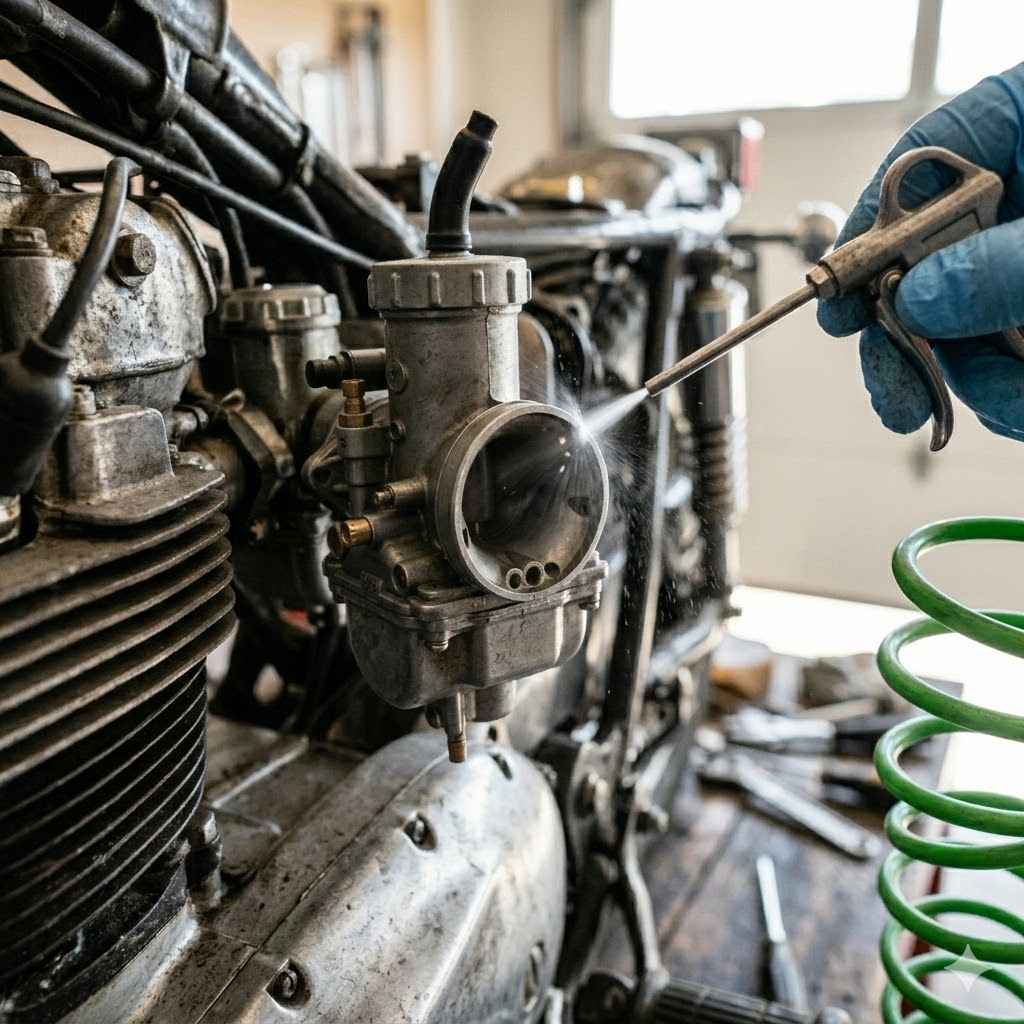
- Use Compressed Air: This is a key step. After letting the cleaner sit for a bit (follow the cleaner’s instructions), use compressed air. Aim the air nozzle into the carburetor throat. Try to blow air into various passages you can see. If you can access the fuel inlet, try blowing air there too.
- Let it Dry: Allow the carburetor to air dry thoroughly.
- Reassemble and Test: Reinstall the air filter and try to start the engine.
I remember one time, my old push mower just wouldn’t start after sitting through the winter. I was so frustrated. I tried the basic fuel and spark checks, but nothing.
I saw some carburetor cleaner in my garage. I took off the air filter, gave it a good spray, and let it sit. Then, I used my air compressor to blow into the intake.
It sputtered a bit, but then it roared to life! It was such a relief. That experience showed me how powerful these simple methods can be.
Key Components to Target with Spray
- Venturi: The narrowest part where air speeds up.
- Throttle Bore: Where the throttle plate controls airflow.
- Fuel Bowl: The reservoir for fuel.
- Jets: Tiny calibrated holes that meter fuel flow.
When Spray Isn’t Enough: Using a Carburetor Dip-In Cleaner
Sometimes, the gunk is just too stubborn for spray cleaners alone. This is when a carburetor dip-in cleaner can be your best friend. These are usually sold in larger cans, and you submerge parts of the carburetor in them.
The catch here is that to use a dip-in cleaner effectively, you do need to remove at least some parts of the carburetor. However, you might be able to remove just the float bowl and spray the cleaner into the main body without fully disassembling the entire unit. This is a middle-ground approach.
Steps for a Partial Dip Clean:
- Remove the Float Bowl: This is usually a metal cup at the bottom of the carburetor, held on by a screw or nut. Be careful of the float and needle inside.
- Inspect the Bowl: Look for sediment or varnish. You can clean this out with a rag and some cleaner.
- Access Internal Passages: With the bowl off, you can often see the main jet and other openings.
- Apply Dip Cleaner: You can carefully pour or spray the dip cleaner into the main body of the carburetor. Let it sit for the time recommended on the product.
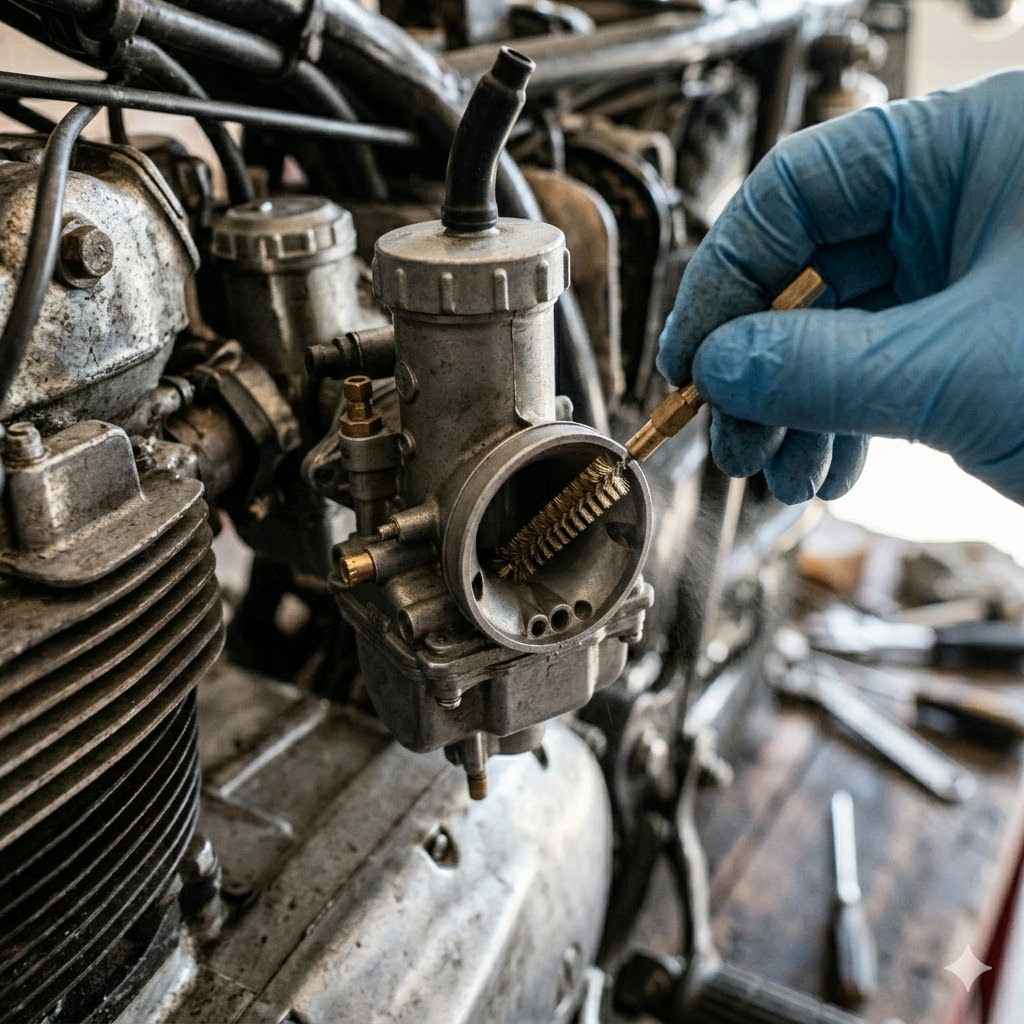
- Agitate and Rinse: Gently use a brush (like an old toothbrush) to scrub any visible areas. Then, use compressed air to blow out the cleaner and any loosened debris.
- Reassemble: Put the float bowl back on with a new gasket if needed.
This method is more involved but can be much more effective for tougher clogs. It allows the solvent to soak and break down the deposits.
Dip Cleaner vs. Spray Cleaner
Dip cleaners are generally stronger and can soak for longer periods, making them better for tough grime. Spray cleaners are good for quick, light cleaning and maintenance.
The “Forced Air” Technique: Blowing Out Clogs
This is a variation of the compressed air method, but it emphasizes using air to push the cleaner and debris through the carburetor. It’s a bit more aggressive and requires careful application.
You’ll typically perform this after you’ve used a spray cleaner. The idea is to use a strong blast of air to clear out any softened gunk that the cleaner loosened. You’ll want to blow air through the various openings – the air intake, the fuel inlet, and any other passages you can access.
How it works:
- Apply Carb Cleaner: Spray a good amount of cleaner into the carburetor.
- Let it Dwell: Allow the cleaner to sit and break down the varnish.
- Targeted Air Blasts: Use a compressed air nozzle. Cover the opening you’re blowing into with a rag or your finger to create some back pressure. This helps force the air and loosened debris out through other passages.
- Focus on Jets: Pay special attention to the main jet and any idle jets. If you can, try to blow air directly through them.
- Fuel Inlet: Blow air into the fuel inlet. This should push air and cleaner out of the float bowl or through the main jet.
I remember helping a friend with his old dirt bike. The carburetor was so gummed up. We tried spraying cleaner, but it still wasn’t running right.
Then, I remembered a trick: using a rag to partially block the intake and then blasting air into the fuel inlet. The cleaner and sludge shot out of the intake like a geyser! After a few rounds of this, the bike started and ran smoother than it had in years.
It was a messy job, but incredibly effective.
Safety Note on Forced Air
Always wear safety glasses. Carb cleaner and fuel debris can spray out unexpectedly. Keep your face away from the direct blast.
What About Additives?
There are fuel additives designed to clean carburetors while the engine is running. These are added directly to your gasoline. They are essentially milder versions of spray cleaners that circulate through the fuel system.
How they work:
- Added to Fuel Tank: You pour the additive into your gas tank.
- Circulates Through System: As the engine runs, the treated fuel flows through the carburetor.
- Dissolves Deposits: The additive helps dissolve small deposits and prevent new ones from forming.
These are great for preventative maintenance or very mild clogs. They won’t fix a severely gummed-up carburetor. Think of them as a daily vitamin for your fuel system, not a cure for a serious illness.
When Additives Are Best
- Maintenance: Use them regularly in gas cans or for engines that sit for a while.
- Mild Symptoms: If you notice slight hesitation or rough running.
- Preventative Care: Especially important for engines with ethanol-laced fuel.
The Real-World Context: Why Carburetors Get Dirty
It’s not magic; it’s chemistry and physics at play. Gasoline is a petroleum product. Over time, it breaks down.
Heat, air, and moisture all play a role in this breakdown. This decomposition creates gummy, sticky residues. These residues are what clog your carburetor.
In places with high humidity or significant temperature swings, fuel can absorb moisture. This water doesn’t mix well with gasoline. It can create tiny droplets that cause corrosion inside your fuel tank and lines.
These tiny rust particles, along with the fuel varnish, get carried to the carburetor.
Modern gasoline, especially formulations with ethanol (like E10 or E15), can be more problematic. Ethanol is hygroscopic, meaning it attracts water. This can lead to phase separation, where the ethanol and water separate from the gasoline.
This separated layer can be highly corrosive and cause significant damage and clogs.
Many people use their equipment seasonally. A lawnmower might sit for six months. A snowblower might sit for eight.
During this time, the fuel in the carburetor can evaporate. This leaves the non-volatile components of the fuel behind, which are the primary source of varnish and gum deposits.
Fuel Stability is Key
Using a fuel stabilizer is one of the best ways to prevent carburetor clogs. Add it to your fuel before storing equipment. It coats internal parts and slows down the fuel degradation process.
What This Means For You: Normal vs. Concerning Signs
It’s important to know when a little sputtering is just a minor issue and when it’s a sign of something more serious. Many engines will occasionally run a little rough if they’ve been sitting, especially on a hot, humid day. This is usually normal and often resolves itself as the engine warms up or after a few minutes of running.
When it’s probably normal:
- Slight Hesitation: The engine stumbles for a second but then recovers.
- Rough Idle: The engine runs a bit unevenly when not under load.
- Starts Harder Than Usual: It takes a few more pulls or tries to get it to fire up, but it eventually does.
When to worry:
- Engine Won’t Start at All: Despite having fuel and spark.
- Engine Dies Immediately After Starting: It can’t sustain running.
- Significant Loss of Power: The engine struggles to do its job, like a mower that can’t cut grass.
- Flooding: You can smell strong raw fuel, and the spark plug might be wet. This indicates too much fuel is getting in.
- Engine Runs Only on Cleaner: If the engine runs fine when you spray cleaner into it but dies as soon as you stop, the main fuel circuit is likely completely blocked.
If you’re experiencing the “when to worry” symptoms, it’s a strong indication that your carburetor needs a more thorough cleaning than just a quick spray. While you might be able to avoid full removal, you’ll likely need to be more hands-on with cleaners and air.
Quick Check: Fuel Shut-Off Valve
If your equipment has a fuel shut-off valve, remember to turn it off when not in use, especially during storage. This prevents fuel from slowly leaking into the carburetor over time.
Quick Tips for Preventing Carburetor Issues
Prevention is always better than cure, right? Taking a few simple steps can save you a lot of frustration down the road.
- Use Fresh Fuel: Always start with fresh gasoline. If you’re not sure how old your fuel is, it’s often best to discard it and get new fuel.
- Add a Fuel Stabilizer: This is especially critical for any equipment that will be stored for more than a month. Add it to your gas can.
- Run the Engine Dry (for Storage): Before storing equipment for an extended period (like the end of a season), run the engine until it stops from lack of fuel. This empties the carburetor of fuel, preventing varnish buildup.
- Clean the Air Filter: A dirty air filter restricts airflow, which can affect the air-fuel mixture and put more strain on the carburetor.
- Use Higher Quality Fuel (if possible): Some people find that using premium fuel or fuel without ethanol can lead to fewer carburetor issues, though this varies by engine.
These are all small habits that make a big difference. I used to be guilty of just leaving fuel in my tools all winter. Then I’d spend the next spring struggling to get them started.
Learning to use fuel stabilizer and running them dry made a world of difference. It really changed my whole experience with maintaining my equipment.
Myth vs. Reality: Fuel Additives
Myth: All fuel additives are the same and equally effective.
Reality: Look for reputable brands specifically designed for fuel stabilization and carburetor cleaning. Some are much more potent than others.
Frequent Questions About Cleaning Carburetors Without Removal
Can I really clean a carburetor without taking it apart?
Yes, for minor clogs and regular maintenance, cleaning without full disassembly is often possible. Using specialized spray cleaners and compressed air can dissolve and blow out light deposits. However, severe clogs usually require more extensive cleaning, which might involve partial or full disassembly.
How often should I clean my carburetor?
This depends on usage and fuel quality. For engines used frequently, regular maintenance might mean cleaning every few years or when symptoms appear. For equipment stored long-term, preventative measures like fuel stabilization and running the engine dry are more important than frequent cleaning.
If you notice rough running, it’s time to check.
What is the best carburetor cleaner spray?
There are many good brands. Look for ones specifically labeled for carburetors, chokes, and throttle bodies. Popular options include those from WD-40 Specialist, Gumout, CRC, and Sea Foam.
Always follow the product instructions for best results and safety.
My engine still won’t start after spraying cleaner. What now?
If your engine runs when you spray cleaner into the carburetor but dies when you stop, the main fuel jet is likely completely blocked. This usually means you’ll need to remove and disassemble at least part of the carburetor to clean it thoroughly. Check for a clogged fuel filter too.
Is it safe to spray cleaner directly into the engine?
Yes, carburetor cleaner is designed for this purpose, but safety precautions are crucial. Always work in a well-ventilated area, wear safety glasses and gloves, and keep the cleaner away from open flames. Follow the cleaner’s specific instructions.
Can I use brake cleaner instead of carburetor cleaner?
While brake cleaner is a strong solvent, it’s generally not recommended for carburetors. Carburetor cleaners are specifically formulated to break down fuel varnish and deposits without damaging rubber or plastic components found in carburetors. Brake cleaner can sometimes be too harsh and damage these parts.
Conclusion: Taking Control of Engine Health
Dealing with a carburetor issue can feel daunting, but it’s often manageable. By understanding how these crucial parts get clogged and knowing the different methods for cleaning them, you can often get your engine purring again. Whether it’s a quick spray or a more involved process, you have options.
Remember, consistent care and preventative steps are your best allies in keeping your engines running smoothly for years to come.