Getting Scratches Out Of A Plastic Bumper The Easy Way
Yes, you can often get scratches out of a plastic bumper using common household items and a bit of patience. The key is to match the repair method to the depth of the scratch. Light scuffs can be buffed out, while deeper ones might need a filler or touch-up paint.
Always start with the gentlest method first.
Understanding Bumper Scratches
Plastic bumpers are everywhere these days. They’re designed to absorb impact. That’s a good thing for safety.
But this flexible material is also prone to scuffs and scrapes. Most car bumpers are made of polypropylene or similar plastics. These materials are tough but can show damage.
Scratches can range from tiny surface marks to deep gouges. Surface scratches often only affect the clear coat or the paint layer. Deeper ones can go down to the plastic itself.
Knowing the difference helps you pick the right fix. It’s like knowing if a cut needs a band-aid or stitches.
Why do they happen? Parking lots are a prime spot. Narrow spaces, careless drivers, or even shopping carts can leave their mark.
Low branches when you’re off-roading, or even a stray pebble kicked up on the road can cause trouble. Sometimes, it’s just daily wear and tear.
The way plastic bumpers are made also plays a role. They are often molded, and the color is usually molded in. This means the color is part of the plastic itself, not just a layer on top.
This can make some types of scratches easier to deal with because you aren’t always trying to match a perfect paint job.
Most modern cars have bumpers that are painted to match the car’s body. This means the scratch might just be in the paint. But if the scratch is deep enough, you’ll see the grey or black plastic underneath.
This is where things get a little more involved.
My Own Bumper Battle
I remember one time I was helping a friend move. We were maneuvering a bulky sofa out of a tight doorway. My car was parked just a bit too close.
You guessed it. As we shifted the couch, a corner scraped HARD against my car’s rear bumper. I heard that sickening shhhhk sound.
My heart sank. When I looked, there was a long, ugly white line right across the dark grey bumper. It looked terrible!
My first thought was “this is going to cost a fortune to fix.” I pictured taking it to a body shop and getting a massive bill. It was a hot, sticky day, and the annoyance just added to the sweat. I felt a mix of frustration and a little bit of dread.
This scratch made my whole car look older and uncared for. I spent the rest of the day just staring at it. I knew I had to do something.
I went online, hoping for a miracle. Most solutions seemed complicated or involved expensive products. But then I started finding simpler tips.
Things people did at home. This gave me some hope. I decided to try the easiest fix first, just to see what would happen.
It wasn’t perfect, but it was a huge improvement. This experience taught me a lot about what’s possible with a little effort.
Light Scuff vs. Deep Scratch: Know the Difference
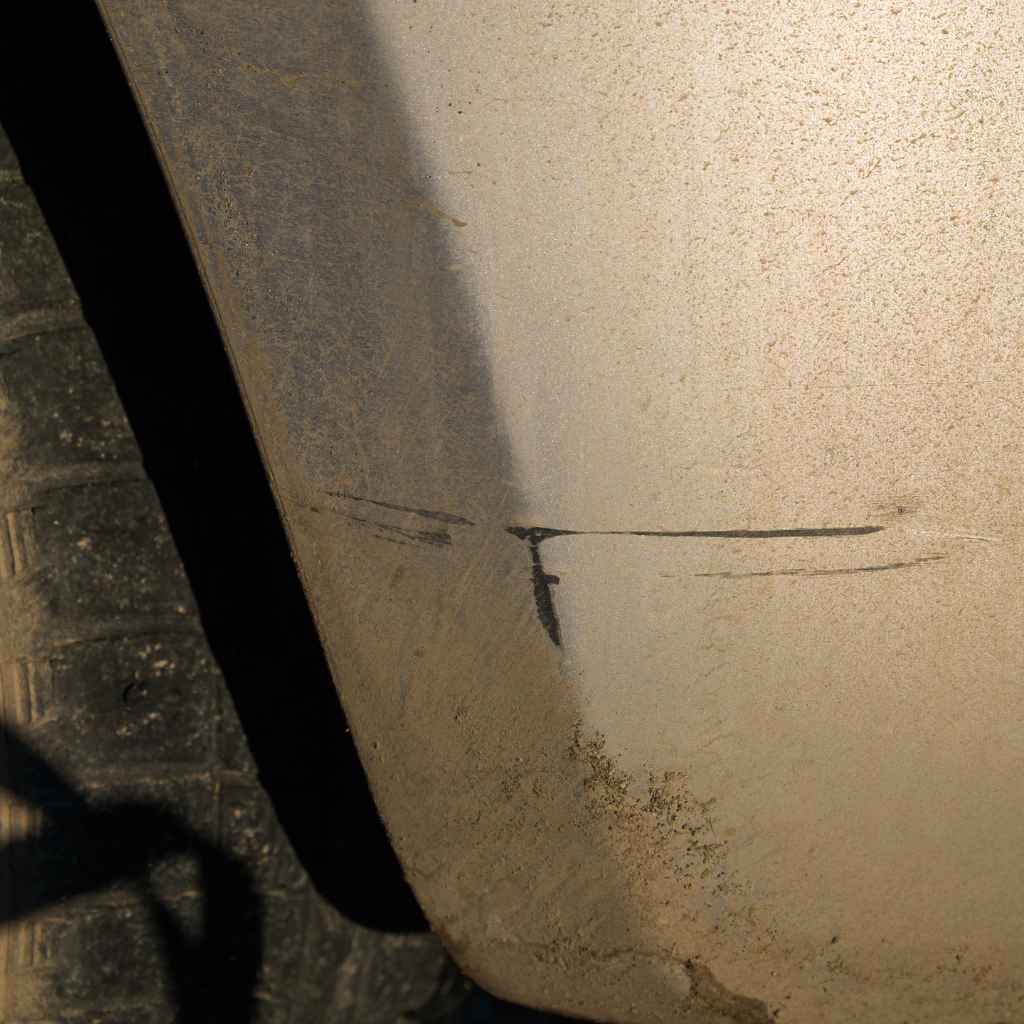
Light Scuffs: These are usually surface marks. They might look like faint white lines or hazy areas. They haven’t gone through the paint layer.
Think of them like a light abrasion on your skin. They usually don’t penetrate the color layer.
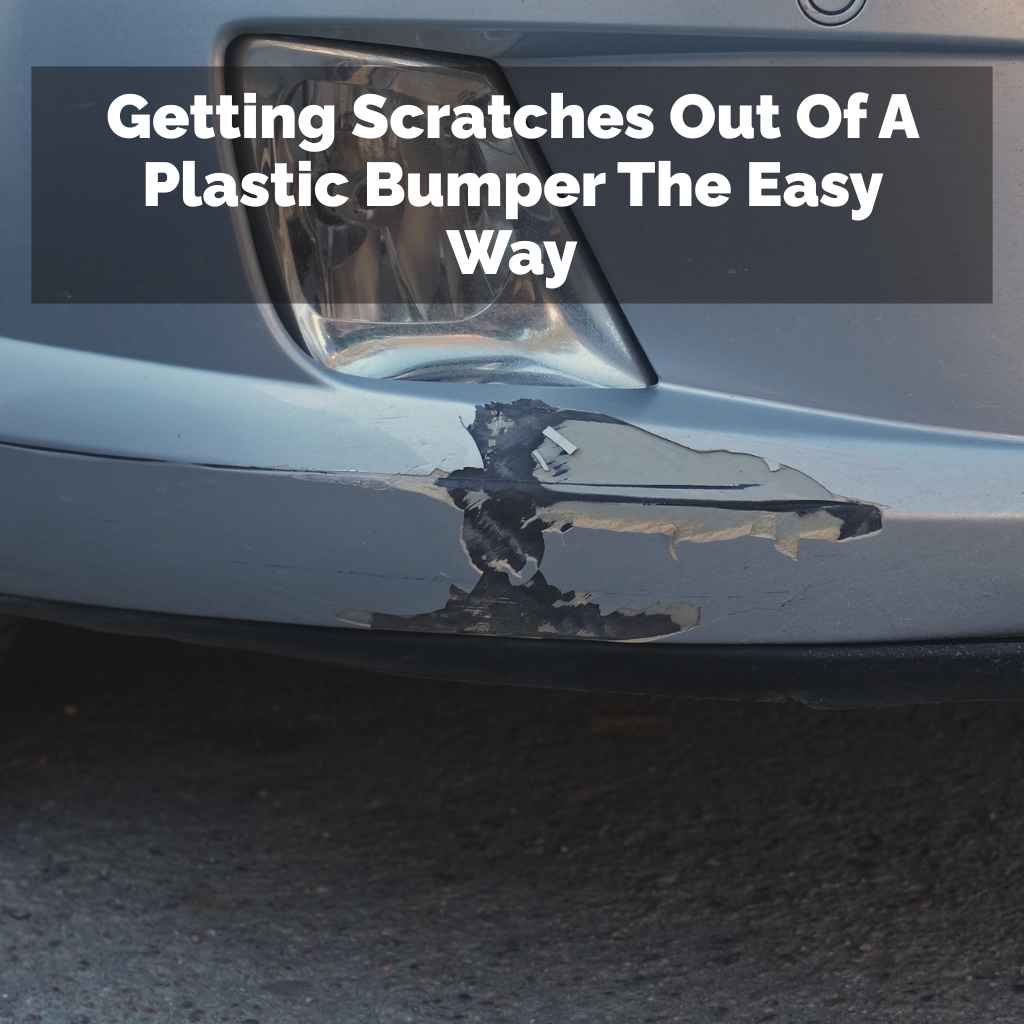
Deeper Scratches: These go down into the paint or even the plastic itself. You might see the primer or the bare plastic color (often grey or black). These need more than just buffing.
They might catch your fingernail.
Assessing the Damage
Before you grab any tools, take a close look at the scratch. Gently run your fingernail across it. If your nail catches or snags, it’s likely a deeper scratch.
If your nail glides over it smoothly, it’s probably a surface scuff. This simple test is your first clue.
What color is the scratch? If it’s white or silver on a dark bumper, it’s probably from something else hitting your car. If it’s the color of your car, it’s a paint scratch.
If you see black or grey plastic, the scratch has gone all the way through the paint and primer.
Sometimes, a scratch might look bad but is just a transfer of paint from another car. These are often easier to remove. Other times, the plastic itself might be a bit deformed or roughed up.
This requires more care.
Quick Scan: Types of Bumper Scratches
- Surface Scuffs: Light, often white. Doesn’t catch fingernail.
- Paint Scratches: Visible color damage. May catch fingernail slightly.
- Deep Gouges: Plastic is exposed. Catches fingernail easily.
- Paint Transfer: Color from another source. Often looks like a line.
Gentle Cleaning: The First Step
No matter how deep the scratch, cleaning is always step one. Dirt and grime can hide the damage. They can also get ground into the scratch as you try to fix it.
This can make things worse. So, a good wash is essential.
Use car wash soap and water. A soft sponge or microfiber cloth works best. Gently wash the entire bumper area.
Rinse it thoroughly. Then, dry it with another clean microfiber towel. Make sure the area is completely dry before you proceed.
Sometimes, a really stubborn scuff might just be dirt stuck in the clear coat. A good wash can remove it. If you use a pressure washer, keep it at a safe distance.
You don’t want to force water into any small openings.
Method 1: For Light Scuffs and Surface Marks
If your scratch doesn’t catch your fingernail, you’re in luck. These are the easiest to fix. You can often buff them out.
Think of it like rubbing out a pencil mark. You need something slightly abrasive but gentle.
What You’ll Need:
- Microfiber cloths (several)
- Rubbing compound or polishing compound
- Car wax (optional, for protection)
How to Do It:
First, make sure the area is clean and dry. Put a small amount of rubbing compound onto a clean microfiber cloth. Gently rub the compound over the scratch.
Use a circular motion. Apply light pressure.
Don’t scrub too hard. You’re trying to remove a thin layer of the clear coat or paint to level the surface. Work in small sections.
After a minute or two, wipe away the residue with a clean part of the cloth. Inspect the scratch.
If the scratch is still visible, apply a little more compound and repeat. You might need to do this a few times. Once the scratch is gone or much less noticeable, wipe the area clean.
You can then apply a bit of car wax to protect the area. This also helps it blend in.
Some people have success with toothpaste too. Use a non-gel white toothpaste. It has very mild abrasives.
Apply it with a cloth and rub gently. Then wipe it off and clean the area. This is a good last resort if you don’t have compound.
Split Insight: Buffing Power
Buffing Action: Rubbing compound works by containing fine abrasive particles. These particles smooth out the edges of the scratch. They essentially remove a tiny bit of surrounding material.
This makes the scratch less deep and therefore less visible.
Patience is Key: For light scuffs, a little bit of gentle rubbing goes a long way. Overdoing it can damage the surrounding paint. It’s better to do several light passes than one aggressive one.
Method 2: For Paint Scratches
If your fingernail catches the scratch, it has likely gone through the clear coat and into the paint. These are a bit trickier. You’ll need to fill the scratch or touch it up.
Option A: Touch-Up Paint
This is best if the scratch is not too wide. You need to get paint that matches your car’s color. Most auto parts stores can mix custom paint.
You can often find paint pens or small bottles.
First, clean the scratch very well. Use rubbing alcohol to remove any wax or oils. Let it dry completely.
Then, using a very fine-tipped brush or the applicator that comes with the paint, carefully apply a thin layer of touch-up paint into the scratch.
Don’t glob it on. You want to fill the scratch, not create a paint blob. Let the first coat dry.
This might take an hour or more. Then apply a second thin coat if needed. You want the paint to be level with the surrounding paint.
Once the paint is fully dry (this can take 24 hours or longer), you might have a slight bump. You can then use a very fine grit sandpaper (like 3000 grit) very carefully to level it. Or, use a polishing compound like in Method 1.
This takes practice.
Option B: Scratch Repair Kits
There are many kits available online and in stores. They often include a filler, sandpaper, primer, color coat, and clear coat. Follow the kit’s instructions precisely.
These kits can yield great results if used correctly.
Quick Scan Table: Touch-Up Paint Steps
| Step | Action | Notes |
| 1 | Clean Scratch | Use soap/water, then rubbing alcohol. Ensure dry. |
| 2 | Apply Paint | Thin coats with a fine brush. Fill scratch only. |
| 3 | Dry | Allow ample drying time between coats. |
| 4 | Level (Optional) | Very fine sandpaper or polishing compound. |
Method 3: For Deep Gouges and Scratches Down to Plastic
When you can see the grey or black plastic, the scratch is deep. This requires filling the void. You’ll be rebuilding the surface.
What You’ll Need:
- Plastic bumper filler (often a two-part epoxy)
- Putty knife or spreader
- Sandpaper (various grits: 180, 320, 600, 1000, 2000+)
- Primer designed for plastic
- Color-matched paint
- Clear coat
- Masking tape and paper
How to Do It:
Start by cleaning the area thoroughly. Then, use a coarser sandpaper (like 180 grit) to lightly sand the edges of the scratch. This helps the filler stick better.
Clean away the dust.
Mix the plastic bumper filler according to the package instructions. You usually mix two parts together. Work quickly, as it starts to harden.
Apply the filler into the scratch using a spreader. Press it down firmly to ensure it fills the entire depth of the scratch.
Make sure the filler is slightly proud (sticking up a little) of the surrounding surface. This is because you’ll be sanding it down. Let the filler cure completely.
This can take several hours.
Once cured, start sanding. Begin with a medium grit (like 320) to shape the filler. Sand it down until it’s flush with the surrounding bumper.
Then, move to finer grits (600, 1000) to smooth it out. The goal is a perfectly smooth surface.
Clean the sanded area well. Mask off the surrounding areas of the car with tape and paper. You don’t want overspray.
Apply a thin coat of plastic primer. Let it dry. You might need two coats.
Sand lightly with very fine grit paper (2000+ grit) if needed.
Now, apply your color-matched paint. Use light, even coats. Let each coat dry before applying the next.
Build up the color gradually. Finally, apply several thin coats of clear coat for protection and shine. Let everything cure fully.
Myth vs. Reality: Bumper Repair
| Myth | Reality |
| Any scratch can be buffed out. | Only light scuffs can be buffed. Deeper scratches need filling or paint. |
| You need professional tools for any repair. | Simple scratches can be fixed with common items. Deeper ones need care but are DIY-able. |
| Filling a scratch is impossible for an amateur. | Plastic fillers and careful sanding make it achievable with practice. |
| Touch-up paint will look perfect. | Touch-up paint requires patience and skill to blend well. |
Dealing with Paint Transfer
Sometimes, the scratch isn’t really a scratch. It’s paint from another car that rubbed off onto yours. This is common in parking lots.
These marks are usually on the surface. They can often be removed with a clay bar or a rubbing compound. First, wash the area well.
Then, try a clay bar kit. Follow the instructions on the kit. It’s like giving your car a deep clean.
If a clay bar doesn’t work, try a rubbing compound. Apply it to a microfiber cloth and rub the transferred paint. It should come off.
Always test in an inconspicuous area first, though this is rare on bumpers.
Stacked Micro-Sections: Paint Transfer Removal
Clean Thoroughly: Always wash and dry the area first.
Clay Bar Method: Use a clay bar and lubricant. Rub gently over the mark.
Compound Method: If clay doesn’t work, use rubbing compound on a cloth.
Gentle Pressure: Avoid harsh scrubbing to protect your car’s paint.
When to Call a Professional
While many bumper scratches are DIY-friendly, there are times when it’s best to seek expert help.
If the bumper is cracked or torn, a simple scratch repair won’t be enough. You might need to replace parts or have it professionally repaired. If the damage is very large or covers a wide area, professional painters have the tools and skills to match the color perfectly.
Also, if you’ve tried a DIY fix and it didn’t work out, or you’re not confident, don’t hesitate to go to a body shop. The cost of a professional repair might save you time and frustration. They can also ensure a factory-like finish.
Consider the age and value of your car. For a brand-new or high-value vehicle, you might want to invest in professional repair to maintain its appearance. For an older car, a DIY fix might be perfectly acceptable.
Tips for Success
Here are some tips to make your bumper repair go smoothly:
- Work in good light: Natural daylight is best. You need to see the scratch clearly.
- Patience is crucial: Rushing can lead to mistakes. Take your time.
- Cleanliness is key: Always start with a clean surface.
- Test in a small area: If unsure, try your method on a hidden spot first.
- Use quality products: Cheap materials can lead to poor results.
- Follow instructions: Especially for fillers, paints, and primers.
- Ventilation: If using paints or compounds, work in a well-ventilated area.
- Layering is better: Thin coats of paint or filler are easier to control.
Observational Flow: DIY Bumper Repair Process
Step 1: Assess – How deep is the scratch? Does it catch your nail?
Step 2: Clean – Wash and dry the bumper area thoroughly.
Step 3: Choose Method – Light scuff? Touch-up paint? Filler?
Step 4: Prepare – Gather all necessary tools and materials.
Step 5: Repair – Apply compound, paint, or filler carefully.
Step 6: Sand & Smooth – Level the repaired area as needed.
Step 7: Finish – Apply primer, paint, and clear coat (if needed).
Step 8: Cure & Protect – Let it dry fully, then wax.
Preventing Future Scratches
Prevention is always better than cure. While you can’t avoid every possible scrape, you can reduce the chances.
Park smart: Choose parking spots that offer more space. Avoid tight spots next to columns or other cars if you can. If possible, park further away from the entrance where there are fewer cars.
Be aware of your surroundings: When driving, be mindful of low branches, bushes, and tight alleyways. When parking, check your mirrors and camera carefully.
Consider protective films: For high-impact areas or if you frequently drive in risky conditions, clear paint protection films (PPF) can be applied to bumpers. These act as a sacrificial layer.
Regular washing: Keeping your car clean helps you spot potential issues early. It also removes abrasive particles that could cause light scuffs.
Contrast Matrix: When to Worry vs. When It’s Normal
| Normal Bumper Scuffs | Concerning Bumper Damage |
| Light, white surface scuffs. | Deep gouges that expose bare plastic. |
| Paint transfer from other vehicles. | Cracks, tears, or holes in the bumper. |
| Minor paint chips on edges. | Large areas of paint missing or peeling. |
| Scratches that don’t catch your fingernail. | Scratches that snag your nail significantly. |
| Small marks from everyday use. | Damage that affects bumper integrity or safety features. |

Frequently Asked Questions
Can I use a magic eraser on my plastic bumper scratches?
Yes, a magic eraser can work on very light scuffs. It’s a fine abrasive. Rub gently in a circular motion.
Be cautious, as too much scrubbing can dull the finish. Always clean the area first.
How long does it take for touch-up paint to dry?
Drying times vary. Most touch-up paints need at least 1-2 hours between thin coats. A full cure can take 24 hours or even longer.
Check the product instructions. Avoid touching the painted area until it’s fully dry.
What is the best way to blend touch-up paint?
The best way is to apply very thin coats. Let each coat dry before applying the next. This helps the new paint level out.
Once fully dry, you can very lightly wet-sand with extremely fine grit sandpaper (3000+) or use a polishing compound to blend the edges. This takes a steady hand.
Can I use regular household fillers for bumper scratches?
It’s best to use fillers specifically designed for plastic bumpers. Household fillers might not be flexible enough. They could crack or peel off as the bumper flexes.
Plastic fillers are made to move with the plastic.
How can I tell if my bumper needs professional repair?
If the bumper is cracked, torn, or has deep damage affecting its shape, it likely needs professional attention. Also, if you’re not comfortable with sanding and painting, or if the scratch is very large, a professional repair is a good idea.
Will fixing scratches affect my car’s resale value?
Yes, fixing scratches can help maintain or improve your car’s resale value. A well-maintained car looks better and commands a higher price. Leaving scratches can make the car look neglected.
Final Thoughts
Scratches on a plastic bumper don’t have to be a permanent eyesore. With a little knowledge and some patience, you can often smooth things over yourself. Start by assessing the damage.
Then, choose the right method for the job, from simple buffing to more involved filling and painting. Remember to work clean and take your time. You’ll likely be surprised at how good your bumper can look again.