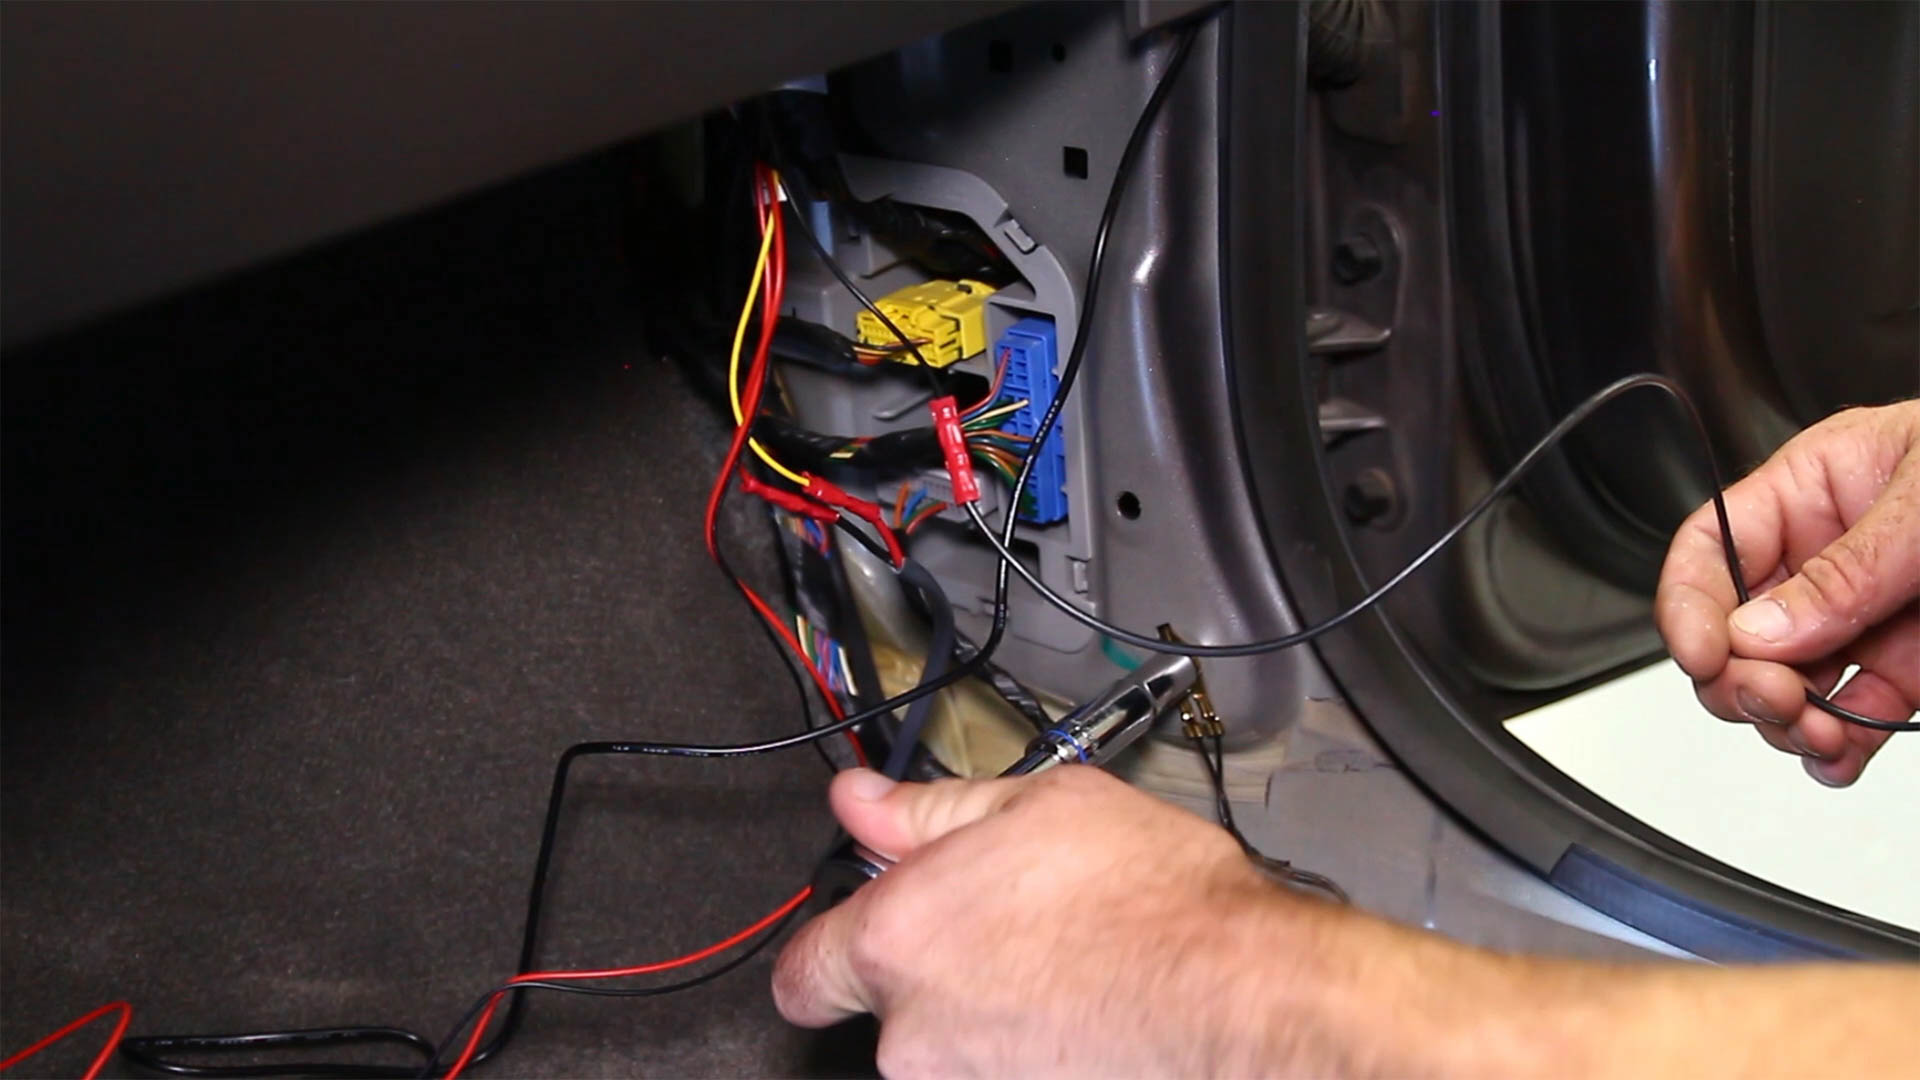
How to Ground a Wire in a Car: Safe Step-by-Step Guide
To ground a wire in a car, strip the bare end, crimp on a ring terminal, and bolt it to a clean, unpainted spot on the metal chassis that runs back to the battery’s negative terminal. Skip a step here and you get flickering lights, a whining stereo, or a part that never powers on at all.
Most guides skip the one step that actually causes DIY electrical fires and shorts: which battery terminal to disconnect first, and why the ground point matters more than the wire itself. This guide covers both, plus the wire gauge most people get wrong when grounding an amplifier or accessory.
What You Will Need
You do not need a full toolbox for this. A wire stripper, a crimping tool, and a digital multimeter cover the electrical side; a socket wrench or screwdriver that matches your chosen bolt covers the mechanical side.
- Wire stripper and crimping tool
- Ring terminals sized to both the wire gauge and the bolt you’re using
- Digital multimeter (for a continuity check after you’re done)
- Wire brush or 120-grit sandpaper, to clean the ground point to bare metal
- Socket wrench or screwdriver set, matched to the bolt or stud you’ll use
- Heat-shrink tubing or electrical tape to seal the crimped terminal
- Dielectric grease or anti-corrosion spray for the finished connection
BEST FOR CRIMPING A CLEAN GROUND CONNECTION
 |
Nilight 135-Piece Heat Shrink Ring Terminal Kit – $15.29 A properly crimped, sealed ring terminal is what actually holds your ground wire to the bolt — a twisted bare wire under a screw works loose and corrodes.
|
Safety First: Disconnect the Battery the Right Way
Before you touch a single wire, turn off the ignition, remove the key, and disconnect the negative (–) battery terminal first, not the positive one. The negative terminal is already connected to the chassis ground, so disconnecting it first means a wrench that accidentally touches metal cannot complete a circuit back to the battery. If you disconnect positive first, that same slip can cause a short or a spark near the battery. See our guide on which terminal to connect and disconnect first on a car battery if you’re not sure which post is which.
Once the negative cable is off, set it aside so it cannot swing back and touch the terminal or any metal on the car. Work in a dry, well-ventilated space, keep the area free of fuel or flammable vapors, and wear safety glasses when cleaning metal with a wire brush or sandpaper. Reconnect the negative terminal last, only after every new connection is tight and tested.
One caution most DIY guides leave out: never add an aftermarket ground wire to airbag (SRS), ABS, or engine control module wiring. Those systems already have factory-calibrated grounds, and an extra connection can throw off sensor readings or disable a safety system. Stick to accessory circuits like stereos, lights, amplifiers, and gauges, and leave factory safety systems to a professional.
How to Find a Good Grounding Point
The best grounding points are existing factory ground bolts, the same bolts and studs the manufacturer already used to ground the body’s own wiring harness. Look under the dash, in the engine bay near the fender, inside the trunk near the taillight harness, or under a seat. These points already have a direct, low-resistance path back to the battery’s negative terminal, which is the whole point of grounding.
Avoid anything with a rubber isolation mount, such as an engine cradle bushing or a body mount bushing, since rubber blocks electrical flow instead of carrying it. Also skip moving parts like hinges and latches, and any bracket that is only screwed into plastic trim rather than bolted through metal.
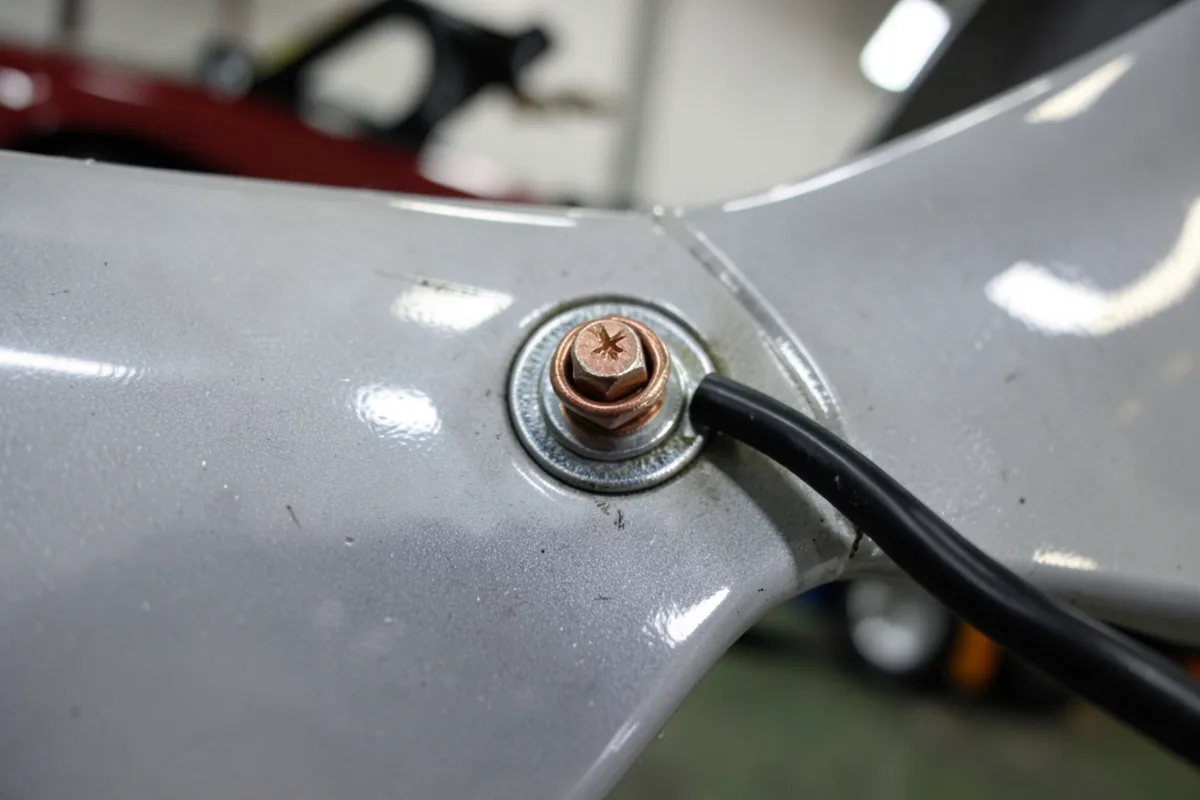
Preparing the Grounding Surface
Paint, primer, rust, and factory undercoating all block electricity, even though the metal underneath conducts it fine. Once you’ve picked a bolt or stud, remove it (or loosen it if it’s a stud with a nut), and scrub the surrounding area with a wire brush or 120-grit sandpaper until you see bright, shiny bare metal in a ring at least as wide as your terminal. Wipe away the dust with a clean rag so grit does not get trapped under the terminal.
Choosing the Right Wire Gauge
Wire gauge is the part most tutorials skip, and it’s the reason a “properly grounded” amplifier can still cut out under bass. As a rule, your ground wire should match or exceed the gauge of the power wire feeding that same circuit, and the run should be as short and direct as possible, ideally under three feet.
For small accessories like an interior light, a relay, or a dash cam, 18 to 16 AWG is normally enough. For a car audio amplifier, do the math instead of guessing: divide the amp’s RMS wattage by 13.8 volts (a running charging system, not the resting 12.6 volts) to get the current draw, then match that to a wire gauge chart. A 1,000-watt amplifier draws roughly 72 amps, which calls for 4 AWG wire on a short run or 2 AWG if the run is longer than about 15 feet. If you’re wiring a full audio system rather than one ground point, our guide on how to wire car audio the right way walks through power and ground wire sizing together.
Connecting the Ground Wire: Step-by-Step
- With the negative battery terminal already disconnected, measure the wire to the shortest practical length and cut it.
- Strip about 3/8 to 1/2 inch of insulation from the end, exposing bare copper without nicking the strands.
- Crimp a ring terminal sized to your bolt onto the bare wire, then slide on and shrink a piece of heat-shrink tubing over the joint to seal out moisture.
- Clean the grounding point to bare, shiny metal as described above, then wipe it dry.
- Place the ring terminal flat over the bolt or stud, add a star or lock washer (not a flat washer alone) to bite through any remaining oxidation, then thread on the nut or bolt.
- Tighten firmly with a wrench or screwdriver until snug, but stop before you strip the threads. A light coat of dielectric grease around the outside of the finished joint, not between the metal-to-metal contact surfaces, helps keep corrosion out.
- Reconnect the negative battery terminal last, and only after every new connection is tight.
Testing the Ground Connection
With the battery still disconnected, set a digital multimeter to its continuity or lowest ohms setting. Touch one probe to the new ring terminal (or the bare wire end) and the other probe directly to a known-good chassis ground, such as the spot where the battery’s negative cable normally bolts on. A continuity beep, or a reading close to 0 ohms, means the connection is solid. A reading in the hundreds of ohms, or no beep at all, means paint, rust, or a loose bolt is still blocking the path, and you should reclean the point and retighten before moving on.
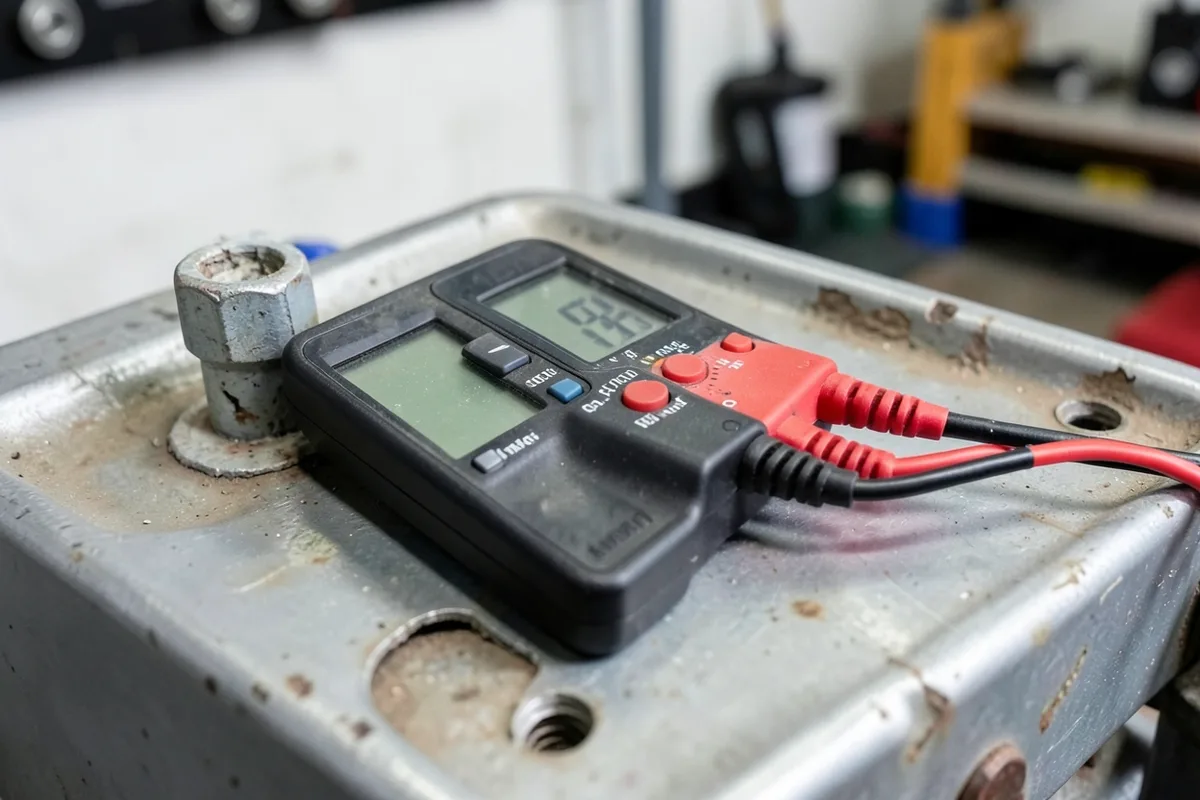
Only after the continuity test passes should you reconnect the negative battery terminal and power the circuit back on. Test the actual device, whether that’s a light, a stereo, or an amplifier, to confirm it works before you button up any panels you removed.
Troubleshooting Common Grounding Problems
If a device is flickering, cutting out, or not powering on at all after you’ve grounded it, start by checking that the connection is actually tight; a bolt that backed off half a turn is enough to break continuity intermittently. Next, clean the ground point again. Dirt, rust, or leftover paint under the terminal is the single most common cause of a “bad ground,” and it’s easy to miss on the first pass, especially in a dim engine bay or under a seat.
Check the wire itself for nicks, corrosion creeping up under the insulation (a wire that looks fine on the outside but is green and crusty where it enters the terminal), or a loose crimp. Re-test with a multimeter after each fix; a good ground point should read close to 0 ohms to the battery’s negative terminal. If it does not, move to a different, cleaner bolt rather than fighting the original spot.
Keeping Ground Connections Working Long-Term
Inspect Ground Wires Periodically
Check accessible ground connections every few months, or any time you notice flickering lights or an electrical gremlin. Look for a loose bolt, a frayed or heat-damaged wire, or a connection sitting too close to an exhaust pipe or moving part. A quick visual check with a flashlight catches most problems before they turn into a no-start or a dead accessory. If you’d like the wiring itself to look cleaner while you’re in there, see our guide on how to hide car wires for a clean look.
Prevent Corrosion Before It Starts
Moisture is what turns a clean ground connection into a corroded one over time. A thin layer of dielectric grease or an anti-corrosion spray around the outside of the finished terminal, plus a properly shrunk piece of heat-shrink tubing over the crimp itself, keeps water and road salt out. If you do spot surface rust starting on a ground point, clean it back to bare metal right away rather than grounding over it; rust under a terminal only gets worse.
Conclusion
Grounding a wire in a car comes down to three things: a clean, bare-metal point that has a direct path back to the battery’s negative terminal, a properly sized and crimped ring terminal, and a bolt tightened firmly enough to bite through any remaining oxidation. Disconnect the negative battery terminal before you start, test the finished connection with a multimeter, and reconnect the battery last. Skip any of those steps and the most likely result is a flickering light or a noisy stereo, not a dramatic failure, which is exactly why bad grounds are so easy to overlook until you know what to check.
Frequently Asked Questions
What Can I Use as a Ground in My Car?
Use the car’s metal chassis or body as the ground, ideally an existing factory ground bolt near the circuit you’re working on. Connect the wire’s ring terminal to a clean, bare metal surface with the paint, rust, and coatings removed, and check the connection with a multimeter before you rely on it.
What Happens If You Do Not Ground a Wire in a Car?
An ungrounded circuit cannot complete, so the device it powers will not work at all, or it will work erratically. Common symptoms include flickering lights, a stereo or amplifier that cuts in and out, static or whining noise through speakers, and in some cases a blown fuse from the circuit trying to find a path to ground through something it shouldn’t.
How Do You Ground Yourself Before Working in a Car?
Touch a bare metal part of the car, such as the door frame or hood latch, before handling sensitive electronics to discharge any static buildup from your body. This matters most when working with airbag control modules or aftermarket electronics that can be damaged by static discharge, not for basic wiring work.
How Do You Fix a Bad Ground Wire in a Car?
Disconnect the negative battery terminal, then locate the ground connection and inspect it for corrosion, a loose bolt, or a damaged wire. Clean the point back to bare metal with a wire brush, replace the terminal if it’s corroded or loose in its crimp, reconnect it with a lock washer, and tighten firmly. Reconnect the battery and test with a multimeter to confirm the reading is close to 0 ohms.
What Gauge Wire Should You Use to Ground a Car Amplifier?
Match the ground wire gauge to the power wire feeding the same amplifier, not to a generic chart. Divide the amp’s RMS wattage by 13.8 volts to estimate the current draw, then size the wire accordingly; a 500-watt amp typically needs 4 to 8 AWG, while a 1,000-watt amp usually calls for 4 AWG or heavier. Keep the ground wire run as short as possible, since a longer path adds resistance the amplifier has to fight against.
Products related to this article
Sponsored / affiliate links. As an Amazon Associate I earn from qualifying purchases. I may earn additional commission from eligible campaigns.