How To Install A Car Seat In The Middle Seat Without Latch
Getting a car seat installed securely in the middle seat without LATCH relies on using the vehicle’s seat belt correctly. You’ll thread the seat belt through the correct car seat belt path, ensure it’s locked using a locking clip or the vehicle’s built-in locking mechanism, and pull it tight. The goal is to remove all slack, making the seat feel like part of the car.
Understanding Seat Belt Installation for the Middle Seat
Installing a car seat can feel tricky. Especially when you move beyond the usual spots. The middle seat in your car might seem like the safest place.
This is because it’s farthest from side impacts. But not all cars have the LATCH system in the middle. LATCH stands for Lower Anchors and Tethers for CHildren.
It’s a system that helps you attach car seats without using the car’s seat belts.
When LATCH isn’t in the middle, you’ll need to use the car’s seat belt. This method is just as safe when done right. The key is a tight, secure fit.
You need to make sure the car seat doesn’t wiggle much. It should feel like it’s one with the car’s seat.
Many parents worry if the seat belt method is truly secure. The good news is that car seats are designed to be installed either way. Both LATCH and seat belt installations are tested for safety.
Your car’s owner manual will have details. Your car seat’s manual is also very important. Always check both.
The middle seat often has a seat belt that retracts. This means it pulls back into the car when you extend it. Most newer cars have a locking mechanism for these belts.
This lets you lock the belt so it stays tight. Older cars might need a separate locking clip. This little metal clip is vital for securing the belt.
Your goal is to get the car seat to move less than one inch. This check is usually side to side and front to back. When you push on the car seat base at the belt path, it shouldn’t move more than that.
This is the standard test for a secure install. Even without LATCH, you can achieve this with a seat belt.
So, if you’re looking at that middle seat and thinking, “Can I do this without LATCH?”, the answer is a definite yes. It just takes a little more attention to detail with the seat belt itself. Let’s break down exactly how to do it.
My First Middle Seat Struggle (Story Mode)
I remember the day I decided to try putting the infant car seat in the middle. My daughter, Lily, was just a few months old. My husband was out of town, and I had to take her to my mom’s.
I looked at the side seats. They felt so close to the doors. The middle seat looked like a safe island.
But then I looked at the car seat. No LATCH connectors in the middle! My heart sank a little.
I felt a wave of panic. Was she going to be safe? I had always used LATCH.
It felt so simple. Now, I was faced with this puzzle. I didn’t want to make a mistake that put her at risk.
The car seat manual felt like a foreign language. I sat there for a moment, holding Lily, feeling a bit overwhelmed. The car seat base felt heavy and awkward on the seat.
I wanted her to be secure, not just placed there.
I took a deep breath. I knew I had to figure this out. I remembered seeing a little metal clip in the car seat box.
I hadn’t paid much attention to it before. Now, it seemed like my most important tool. I dug out both manuals.
The car seat one and the car’s manual. It was a slow process. I reread sections multiple times.
I tried threading the seat belt. It felt loose. I tightened it.
It still had too much give. My hands started to ache from pulling. The sun was setting outside, casting long shadows in the car.
I could feel my frustration growing. But I kept telling myself, “Just get it to move less than an inch.” Finally, after what felt like forever, I felt it. The base was snug.
I wiggled it. It barely budged. A huge sigh of relief escaped me.
I had done it. It wasn’t as scary as I thought. It just required focus and following the steps carefully.
Key Steps for Seat Belt Installation (No LATCH)
1. Check Manuals: Always read your car seat and vehicle manuals first. They have specific instructions for your car and seat.
2. Find the Belt Path: Locate the correct belt path on your car seat. This is usually marked with a sticker or written in the manual.
3. Lock the Seat Belt: Understand how your car’s seat belt locks. Most newer cars have an auto-retracting, locking belt.
Older cars might need a locking clip.
4. Install the Seat: Thread the seat belt through the belt path. Buckle it.
Pull the shoulder belt as tight as possible to remove slack.
5. Lock it Tight: Engage the car’s locking mechanism or add the locking clip. Re-check for tightness.
What You Need: Tools for a Secure Fit
To install a car seat in the middle seat using only the seat belt, you might need a couple of specific items. But don’t worry, most of these are simple and often come with your car seat. The most important thing is understanding what they do.
Your Car Seat: This is the primary tool. Every car seat has a built-in system for installation. For a rear-facing seat, you’ll usually use a specific belt path on the seat’s base.
For a forward-facing seat, there’s a different belt path.
Vehicle Seat Belt: This is your anchor. You’ll thread the vehicle’s lap and shoulder belt through the car seat’s designated belt path. It’s crucial to use the correct path for your seat’s direction (rear-facing or forward-facing).
Locking Clip (Maybe): Not all cars require a separate locking clip. Many modern vehicles have seat belts that lock automatically when pulled out all the way. These are often called “retracting lap and shoulder belts” or “automatic locking retractors.” Check your car’s owner manual to see if your belts lock automatically.
If they don’t, you will likely need a locking clip. This is a small metal device that slides onto the seat belt. It prevents the belt from loosening after you tighten it.
Tether Strap (for Forward-Facing Seats): If you are installing a forward-facing car seat, you will almost always use a top tether. This strap attaches to an anchor point in your car behind the seat. It significantly reduces forward head movement in a crash.
Always use it when your seat is facing forward. Check your car seat manual for where to attach it. Your car should have designated tether anchor points.
Your Hands (and Some Strength!): This might sound silly, but installing a car seat securely often requires a good amount of physical effort. You need to be able to pull the seat belt very, very tight. Sometimes it helps to put your weight on the car seat base while you pull the belt.
This helps you get out as much slack as possible.
Knowing what tools you have and how they work makes a big difference. Don’t be afraid to look at your car seat and your car’s manual. They are your best resources for a safe installation.
Seat Belt Locking Mechanisms: What to Look For
Auto-Locking Retractor: This is common in newer cars. You pull the seat belt out slowly. When it reaches its full length, it starts to retract.
You’ll hear a clicking sound as it goes back. Pull it out all the way first, let it retract a bit, and then it should lock.
Locking Clip: This is a small, metal C-shaped clip. It comes with many car seats. You slide the seat belt through it and close the clip.
It’s used when your car’s seat belt doesn’t lock on its own. Your car seat manual will show you how to use it.
Fixed Retractor: Older cars might have seat belts that do not lock automatically. They might only lock when the buckle is engaged. These belts are harder to use for car seat installation.
Check your manual. You will likely need a locking clip.
Rear-Facing Installation in the Middle
For infants and younger toddlers, the car seat faces the rear. This is the safest position for them. Installing a rear-facing seat in the middle without LATCH involves careful attention to the seat belt path.
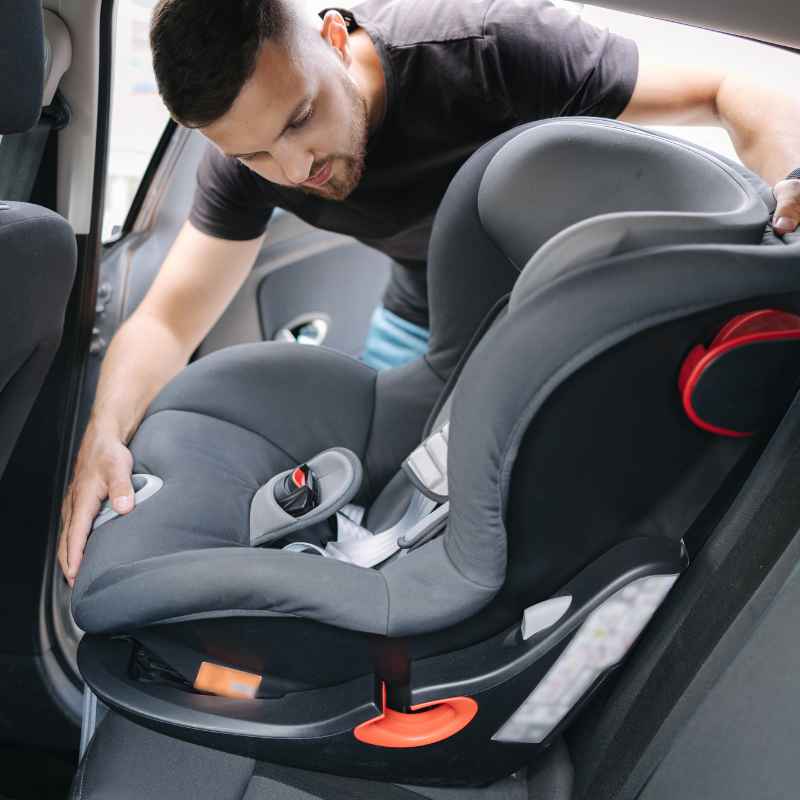
First, place the car seat base on the middle seat. Make sure it’s flat and level. Many car seats have a level indicator to help you.
This ensures the seat is at the right angle for your baby’s airway. For rear-facing seats, the belt path is usually on the back of the base or lower down on the sides.
Find the correct belt path on the car seat. It will be clearly marked. Now, take your vehicle’s seat belt.
Extend the lap and shoulder belt. Thread it through the rear-facing belt path. Buckle the seat belt.
The buckle should click securely into the buckle receiver.
This is where the tightening comes in. You need to get all the slack out of the belt. Push down firmly on the car seat base with your knee or hand.
While pushing down, pull the shoulder belt of the vehicle’s seat belt as tightly as you can. You want to pull it as far back into the retractor as it will go. This removes any looseness.
Next, you need to lock the belt. If your car has an auto-locking retractor, you might have already engaged it by pulling the belt all the way out. If not, or if you’re unsure, consult your car manual.
You might need to pull the belt out fully, let it retract about an inch, and then it will lock. If your car’s belt does not lock, you’ll use the locking clip. Slide the seat belt through the locking clip.
Then, put the seat belt through the correct belt path. Make sure the locking clip is positioned as close to the buckle as possible, without interfering with it. Then, pull the shoulder belt to tighten everything and engage the clip.
Once the belt is buckled and locked, test the installation. Grab the car seat base at the belt path. Try to move it side to side and front to back.
It should not move more than one inch in any direction. If it moves more, you need to try again. You might need to put more weight into it or try a different approach to tightening.
Remember to check your car seat manual for any specific instructions about recline angles or foot của the base. Some seats have adjustable feet to help achieve the correct recline. The goal is a snug, secure fit that will keep your baby safe.
Rear-Facing Recline Angle Matters
Why it’s important: A rear-facing infant’s head is heavy. Their neck muscles are still developing. An incorrect recline angle can cause their head to fall forward.
This can block their airway. This is very dangerous.
How to check: Most car seat bases have a built-in level indicator. This might be a bubble or a line. Make sure the indicator shows the correct angle for your child’s age and weight.
If your car seat doesn’t have a level, use a rolled-up towel or pool noodle under the base. This can help achieve the right recline. Always refer to your car seat manual for specific guidance on recline angles.
Forward-Facing Installation in the Middle
When your child outgrows their rear-facing seat, they will move to a forward-facing car seat. This also has a specific installation process when using the seat belt in the middle, and it includes the top tether.
Place the forward-facing car seat on the middle seat. Ensure it sits flat. Check your car seat manual for the correct belt path for forward-facing installation.
This path is usually on the back of the car seat, often near the top. It’s different from the rear-facing path.
Thread the vehicle’s lap and shoulder belt through the forward-facing belt path. Buckle the seat belt securely. Again, you need to remove all slack.
Push down on the top of the car seat. While pressing down, pull the shoulder belt of the vehicle’s seat belt as tight as possible. You want the seat to feel very secure.
Now, engage the seat belt’s locking mechanism. This is the same process as for rear-facing seats. If your car’s belt locks automatically, ensure it’s engaged.
If you need a locking clip, use it correctly. Attach it to the vehicle belt as shown in your car seat manual. Ensure the clip is close to the buckle but not preventing it from latching.
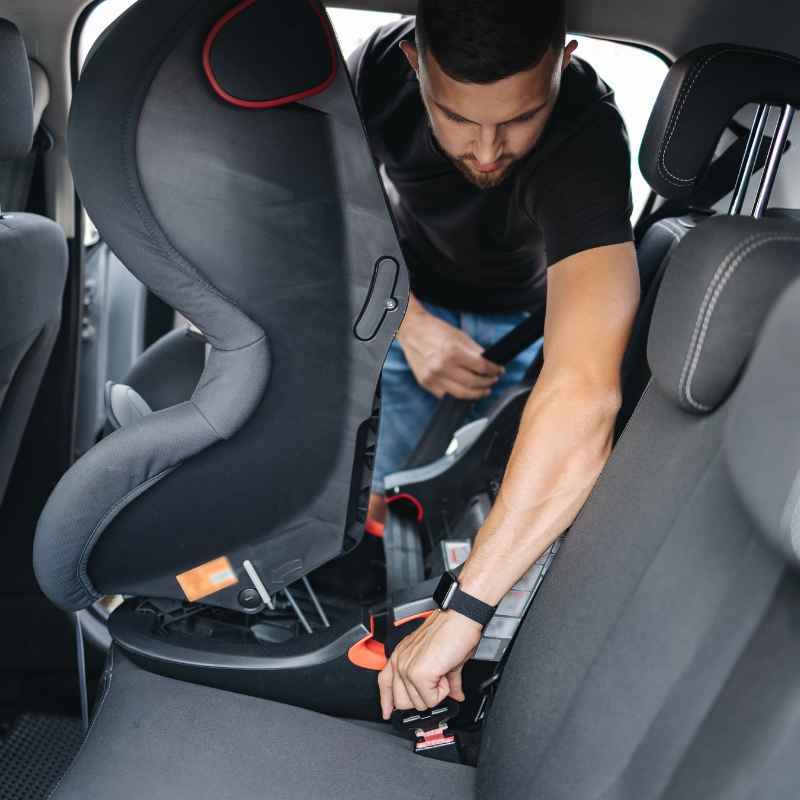
The next crucial step for forward-facing seats is the top tether. Locate the tether strap on your car seat. Find the designated tether anchor point in your vehicle.
These are usually on the back of the seat, the ceiling, or the floor behind the seat. Consult your car owner’s manual if you can’t find it. Attach the tether hook to the anchor point.
Pull the tether strap snug. This strap is very important. It helps prevent the child’s head from moving too far forward in a crash.
It significantly improves safety.
After securing the seat belt and attaching the top tether, perform the wiggle test. Grab the car seat at the belt path. It should not move more than one inch side to side or front to back.
If it moves too much, you need to tighten the seat belt further or re-do the process. Ensure the top tether is also snug. A loose tether won’t provide the full safety benefit.
Always double-check that the seat belt is routed correctly. Ensure it’s not twisted anywhere. A twisted belt can reduce its effectiveness.
Take your time with this. Getting a tight installation with the seat belt and the top tether is vital for your child’s safety in the middle seat.
Top Tether: A Critical Safety Feature
What it is: A strap that attaches from the top of a forward-facing car seat to an anchor point in your vehicle.
Why use it: It limits the forward movement of the child’s head and torso in a crash. This can help prevent neck and head injuries.
When to use it: ALWAYS for forward-facing car seats. Even if your car has LATCH, use the top tether if available.
Where to find anchors: Check your car’s owner manual. They are usually on the rear shelf, seat backs, or floor.
Real-World Contexts: When the Middle Seat Works Best
The middle seat can be a great choice for a car seat. It’s often considered the safest spot in the car. This is because it’s the furthest away from potential side impacts.
Think about driving on busy roads. Cars often pass on your left and right. The middle offers the most buffer zone from those passing vehicles.
In many families, the middle seat is perfect if you have only one car seat. If you have two or more children in the car, sometimes the middle seat is the only way to fit them all. This happens especially if you have a smaller car or larger car seats.
You might need to place one seat in the middle and one behind a front seat. Or, if your car is wide enough, you might fit two seats side-by-side, leaving the middle open for an older passenger.
Let’s consider a common scenario. You have a new baby. Your older child is in preschool.
You need to pick them up from school. They can ride in the middle seat, or behind the driver. The middle seat offers a clear line of sight for the driver to check on the baby.
Many parents like this. They can glance in the rearview mirror and see their little one.
Another situation is long road trips. The middle seat can sometimes be more comfortable for a child if the seats on the sides have awkward angles. Perhaps the car doors are thick, or the seat contours don’t fit a car seat base well.
In these cases, the flatter, more straightforward middle seat can be a better option.
The design of your car plays a role too. Some cars have deeply bucketed side seats. These might not be ideal for a car seat base.
They could cause the seat to tilt incorrectly. The middle seat is often flatter and more uniform. This makes it easier to get a level and secure installation.
However, the middle seat isn’t always the best choice. If your car has a hump in the middle of the floor, it can interfere with getting a good seat belt installation. Also, some center consoles are very tall and might push the car seat forward.
Always check how the seat fits in your specific car.
Ultimately, the “best” spot is the one where you can get the most secure installation. For many, that’s the middle seat, and learning to use the seat belt without LATCH makes this option available.
Quick Scan: Middle Seat vs. Side Seat Safety
Middle Seat Pros:
- Farthest from side impacts.
- Often has a flatter seat design for easier installation.
- Good visibility for parents to check on the child.
Middle Seat Cons:
- May not have LATCH anchors.
- Floor humps or consoles can interfere.
- Can be harder to get older siblings in and out if other seats are present.
Side Seat Pros:
- Almost always has LATCH anchors.
- Easier access for buckling/unbuckling older children.
Side Seat Cons:
- Closer to side impact zones.
- Seat contours can make installation tricky.
What This Means For You: When is it Normal?
It’s completely normal to need to install a car seat in the middle seat without LATCH. Many cars are designed this way. The key is understanding that the vehicle’s seat belt is a perfectly safe way to install a car seat when done correctly.
If your car seat wiggles less than one inch at the belt path, that’s a good sign. It means you’ve likely achieved a secure installation. Don’t obsess over tiny movements.
A little bit of movement is okay. Too much movement means it’s not tight enough.
It’s also normal for it to take a few tries to get it right. Installing a car seat isn’t always intuitive. Many parents struggle with it the first time.
Watching videos, reading manuals, and even getting hands-on help from a certified technician can be very useful.
The angle of the car seat is also normal to check. For rear-facing seats, ensuring the correct recline angle is vital for your baby’s breathing. For forward-facing seats, the angle is usually less critical, but still important for comfort and proper fit.
It’s normal to feel a bit anxious about car seat safety. You want the absolute best for your child. This feeling is good!
It means you’re being a responsible parent. Use that drive to learn and do it right.
What’s not normal? If the seat moves more than one inch. If the seat belt feels loose and you can’t tighten it.
If the car seat is at a very strange angle. These are signs that something isn’t right and you should re-evaluate your installation.
Don’t hesitate to seek professional help. Many fire stations and police departments offer car seat checks. Certified Child Passenger Safety Technicians (CPSTs) can inspect your installation.
They can also show you how to do it correctly. This is a free service in many communities.
Simple Checks for a Secure Fit
The Wiggle Test: Grab the car seat at the belt path (where the seat belt goes through). Try to move it side to side and front to back. It should not move more than 1 inch in any direction.
Belt Tightness: Make sure the seat belt is pulled as tight as possible. You should not be able to slide your fingers between the car seat and the vehicle seat. Push down on the car seat while tightening.
Seat Angle (Rear-Facing): Use the level indicator on your car seat base. Ensure it shows the correct recline angle. This is crucial for infant breathing.
Tether Tightness (Forward-Facing): The top tether strap should be snug. There should be no slack in it.
Quick Fixes & Tips for Middle Seat Installation
When you’re installing a car seat in the middle seat using the seat belt, here are some helpful tips:
Put Your Weight Into It: Don’t be afraid to use your body weight. Sit on the car seat base or push down hard with your knee while you pull the seat belt tight. This is often the secret to getting it snug.
Check the Belt Path: Make sure the seat belt is routed through the correct belt path for the direction your car seat is facing. It’s easy to get this wrong. The manuals are clear about this.
No Twists Allowed: Ensure the seat belt is not twisted at all. A twisted belt is weaker and won’t hold as securely. Smooth it out before you tighten.
Locking Clip Placement: If you use a locking clip, make sure it’s positioned correctly. Usually, it should be right next to the buckle. This prevents the belt from loosening.
Follow the diagram in your manual.
Re-Test After Driving: Seat belts can sometimes loosen slightly after a period of driving. It’s a good idea to re-check the tightness of your car seat installation every few weeks, or after any long trips.
Know Your Vehicle’s Locking System: Spend time understanding how your car’s seat belts lock. Read your car’s owner manual. If you’re unsure, get it checked by a professional.
Use the Top Tether (Forward-Facing): Never forget the top tether for forward-facing seats. It’s a critical safety feature that reduces injury risk significantly.
Consider a Car Seat Technician: If you’re still struggling, reach out to a certified Child Passenger Safety Technician (CPST). They can provide expert help and peace of mind.
Don’t Rely on Memory: Car seat installation can be tricky. Refer to your manuals every time, especially if it’s been a while.
Infographic: Tightening the Seat Belt
Step 1: Buckle the seat belt. Ensure it is not twisted.
Step 2: Apply firm pressure to the car seat base (use your weight!).
Step 3: Pull the shoulder portion of the vehicle seat belt as tight as possible.
Step 4: Engage the car’s locking mechanism or add a locking clip.
Step 5: Re-test the seat for movement. Repeat if needed.
Frequent Questions About Middle Seat Car Seat Installation
Can I install a car seat in the middle seat if my car doesn’t have LATCH there?
Yes, absolutely. You can use the vehicle’s seat belt to install a car seat in the middle seat. This method is just as safe as LATCH when done correctly.
Make sure to follow your car seat and vehicle manuals carefully.
How tight does the seat belt need to be for a car seat installation?
The car seat should not move more than one inch side to side or front to back when tested at the belt path. You need to remove all slack from the seat belt. Putting your weight on the car seat while tightening helps achieve this.
What is a locking clip and do I need one?
A locking clip is a small metal device used to secure the vehicle’s seat belt. You only need one if your car’s seat belt does not lock on its own. Many newer cars have seat belts that lock automatically when pulled out all the way.
Check your car’s owner manual to be sure.
Is the middle seat truly the safest place for a car seat?
For many vehicles and crash types, the middle seat is often considered the safest spot. This is because it offers the most distance from side impacts. However, the most important factor is getting a secure installation.
The safest spot is the one where you can install the car seat most tightly and correctly.
My car seat base has a level, but it won’t sit level in the middle seat. What should I do?
If your car seat base won’t sit level in the middle seat, you might need to use a pool noodle or a tightly rolled towel. Place it under the base at the seat bight (where the seat back meets the seat cushion) to help achieve the correct recline angle. Always check your car seat manual for specific guidance on recline positions.
Can I use the top tether for a rear-facing car seat installed with a seat belt?
No, the top tether is only used for forward-facing car seats. Rear-facing seats use a different system of securing. You do not use the top tether when the car seat is facing the rear.
Your car seat manual will clearly state when to use the tether.
How often should I check my car seat installation?
It’s a good practice to check your car seat installation regularly. You should check it every few weeks and especially after long trips or if the seat has been removed. Seat belts can sometimes loosen over time.
Conclusion
Installing a car seat in the middle seat without LATCH is achievable and safe. It requires understanding your vehicle’s seat belt system. Pay close attention to the belt path and how to lock the belt tightly.
Always refer to your car seat and car manuals. A secure installation means your child is well-protected. Don’t hesitate to get expert help if you’re unsure.
Safe travels!