How To Use A Car Polish Machine Like A Pro (Full Guide)
It’s a common goal for many car owners: that showroom shine. You see it on new cars, or maybe on someone else’s pride and joy at a car show. You wonder how they get that paint so smooth and reflective.
Often, the secret isn’t just a good wash. It’s car polishing. But using a machine can feel a bit daunting.
You might worry about damaging the paint. Or maybe you just don’t know where to start. This guide is here to help you feel confident.
We’ll break down everything you need to know to get that amazing finish right at home.
Getting that mirror-like car finish at home is achievable. A car polish machine, when used correctly, removes swirls and scratches. It makes your car’s paint look deep and vibrant. This guide shows you the steps and tools needed for a professional result.
Understanding Car Polish Machines
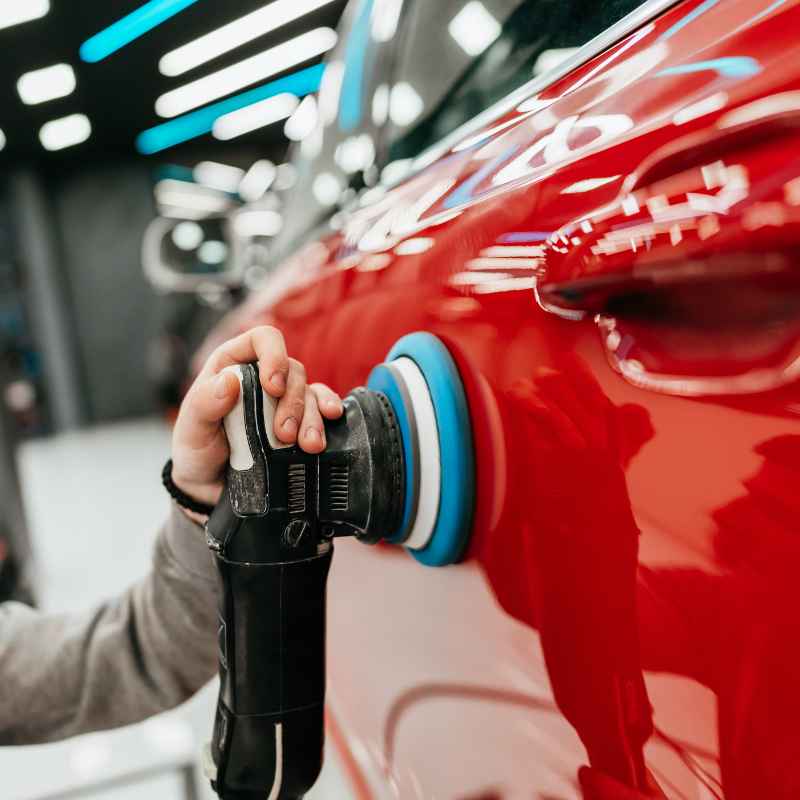
So, what exactly is a car polish machine? Think of it as a power tool for your car’s paint. Its main job is to apply polish evenly.
It also works the polish into the paint’s surface. This process removes minor defects. These include light scratches, swirls, and oxidation.
It leaves the paint looking smooth and shiny.
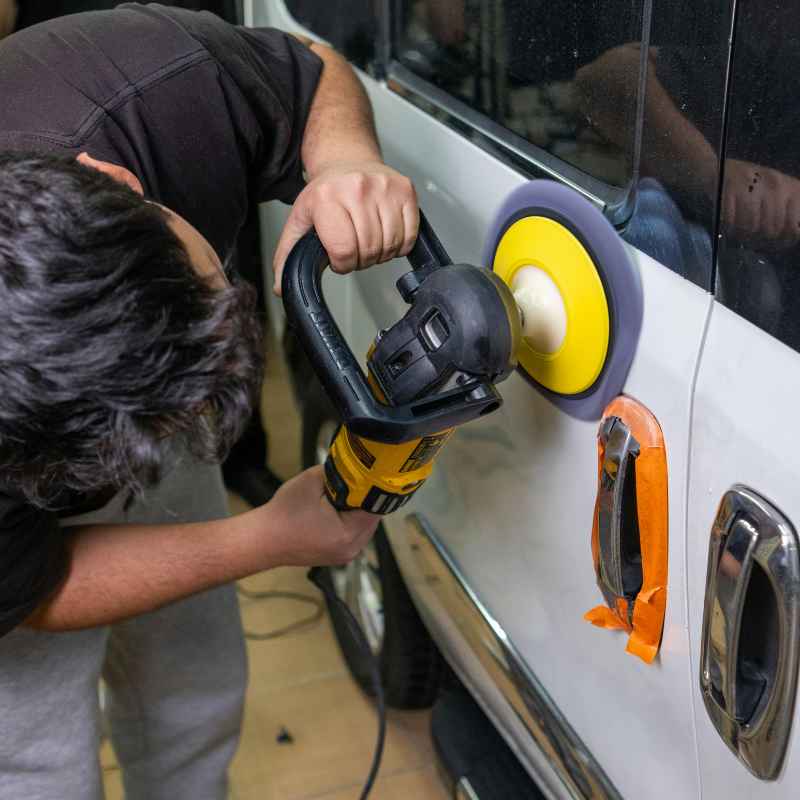
There are a few main types of polishers. The most common for DIY use is the orbital polisher. These move in an oscillating or random pattern.
This makes them much safer for beginners. They are less likely to burn through paint. A rotary polisher spins in one direction.
It’s more aggressive and can remove deeper defects. But it requires more skill. For most home users, an orbital polisher is the way to go.
You’ll often hear them called dual-action (DA) polishers.
The polish itself is a mild abrasive. It works with the machine to level out imperfections. It doesn’t just fill them in.
It actually removes a tiny layer of clear coat. This reveals a fresh, smooth surface underneath. The result is a paint job that looks like new.
Or even better than new.
Gathering Your Essential Tools
Before you even touch a polisher, you need the right gear. This isn’t just about buying a machine. It’s about having a system.
A good car wash is the first step. You need a clean surface to start. Wash your car thoroughly.
Use a pH-neutral car soap. Rinse it well. Then, dry it with soft microfiber towels.
Next, you’ll need detailing clay. Clay is amazing for removing bonded contaminants. Think of things like tree sap, bug guts, or industrial fallout.
These are things a regular wash can’t remove. Claying makes the surface perfectly smooth. This is super important.
Polishing a dirty surface will just grind those contaminants in. That will cause more scratches.
You’ll need a variety of microfiber towels. Have some for drying, some for buffing off polish, and some for cleaning. Make sure they are high quality.
Cheap towels can scratch your paint. You’ll also need polishing pads. These attach to the polisher.
They come in different densities. A foam cutting pad is more aggressive. A foam finishing pad is softer.
You might need a wool pad for heavy correction. Start with foam pads for most jobs.
Polish is key too. Polishes come in different levels of cut. All-in-one (AIO) polishes clean, polish, and protect.
Compound polishes are for heavy defect removal. Finishing polishes are for the final shine. For beginners, a good quality, medium-cut polish is often best.
It can handle light to moderate swirls.
Finally, you need the polisher itself. An orbital polisher is highly recommended for beginners. Look for one that feels comfortable in your hand.
Variable speed control is a must. This lets you adjust the speed for different tasks. A backing plate size of 5 or 6 inches is common and versatile.
Polisher Types at a Glance
Random Orbital (DA) Polishers:
Pros: Safe for beginners, low risk of paint damage, easy to control.
Cons: Slower for heavy correction, less heat generation.
Rotary Polishers:
Pros: Aggressive for fast defect removal, generates more heat.
Cons: High risk of paint damage if used incorrectly, requires more skill.
Gear-Driven Orbital:
Pros: Offers more power than a standard DA, reduces vibration.
Cons: Can still inflict some heat, steeper learning curve than DA.
Preparing Your Car for Polishing
This part is critical. Skipping prep work is the quickest way to a bad result. Or worse, damaged paint.
Start with a thorough wash. Get rid of all surface dirt. Use a good car wash mitt.
Work from top to bottom. Rinse often. Dry the car completely with soft microfiber towels.
Don’t let water spots form.
Next, inspect the paint. Look for any embedded dirt. Feel the surface with your hand.
If it feels rough, you need to clay. Grab your detailing clay. Use a clay lubricant.
Spray it on a small section. Rub the clay back and forth gently. You’ll feel the clay grab and release.
This means it’s picking up contaminants. Wipe the section dry with a microfiber towel. Repeat this process over the entire car.
You’ll be amazed at what comes off.
After claying, wash and dry the car again. This removes any clay residue. Now the paint should feel slick.
It’s ready for the next step. You might also want to use a paint cleaner. This removes old wax or sealants.
It also helps to de-grease the surface. This ensures the polish will bond well. Use an IPA (Isopropyl Alcohol) solution, diluted to around 15-20% with distilled water.
Wipe down the paint. It will evaporate quickly. This step reveals the true condition of your paint.
Masking is also very important. Use painter’s tape. Tape off any plastic trim.
Also tape off rubber seals. You don’t want polish or compound getting on these. It can stain them.
It’s also hard to clean off. Take your time here. Careful taping prevents a messy job.
It shows you’re being thorough. It protects delicate parts of your car.
The Polishing Process: Step-by-Step
Now for the main event. You have your clean, prepped car. You have your tools ready.
It’s time to use the car polish machine. Start with a small, inconspicuous area. This is your test spot.
A lower section of a door panel is good. Or the lower part of a fender.
Attach the correct polishing pad to your polisher. A foam finishing pad is a good start. Or a mild foam cutting pad.
Put a few small drops of polish on the pad. Don’t overdo it. About the size of a nickel or quarter is enough.
Spread the polish over a small section of the paint. About 2×2 feet is a good size to start.
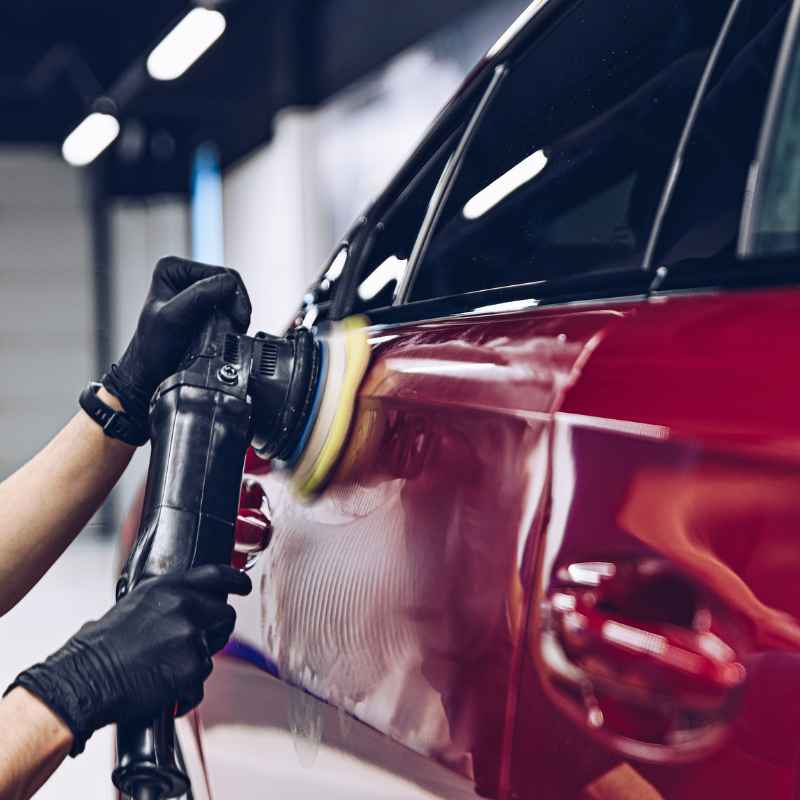
Place the polisher flat on the surface. Start the polisher at a low speed. Then, move it over the taped-off area.
Gently spread the polish. Once it’s spread, increase the speed. A speed setting of 3-4 on most DA polishers is common.
Work the polish over the section. Use light to moderate pressure. Overlap your passes.
Move the machine slowly and evenly. Make about 4-6 slow passes.
Keep the polisher moving at all times. Don’t let it sit in one spot. This can cause heat buildup.
This can damage the paint. After you’ve made your passes, reduce the speed. Spread the polish off the area.
Then, turn off the machine. Use a clean microfiber towel to gently wipe away the polish residue.
Inspect the area. Use a good light source. Look for any remaining polish haze.
Look for any swirl marks. If the swirls are gone, you’ve found your method. If they’re still there, you might need more passes.
Or you might need a more aggressive pad or polish. This is why you start small. You learn what works for your paint.
Work your way around the car. Panel by panel. Be patient.
Don’t rush. Each section should be polished. Then buffed clean.
Then inspected. If you encounter tougher scratches, you might need to switch pads. Or use a more aggressive polish.
Always follow up with a less aggressive polish. This refines the finish. It brings out the gloss.
Quick Pad & Polish Guide
- Heavy Defects (Deep Scratches, Oxidation): Use a wool pad or a firm foam cutting pad with a compound polish.
- Moderate Defects (Swirls, Light Scratches): Use a medium-cut foam pad with a polish.
- Finishing for Gloss (Removing Light Haze): Use a soft finishing foam pad with a fine polish or glazes.
Different Types of Paint Defects
Understanding what you’re looking at helps you fix it. Paint defects aren’t all the same. Some are superficial.
Others go deeper. Knowing the difference helps you choose the right tools. And the right technique.
Swirl Marks: These are fine, circular scratches. They look like spiderwebs. They appear when light hits the paint.
They are usually caused by improper washing. Or by using dirty towels. Or by using abrasive sponges.
Most orbital polishers can remove these easily. Especially with a medium polish and foam pad.
Scratches: These are lines in the paint. They can be light or deep. Light scratches might only be in the clear coat.
These can often be polished out. Deeper scratches go through the clear coat. Or even into the paint color.
These are harder to fix. Sometimes they can be improved. But they may not disappear completely.
For very deep scratches, professional help might be needed. Or a touch-up pen.
Oxidation: This is when the paint fades. It looks dull and chalky. It’s caused by UV rays from the sun.
And by weather exposure. It’s a breakdown of the clear coat. Aggressive polishing or compounding can remove this layer.
It reveals fresh paint underneath.
Water Spots: These are mineral deposits left behind. They form when water evaporates on the surface. They can etch into the clear coat.
Light ones can be polished off. Hard water spots can be stubborn. Sometimes they require a stronger cleaner or polish.
Or even a clay bar.
Bird Droppings and Bug Splatter: These are acidic. They can eat into the clear coat. They cause etching.
If left too long, they create permanent marks. These can often be polished out. But the sooner you remove them, the better.
Defect Depth Matters
Clear Coat Only: Swirls, light scratches, light water spots, most oxidation.
Into Color Coat: Deeper scratches, severe etching from bird droppings.
Into Primer/Metal: Deep gouges, rust spots. These require professional repair or paint touch-up.
When is it Time to Worry?
Most paint imperfections are fixable with careful polishing. But there are times when you need to pause. Or seek professional advice.
If you can feel a scratch with your fingernail, it’s likely deep. It might go through the clear coat. Trying to polish out a deep scratch can remove too much clear coat.
This can create a weak spot.
Look at the paint under good light. If you see large, deep gouges. Or areas where the paint is chipped away.
These are beyond typical polishing. They need body shop attention. Also, be careful around edges.
Like the edge of a hood or door. The clear coat can be thinner there. It’s easier to burn through.
If your car has been repainted. The paint layers might be different. Or thinner than factory paint.
Be extra cautious. Older cars might have older paint. It might be more brittle.
Always test in an inconspicuous area first. If you’re unsure, it’s better to stop. Or consult a professional detailer.
They have seen it all. They know what can and cannot be fixed.
Don’t expect miracles. Polishing enhances the paint. It brings back its life.
But it doesn’t create new paint. If a panel has been heavily damaged. Or has extensive rust.
Polishing won’t fix that. It’s about restoration and protection. Not a complete restoration.
Red Flags for DIY Polishing
- Scratches you can easily catch with a fingernail.
- Deep chips or gouges in the paint.
- Areas of rust forming on the paint surface.
- Paint that feels incredibly thin or has visible peeling.
- Uncertainty about the paint’s history (e.g., aftermarket paint jobs).
Protecting Your Polished Paint
Polishing is hard work. You want that shine to last. Once you’ve polished your car, you need to protect it.
This is the final, crucial step. The polish removes defects. But it leaves the paint bare.
It needs a shield against the elements.
There are several options for protection. Car wax is a traditional choice. It’s easy to apply.
It gives a warm glow. But it doesn’t last very long. Usually only a few weeks to a couple of months.
Synthetic sealants are another option. They are more durable than wax. They can last 4-6 months.
They offer excellent protection and gloss.
For longer-lasting protection, consider ceramic coatings. These are advanced polymer treatments. They bond to the paint.
They create a very hard, durable layer. They can last for years. They offer superior protection against UV rays, chemicals, and light scratches.
Applying a ceramic coating is more involved. It often requires meticulous paint preparation. Some DIY-friendly ceramic sprays are available.
But professional application offers the best results and longevity.
Even after protection, good maintenance is key. Continue to wash your car regularly. Use a pH-neutral soap.
Dry it carefully with microfiber towels. Avoid automatic car washes with harsh brushes. These can put swirls back into your paint.
Keeping the car clean and protected is the best way to maintain that polished finish.
Protection Options Compared
| Option | Ease of Use | Durability | Appearance |
| Wax | Very Easy | 1-2 Months | Warm Glow |
| Synthetic Sealant | Easy | 4-6 Months | Glossy, Slick |
| Ceramic Coating (DIY Spray) | Moderate | 6-12 Months | Deep Shine, Hydrophobic |
| Ceramic Coating (Professional) | Professional Only | 2-5+ Years | Extreme Gloss, Hard Protection |
My First Time Polishing
I remember my first time using a polisher. It was a bright Saturday morning. My car, a dark blue sedan, was covered in swirl marks.
I’d seen those YouTube videos. They made it look so easy. I bought a beginner kit.
It had a dual-action polisher, some pads, and a bottle of polish. I felt a mix of excitement and pure dread.
I spent the entire morning washing and decontaminating the car. I felt like I was doing a good job. Then came the polishing.
I started on the hood. I put way too much polish on the pad. It splattered everywhere.
The machine felt awkward in my hands. I pushed too hard on one spot. I thought I’d burned a hole through the paint.
My heart sank. I quickly lifted the polisher.
I wiped off the polish. And my eyes widened. The area I’d polished looked so much better.
The swirls were gone. The paint had a depth I hadn’t seen before. That small success gave me courage.
I slowed down. I used less polish. I focused on smooth, even passes.
I learned to let the machine do the work. The pressure was light. The movement was consistent.
By the afternoon, the whole car was done. It wasn’t perfect. There were still a few deeper marks.
But the overall transformation was incredible. It was a dirty, humid day, and I was sweating, but seeing that shine under the sun made it all worth it.
Real-World Polishing Scenarios
The Daily Driver: Many people polish their daily drivers. It’s a way to fight the daily grind of dust, dirt, and light scratches. Regular washing and occasional polishing keep it looking good.
It helps preserve the paint’s value. Most daily drivers benefit from a medium polish. This fixes swirl marks from washing.
Then a sealant provides protection. It’s a practical approach for busy owners.
The Weekend Warrior/Enthusiast Car: These cars often get more attention. Owners might use more aggressive polishes. They might go for multi-stage polishing.
This means using different pads and polishes. It’s about achieving the absolute best finish. These owners often opt for ceramic coatings.
They want maximum protection and a deep, wet look.
The Classic Car: Older paint can be delicate. It might be single-stage paint. Or it might have had many repairs over the years.
Polishing a classic requires extra care. Often, a gentler approach is best. A fine polish and a soft pad.
The goal is to clean and enhance. Not to remove too much material. Sometimes, a carnauba wax provides the best glow for classic finishes.
The New Car: Yes, even new cars can benefit from polishing. Factory paint can have minor defects. These happen during transport or at the dealership.
A quick polish and a good sealant can protect that new car finish from day one. It’s like giving it a head start on looking great for years to come.
Tips for Different Paint Types
- Single-Stage Paint (Older Cars): Use very fine polishes. Be extremely cautious. You are polishing pigment and clear coat together.
- Two-Stage Paint (Base Coat/Clear Coat): Most modern cars. Offers more room for correction. Focus on the clear coat layer.
- Matte Paint: Do NOT polish matte paint. It will change the finish. Use specialized matte cleaners and protectants.
- Specialty Finishes (e.g., Chrome, Vinyl Wrap): These require different cleaning and care methods.
Quick Fixes and Pro Tips
Work in the Shade: Never polish your car in direct sunlight. The heat can cause the polish to dry too quickly. It can also make it hard to see what you’re doing.
Find a shaded spot. Or polish early in the morning or late in the evening.
Clean Your Pads: After each section, clean your polishing pad. You can use a brush. Or compressed air.
A dirty pad will just re-apply old residue. It will also scratch the paint. Swap pads if they become heavily loaded.
Don’t Use Too Much Polish: More polish is not better. It just makes a mess. It can also clog your pad.
Start with a few drops. Add more only if needed. You’ll get a feel for it.
Edge Control: Be careful around sharp edges and body lines. The clear coat is often thinner here. Use less pressure.
Or even use your hand to guide the polisher.
Inspect Constantly: Use a good LED inspection light. Or even the sun. Look at your work often.
See if the defects are gone. This saves you from having to re-do sections.
Take Breaks: Polishing can be tiring. Take breaks. Step back and look at your work.
This also helps prevent mistakes when you’re fatigued.
Invest in Good Microfiber: I can’t stress this enough. High-quality microfiber towels are essential. They are soft and absorbent.
They won’t scratch your paint. Wash them separately from other laundry.
Frequently Asked Questions About Using a Car Polish Machine
What is the difference between polishing and waxing?
Polishing uses mild abrasives to remove defects like swirl marks and light scratches. It levels the paint surface. Waxing applies a protective layer over the paint.
It adds shine and protects from the elements. Polishing is about correction. Waxing is about protection and gloss enhancement.
Can I use a drill to polish my car?
You can. Some drills can be fitted with polishing pads. However, most drills lack the controlled speed and oscillation of a dedicated polisher.
This makes them harder to use. They also increase the risk of paint damage. A dedicated dual-action polisher is much safer and more effective for beginners.
How often should I polish my car?
It depends on your car’s condition and how you care for it. For most cars, polishing once a year is sufficient. If your car is heavily exposed to the elements or you notice swirl marks, you might polish more often.
Over-polishing can wear down the clear coat, so don’t do it too frequently.
Do I need to wear gloves when polishing?
It’s a good idea. Polishes and compounds can be messy. Gloves protect your hands from the chemicals.
They also help keep your hands clean. And prevent transferring oils from your skin onto the polishing pads, which can affect performance.
What kind of lighting is best for polishing?
Good lighting is crucial for seeing paint defects. Bright, even light sources are best. Many professionals use specialized LED detailing lights.
These lights mimic sunlight. They show imperfections clearly. Even a good shop light or strong daylight can work if used correctly.
Avoid shadows.
Can polishing remove deep scratches?
Polishing can remove light to moderate scratches. Deep scratches that you can feel with your fingernail often go through the clear coat. Polishing can sometimes improve their appearance.
But it may not remove them entirely. For very deep scratches, professional repair or touch-up paint might be needed.
Conclusion
Using a car polish machine doesn’t have to be intimidating. With the right tools, preparation, and a patient approach, you can achieve stunning results. You’ll be able to fix those annoying swirls and scratches.
And bring back that deep, glossy shine. It’s a rewarding process. It enhances your car’s appearance.
It also helps protect your investment. So grab your gear. Take your time.
And get ready to see your car in a whole new light.