How to Install a Car Sun Visor: OEM Replacement Steps
Installing a car sun visor is usually a 15-minute job: remove the old visor’s mounting screws (and light wiring, if equipped), then screw the new one into the same bracket. Below is the full OEM replacement process, plus how a tool-free clip-on extender differs if that’s the product you actually need.
This guide covers a factory-style replacement sun visor that bolts to your existing mounting bracket, including how to wire up a lighted vanity mirror if your visor has one.
Tools And Materials Needed
Before starting, gather all the necessary tools and materials. You’ll need a screwdriver to loosen and tighten screws, since screws are what hold the visor in place. A measuring tape helps confirm the new visor matches your mounting area, and a marker helps you mark spots if you’re drilling new holes. A plastic trim tool or flathead screwdriver is useful for popping off any caps hiding the screws. Safety goggles protect your eyes during drilling. Lastly, you’ll need the new sun visor itself.
Keep these tools nearby so you’re not stopping midway through the job. Having everything ready before you start makes the whole installation faster and less frustrating.
OEM Replacement Visor vs. Clip-On Sun Visor Extender
Not everyone searching for “sun visor install” needs the same thing. If your factory visor is cracked, sagging, or missing its mirror, you need an OEM-style replacement visor that bolts into the same mounting bracket — that’s the job this article walks through step by step, screws and all.
If instead you just want more glare protection than your factory visor already gives you, a clip-on sun visor extender is the simpler option. It clips directly over the edge of your existing visor in a few seconds, needs no tools or drilling, and flips out of the way when you don’t need it.
SUN VISOR INSTALL & REPAIR PICKS
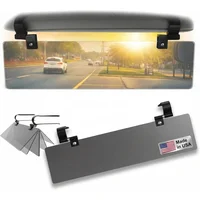
Glare Guard Polarized Sun Visor Extender
Clips onto your factory visor in seconds — no screws, no drilling, no wiring to deal with.
- Best for: Extra glare protection without touching your existing visor
- Why we picked it: Tool-free clip design, 100,000+ units sold, fits most factory visors
- Main drawback: It’s an add-on, not a fix — won’t repair a cracked or sagging visor
Compare more sun visor install & repair options
|
Option 1
Glare Guard Visor Extender
|
Option 2 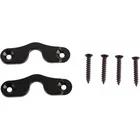 Pilipane Mounting Clip Repair Kit
|
Option 3 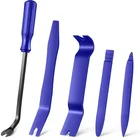 LivTee Trim Removal Tool Kit
|
As an Amazon Associate we earn from qualifying purchases.
Preparing Your Vehicle
First, clean the area where the visor will go using a soft cloth. Remove dust and dirt, and check for sticky spots that need extra cleaning with mild soap and water — avoid strong chemicals. Let the area dry completely; a clean surface helps everything sit flush.
Next, measure the length and width of the new visor and compare it with your car’s visor area to confirm a proper fit. If it’s the wrong size, it won’t mount correctly. Mark the screw locations with a pencil, and double-check your measurements before you start removing anything.
Removing The Old Sun Visor
Many visors hide their mounting screws under small plastic caps. If yours does, gently pry these off first with a flathead screwdriver or plastic trim tool — forcing a screwdriver straight into the cap can crack the plastic. Set the caps aside; you’ll snap them back on later.
With the caps off, find the screws holding the visor in place and remove them with a screwdriver. Keep the screws safe; you’ll need them again. The visor will now be loose and ready to come down.
If your visor has a lighted vanity mirror, carefully detach the wires before pulling the visor free. Pull gently and don’t force anything — make sure all wires are disconnected, then slide the visor rod out of its mounting bracket. Forcing the rod can crack the plastic bracket.
Installing The New Sun Visor
Hold the new sun visor up to the mount and make sure the holes on the visor line up with the holes on the bracket. Check both sides to confirm proper alignment — this is what keeps the visor from wobbling once it’s installed.
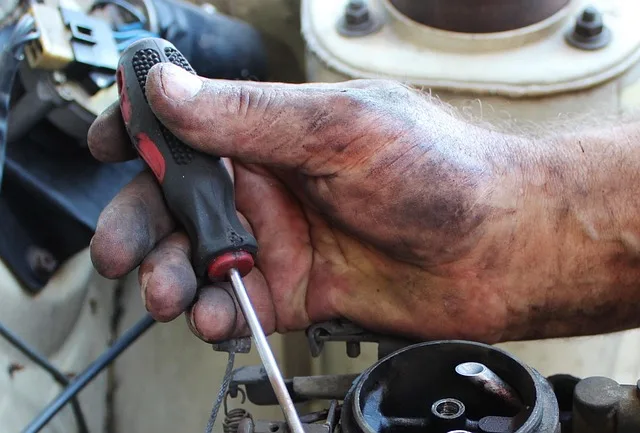
Use a screwdriver to tighten the screws while holding the visor steady with your other hand. Check all screws to make sure they’re secure, but don’t overtighten — that can crack the visor’s plastic mount.
Connecting Electrical Components
If your new visor has a lighted mirror, find the wires near the roof mount and connect the positive wire to the visor’s positive end and the negative wire to its negative end. Use a screwdriver to secure the visor in place once the wires are connected and not pinched.
Turn on the car’s ignition and check that the visor light turns on. If it doesn’t, recheck the wire connections first — a loose or reversed connection is the most common cause. If the wiring looks correct, check the relevant fuse next, since a blown fuse will keep the light from working even with everything else connected properly.
Adjusting And Testing The Sun Visor
Rotate the visor down and adjust it until it blocks the sun without blocking your view of the road. It should also tilt toward the side window and swivel back to the windshield for side-glare coverage.
Push the visor gently to test for wobble. It should hold firm in every position without drifting down on its own while driving — if it doesn’t, go back and tighten the mounting screws.
Maintenance Tips
Installing a car sun visor involves attaching the visor securely to the mounting brackets. Ensure proper alignment and tighten the screws carefully to avoid damage, so the visor stays in place while driving.
Regular Cleaning
Keep your visor clean with a soft cloth and a mild cleaner once a month — avoid harsh chemicals, which can damage the material and any mirror coating.
Checking Screws
Loose screws are the main reason a visor gets wobbly over time. Check them periodically and snug them up with a screwdriver — a visor that falls on its own while driving is a real distraction, so don’t put this off.
Frequently Asked Questions
How are you supposed to put a sun visor on a car?
Align the visor’s mounting holes with the bracket’s holes, then secure it with the original screws (or clips, on some models). Reconnect any light wiring before final installation, then adjust it to block the sun without obstructing your view of the road.
Do I need any tools to install a clip-on sun visor extender?
No. A clip-on sun visor extender simply clips over the edge of your existing factory visor by hand — there’s no drilling, no screws, and nothing to wire up. That’s the main difference between it and an OEM replacement visor, which does require a screwdriver and possibly wiring.
How do I fix my sun visor from falling down?
Tighten any loose mounting screws first, since that fixes most sagging visors. If the pivot itself is worn out, a metal sun visor mounting clip repair kit can reinforce it without replacing the whole visor. Replace broken clips or hinges for a permanent fix if tightening doesn’t help.
Which way is a car sun visor supposed to face?
The sun visor should face downward, toward the windshield, when in use. This position blocks direct sunlight and reduces glare for the driver and front passenger. Swing it toward the side window instead when the sun is coming in from an angle.
Are the mounting screws hidden under plastic caps?
On many vehicles, yes. Small plastic caps snap over the visor’s mounting screws for a cleaner factory look. Pry them off gently with a flathead screwdriver or plastic trim tool before removing the screws underneath, then snap them back into place once the new visor is installed.
Why won’t my sun visor light turn on after installation?
First, double-check that the positive and negative wires are connected to the matching terminals and aren’t pinched under the mounting bracket. If the connections look correct, check the relevant fuse next, since a blown fuse is a common reason the light won’t work even when everything is wired correctly.
Conclusion
Installing a car sun visor is a straightforward job once you know whether you’re replacing the factory visor or just adding a clip-on extender. Gather your tools, take your time with the screws and wiring, and check that the visor holds firm in every position before you call it done.
For more ways to protect your car’s interior from sun damage, see our guide on organizing your visor storage, or check how to fix sagging headliner fabric if you removed your visor as part of a roof repair.
Products related to this article
Sponsored / affiliate links. As an Amazon Associate I earn from qualifying purchases. I may earn additional commission from eligible campaigns.