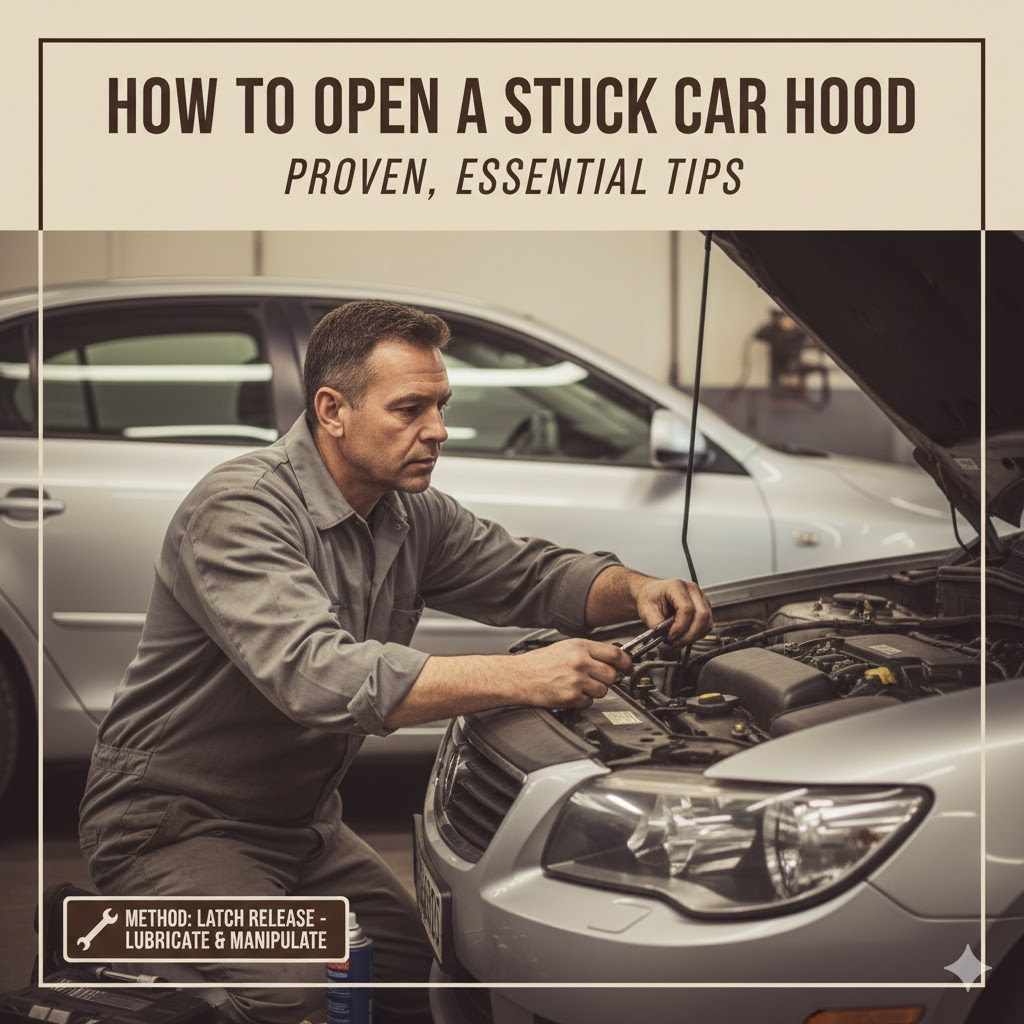
How To Open a Stuck Car Hood: Proven, Essential Tips
To open a stuck car hood, first have a friend pull and hold the interior release lever while you press down firmly on the hood several times, then try to lift it. This often releases a stuck latch. If that fails, check if the release cable is loose or broken and try to pull it directly with pliers.
It’s a frustrating moment we all dread. You pull the hood release lever inside your car, hear a faint click (or nothing at all), and… the hood stays shut. Whether you need to check your oil, top off washer fluid, or investigate a strange noise, a stuck hood can stop you in your tracks. It feels like your own car is locking you out.
Don’t worry! This is a very common issue, and you can often fix it yourself with a little patience and the right technique. You don’t need to be a master mechanic to solve this problem. We’re going to walk through the simple, proven steps to get that hood open safely. Let’s figure this out together and get you back on the road with confidence.
Why Won’t My Hood Open? Common Reasons Explained
Understanding why your hood is stuck is the first step to fixing it. Most of the time, the problem isn’t complicated. It usually comes down to one of three things: the latch, the cable, or a little bit of pressure in the wrong place. Think of it like a sticky door—sometimes it just needs a little jiggle or the right touch to open.
The system is simple: you pull a lever inside, which pulls a long steel cable. That cable pulls on a latch at the front of your car, which releases the hood. When one part of that simple chain has an issue, the whole system stops working. The good news is that we can check each part one by one.
Here’s a quick look at the most common culprits. Seeing them laid out like this can help you figure out where to start looking.
| Common Cause | What It Means | First Thing to Check |
|---|---|---|
| Stuck Latch Mechanism | The latch at the front of the car is jammed with dirt, rust, or grime. | Gently pressing down on the hood while a friend pulls the lever. |
| Stretched or Loose Cable | The cable connecting the lever to the latch has too much slack and isn’t pulling enough. | Feel for tension on the inside release lever. Does it feel loose or floppy? |
| Broken Release Cable | The cable has snapped somewhere between the lever and the latch. | The inside lever moves with zero resistance or feels completely disconnected. |
| Temperature Changes | Metal and rubber parts can expand or contract in extreme heat or cold, causing things to stick. | This is often combined with a dirty latch. Cleaning is the best solution. |

Before You Start: Safety First and Tools You’ll Need
Before we dive in, let’s talk about safety. Working on your car should always be done carefully. We aren’t doing anything dangerous here, but it’s always smart to be prepared. Your safety is more important than anything else. Make sure your car is in a safe and stable position before you begin.
Also, gathering a few basic tools beforehand will make the process much smoother. You probably have most of these in your garage or a basic home toolkit. Having them ready means you won’t have to stop and search for something halfway through the job.
Safety First: Your Non-Negotiable Checklist
Please take a moment to run through these simple safety steps. They only take a minute and ensure you and your car stay safe.
- Park on a Flat Surface: Make sure your car is on level ground, not on a hill or incline.
- Engage the Parking Brake: This is a critical step. Put your parking brake on firmly to prevent the car from rolling.
- Turn Off the Engine: Never work under the hood with the engine running. Make sure the engine is off and the keys are out of the ignition.
- Let the Engine Cool Down: If you were just driving, give the engine at least 30 minutes to cool off. Engine components, especially the radiator and exhaust, can be extremely hot and cause severe burns.
- Wear Protective Gear: A pair of work gloves will protect your hands from dirt, grease, and sharp edges. Safety glasses are also a good idea to protect your eyes.
Essential Tools for the Job
You won’t need a professional mechanic’s toolbox for this. A few simple items are usually all it takes to get the job done.
- A Friend (Highly Recommended): An extra set of hands makes the first and easiest method possible.
- Flashlight: A good, bright flashlight (or your phone’s light) is essential for seeing into the dark areas around the latch and under the car.
- Work Gloves: To keep your hands clean and safe.
- Pliers (Needle-Nose): Very useful for grabbing the release cable if it’s broken or slipped off the lever.
- Screwdriver (Flat-Head): Can be used to gently pry or manipulate the latch mechanism.
- Penetrating Lubricant: A spray like WD-40 or PB B’laster is perfect for loosening a rusty or grimy latch.
Method 1: The “Two-Person” Technique (The Easiest First Step)
This is the first thing you should always try. It’s incredibly simple, requires no tools, and works a surprising amount of the time. The problem is often just a bit of pressure causing the latch to bind. This method helps relieve that pressure.
The goal here is to gently push the hood down, which takes the tension off the latch mechanism. This can allow the latch to release when your friend pulls the lever inside the car. It’s a classic trick that mechanics have used for decades.
- Get Your Helper in Position: Ask your friend to sit in the driver’s seat, ready to pull the hood release lever. Tell them not to pull it yet.
- Position Yourself at the Front: Stand at the front of the car, directly in front of the hood emblem.
- Apply Firm Pressure: Place both of your hands flat on the hood, about a foot back from the front edge. Press down with firm, steady pressure. You can even gently bounce it a few times. You are not trying to dent the hood, just compress it slightly against the latch.
- Coordinate the Pull: While you are pushing down, signal your friend to pull the hood release lever inside the car and hold it out.
- Listen for the Pop: You should hear or feel a “pop” when the latch releases. If it does, you can lift the hood. Don’t forget to find and release the secondary safety latch before lifting the hood all the way.
If this works, congratulations! The problem was likely just a bit of tension. Before you close the hood again, it’s a great idea to spray the latch mechanism with some lubricant to prevent it from sticking in the future. If it didn’t work after a couple of tries, don’t worry. Let’s move on to the next method.
Method 2: Troubleshooting the Hood Release Cable
If the two-person method didn’t work, the next suspect is the hood release cable itself. This cable runs from the lever inside your car to the latch at the front. It can get stretched, disconnected, or even snap over time. We’ll check it at both ends.
Step 1: Check the Interior Release Lever
First, let’s examine the handle inside your car. How does it feel? The answer can tell you a lot about the problem.
- If the Lever Feels Completely Loose: If you pull the lever and there is no resistance at all, it feels like it’s not connected to anything. This almost always means the cable has snapped or has become disconnected from the lever assembly.
- If the Lever Feels Stiff but Nothing Happens: If you can pull the lever and feel tension, the cable is likely still attached. The problem is more likely a stuck latch or a stretched cable that isn’t pulling far enough to release the latch.
If the cable feels disconnected, use your flashlight to look behind the lever. Sometimes, the small metal nub at the end of the cable has simply slipped out of its slot in the plastic handle. If you can see the end of the cable, you may be able to grab it with needle-nose pliers and pull it directly. If you pull the cable with pliers and the hood pops open, you’ve found your problem! You may need to re-secure it or replace the handle assembly.
Step 2: Accessing the Cable from the Front
If the cable is broken somewhere in the middle or has disconnected at the latch end, you’ll need to try and activate the latch manually. This can be tricky and varies greatly between car models, but the principle is the same: you need to find the latch and pull the lever that the cable was supposed to pull.
There are a few ways to approach this, often depending on your car’s design.
- Look Through the Grille: This is the most common and least invasive method. Take your flashlight and peer through the slots in your car’s front grille. You are looking for the latch mechanism, which is usually in the center. You should see a small lever or arm where the cable attaches.
- Use a Tool to Reach It: If you can see the lever, you’ll need a long, thin tool to reach it. A long flat-head screwdriver or a bent piece of a wire coat hanger can work.
- Manipulate the Latch: Carefully guide your tool through the grille and try to hook or push the release lever. You’ll want to move it in the same direction the cable would have pulled it (usually towards the driver’s side of the car). This may take some trial and error. Be patient and gentle to avoid damaging your grille.
- Try from Underneath (Advanced): If you can’t reach the latch through the grille, you may be able to access it from underneath the car. This is more difficult and may require you to safely jack up the car. For beginners, this is often the point where calling a mechanic is the safer choice. For general vehicle safety guidelines, you can always refer to trusted sources like the National Highway Traffic Safety Administration (NHTSA). If you do proceed, look for the cable running towards the latch and try to pull it.
This process requires patience. Every car is different. Sometimes, a quick search online for your specific make and model (e.g., “open stuck hood Toyota Camry 2015″) can show you exactly where the latch is located.
Method 3: Dealing with a Stuck Latch Mechanism
If you’ve confirmed the cable is working but the hood still won’t budge, the problem is almost certainly the latch itself. Over years of exposure to rain, road salt, and dirt, the latch mechanism can become rusty and gummed up, preventing it from moving freely.
Understanding the Latch
The latch is a simple spring-loaded hook. When you close the hood, a striker bar on the hood pushes into the latch, which then hooks around it to hold it shut. Pulling the release cable retracts this hook, allowing the hood to pop up slightly. If that hook is stuck with rust or grime, it won’t retract no matter how hard the cable pulls.
Cleaning and Lubricating the Latch
Our goal is to get some penetrating lubricant onto the moving parts of the latch to free them up. This can sometimes be done even with the hood closed.
- Find an Opening: The hood will likely have a small gap at the front, even when closed. This is your access point.
- Use the Straw: Attach the thin straw that comes with your can of penetrating lubricant (like WD-40). This allows you to direct the spray accurately.
- Spray Generously: Aim the straw into the gap and towards the area where the latch is located. Spray a generous amount of lubricant, trying to coat the entire mechanism. Don’t be shy with it; you want it to soak in and break down the rust and grime.
- Let it Sit: Give the lubricant at least 15-20 minutes to work. It needs time to penetrate the rust and free up the moving parts.
- Try Again: After waiting, go back and try Method 1 (the two-person technique) again. With the latch now lubricated, the gentle pressure and the pull from the lever are often enough to pop it open.
This method is highly effective for latches that are just dirty or have light surface rust. If the hood opens, make sure to clean the latch thoroughly with a wire brush and rag, then apply a thicker grease (like white lithium grease) for long-lasting protection.
Here’s a table comparing the different approaches so you can choose the best one for your situation.
| Method | Best For… | Difficulty | Tools Needed |
|---|---|---|---|
| Two-Person Technique | A latch that is slightly stuck or under pressure. | Easy | A friend |
| Troubleshoot Cable | A broken, loose, or disconnected release cable. | Moderate | Flashlight, Pliers, Screwdriver |
| Lubricate the Latch | A dirty, grimy, or rusty latch mechanism. | Easy to Moderate | Penetrating Lubricant |
| Access from Underneath | When you can’t reach the latch through the grille. | Advanced | Jacks, Jack Stands, Pliers |
What If Nothing Works? When to Call a Professional
It’s important to know when to stop and ask for help. While most stuck hoods can be opened with the methods above, there are times when it’s best to let a professional mechanic take over. There is no shame in this! In fact, it’s the smartest choice if you feel you’re out of your depth.
Consider calling a mobile mechanic or a local repair shop if:
- You have tried all the methods above without success.
- You are not comfortable trying to access the latch from underneath the car.
- You are worried about damaging the grille, paint, or other components of your vehicle.
- The release cable has snapped deep inside the dashboard, where it is very difficult to access.
- You suspect the problem is more complex, such as damage from a minor front-end collision.
A professional has specialized tools and, more importantly, experience with many different makes and models. They can often get a hood open quickly and without causing any damage, saving you time and potential frustration.
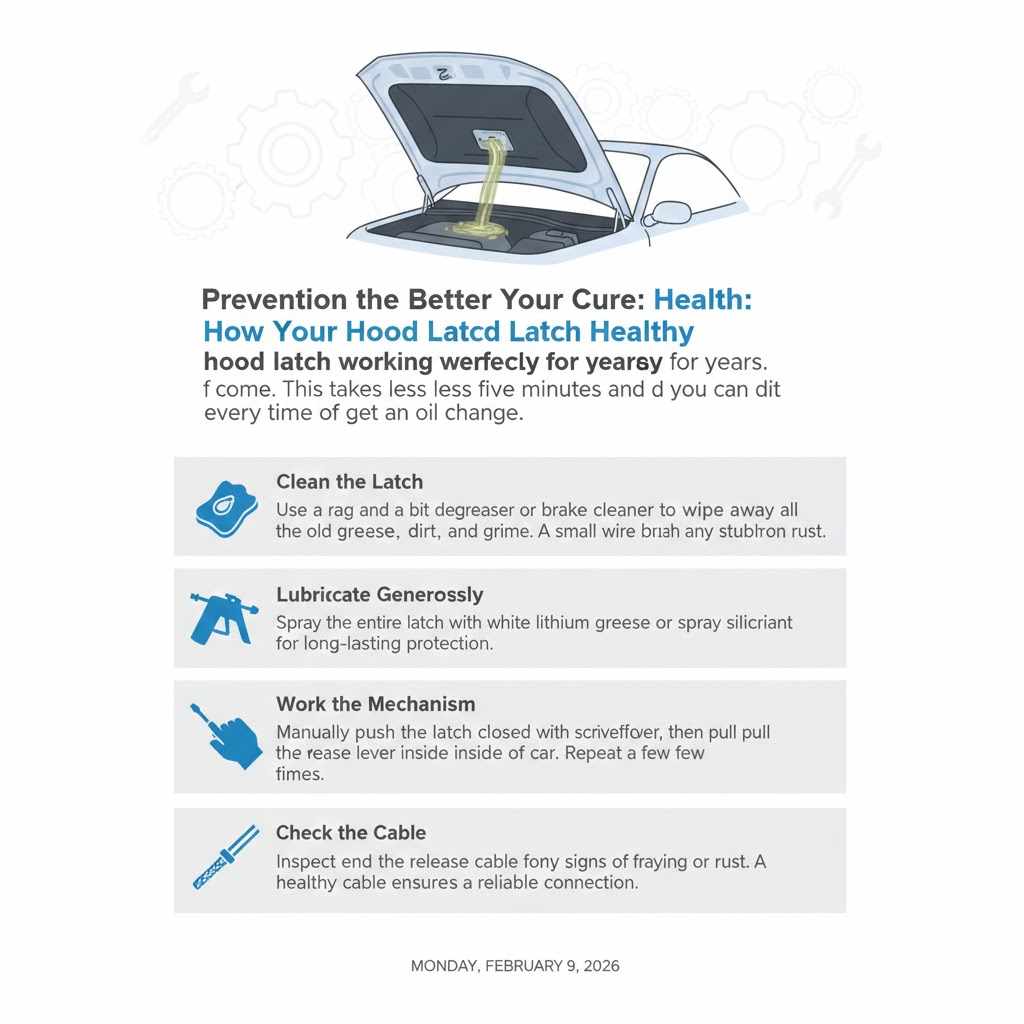
Prevention is Better Than Cure: How to Keep Your Hood Latch Healthy
Once you get your hood open, you’ll want to make sure this never happens again. A little bit of simple, regular maintenance can keep your hood latch working perfectly for years to come. This takes less than five minutes and you can do it every time you get an oil change.
- Clean the Latch: Use a rag and a bit of degreaser or brake cleaner to wipe away all the old grease, dirt, and grime from the latch mechanism. A small wire brush can help with any stubborn rust.
- Lubricate Generously: After cleaning, spray the entire latch mechanism with a quality lubricant. White lithium grease is an excellent choice because it’s thick, water-resistant, and provides long-lasting protection. A spray silicone lubricant also works well.
- Work the Mechanism: Use a screwdriver to manually push the latch into the “closed” position and then pull the release lever inside the car to open it. Do this a few times to work the new lubricant into all the moving parts.
- Check the Cable: While you’re there, inspect the end of the release cable for any signs of fraying or rust. A healthy cable ensures a reliable connection.
Frequently Asked Questions (FAQ)
Here are some quick answers to common questions about stuck car hoods. I hope they help clear things up!
What does it mean if the hood release lever is loose?
A loose or floppy hood release lever with no resistance usually means the release cable has either snapped or become disconnected from the back of the lever assembly. You will need to access the cable directly to open the hood.
Can I drive my car with a stuck hood?
Yes, you can generally drive your car if the hood is stuck closed. The main issue is that you cannot access the engine bay to check fluids or perform necessary maintenance. You should get it fixed as soon as possible, especially if you need to check your oil or coolant levels.
How much does it cost to fix a stuck hood?
The cost can vary widely. If it’s a simple fix like reattaching a cable or lubricating a latch, a mechanic might only charge for a small amount of labor, perhaps $50-$100. If the release cable needs to be replaced, the part is usually inexpensive ($20-$40), but the labor can be more involved, potentially costing $100-$250 depending on the car.
Is WD-40 a good long-term solution for the latch?
WD-40 is excellent for freeing a stuck latch because it’s a penetrating oil that breaks down rust and grime. However, it is not a great long-term lubricant. After you get the hood open and clean the latch, it’s best to apply a thicker, more durable grease like white lithium grease for lasting protection.
My car has a key lock on the grille for the hood. What if that’s stuck?
Some vehicles, particularly older Fords, have a key lock on the front grille. If this is stuck, the problem is often the lock cylinder itself. Try spraying a small amount of graphite lubricant or penetrating oil directly into the keyhole. Gently wiggle the key in the lock to work the lubricant in. Do not force the key, as it could break off in the lock.
The hood popped but won’t lift all the way. What do I do?
This is a great sign! It means the main latch has released. Now you just need to release the secondary safety latch. Slide your hand under the front-center of the hood. You should feel a small lever. You’ll need to push this lever (usually to the side or up) while lifting the hood with your other hand.
Can cold weather make my hood stick?
Absolutely. In freezing temperatures, any moisture on the latch mechanism can freeze, essentially gluing it shut. Additionally, the rubber weatherstripping around the hood can become hard and less pliable, contributing to the problem. In this case, letting the car run for a bit to warm up the engine bay can sometimes help thaw the latch.
A Final Word of Encouragement
Dealing with a stuck car hood can be a real headache, but as you’ve seen, the solution is often simpler than you think. By staying calm, being patient, and working through these steps, you have the power to solve the problem yourself. Remember to always prioritize safety, and don’t hesitate to ask a friend for help or call a professional if you get stuck.
Every time you tackle a small car problem like this, you build confidence and save money. You learn a little more about how your vehicle works, and that knowledge is empowering. You’ve got this! Now that your hood is open, take a moment to perform that preventive maintenance so you won’t have to worry about this again for a long, long time.