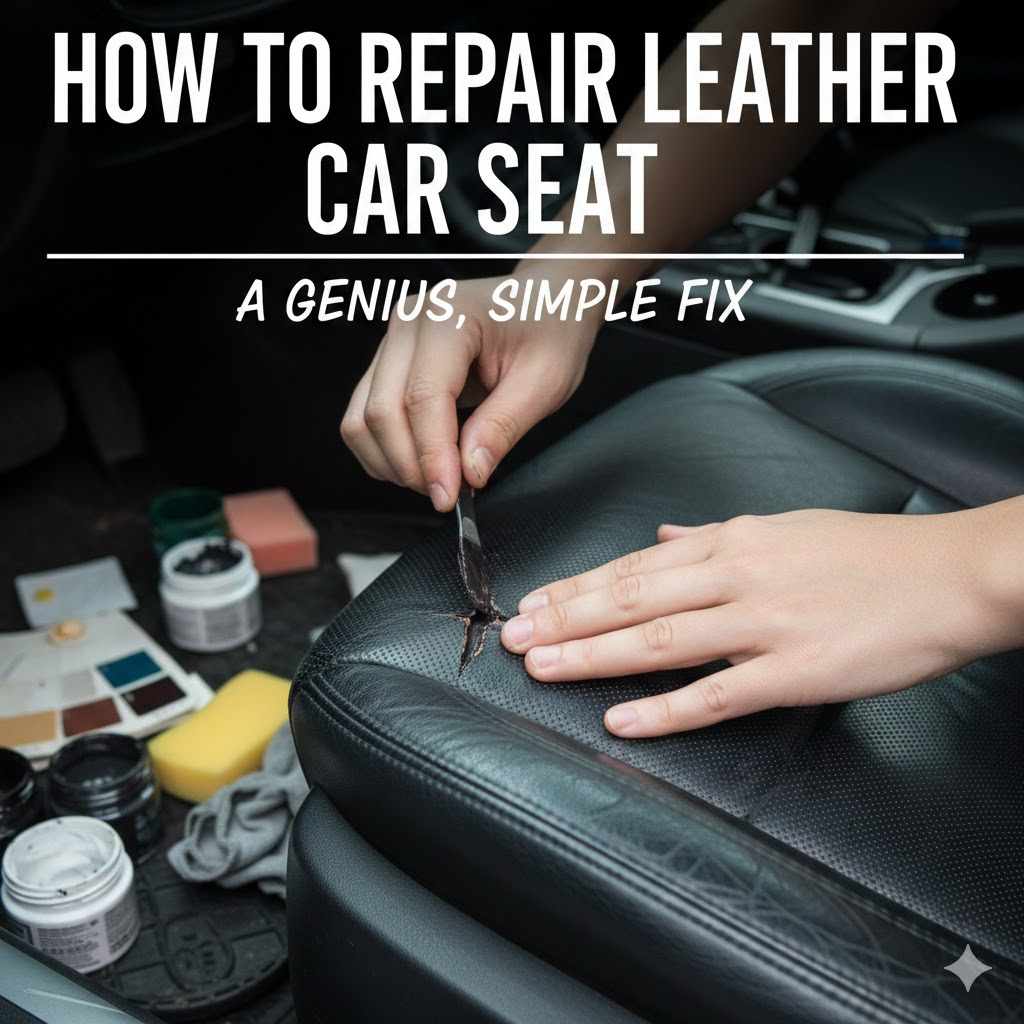
How To Repair Leather Car Seat: A Genius, Simple Fix
To repair a leather car seat, first clean the damaged area thoroughly with a leather cleaner. For tears, insert a sub-patch for support. Apply a flexible leather filler in thin layers, allowing each to dry. Gently sand the filler smooth, then apply a matching colorant with a sponge. Finish with a leather sealant to protect the repair and blend it perfectly.
Hello there! I’m Md Meraj, and I’m here to help you with your car. Seeing a rip, scratch, or crack in your beautiful leather car seat can be so frustrating. It makes your car’s interior look worn out and can lower its value. Many people think fixing it costs a fortune at a professional shop. But I have great news for you.
You can absolutely fix it yourself! It’s easier than you think, and you don’t need to be a car expert. With a simple kit and a little bit of patience, you can make that damage disappear. This guide will walk you through every single step. We’ll turn that annoying eyesore into a repair you can be proud of. Let’s get started and bring your car seats back to life!
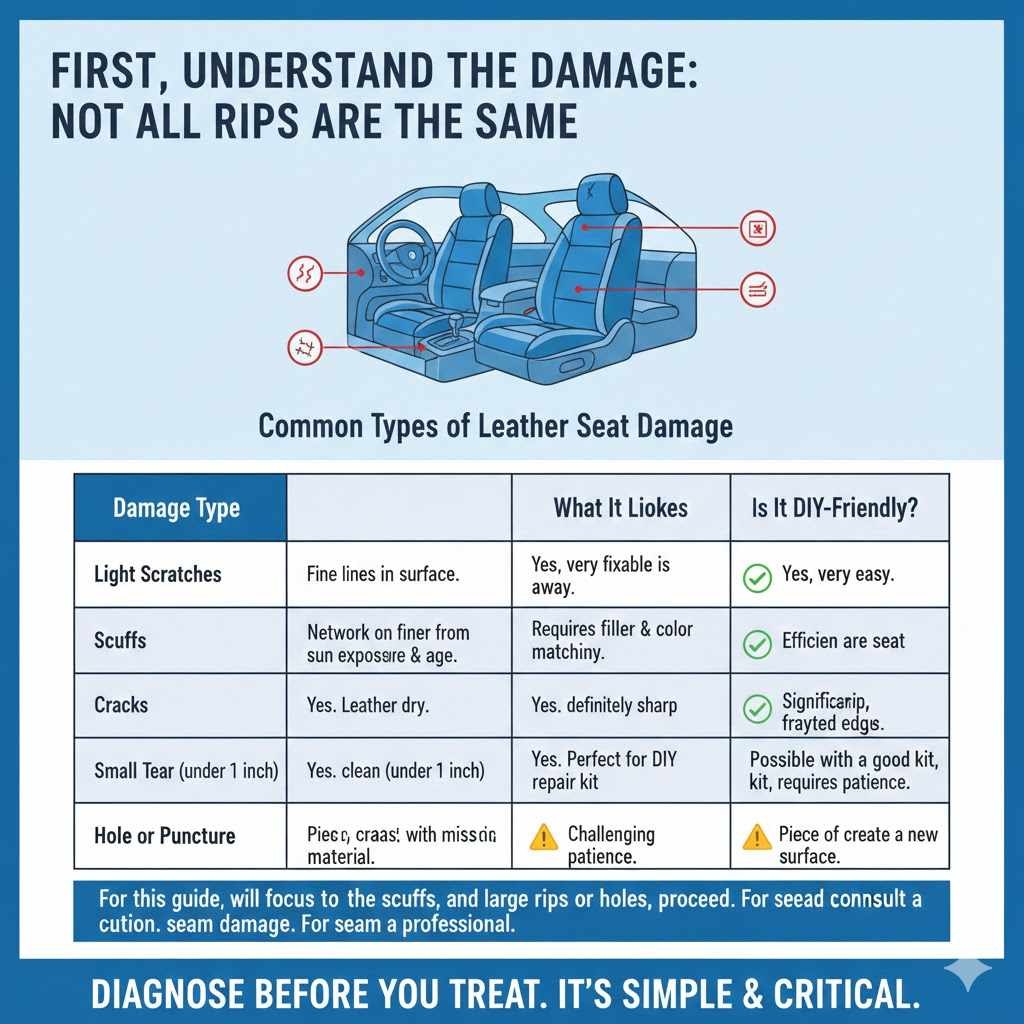
First, Understand the Damage: Not All Rips Are the Same
Before you grab any tools, let’s take a close look at the problem. The type of damage on your leather seat will determine the best way to fix it. Getting this first step right is the key to a successful repair. Think of it like a doctor diagnosing a problem before starting treatment. It’s simple, quick, and sets you up for success.
Leather damage usually falls into a few categories. You might have light surface scratches from keys, a deeper scuff from getting in and out of the car, or a full-blown tear. Each one needs a slightly different approach, but don’t worry, we’ll cover them all.
Common Types of Leather Seat Damage
Here’s a simple breakdown to help you identify what you’re working with. Check your seat against this table to see which category your damage fits into.
| Damage Type | What It Looks Like | Is It DIY-Friendly? |
|---|---|---|
| Light Scratches | Fine lines on the surface. The color of the leather is usually still there. | Yes, very easy. Often fixed with just a conditioner or colorant. |
| Scuffs | The top color layer is rubbed away, revealing the lighter leather underneath. | Yes, very fixable. Requires filler and color matching. |
| Cracks | A network of fine lines, often from sun exposure and age. The leather feels dry. | Yes, definitely. This is a common and straightforward repair. |
| Small Tear (under 1 inch) | A clean rip or cut in the leather. The edges are still sharp. | Yes. This is the perfect candidate for a DIY repair kit. |
| Large Rip (over 1 inch) | A significant tear, possibly with frayed edges or missing material. | Challenging. Possible with a good kit, but requires more patience. |
| Hole or Puncture | A piece of leather is completely gone, leaving a hole. | Challenging. Similar to a large rip, you’ll need to create a new surface. |
For this guide, we will focus on the most common issues: scuffs, cracks, and small tears. These are the problems you can fix at home with fantastic results. If you have a massive rip or a hole the size of a coin, a DIY fix is still possible, but you’ll need to be extra careful and patient. For damage along a seam, it’s often best to consult a professional, as that requires sewing.
Gather Your Tools: The DIY Leather Repair Kit
Now for the fun part! You don’t need a professional workshop full of tools. Everything you need usually comes in a good-quality leather repair kit. These kits are designed for people just like you and are a huge money-saver. Investing in a good kit is the most important step.
Here’s a list of what you’ll need. Most of these items will be in your kit, but you might need a few extra household items.
Your Leather Repair Shopping List:
Leather Repair Kit: This is your main purchase. A good kit should include a leather cleaner, sub-patch material, leather adhesive (glue), flexible leather filler (sometimes called heavy filler or paste), a palette knife or applicator, and several color tints for matching.
Isopropyl Alcohol (Rubbing Alcohol): For cleaning and preparing the surface. You can find this at any drug store.
- Soft, Lint-Free Cloths: Microfiber cloths are perfect for this. You’ll need a few for cleaning and applying products.
- Fine-Grit Sandpaper: 600 to 1200-grit sandpaper is ideal. Some kits include this. It’s for smoothing the filler without scratching the surrounding leather.
- Small Scissors or a Craft Knife: For trimming any frayed edges on a tear.
- Hairdryer (Optional but Recommended): This helps speed up the drying time between steps.
- Leather Sealant (or Finisher): This is the final protective top coat. The best kits include this. It seals your repair and gives it the right level of shine (matte, satin, or gloss) to match the rest of the seat.
You can find great leather repair kits online or at auto parts stores. Look for kits with good reviews that mention color matching. The ability to mix colors is what makes a repair truly invisible.
The Step-by-Step Guide to a Perfect Leather Seat Repair
Alright, you’ve identified the damage and have your tools ready. Let’s walk through the repair process together. Take your time with each step. Rushing is the only way to get a bad result. Think of it as a small, rewarding project. Put on some music and let’s begin!
Step 1: Clean the Area Thoroughly
You cannot skip this step! A clean surface is essential for the repair materials to bond correctly. Any dirt, oil, or old conditioning products will prevent the filler and color from sticking.
- Vacuum the Seat: First, vacuum the entire seat to remove any loose dirt and debris, especially in the creases.
- Use a Leather Cleaner: Most kits come with a cleaner. If not, a dedicated leather cleaner is best. Apply a small amount to a microfiber cloth and gently scrub the damaged area and the space around it (about a 2-3 inch radius).
- Wipe with Isopropyl Alcohol: After cleaning, lightly dampen a clean cloth with isopropyl alcohol and wipe the area. This removes any remaining oils or silicones from old protectants. The leather should look dull or matte after this step. Let it air dry completely for about 15-20 minutes.
Step 2: Prepare the Damage
This step involves getting the tear or scuff ready for the filler. A little prep work here makes the final result much smoother.
- For Scuffs and Scratches: If the surface feels smooth, you can skip to Step 4. If it’s a bit rough, lightly sand the scuffed area with 1200-grit sandpaper. Just a few gentle passes are enough. You just want to remove any loose fibers. Wipe away the dust with your alcohol-dampened cloth.
- For Tears and Rips: Use your small scissors or craft knife to trim away any fuzzy, frayed edges around the tear. You want the edges to be as clean as possible.
Step 3: Insert the Sub-Patch (For Tears Only)
If you are fixing a tear or a hole, you need to create a stable base for your repair. This is what the sub-patch is for. It’s a piece of canvas-like fabric that goes behind the leather to support the filler and keep the tear closed.
- Cut the Sub-Patch: Cut the patch material so it is slightly larger than the tear itself, about a half-inch bigger on all sides.
- Insert the Patch: Use the palette knife or a pair of tweezers to carefully slide the patch through the tear and position it flat behind the leather. This can be tricky, so be patient. Make sure the patch lies completely flat and covers the entire hole from underneath.
- Glue It in Place: Lift one edge of the leather tear. Use the palette knife to apply a small amount of the leather adhesive from your kit onto the sub-patch. Gently press the leather down onto the glued patch. Repeat for the other side of the tear. Use the knife to make sure the edges of the tear are as level as possible. Wipe away any excess glue immediately. Let the glue dry for 20-30 minutes, or use a hairdryer on a low setting to speed it up.
Once the glue is dry, the tear should be closed and stable. You now have a solid foundation for the next step.
Step 4: Apply the Leather Filler
The leather filler is the magic part of this process. It’s a flexible paste that will fill in the gap, scuff, or cracks, creating a new, smooth surface. The golden rule here is: apply multiple thin layers, not one thick one.
- Apply the First Layer: Put a small amount of filler on the end of your palette knife. Spread a very thin layer over the damaged area, going slightly beyond the edges. Try to feather it into the surrounding leather. The goal is to make it level.
- Dry the Filler: Let the filler dry completely. This can take 20-30 minutes naturally, or you can speed it up with a hairdryer on a low, warm setting. Hold the hairdryer a few inches away and keep it moving. The filler will often shrink slightly as it dries.
- Repeat the Process: Apply another thin layer of filler and dry it. Continue this process until the repaired area is level with, or just slightly higher than, the surrounding leather surface. It usually takes 3-5 layers for a deep scuff or tear.
- The Final Sanding: Once the last layer is fully dry, take your fine-grit sandpaper (800 or 1200-grit) and gently sand the filler until it is perfectly smooth and flush with the rest of the seat. Your sense of touch is your best guide here. It should feel completely smooth. Wipe away all the sanding dust with a clean, dry cloth.
For a perfect texture match, some advanced kits include a texture stamp. You would press this into the final, wet layer of filler to replicate the leather’s grain. For a beginner, a smooth finish is a fantastic result.
Step 5: Match and Apply the Color
This is where your repair becomes invisible. Color matching might seem intimidating, but it’s just like mixing paint. Your kit will come with base colors (black, white, red, yellow, blue) that you can mix to match your seat. For more information on leather types and dyes, the Leather Dictionary provides excellent resources.
- Find a Hidden Spot for Testing: Find a hidden piece of the same leather to test your color match. The flap of leather on the underside of the seat is a perfect spot.
- Mix Your Colors: Start with the base color that is closest to your seat color. Add tiny drops of the other colors to adjust the shade. For example, to make a tan color, you might start with white, add yellow and a tiny bit of red and black. Always mix a small amount first.
- Test and Adjust: Use a cotton swab to dab a small amount of your mixed color onto the hidden spot. Dry it with a hairdryer, as the color often changes slightly when it dries. Compare it to the seat. Does it need more white to lighten it? A touch of blue to cool it down? Keep adjusting until you have a perfect match.
- Apply the Color: Use the sponge or applicator from your kit. Dab a small amount of the colorant onto the repaired area. Don’t wipe it; use a light dabbing or stippling motion. This helps it blend naturally. Apply a thin, even coat that covers the filler and slightly overlaps onto the original leather.
- Dry and Re-coat: Dry the first coat with a hairdryer. It will only take a minute or two. Then apply another thin coat. Continue this process until the color is uniform and the repair is completely hidden. Usually, 3-4 coats are enough.
Step 6: Apply the Leather Sealant
You’re almost done! The sealant, or finisher, is a clear protective top coat. It locks in the color, protects the repair from wear and tear, and matches the sheen (shine) of your original leather. Kits often come with both matte and gloss sealants that you can mix to get the perfect satin finish of most car seats.
- Mix for the Right Sheen: Look at your seat. Is it shiny (gloss), completely flat (matte), or somewhere in between (satin)? Mix your sealants to match. A 50/50 mix is often a good starting point for a factory satin finish.
- Apply the Sealant: Apply a thin layer of the sealant over the colored area using a clean sponge or applicator. Extend it just a bit further than you applied the color to help blend everything in.
- Dry and Add More Coats: Let it dry for a few minutes (or use a hairdryer). Apply 2-3 thin coats in total, drying each one in between.
And that’s it! You’ve done it. The final step is to let the repair fully cure. Avoid using or putting pressure on the seat for at least 24-48 hours. This allows all the layers to fully harden and bond together.
DIY Repair vs. Calling a Professional
While a DIY fix is incredibly rewarding and cost-effective, it’s also smart to know when it might be better to call a professional upholsterer. Your safety and satisfaction are the top priorities. Making an informed decision is key, and as the National Highway Traffic Safety Administration (NHTSA) emphasizes, seats contain important safety equipment like airbags, so major structural repairs are best left to experts.
Here’s a table to help you decide which path is right for you:
| Factor | DIY Leather Repair Kit | Professional Upholstery Service |
|---|---|---|
| Cost | $20 – $70 for a complete kit. | $150 – $500+ per seat panel. |
| Time Investment | 2 to 4 hours of active work, plus drying time. | A quick phone call and dropping off your car. |
| Skill Level Required | Beginner to intermediate. Requires patience and attention to detail. | None. You are paying for their expertise. |
| Best For | Scuffs, scratches, cracks, and small tears (under 2 inches). | Large rips, damage on seams, burn holes, or if you want a guaranteed perfect result. |
| Result Quality | Can be excellent and nearly invisible if done carefully. | Guaranteed professional, factory-like finish. |

Frequently Asked Questions (FAQ)
1. How do I get a perfect color match for my car seat?
The key is to test your color mix in a hidden area, like under the seat flap. Always start with the base color that is closest to your seat, then add tiny amounts of other colors to adjust the shade. Dry each test spot with a hairdryer, as the color can change when it dries. Patience is your best tool here!
2. Can I use this repair method on vinyl or faux leather seats?
Yes, most modern leather and vinyl repair kits are designed to work on both materials. Vinyl is a non-porous plastic, so the preparation stage (cleaning with alcohol) is especially important to ensure the products adhere properly. Always check the product description on your repair kit to confirm it’s suitable for vinyl.
3. How long will the leather repair last?
A well-done repair using a quality kit can last for years. The key factors are thorough cleaning and preparation, and applying a good quality sealant as the final step. The sealant protects the repair from friction, spills, and UV rays, just like the original factory finish.
4. What is the difference between leather filler and leather glue?
Leather glue (or adhesive) is used specifically to bond two pieces of leather together or to attach the sub-patch behind a tear. Its job is to provide structural strength. Leather filler, on the other hand, is a flexible paste used to fill in surface imperfections like scuffs, cracks, or the seam of a tear after it’s been glued. It creates a smooth, new surface that can then be colored.
5. The repaired spot feels a bit stiff. Is that normal?
The repaired area might feel slightly less flexible at first, but it will soften with use. The flexibility of the repair depends heavily on the quality of the filler. High-quality fillers are designed to remain flexible and move with the leather. Applying the filler in thin layers also helps maintain flexibility.
6. How long does the repair need to dry and cure?
While each layer may dry to the touch in minutes (especially with a hairdryer), the entire repair needs time to fully cure and harden. It’s best to avoid using the seat for at least 24 hours. For a complete cure where the repair reaches maximum durability, wait 48-72 hours if possible.
Conclusion: Enjoy Your Like-New Car Seat
You did it! By following these steps, you’ve not only saved a significant amount of money but also gained a valuable new skill. Repairing your leather car seat is a project that brings instant satisfaction every time you get into your car. That ugly blemish is gone, replaced by a smooth, seamless finish that you created yourself.
Remember, the secrets to a great repair are patience, cleanliness, and working in thin layers. Don’t be afraid to take your time. You’ve proven that you don’t need to be a professional to take great care of your vehicle. Now you can sit back, relax in your beautifully restored seat, and be proud of the fantastic job you’ve done.
Keep taking charge of your car care. Every small repair you learn builds your confidence and keeps your car looking and running its best. Happy driving!