How To Buff Out Scrapes On A Car At Home (Real Results)
Buffing out minor car scrapes at home is achievable with the right tools and a careful approach. This method is best for clear coat scratches, not deep gouges that reach the metal or primer. Patience and attention to detail are key for success, helping restore your car’s finish and boost your confidence.
Understanding Car Scrapes and Paint Layers
To fix a scrape, we need to know what we’re working with. Car paint isn’t just one solid color. It has layers.
Think of it like a cake. The very top layer is the clear coat. This is what gives your car its shine and protects the color underneath.
It’s tough stuff. Below that is the base coat. This is the actual color of your car – red, blue, silver, you name it.
Underneath that is the primer. This layer helps the paint stick to the metal. And finally, the metal of the car body itself.
Most of the time, when you see a scrape, it’s just in the clear coat. This is the best-case scenario for DIY repair. If the scrape is white or you can see a different color, you’ve likely gone through the clear coat.
If you see primer or bare metal, that’s a deeper issue. Those need more advanced work, often involving repainting. We’re focusing on the clear coat scrapes here.
These are the ones that look like white lines or faint scratches.
Why does this matter? Because you can buff out damage in the clear coat. You are essentially leveling out the scratch.
You’re gently removing a tiny bit of clear coat around the scratch. This makes the edges of the scratch disappear. The light then reflects off the surface more evenly.
It’s like magic, but it’s science. For deeper scratches, you can’t just buff them away. You would need to add paint back.
That’s a different job entirely.
My Own Scrape Scare
I remember one sunny Saturday morning. I was heading out for a picnic. I backed out of my garage, and thump.
I’d grazed the side of the garage door frame. My heart sank. It was a fresh, white scrape right on my rear passenger door.
It wasn’t deep, thankfully, but it was ugly. My first thought was, “Oh no, how much is this going to cost?” I imagined a trip to the body shop and a bill I wasn’t ready for. I felt that familiar knot of annoyance in my stomach.
I looked at the scrape, then at my tools. I knew I had some car cleaning supplies. Could I do this myself?
I decided to give it a try before calling a professional. It was a small victory waiting to happen.
Tools You’ll Need for Home Buffing
Wash Mitt & Car Soap: First, you must clean the area. Dirt can make scratches worse. Use a gentle car soap.
Rinse well.
Microfiber Towels: You’ll need several. For washing, drying, and applying/removing polish. They are soft and don’t scratch.
Rubbing Compound or Scratch Remover: This is your main tool. Pick one for light scratches. Check the label.
It should say for clear coat.
Polishing Compound: After the scratch remover, this adds shine back.
Wax: To protect your work. Use a good quality car wax.
Applicator Pads: Foam or microfiber pads help apply compounds and wax.
The Step-by-Step Process for Buffing Out Scrapes
Let’s get to it. This process is straightforward, but it needs care. Rushing will not help.
Think of it as giving your car a spa treatment. A gentle one.
Step 1: Thoroughly Clean the Area
This is non-negotiable. You must remove all dirt, dust, and debris. Anything left on the paint can cause more scratches when you start buffing.
Wash the entire panel where the scrape is. Rinse it very well. Dry it with a clean microfiber towel.
Make sure the area is totally dry before you proceed.
Step 2: Inspect the Damage
Look closely at the scrape. Is it just a scuff mark? Can you feel a rough edge with your fingernail?
If your fingernail catches on the scratch, it might be too deep for simple buffing. If it feels smooth or you can only see a faint white line, you’re probably good to go. Remember, we’re aiming for clear coat scratches.
Step 3: Apply Rubbing Compound
Take a small amount of rubbing compound. Put it on an applicator pad. You don’t need a lot.
Just enough to cover the pad. Apply it directly to the scraped area. You can also apply it to a small section of the panel around the scratch.
Work in a small area at a time. This compound is a mild abrasive. It will help remove the damaged clear coat.
Rub the compound onto the scratch. Use gentle, circular motions. Or you can use back-and-forth motions.
Keep the pressure light. You are not trying to scrub hard. You’re letting the compound do the work.
Work for about 30-60 seconds. Don’t let the compound dry out completely.
Step 4: Wipe Away the Compound
Take a clean microfiber towel. Gently wipe away the rubbing compound. You should start to see the scratch fading.
Don’t be discouraged if it’s not completely gone. You might need to repeat this step. If you do repeat, use a fresh part of your applicator pad and a clean section of the microfiber towel each time.
Check the area again. If the scratch is still visible, apply more compound. Repeat the rubbing and wiping.
Do this a few times. Always use light pressure. The goal is to be patient.
Each pass removes a tiny bit of clear coat. You want to level the surface. Avoid using too much product.
It’s better to do several light passes than one aggressive one.
When to Stop Buffing
Deep Scratches: If you can see primer (grey or tan) or metal (silver), stop immediately. You cannot buff these out. They need more advanced repair.
No Improvement: If after several careful attempts, the scratch is still very obvious, it might be too deep for this method.
Feel the Edge: If your fingernail still catches significantly on the scratch after buffing, it’s likely too deep.
Step 5: Use Polishing Compound
Once the scratch is gone or greatly reduced, you’ll likely have a dull spot. This is where the polishing compound comes in. It’s less abrasive than rubbing compound.
Its job is to restore the shine. Apply a small amount of polishing compound to a clean applicator pad.
Gently rub the polishing compound over the area where the scratch was. Use the same motions as before: circular or back-and-forth. Work it in until the dullness disappears.
You should see the clear coat regain its gloss. This step helps blend the repaired area with the surrounding paint.
Wipe away the polishing compound with a clean microfiber towel. The area should now look much better. It should be shiny and smooth.
Compare it to the untouched paint next to it. It should look almost seamless.
Step 6: Apply Car Wax
This is the final protective layer. Wax adds a barrier. It protects the clear coat.
It also enhances the shine. Apply a thin layer of car wax to the polished area. You can use a wax applicator pad or a clean microfiber towel.
Let the wax haze over according to the product’s instructions. This usually takes a few minutes. Then, take a clean, soft microfiber towel.
Buff off the wax. Use light, sweeping motions. You’ll be left with a smooth, protected, and shiny surface.
The repair should be virtually invisible now.
Quick Scan: Scrape Repair Checklist
- Clean: Yes
- Inspect: Yes
- Rubbing Compound: Light pressure, circular motion
- Wipe: Gentle, clean towel
- Repeat (if needed): Yes, with clean tools
- Polishing Compound: Restore shine
- Wax: Protect and seal
Common Mistakes to Avoid
It’s easy to make a mistake when you’re trying to fix something. Especially when it comes to car paint. Here are some common pitfalls.
Knowing them can help you avoid them.
Using Too Much Pressure
This is probably the most common mistake. People think they need to scrub hard to remove the scratch. But rubbing compound is designed to work with friction and time.
Too much pressure can actually create more swirl marks or even wear through the clear coat faster than you intend. Always start with the lightest pressure possible and increase only if absolutely necessary. Think of it as gentle persuasion, not brute force.
Not Cleaning Enough
I mentioned this, but it bears repeating. If there’s any grit on the surface when you start rubbing, that grit becomes a tiny cutting tool. It will embed itself in your compound or applicator pad.
Then, as you rub, you’ll be creating new scratches. Always wash the area thoroughly. And use clean microfiber towels at every stage.
Don’t reuse a towel that touched the dirty car wash water without washing it first.
Using the Wrong Products
There are many types of polishes and compounds. Some are very aggressive. Some are for minor paint correction.
Some are for wax. Make sure you are using a product specifically designed for removing light scratches from car paint. Products for furniture or metal won’t work.
Also, be aware of “all-in-one” products. They can be good, but sometimes a separate rubbing compound and then a polishing compound gives you more control.
Myths vs. Reality of Home Paint Repair
Myth: Toothpaste can fix scratches.
Reality: Toothpaste has mild abrasives. It might work on very minor scuffs. But it’s inconsistent.
It can also leave a dull finish. It’s not a true paint repair solution.
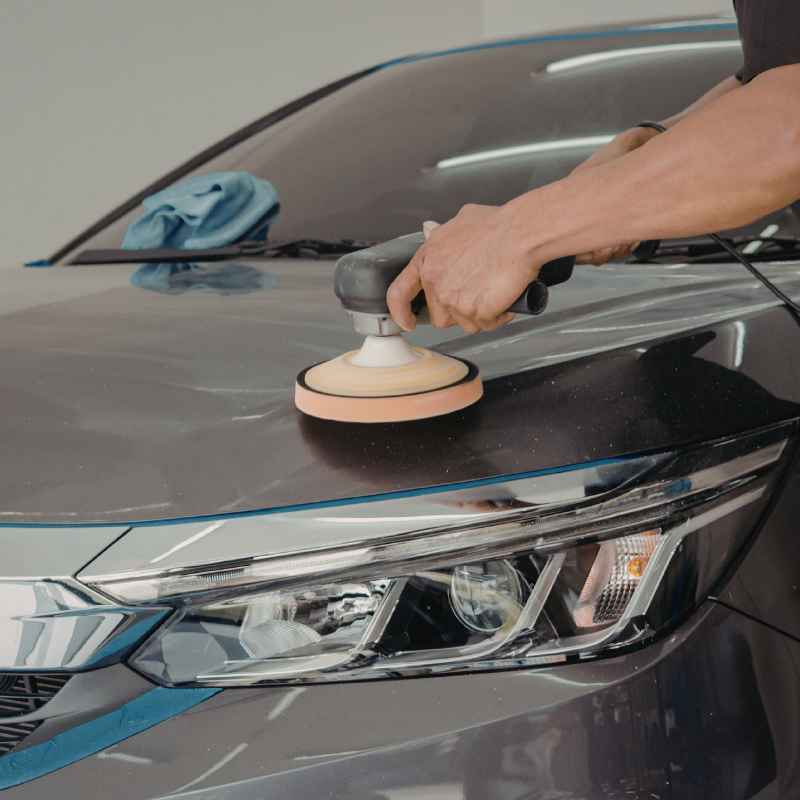
Myth: You need a machine buffer for good results.
Reality: While machines make it faster, you can get excellent results by hand for light scratches. It just takes more time and patience. Hand buffing is safer for beginners.
Myth: Any old rag will do.
Reality: Using a rough rag or paper towel can cause micro-scratches. Always use clean, soft microfiber towels. They are designed to lift dirt and be gentle on paint.
Stopping Too Soon or Going Too Far
It’s a balance. You need to work the product enough to remove the scratch. But you don’t want to go so far that you damage the surrounding paint.
Pay attention to the paint’s appearance as you work. If the scratch is gone, stop. If you’re unsure if it’s gone, wipe the area clean and look in good light.
Sometimes, seeing the area dry and clean reveals the true outcome.
Forgetting the Wax
The wax step is important. It’s not just for shine. It protects the clear coat you just worked so hard to restore.
It adds a barrier against future light abrasions and UV damage. Skipping this step leaves the paint more vulnerable. It’s like washing dishes and not drying them – they’ll get water spots and aren’t protected.
When to Call a Professional
We’ve talked a lot about what you can fix at home. But it’s crucial to know when it’s time to step back. Professional auto detailers and body shops have specialized tools and knowledge.
They can handle jobs that are beyond DIY capabilities.
If the scratch has gone through the clear coat and into the color layer, you’ll see a distinct color change. White scratches on a dark car are often just clear coat. But if you see a deep black scratch on a white car, that might be the base coat.
If you can see primer, which is usually gray or tan, or the bare metal of the car, you absolutely need a professional. These require repainting and proper finishing.
Also, if you’ve tried the steps above and the scratch is still very noticeable, it’s likely too deep. Sometimes, a deep scratch can weaken the paint structure. Trying to buff it out further might make it worse.
In these cases, a professional can assess the damage properly. They can tell you if touch-up paint is an option or if a panel needs repainting.
Real-World Scrape Scenarios
Scenario 1: Parking Lot Scuff
What happened: A shopping cart rolled into your car door. You see a white line about 4 inches long.
Assessment: Likely a clear coat scratch. Good candidate for home buffing.
Scenario 2: Garage Door Nudge
What happened: You scraped your bumper on the garage door frame. It’s a grayish mark.
Assessment: Could be clear coat or primer. Inspect closely. If it feels smooth and no color is missing, try buffing.
If you see gray, call a pro.
Scenario 3: Keys on the Paint
What happened: Someone dragged keys across your hood. Multiple thin, deep-looking lines.
Assessment: These often go through the clear coat. If you see color missing, it’s likely too deep for buffing. A touch-up pen might be the best DIY option for these.
Maintaining Your Car’s Paint After Repair
Once you’ve successfully buffed out a scratch, you’ll want to keep your car’s paint looking good. A little regular care goes a long way.
Regular Washing: Continue to wash your car regularly. Use a proper car wash soap and a good wash mitt. This removes dirt and contaminants before they can etch into the paint.
Make sure to rinse thoroughly and dry with clean microfiber towels.
Occasional Waxing: Even after your repair, give your car a full wax every few months. This adds a protective layer. It helps repel water and dirt.
It also keeps the paint looking glossy and vibrant. Check your wax’s recommendations for frequency.
Protective Coatings: For even longer-lasting protection, consider ceramic coatings or paint sealants. These are more durable than traditional wax. They offer better resistance to minor abrasions and UV rays.
Application can range from DIY to professional services.
Be Mindful: Be aware of your surroundings when parking or driving. Try to avoid tight spaces. Pay attention when opening doors in parking lots.
Small habits can prevent future scratches. It’s always easier to prevent damage than to fix it.
What This Means for You
So, what does all this mean for you and your car? It means that those annoying little scrapes don’t have to be a source of constant worry or expense. For many common marks, you have the power to fix them yourself.
When you see a new scratch, take a deep breath. Don’t panic. Your first step should be to clean the area thoroughly.
Then, look closely. If it appears to be only in the clear coat – that shiny, protective top layer – then it’s a prime candidate for home repair. This process involves using mild abrasives to gently level the paint around the scratch.
You can achieve noticeable improvements and often make the scratch disappear completely with products like rubbing compound and polishing compound. The key is patience, light pressure, and using the right materials, especially soft microfiber towels. Always finish by waxing to protect your work and restore shine.
However, it’s important to know your limits. If a scratch is deep enough that you can see color other than your car’s paint, like primer or bare metal, you should not attempt to buff it out. Those repairs require professional attention, possibly involving repainting.
But for the majority of minor scuffs and clear coat scratches, you can save time and money by following these steps.
Quick Fixes & Tips
Here are some super quick tips to keep in mind:
- Work in the shade: Never buff paint in direct sunlight. The heat makes compounds dry too fast. It also makes it hard to see what you’re doing.
- Use clean tools: Always use fresh microfiber towels and clean applicator pads for each step.
- Small sections: Work on one small area at a time. This helps you stay focused and control the process.
- Test patch: If you’re unsure about a product, test it on an inconspicuous area first.

Frequent Questions
Can I really buff out any scratch on my car?
No, you can only buff out scratches that are in the clear coat layer. If the scratch goes into the color layer or down to the primer or metal, you cannot buff it out. You would need to repaint.
What is the difference between rubbing compound and polishing compound?
Rubbing compound is a more aggressive abrasive. It’s used to remove deeper scratches or imperfections. Polishing compound is less abrasive.
It’s used to restore shine and remove light haze or swirl marks left by the rubbing compound.
How many times can I buff out a scratch?
You can repeat the buffing process a few times for light scratches. However, each time you buff, you remove a little bit of clear coat. Don’t overdo it.
If the scratch is still there after a few attempts, it might be too deep.
What if I don’t have rubbing compound? Can I use something else?
While some household items like toothpaste have mild abrasives, they are not ideal. They can be inconsistent and may leave a dull finish. It’s best to use products specifically designed for car paint.
These ensure better, safer results.
How do I know if my scratch is too deep to buff?
The easiest way is to run your fingernail across the scratch. If your nail catches on the scratch, it’s likely too deep. Also, if you see a color that isn’t your car’s paint (like gray primer or metal), it’s too deep for buffing.
Should I wax my car after buffing out a scratch?
Yes, absolutely. Waxing is a crucial final step. It protects the newly restored clear coat and adds shine.
It helps seal the repair and protects it from the elements.
Conclusion
Fixing minor car scrapes at home is totally within your reach. With the right approach, patience, and tools, you can restore your car’s finish. You’ll feel a sense of accomplishment.
Remember to always clean well and work gently. Knowing when to call a pro is also key. Enjoy your car looking its best again!